Table of Contents
Advertisement
Quick Links
Advertisement
Table of Contents

Related Manuals for ESAB EPR-X1.1


Summary of Contents for ESAB EPR-X1.1
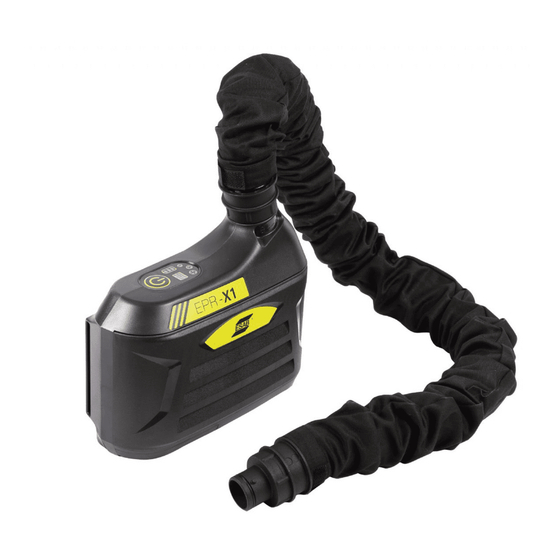
- Page 1 EPR-X1.1 Powered Air-Purifying Respirator Instruction manual and Spare parts list PLEASE READ AND UNDERSTAND ALL INSTRUCTION BEFORE USE. RETAIN THIS MANUAL FOR FUTURE REFERENCE. Complete User Manual at: Manual Number: 0448307 Revision Date: 2024-07-02 Revision Number: B Language: English UK...
-
Page 3: Table Of Contents
Testing the air flow alarm ..................... Fitting the face seal ..........................OPERATION ....................Buttons and indicators ........................ Functionality .......................... MAINTENANCE ......................... Storage ........................ TROUBLESHOOTING ....................... ORDERING SPARE PARTS ..........................APPENDIX ......................SPARE PARTS 0448307 - 3 - © ESAB AB 2024... -
Page 4: Safety
Fumes and gases, can cause discomfort or harm, particularly in confined spaces. Shielding gases can cause asphyxiation. Therefore: 1. Keep your head out of the fumes. Do not breathe the fumes and gases. 0448307 - 4 - © ESAB AB 2024... - Page 5 CSA W117.2 - "Code for safety in welding and cutting" • CGA Standard P-1, “Precautions for Safe Handling of Compressed Gases in Cylinders” • ANSI Z87.1, "Occupational and Educational Personal Eye and Face Protection Devices" 0448307 - 5 - © ESAB AB 2024...
-
Page 6: Safety Instructions For Papr System
For further information contact the nearest ESAB dealer. Safety instructions for PAPR system Use the ESAB PAPR system during welding in unconfined spaces, strictly in accordance with this instruction manual and the instructions supplied with the corresponding helmets. Do not use the unit: •... - Page 7 1 SAFETY • Contaminant can be smelled or tasted inside the head unit. • In the unlikely event of an allergic reaction to the air-helmet materials. 0448307 - 7 - © ESAB AB 2024...
-
Page 8: Introduction
Warning indication This EPR-X1.1 PAPR has both sound and vibration alarm function. Each grid stands for a period of 100ms. Gray is the beep sound and blank grid is a quiet period. If several continued grids are in gray then there is a continuous beep sound. - Page 9 2 INTRODUCTION 100 ms per grid Install the battery Turn on the system Change air flow speed Turn off the system Current overload Air outlet jam Over heat Low battery Filter jam 0448307 - 9 - © ESAB AB 2024...
-
Page 10: Technical Data
Level 3 > 6h Battery charging time 3.5 hours Battery life 500 charges (run time dependent on air flow rate and filter load) LED light Air flow level Battery capacity Filter status 0448307 - 10 - © ESAB AB 2024... -
Page 11: Installation
1) Open and remove the filter cover. 2) Remove the used filter by pressing the filter latch and lifting it out from cover. 0448307 - 11 - © ESAB AB 2024... -
Page 12: Installing And Charging The Battery
15 days. When the battery is new or has been stored for more than 3 months, charge it and discharge it at least twice in a row to resume the nominal/rated charge capacity. 0448307 - 12 - © ESAB AB 2024... - Page 13 3) Close battery house cover and turn the knob to LOCK position 4) Take battery out from battery housing and charge battery. Charging the battery 1) Take battery out from battery housing. 0448307 - 13 - © ESAB AB 2024...
-
Page 14: Installing The Respiratory System On The Belt
1) Place belt and PAPR unit at correct position. 2) Unlock the hook and loop fastener and pass through the blower assembly’s belt loops. 3) Pass the fastening belt through the gap on belt. 0448307 - 14 - © ESAB AB 2024... -
Page 15: Connecting The Tube
5) Attach the harness to the belt’s four plastic rings. Connecting the tube 1) Install the fire protecting sleeve over hose. 2) Connect the air tube to the respiratory system and twist it clockwise to lock its position. 0448307 - 15 - © ESAB AB 2024... -
Page 16: Testing The Air Flow
Change the filter or the battery and retest the air flow. 1) Connect the breathing tube to the blower unit and twist it clockwise to lock it. 2) Insert the airflow tester at the top of the tube. 0448307 - 16 - © ESAB AB 2024... -
Page 17: Testing The Air Flow Alarm
If the alarm does not work, repair or change respiratory system. 1) Remove the tube from the helmet and press the ON button. 2) Cover the air output with your hand and wait approximately 45 seconds. 0448307 - 17 - © ESAB AB 2024... -
Page 18: Fitting The Face Seal
The face seal must be positioned properly, otherwise, the protection factor will be incorrect. 1) Adjust the tightness of the face seal and put on the head top. 2) Adjust the headgear to suitable tightness (push and turn left to loosen, turn right to tighten). 0448307 - 18 - © ESAB AB 2024... -
Page 19: Operation
The device turns on/off. The air flow is at level 1 seconds. (~170L/min). Turn on the device and then press the ON/OFF The air flow is at level 2 (~190L/min). button once again. 0448307 - 19 - © ESAB AB 2024... - Page 20 Turn on the device and then press the ON/OFF The air flow is at level 3 (~210L/min). button two times. Turn on the device and then press the ON/OFF The air flow reverts to level 1 (~170L/min). button three times. 0448307 - 20 - © ESAB AB 2024...
-
Page 21: Maintenance
If the equipment is not used for a long time, the battery should be fully charged, removed from respiratory system unit and stored separately. Transport the equipment with original packaging box and away from direct sunlight. 0448307 - 21 - © ESAB AB 2024... -
Page 22: Troubleshooting
Replace ADF helmet Supply insufficient Breathing tube broken off Check tube connection to hood and air to hood respiratory system unit Breathing tube broken Replace breathing tube Filter is blocked Remove obstruction, change filter 0448307 - 22 - © ESAB AB 2024... -
Page 23: Ordering Spare Parts
EPR-X1.1 is designed and tested in accordance with the requirements of PPE Regulation 2016/425 and European Standard EN 12941: 1998+A2:2008 class TH3 P R S L. EPR-X1.1 is designed to provide a supply of filtered air via a breathing tube to a helmet or a hood. The equipment can be used in any environment that requires a class TH3P breathing protection device. -
Page 24: Appendix
EPR-X1.1 PAPR filter cover 0700500906 EPR-X1.1 PAPR spark arrestor 0700500907 EPR-X1.1 PAPR breathing tube 0700500908 EPR-X1.1 PAPR FR fabric tube cover 0700500909 EPR-X1.1 PAPR waist and shoulder harness 0700500910 EPR-X1.1 PAPR universal battery charger 0700002413 EPR-X1.1 PAPR air flow tester 0700500914 EPR-X1.1 A1B1E1 P3 combined filter (optional) - Page 25 9 APPENDIX 0448307 - 25 - © ESAB AB 2024...
- Page 26 ESAB AB ESAB Corporation ESAB Holdings Ltd Lindholmsallén 9 2800 Airport Road 322 High Holborn Box 8004 Denton, TX 76207 WC1V 7PB 402 77 Gothenburg London, Great Britain Sweden Phone +1 800 378 8123 Phone +44 (0) 1992 768515 Phone +46 (0) 31 50 90 00 For contact information visit http://esab.com...
Need help?
Do you have a question about the EPR-X1.1 and is the answer not in the manual?
Questions and answers