
Related Manuals for HPE ProLiant MicroServer Gen11


Summary of Contents for HPE ProLiant MicroServer Gen11
- Page 1 HPE ProLiant MicroServer Gen11 Maintenance and Service Guide HPE ProLiant MicroServer Gen11 Maintenance and Service Guide Part Number: 30-2232B4BF-001 Published: June 2024 Edition: 1...
- Page 2 HPE ProLiant MicroServer Gen11 Maintenance and Service Guide HPE ProLiant MicroServer Gen11 Maintenance and Service Guide Abstract Abstract This document is for the person who installs, administers, and troubleshoots servers and storage systems. Hewlett Packard Enterprise assumes you are qualified in the servicing of computer equipment, trained in recognizing hazards in products with hazardous energy levels, and are familiar with the weight and stability precautions for rack installations.
-
Page 3: Table Of Contents
Table of contents Table of contents Customer self repair Illustrated parts catalog Mechanical components Front bezel spare part System components Power distribution board (PDB) spare part System board spare part Processor spare parts System battery spare part Heatsink spare part Fan spare part DIMM spare parts Power cord spare parts... - Page 4 Removing and replacing a DIMM Removing and replacing the fan Heatsink replacement Removing the heatsink Installing the heatsink Processor replacement Processor cautions Removing the processor Installing the processor Reconfiguring the system date and time settings Removing and replacing an expansion card Removing and replacing the iLO-M.2-serial module Removing and replacing the serial port cable System board replacement...
- Page 5 Rear panel LEDs Server UID LED Using the UID button to view the Server Health Summary System board components System maintenance switch descriptions DIMM label identification DIMM slot numbering Drive bay numbering Drive screws Fan mode behavior Trusted Platform Module 2.0 Trusted Platform Module 2.0 guidelines BitLocker recovery key/password retention guidelines Component touchpoints...
-
Page 6: Customer Self Repair
Dans le cas d'une pièce CSR, Hewlett Packard Enterprise supporte l'ensemble des frais d'expédition et de retour, et détermine la société de courses ou le transporteur à utiliser. Pour plus d'informations sur le programme CSR de Hewlett Packard Enterprise, contactez votre Mainteneur Agrée local. HPE ProLiant MicroServer Gen11 Maintenance and Service Guide... - Page 7 Enterprise zurückgeschickt werden muss. Wenn es erforderlich ist, das defekte Teil an Hewlett Packard Enterprise zurückzuschicken, müssen Sie dies innerhalb eines vorgegebenen Zeitraums tun, in der Regel innerhalb von fünf (5) Geschäftstagen. Das defekte Teil muss mit HPE ProLiant MicroServer Gen11 Maintenance and Service Guide...
- Page 8 Optioneel—Onderdelen waarvoor reparatie door de klant optioneel is. Ook deze onderdelen zijn ontworpen voor reparatie door de klant. Optioneel Als u echter Hewlett Packard Enterprise verzoekt deze onderdelen voor u te vervangen, kunnen daarvoor extra kosten in rekening HPE ProLiant MicroServer Gen11 Maintenance and Service Guide...
- Page 9 Hewlett Packard Enterprise fornece as peças de reposição sem cobrar nenhuma taxa. No caso desse serviço, a substituição de peças CSR é obrigatória. Se desejar que a Hewlett Packard Enterprise substitua essas peças, serão cobradas as despesas de transporte e mão-de-obra do serviço. HPE ProLiant MicroServer Gen11 Maintenance and Service Guide...
- Page 10 HPE ProLiant MicroServer Gen11 Maintenance and Service Guide...
- Page 11 HPE ProLiant MicroServer Gen11 Maintenance and Service Guide...
- Page 12 HPE ProLiant MicroServer Gen11 Maintenance and Service Guide...
-
Page 13: Illustrated Parts Catalog
Server options Server options Mechanical components Mechanical components Hewlett Packard Enterprise continually improves and changes product parts. For complete and current supported spare parts information, see the Hewlett Packard Enterprise PartSurfer website: HPE ProLiant MicroServer Gen11 Maintenance and Service Guide... -
Page 14: Front Bezel Spare Part
DIMM spare parts Power cord spare part Power adapter spare part Type-p storage controller converter cabling spare part Four-bay drive cable assembly spare part System board power cable spare part Not shown HPE ProLiant MicroServer Gen11 Maintenance and Service Guide... -
Page 15: Power Distribution Board (Pdb) Spare Part
Spare part number Spare part number System board P66549-001 For more information on the removal and replacement procedures, see System board replacement. Processor spare parts Processor spare parts Customer self repair: Optional Optional HPE ProLiant MicroServer Gen11 Maintenance and Service Guide... -
Page 16: Heatsink Spare Part
Spare part number Spare part number P68308-001 For more information on the removal and replacement procedures, see Removing and replacing the fan . DIMM spare parts DIMM spare parts Customer self repair: Mandatory Mandatory HPE ProLiant MicroServer Gen11 Maintenance and Service Guide... -
Page 17: Power Cord Spare Parts
Cable part number Cable part number Cable Spare part number Cable Spare part number Type-p storage controller converter cable P64334-001 P68378-001 Four-bay drive cable assembly spare part Four-bay drive cable assembly spare part HPE ProLiant MicroServer Gen11 Maintenance and Service Guide... -
Page 18: System Board Power Cable Spare Part
Server options Server options Hewlett Packard Enterprise continually improves and changes product parts. For complete and current supported spare parts information, see the Hewlett Packard Enterprise PartSurfer website: https://www.hpe.com/info/partssurfer https://www.hpe.com/info/partssurfer https://sketchfab.com/models/dc743c926b7e4b1982ae1b6c45221765/embed? ui_infos=0&ui_watermark=0&ui_help=0&ui_vr=0&ui_settings=0&ui_inspector=0&ui_hint=2&ui_animations=0&ui_color=01a982&ui_theme=d ark&autostart=1&camera=0 HPE ProLiant MicroServer Gen11 Maintenance and Service Guide... -
Page 19: Ilo-M.2-Serial Module Spare Part
For more information on the removal and replacement procedures, see Removing and replacing the serial port cable . Removal and replacement procedures Removal and replacement procedures This chapter provides detailed instructions on how to remove and replace component spare parts. HPE ProLiant MicroServer Gen11 Maintenance and Service Guide... -
Page 20: Safety Considerations
Avoid hand contact by transporting and storing products in static-safe containers. Keep electrostatic-sensitive parts in their containers until they arrive at static-free workstations. Place parts on a grounded surface before removing them from their containers. Avoid touching pins, leads, or circuitry. HPE ProLiant MicroServer Gen11 Maintenance and Service Guide... -
Page 21: Symbols On Equipment
This symbol indicates the presence of electric shock hazards. The area contains no user or field-serviceable parts. Do not open for any reason. WARNING: WARNING: To reduce risk of injury from electric shock hazards, do not open this enclosure. HPE ProLiant MicroServer Gen11 Maintenance and Service Guide... - Page 22 These symbols on power supplies or systems indicate that the equipment is supplied by multiple sources of power. WARNING: WARNING: To reduce the risk of injury from electric shock, remove all power cords to completely disconnect power from the system. HPE ProLiant MicroServer Gen11 Maintenance and Service Guide...
- Page 23 This symbol indicates the presence of moving parts inside the product that may present a pinch point if improperly contacted. WARNING: WARNING: Hazardous moving parts. Do not insert any tools or any part of your body into the product while it is operating or in any openings. HPE ProLiant MicroServer Gen11 Maintenance and Service Guide...
-
Page 24: Server Warnings And Cautions
Preparation procedures Preparation procedures Prerequisites Prerequisites Before powering down the server for an upgrade, maintenance, or service procedure, do the following: Perform a backup of critical server data . HPE ProLiant MicroServer Gen11 Maintenance and Service Guide... -
Page 25: Server Data Backup
Customer iLO user name, password, and DNS name iLO configuration settings For servers managed by HPE GreenLake for Compute Ops Management , make sure that you have your HPE GreenLake account ID. For more information, see HPE GreenLake HPE GreenLake for Compute Ops Management Getting Started Guide for Compute Ops Management Getting Started Guide . -
Page 26: Power Down The Server
5. If installed, unlock and remove the security padlock and/or the Kensington security lock. For more information, see the lock documentation. 6. If the server is in a vertical orientation, position the server in a horizontal orientation. HPE ProLiant MicroServer Gen11 Maintenance and Service Guide... - Page 27 If the thumbscrews are too tight, use a T-15 Torx screwdriver to loosen them. b. Slide the cover about half an inch towards the rear panel. c. Detach the cover from the server. HPE ProLiant MicroServer Gen11 Maintenance and Service Guide...
-
Page 28: Remove The Front Bezel
5. If installed, unlock and remove the security padlock and/or the Kensington security lock. For more information, see the lock documentation. 6. If the server is in a vertical orientation, position the server in a horizontal orientation. HPE ProLiant MicroServer Gen11 Maintenance and Service Guide... - Page 29 Switch the bezel locks upward. 8. To remove an unlocked front bezel, do the following: a. Pivot the bottom part of the bezel upward. b. Release the bezel tabs from their chassis openings. HPE ProLiant MicroServer Gen11 Maintenance and Service Guide...
-
Page 30: Open The Chassis
5. If installed, unlock and remove the security padlock and/or the Kensington security lock. For more information, see the lock documentation. 6. If the server is in a vertical orientation, position the server in a horizontal orientation. HPE ProLiant MicroServer Gen11 Maintenance and Service Guide... - Page 31 8. Remove the front bezel . 9. Open the chassis: a. Remove the chassis screws. b. Grab the upper half of the chassis at the blue touchpoint, and then pivot it outward to open the chassis. HPE ProLiant MicroServer Gen11 Maintenance and Service Guide...
-
Page 32: Close The Chassis
Procedure Procedure 1. Close the chassis: a. Ensure that all cables are secured by cable clamps or metal tabs. b. Pivot the upper half of the chassis inward to close the chassis. HPE ProLiant MicroServer Gen11 Maintenance and Service Guide... - Page 33 Install the chassis screws. 2. Install the front bezel. 3. If you prefer to secure the bezel to the chassis, switch the bezel locks downward. HPE ProLiant MicroServer Gen11 Maintenance and Service Guide...
-
Page 34: Power Up The Server
3. Remove the power adapter cord from the power cord clamp, and then disconnect the power adapter from the server. 4. Disconnect all peripheral cables from the server. 5. If installed, unlock and remove the security padlock and/or the Kensington security lock. HPE ProLiant MicroServer Gen11 Maintenance and Service Guide... - Page 35 Switch the bezel locks upward. 8. To remove an unlocked front bezel, do the following: a. Pivot the bottom part of the bezel upward. b. Release the bezel tabs from their chassis openings. HPE ProLiant MicroServer Gen11 Maintenance and Service Guide...
-
Page 36: Drive Replacement
5. If installed, unlock and remove the security padlock and/or the Kensington security lock. For more information, see the lock documentation. 6. If the server is in a vertical orientation, position the server in a horizontal orientation. HPE ProLiant MicroServer Gen11 Maintenance and Service Guide... - Page 37 Slide the drive out of the drive bay. c. Remove the screws from the drive. Retain the screws. These screws will be used to install the new spare LFF drive. Results Results HPE ProLiant MicroServer Gen11 Maintenance and Service Guide...
-
Page 38: Removing And Replacing An Sff Drive
6. If the server is in a vertical orientation, position the server in a horizontal orientation. 7. Remove the front bezel . 8. Remove the SFF drive: a. Press and hold the release latch. b. Slide the drive converter tray out of the drive bay. HPE ProLiant MicroServer Gen11 Maintenance and Service Guide... - Page 39 Remove the screws on the bottom of the converter tray. Retain the screws. These screws will be used to install the new spare SFF drive. d. Remove the drive from the converter tray. HPE ProLiant MicroServer Gen11 Maintenance and Service Guide...
-
Page 40: Removing And Replacing The Four-Bay Drive Cable Assembly
CAUTION: A discharge of static electricity from a finger or other conductor might damage system boards or other static- sensitive devices. To prevent damage, observe antistatic precautions. Procedure Procedure 1. Back up all server data. 2. Power down the server. HPE ProLiant MicroServer Gen11 Maintenance and Service Guide... - Page 41 11. Remove all drives . 12. Disconnect the four-bay drive cable assembly from the system board . 13. Remove the four-bay drive cable assembly: a. Remove the four-bay drive cable assembly screws. HPE ProLiant MicroServer Gen11 Maintenance and Service Guide...
-
Page 42: Removing And Replacing The Ambient Temperature Sensor Cable
Results Results To replace the component, reverse the removal procedure. Removing and replacing the ambient temperature sensor cable Removing and replacing the ambient temperature sensor cable About this task About this task HPE ProLiant MicroServer Gen11 Maintenance and Service Guide... - Page 43 8. Remove the front bezel . 9. Open the chassis . 10. Disconnect the ambient temperature sensor cable from the system board . 11. Remove the ambient temperature sensor from the clip. HPE ProLiant MicroServer Gen11 Maintenance and Service Guide...
- Page 44 1. Power down the server. 2. Disconnect the power cord from the AC source. 3. Remove the power adapter cord from the power cord clamp, and then disconnect the power adapter from the server. HPE ProLiant MicroServer Gen11 Maintenance and Service Guide...
- Page 45 7. Remove the chassis cover . 8. Remove the front bezel . 9. Open the chassis . 10. Remove the DIMM. a. Open the DIMM slot latches. b. Lift the DIMM out of the slot. Results Results HPE ProLiant MicroServer Gen11 Maintenance and Service Guide...
- Page 46 6. If the server is in a vertical orientation, position the server in a horizontal orientation. 7. Remove the chassis cover . 8. Remove the front bezel . 9. Open the chassis . 10. If installed, remove the following: HPE ProLiant MicroServer Gen11 Maintenance and Service Guide...
- Page 47 12. Remove the fan: a. Remove the fan screws from the rear panel. b. Remove the fan from between the rear panel and the heatsink. Results Results To replace the component, reverse the removal procedure. HPE ProLiant MicroServer Gen11 Maintenance and Service Guide...
- Page 48 5. If installed, unlock and remove the security padlock and/or the Kensington security lock. For more information, see the lock documentation. 6. If the server is in a vertical orientation, position the server in a horizontal orientation. HPE ProLiant MicroServer Gen11 Maintenance and Service Guide...
- Page 49 Loosen one pair of diagonally opposite screws halfway, then loosen the other pair of screws. b. Completely loosen all screws in the same sequence. c. Lift the heatsink away from the processor socket. HPE ProLiant MicroServer Gen11 Maintenance and Service Guide...
- Page 50 When using a torque wrench to tighten the heatsink screws, set it to 6.0. b. Note the Front of server Front of server text on the heatsink label to correctly orient the heatsink over the processor socket. HPE ProLiant MicroServer Gen11 Maintenance and Service Guide...
- Page 51 Subtopics Subtopics Processor cautions Processor cautions Removing the processor Removing the processor Installing the processor Installing the processor Reconfiguring the system date and time settings Reconfiguring the system date and time settings HPE ProLiant MicroServer Gen11 Maintenance and Service Guide...
- Page 52 Processor socket 1 must be populated at all times or the server does not function. IMPORTANT: IMPORTANT: If installing a processor with a faster speed, update the system ROM before installing the processor. To download firmware, go to the Hewlett Packard Enterprise Support Center website (https://www.hpe.com/support/hpesc https://www.hpe.com/support/hpesc). IMPORTANT: IMPORTANT: After removing a processor from the system board, the server resets the date and time.
- Page 53 Loosen one pair of diagonally opposite screws halfway, then loosen the other pair of screws. b. Completely loosen all screws in the same sequence. c. Lift the heatsink away from the processor socket. HPE ProLiant MicroServer Gen11 Maintenance and Service Guide...
- Page 54 THE PINS ON THE PROCESSOR SOCKET AND ON THE PROCESSOR ARE VERY FRAGILE AND EASILY DAMAGED. Any THE PINS ON THE PROCESSOR SOCKET AND ON THE PROCESSOR ARE VERY FRAGILE AND EASILY DAMAGED. damage to them might require replacing the system board. HPE ProLiant MicroServer Gen11 Maintenance and Service Guide...
- Page 55 15. Hold the processor by the edges, and then lift it out of the socket. HPE ProLiant MicroServer Gen11 Maintenance and Service Guide...
- Page 56 CAUTION: Do not press down on the dust cover. Pressing down on the dust cover might damage the processor socket. CAUTION: a. Close the processor load plate, and then engage the hinge lever. HPE ProLiant MicroServer Gen11 Maintenance and Service Guide...
- Page 57 Install the processor socket dust cover. HPE ProLiant MicroServer Gen11 Maintenance and Service Guide...
- Page 58 CAUTION: A discharge of static electricity from a finger or other conductor might damage system boards or other static- sensitive devices. To prevent damage, observe antistatic precautions. Procedure Procedure 1. If the processor dust socket cover is installed, remove it. Retain the cover for future use. HPE ProLiant MicroServer Gen11 Maintenance and Service Guide...
- Page 59 Push the hinge lever down to unclamp it, and then pivot it to the fully open position. b. Open the processor load plate. 3. Do not touch the socket contacts or the bottom of the processor. HPE ProLiant MicroServer Gen11 Maintenance and Service Guide...
- Page 60 Pin 1 indicator on the processor and the socket b. Lower the processor straight down, without tilting or sliding the processor in the socket. Make sure that the processor is properly seated in the socket. HPE ProLiant MicroServer Gen11 Maintenance and Service Guide...
- Page 61 CAUTION: The processor load plate and hinge lever should close without resistance. Forcing to close these parts can damage the processor and the socket. This damage might require replacing the system board. HPE ProLiant MicroServer Gen11 Maintenance and Service Guide...
- Page 62 6. Apply new thermal grease to the processor in the pattern shown in the following image to ensure even distribution. Use the full contents of the thermal grease syringe. 7. Install the heatsink: HPE ProLiant MicroServer Gen11 Maintenance and Service Guide...
- Page 63 13. Connect the power adapter to the server, and then secure the power adapter cord in the power cord clamp. 14. Connect the power cord to the AC source. 15. Power up the server. 16. Reconfiguring the system date and time settings . Results Results HPE ProLiant MicroServer Gen11 Maintenance and Service Guide...
- Page 64 About this task CAUTION: CAUTION: To prevent improper cooling and thermal damage, do not operate the server unless all PCIe slots have either a riser slot blank or an expansion card installed. HPE ProLiant MicroServer Gen11 Maintenance and Service Guide...
- Page 65 7. Remove the chassis cover . 8. Remove the front bezel . 9. Open the chassis . 10. Disconnect any internal cables that are connected to the expansion card. 11. Remove the expansion card. HPE ProLiant MicroServer Gen11 Maintenance and Service Guide...
- Page 66 When installing the replacement component: Observe antistatic precautions. Handle the PCA only along the edges. Do not touch the components and connectors on the PCA. Do not bend or flex the PCA. HPE ProLiant MicroServer Gen11 Maintenance and Service Guide...
- Page 67 11. Do the following: If installed, remove the expansion card from the PCIe Slot 1 . If installed, disconnect the serial port cable from the iLO-M.2-serial module. 12. If installed, remove the M.2 SSD. HPE ProLiant MicroServer Gen11 Maintenance and Service Guide...
- Page 68 13. Remove the module stabilizer. 14. Remove the iLO-M.2-serial module. HPE ProLiant MicroServer Gen11 Maintenance and Service Guide...
- Page 69 5. If installed, unlock and remove the security padlock and/or the Kensington security lock. For more information, see the lock documentation. 6. If the server is in a vertical orientation, position the server in a horizontal orientation. HPE ProLiant MicroServer Gen11 Maintenance and Service Guide...
- Page 70 10. Remove the serial port cable: a. Remove the hex screws. b. Remove the serial port from the rear panel. Results Results To replace the component, reverse the removal procedure. System board replacement System board replacement HPE ProLiant MicroServer Gen11 Maintenance and Service Guide...
- Page 71 5. If installed, unlock and remove the security padlock and/or the Kensington security lock. For more information, see the lock documentation. 6. If the server is in a vertical orientation, position the server in a horizontal orientation. HPE ProLiant MicroServer Gen11 Maintenance and Service Guide...
- Page 72 Loosen the system battery cover screw. b. Lift the cover from the system battery. 12. Disconnect all cables from the system board. 13. If installed, remove the following components from the system board: DIMMs HPE ProLiant MicroServer Gen11 Maintenance and Service Guide...
- Page 73 Allow the alcohol to evaporate before continuing. 16. Open the processor load plate: a. Push the hinge lever down to unclamp it, and then pivot it to the fully open position. b. Open the processor load plate. HPE ProLiant MicroServer Gen11 Maintenance and Service Guide...
- Page 74 THE PINS ON THE PROCESSOR SOCKET AND ON THE PROCESSOR ARE VERY FRAGILE AND EASILY DAMAGED. Any THE PINS ON THE PROCESSOR SOCKET AND ON THE PROCESSOR ARE VERY FRAGILE AND EASILY DAMAGED. damage to them might require replacing the system board. HPE ProLiant MicroServer Gen11 Maintenance and Service Guide...
- Page 75 18. Hold the processor by the edges, and then lift it out of the socket. HPE ProLiant MicroServer Gen11 Maintenance and Service Guide...
- Page 76 CAUTION: Do not press down on the dust cover. Pressing down on the dust cover might damage the processor socket. CAUTION: a. Close the processor load plate, and then engage the hinge lever. HPE ProLiant MicroServer Gen11 Maintenance and Service Guide...
- Page 77 Install the processor socket dust cover. HPE ProLiant MicroServer Gen11 Maintenance and Service Guide...
- Page 78 Slide the system board away from the rear panel, and then lift the system board in the upward direction from the chassis. Make sure that the system board is disconnected from the PDB. HPE ProLiant MicroServer Gen11 Maintenance and Service Guide...
- Page 79 Make sure that the system board is firmly connected to the PDB. b. Install the system board screws. 2. If the processor dust socket cover is installed, remove it. Retain the cover for future use. HPE ProLiant MicroServer Gen11 Maintenance and Service Guide...
- Page 80 Push the hinge lever down to unclamp it, and then pivot it to the fully open position. b. Open the processor load plate. 4. Do not touch the socket contacts or the bottom of the processor. HPE ProLiant MicroServer Gen11 Maintenance and Service Guide...
- Page 81 Pin 1 indicator on the processor and the socket b. Lower the processor straight down, without tilting or sliding the processor in the socket. Make sure that the processor is properly seated in the socket. HPE ProLiant MicroServer Gen11 Maintenance and Service Guide...
- Page 82 CAUTION: The processor load plate and hinge lever should close without resistance. Forcing to close these parts can damage the processor and the socket. This damage might require replacing the system board. HPE ProLiant MicroServer Gen11 Maintenance and Service Guide...
- Page 83 7. Apply new thermal grease to the processor in the pattern shown in the following image to ensure even distribution. Use the full contents of the thermal grease syringe. 8. Install the heatsink: HPE ProLiant MicroServer Gen11 Maintenance and Service Guide...
- Page 84 Finish the installation by completely tightening the screws in the same sequence. 9. Install the system battery cover: a. Attach the cover on the system battery socket. b. Tighten the cover screw. HPE ProLiant MicroServer Gen11 Maintenance and Service Guide...
- Page 85 21. Re-entering the server serial number and product ID . Results Results The procedure is complete. Re-entering the server serial number and product ID Re-entering the server serial number and product ID HPE ProLiant MicroServer Gen11 Maintenance and Service Guide...
- Page 86 Do not touch the components and connectors on the PCA. Do not bend or flex the PCA. Procedure Procedure 1. Power down the server. 2. Disconnect the power cord from the AC source. HPE ProLiant MicroServer Gen11 Maintenance and Service Guide...
- Page 87 10. Remove the system board . 11. Disconnect all cables from the power distribution board. 12. Remove the power distribution board: a. Remove all screws. b. Lift the power distribution board from the chassis. HPE ProLiant MicroServer Gen11 Maintenance and Service Guide...
- Page 88 Do not expose the battery to low air pressure as it might lead to explosion or leakage of flammable liquid or gas. Do not disassemble, crush, puncture, short external contacts, or dispose of the battery in fire or water. Removing and replacing the system battery Removing and replacing the system battery HPE ProLiant MicroServer Gen11 Maintenance and Service Guide...
- Page 89 9. Open the chassis . 10. Locate the battery on the system board . 11. If installed, remove the expansion cards from PCIe Slots 1 and 2 . 12. Remove the system battery cover: HPE ProLiant MicroServer Gen11 Maintenance and Service Guide...
- Page 90 14. Install the system battery: a. With the side of the battery showing the "+" sign facing up, insert the battery into the socket. b. Press the system battery down until it clicks into place. HPE ProLiant MicroServer Gen11 Maintenance and Service Guide...
- Page 91 16. If removed, install the expansion cards. 17. Close the chassis . 18. Install the front bezel. 19. Install the chassis cover. 20. If removed, install the security padlock and/or the Kensington security lock. HPE ProLiant MicroServer Gen11 Maintenance and Service Guide...
- Page 92 Some cables have more than one connector, such as a Y-cable, but not all connectors are used. The cable colors in the cabling diagrams used in this chapter are for illustration purposes only. Observe all guidelines when working with server cables. HPE ProLiant MicroServer Gen11 Maintenance and Service Guide...
- Page 93 Grip the body of the cable connector. Do not pull on the cable itself because this action can damage the internal wires of the cable or the pins on the port. If a cable does not disconnect easily, check for any release latch that must be pressed to disconnect the cable. HPE ProLiant MicroServer Gen11 Maintenance and Service Guide...
- Page 94 Cabling diagrams Cabling diagrams Observe the following: Before cabling components, see the cabling guidelines. Use the cable part number or search feature to find your diagram. HPE ProLiant MicroServer Gen11 Maintenance and Service Guide...
- Page 95 Internal cabling management Item Item Description Description Cable clip Metal tab Metal tab Cable clamp Cable tie secures the following cables: Fan cable CPU power cable System power cable Drive power cable HPE ProLiant MicroServer Gen11 Maintenance and Service Guide...
- Page 96 System board: SlimSAS x4 port Drive bay 1–4 Blue PDB: Drive power connector Option kit: P68408-B21 Four-bay drive cabling: Type-p storage controller converter cabling Four-bay drive cabling: Type-p storage controller converter cabling HPE ProLiant MicroServer Gen11 Maintenance and Service Guide...
- Page 97 Cable part number Cable part number Color Color From From P64334-001 Orange Storage controller signal Onboard SATA signal cable connector Option kit: P68413-B21 Serial port cabling Serial port cabling HPE ProLiant MicroServer Gen11 Maintenance and Service Guide...
- Page 98 Ambient temperature sensor cabling Cable part number Cable part number Color Color From From P65284-001 Orange System board: Ambient Ambient temperature sensor temperature sensor connector Option kit: P68408-B21 Fan cabling Fan cabling HPE ProLiant MicroServer Gen11 Maintenance and Service Guide...
- Page 99 Color Color From From Orange PDB: Fan connector Fan System power cabling System power cabling HPE ProLiant MicroServer Gen11 Maintenance and Service Guide...
- Page 100 Integrated Management Log Messages for HPE ProLiant Gen10, Gen10 Plus, and Gen11 servers and HPE Synergy provides IML messages and associated troubleshooting information to resolve critical and cautionary IML events. https://www.hpe.com/info/Troubleshooting-IML-en https://www.hpe.com/info/Troubleshooting-IML-en...
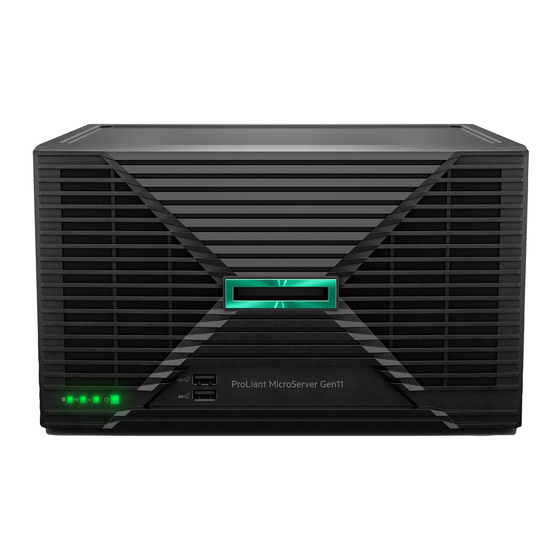
- Page 101 These ports are also known as SuperSpeed USB 10 Gb/s ports. The appropriate cable and compatible hardware are required to take advantage of the 10 Gb/s data transfer speed. Front panel LEDs and button Front panel LEDs and button HPE ProLiant MicroServer Gen11 Maintenance and Service Guide...
- Page 102 This LED reflects the status of the onboard NIC ports and the optional iLO dedicated network port. If the health LED indicates a degraded or critical state, review the system Integrated Management Log (IML) or use HPE iLO to review the system health status.
- Page 103 8 flashes Storage backplane 9 flashes Power supply 10 flashes PCIe expansion cards installed in riser board 11 flashes Chassis 12 flashes GPU card 13 flashes Rear panel components Rear panel components HPE ProLiant MicroServer Gen11 Maintenance and Service Guide...
- Page 104 The embedded video controller in the iLO chipset does not support dual display or screen extension mode. To enable dual display mode, install a compatible PCIe graphics card that supports this feature in the expansion slot. HPE ProLiant MicroServer Gen11 Maintenance and Service Guide...
- Page 105 This iLO link LED is on the optional iLO-M2-serial module. Subtopics Subtopics Server UID LED Server UID LED Using the UID button to view the Server Health Summary Using the UID button to view the Server Health Summary HPE ProLiant MicroServer Gen11 Maintenance and Service Guide...
- Page 106 The Server Health Summary screen is displayed on the external monitor. For more information, see the iLO troubleshooting guide: https://www.hpe.com/support/ilo6 https://www.hpe.com/support/ilo6 2. Press the UID button again to close the Server Health Summary screen. System board components System board components HPE ProLiant MicroServer Gen11 Maintenance and Service Guide...
- Page 107 The server has two individual printed circuit assemblies (PCA): Item Board Item Board System board Power distribution board (PDB) HPE ProLiant MicroServer Gen11 Maintenance and Service Guide...
- Page 108 This connector supports a maximum of four SATA devices. Subtopics Subtopics System maintenance switch descriptions System maintenance switch descriptions DIMM label identification DIMM label identification DIMM slot numbering DIMM slot numbering System maintenance switch descriptions System maintenance switch descriptions HPE ProLiant MicroServer Gen11 Maintenance and Service Guide...
- Page 109 To determine DIMM characteristics, see the label attached to the DIMM. The information in this section helps you to use the label to locate specific information about the DIMM. For more information about product features, specifications, options, configurations, and compatibility, see the HPE DDR5 SmartMemory QuickSpecs: https://www.hpe.com/docs/server-memory...
- Page 110 The maximum memory speed and capacity is a function of the memory type, memory configuration, and processor model. DIMM slot numbering DIMM slot numbering The arrow points to the front of the server. HPE ProLiant MicroServer Gen11 Maintenance and Service Guide...
- Page 111 Drive bay numbering Drive bay numbering Drive screws Drive screws There are 16 T-15 Torx screws located under the drive bays. Use these screws to install drives in the server. HPE ProLiant MicroServer Gen11 Maintenance and Service Guide...
- Page 112 The TPM 2.0 is supported with specific operating system support such as Microsoft Windows Server 2012 R2 and later. For more information about operating system support, see the product QuickSpecs on the Hewlett Packard Enterprise website (https://www.hpe.com/info/quickspecs https://www.hpe.com/info/quickspecs). For more information about Microsoft Windows BitLocker Drive Encryption feature, see the Microsoft website (https://www.microsoft.com https://www.microsoft.com).
- Page 113 Recovery Mode after BitLocker detects a possible compromise of system integrity. HPE is not liable for blocked data access caused by improper TPM use. For operating instructions, see the documentation for the encryption technology feature provided by the operating system.
- Page 114 QuickSpecs (https://www.hpe.com/info/quickspecs https://www.hpe.com/info/quickspecs). Products ordered from HPE Factory Express might have already been configured with some or all the configurations in this chapter. To determine if any additional setup is required, see your HPE Factory Express order. For the most recent changes, feature enhancements, and bug fixes, see the latest product release notes.
- Page 115 Enable policy-based management of server or server group firmware for distributed server infrastructure https://www.hpe.com/info/com-docs https://www.hpe.com/info/com-docs Monitor server compliance with a configured firmware baseline Receive automatic iLO firmware updates Receive baseline update alerts Configuring the server Configuring the server HPE ProLiant MicroServer Gen11 Maintenance and Service Guide...
- Page 116 For servers running HPE OneView, do not use another tool, such as iLO, to delete or change certain settings. For more information about using HPE OneView and iLO to manage the same server, see the iLO user guide at https://www.hpe.com/support/ilo6 https://www.hpe.com/support/ilo6.
- Page 117 Deploying an OS Deploying an OS For a list of supported operating systems, see the HPE Servers Support & Certification Matrices: https://www.hpe.com/support/Servers-Certification-Matrices https://www.hpe.com/support/Servers-Certification-Matrices Configure the server to boot from a SAN HPE Boot from SAN Configuration Guide https://www.hpe.com/info/boot-from-san-config-guide...
- Page 118 HPE iLO 6 Security Technology Brief https://www.hpe.com/support/ilo6-security-en https://www.hpe.com/support/ilo6-security-en Configure and use the Server Configuration Lock feature on HPE Server Configuration Lock User Guide for HPE ProLiant servers and Trusted Supply Chain servers and other servers that have the Server HPE Synergy Configuration Lock feature enabled.
- Page 119 3,050 m (10,000 ft), no direct sustained sunlight. Maximum rate of change is 20°C/hr (36°F/hr). The upper limit and rate of change may be limited by the type and number of options installed. HPE ProLiant MicroServer Gen11 Maintenance and Service Guide...
- Page 120 40°C to 45°C (104°F to 113°F) at sea level with an altitude derating of 1.0°C per every 125 m (1.8°F per every 410 ft) above 900 m (2953 ft) to a maximum of 3,050 m (10,000 ft). The approved hardware configurations for this system are listed in the Extended Ambient Temperature Guidelines for Gen11 HPE ProLiant servers: https://www.hpe.com/support/ASHRAEGen11...
- Page 121 Accessing Hewlett Packard Enterprise Support For live assistance, go to the Contact Hewlett Packard Enterprise Worldwide website: https://www.hpe.com/info/assistance https://www.hpe.com/info/assistance To access documentation and support services, go to the Hewlett Packard Enterprise Support Center website: https://www.hpe.com/support/hpesc https://www.hpe.com/support/hpesc HPE ProLiant MicroServer Gen11 Maintenance and Service Guide...
- Page 122 IMPORTANT: IMPORTANT: Access to some updates might require product entitlement when accessed through the Hewlett Packard Enterprise Support Center. You must have an HPE Account set up with relevant entitlements. Remote support Remote support Remote support is available with supported devices as part of your warranty or contractual support agreement. It provides intelligent event diagnosis, and automatic, secure submission of hardware event notifications to Hewlett Packard Enterprise, which initiates a fast and accurate resolution based on the service level of your product.
- Page 123 Feedback button and icons (at the bottom of an opened document) on the Hewlett Packard Enterprise Support Center portal (https://www.hpe.com/support/hpesc https://www.hpe.com/support/hpesc) to send any errors, suggestions, or comments. This process captures all document information. HPE ProLiant MicroServer Gen11 Maintenance and Service Guide...
Need help?
Do you have a question about the ProLiant MicroServer Gen11 and is the answer not in the manual?
Questions and answers