Hikmicro SP Series User Manual
Handheld thermography camera
Hide thumbs
Also See for SP Series:
- Quick start manual (274 pages) ,
- User manual (75 pages) ,
- Quick start manual (184 pages)

Related Manuals for Hikmicro SP Series


Summary of Contents for Hikmicro SP Series
- Page 1 Handheld Thermography Camera User Manual Handheld Thermography Camera HIKMICRO SP Series User Manual...
- Page 2 Handheld Thermography Camera User Manual Safety Instruction These instructions are intended to ensure that user can use the product correctly to avoid danger or property loss. Laws and Regulations Use of the product must be in strict compliance with the local electrical safety regulations.
- Page 3 Handheld Thermography Camera User Manual DO NOT place the battery in the reach of children. When the device is powered off and the RTC battery is full, the time settings can be kept for 3 months. In the first use, power on the device and charge the RTC battery with the lithium battery for more than 2 hours.
- Page 4 For more detailed calibration services, please visit https://www.hikmicrotech.com/en/support/calibration-service.html. Technical Support The https://www.hikmicrotech.com/en/contact-us.html portal will help you as a HIKMICRO customer to get the most out of your HIKMICRO products. The portal gives you access to our support team, software and documentation, service contacts, etc. Emergency ...
- Page 5 Handheld Thermography Camera User Manual less than 1 mW. The laser meets the IEC60825-1:2014, and EN60825-1:2014+A11:2021 standard. Laser maintenance: It is not necessary to maintain the laser regularly. If the laser does not work, the laser assembly needs to be replaced in the factory under warranty.
- Page 6 Handheld Thermography Camera User Manual Symbol Conventions The symbols that may be found in this document are defined as follows. Symbol Description Danger Indicates a hazardous situation which, if not avoided, will or could result in death or serious injury. Indicates a potentially hazardous situation which, if Caution not avoided, could result in equipment damage, data...
-
Page 7: Table Of Contents
Handheld Thermography Camera User Manual Contents Overview ..........................1 Device Description ..........................1 Main Function ............................1 Appearance ............................. 3 Preparation........................9 Cable Connection ........................... 9 Charge Battery ............................9 2.2.1 Remove Battery ..........................9 2.2.2 Charge Battery via Charging Base ....................11 Change Interchangeable Lens ...................... - Page 8 Import and Manage Tag Note Templates ..................64 Export Files ............................64 7.5.1 Export Files to PC ..........................64 7.5.2 Export Files to HIKMICRO Viewer ....................65 Distance Detection......................67 Geographic Location Display ..................68 Direction Display ......................69 10.1 Calibrate Compass ..........................
- Page 9 13.1 View Device Information ........................77 13.2 Upgrade Device............................. 77 13.2.1 Upgrade Device via PC ........................ 77 13.2.2 Upgrade Device via HIKMICRO Viewer ..................78 13.3 Restore Device ............................78 13.4 Initialize Memory Card ......................... 78 13.5 Save Logs.............................. 78 13.6...
-
Page 10: Overview
Bluetooth. The built-in high-sensitivity IR detector and high- performance sensor detects the variation of temperature and measure the real-time temperature. Refer to the production specification on HIKMICRO website for detailed information. The built-in laser module detects the target distance. - Page 11 For some models that have a micro HDMI output interface, you can connect the device to a display unit to view live image. Client Software Mobile Phone: Use HIKMICRO Viewer to see Connection live image, capture, and recording, etc. on your phone. Android...
-
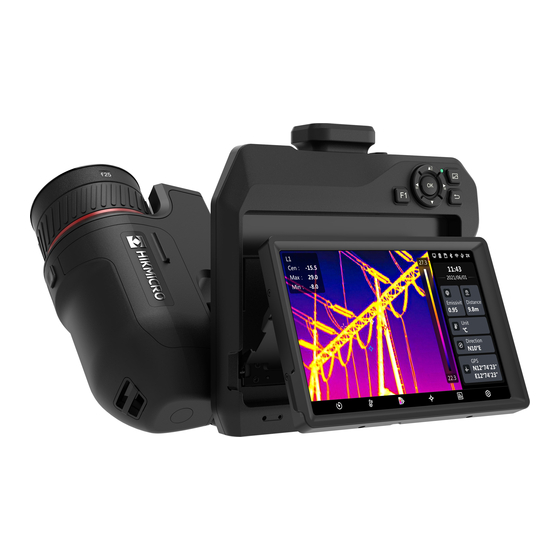
Page 12: Appearance
Handheld Thermography Camera User Manual Appearance... - Page 13 Handheld Thermography Camera User Manual...
- Page 14 Handheld Thermography Camera User Manual...
- Page 15 Handheld Thermography Camera User Manual Figure 1-1 Buttons and Interfaces Table 1-2 Button and Interface Description Description Function Menu Mode: Press , and to select parameters. Press OK to confirm. Navigation Button Non-Menu Mode: Press to turn on/off the LED light supplement.
- Page 16 Handheld Thermography Camera User Manual Description Function Hold: start recording Focus Button Press to start focus. Press: measure the distance with laser once Laser Button Hold: measure the distance with laser continuously Hand Strap Mount the hand strap. Attachment Point Neck Strap 16 &...
- Page 17 Handheld Thermography Camera User Manual Description Function Lens Release Unlock the interchangeable lens. Button The laser radiation emitted from the device can cause eye injuries, burning of skin or inflammable substances. Before enabling the light supplement function, make sure no human or inflammable substances are in front of the laser lens.
-
Page 18: Preparation
Handheld Thermography Camera User Manual Preparation Cable Connection Connect the device and power adaptor with a type-C cable to charge the device battery. Alternatively, connect the device and PC to export files. 1. Lift the cable interface cover. 2. Connect the device and the Type-C cable. Figure 2-1 Connect to Type-C Cable Charge Battery 2.2.1... - Page 19 Handheld Thermography Camera User Manual Figure 2-2 Unlock Battery Compartment 2. Push the inner battery lock (in the black circle) leftwards to release the battery. Figure 2-3 Release Battery 3. Take the battery out of the battery compartment. Figure 2-4 Remove Battery...
-
Page 20: Charge Battery Via Charging Base
Handheld Thermography Camera User Manual 2.2.2 Charge Battery via Charging Base Please charge the battery with the cable and power adapter supplied by the manufacturer (or according to the input voltage from the specifications). 1. Put one or two batteries in the charging base. 2. - Page 21 Handheld Thermography Camera User Manual The device pops up a window to show the lens information or the calibration program when detecting a mounted lens. 1. Press the lens release button and turn the interchangeable lens anticlockwise until it stops. Figure 2-6 Release Lens 2.
-
Page 22: Mount Hand Strap
Handheld Thermography Camera User Manual 4. Push the lens into position. Figure 2-9 Mount Lens 5. Rotate the lens clockwise to fix it. The lens makes a click when it locks in place. Figure 2-10 Fix Lens Dust on the detector may cause blemishes in the image. If you can find the dust on the detector, use pressurized air from a compressed air canister to blow it off;... - Page 23 Handheld Thermography Camera User Manual Figure 2-11 Thread Hand Strap 2. Insert one end of the hand strap through the two hand strap attachment points. Figure 2-12 Thread Hand Strap Through Attachment Points 3. Thread hand strap through the hand strap buckle, and fasten the hand strap.
-
Page 24: Mount Neck Strap
Handheld Thermography Camera User Manual Mount Neck Strap 1. Insert one end of the neck strap through a neck strap attachment point. 2. Thread the neck strap through the buckle, and fasten the neck strap. Figure 2-14 Fasten Hand Strap 3. -
Page 25: Power On/Off
Handheld Thermography Camera User Manual Figure 2-16 Tilt Lens and Screen Power On/Off Power On Remove the lens cover, and hold for over three seconds to turn on the device. You can observe the target when the interface of the device is stable. -
Page 26: Operation Method
Handheld Thermography Camera User Manual Set Auto Sleep Select , and go to Device Settings > Auto Sleep to set waiting time before auto sleep. When there is no button pressing or screen tapping operation on device for more than the set waiting time, device enters sleep mode automatically. -
Page 27: Menu Description
Handheld Thermography Camera User Manual Figure 2-18 Button Control In menu mode, press , and to select parameters. Press to confirm. 2.10 Menu Description In the observation interface, tap the screen to show the menu bar, and swipe down to call the swipe-down menu. 2.10.1 Live View Interface Figure 2-19 Live View... - Page 28 Handheld Thermography Camera User Manual Table 2-1 Live View Interface Description Descriptions Live view interface. Display the thermal images of the target and its real-time temperature values. Shortcut bar. Record/camera mode, focus mode, level & span mode, display mode, palettes, and measurement settings support quick operation.
- Page 29 Handheld Thermography Camera User Manual Status Display Description Interchangeable Lens is mounted on the device and the interchangeable lens type is on the bottom right of the icon. The inspection data is transmitting to the device. Cast Screen is on. Compass is on.
-
Page 30: Main Menu
Handheld Thermography Camera User Manual Icon Description Tap to switch palettes. Please see 3.4 3.1 for more details. Tap to set temperature measurement parameters such as humidity, emissivity, distance, and temperature. Please see 3.4 3.1 for more details. 2.10.2 Main Menu Figure 2-20 Main Menu Table 2-4 Description of Main Menu Icon... - Page 31 Handheld Thermography Camera User Manual Figure 2-21 Swipe-down Menu Table 2-5 Swip-down Menu Table Function Wi-Fi Bluetooth Hotspot Flashlight Auto-Rotation Dark/Bright Mode Compass Inspection Mode...
-
Page 32: Display Settings
Handheld Thermography Camera User Manual Display Settings Your device will periodically perform a self-calibration to optimize image quality and measurement accuracy. In this process the image will pause briefly and you'll hear a "click" as a shutter moves in front of the detector. The self-calibration will be more frequent during start up or in very cold or hot environments. -
Page 33: Laser Assisted Focus
Handheld Thermography Camera User Manual DO NOT touch the lens, or the imaging effect may be affected. 3.1.2 Laser Assisted Focus Aim the laser to the target and the device focuses automatically. Before You Start It is recommended to use this function in a non-glare environment, such as indoor environment. -
Page 34: Continuous Autofocus
Handheld Thermography Camera User Manual − In live view, tap the focus shortcut key in shortcut bar and switch to Auto Focus 2. In the live view interface, aim image center at the target and press finish focus. The device adjusts its focus on targets in the image center. 3. -
Page 35: High Temperature Priority
Handheld Thermography Camera User Manual In live view, tap the focus shortcut key in shortcut bar and switch it to Continuous Autofocus Then aim the device at the target, and the device focuses automatically. Focus ring adjustment does not take effect in this mode. 3.1.5 High Temperature Priority Enable the high temperature priority function if you want to focus on the... -
Page 36: Set Palettes
Handheld Thermography Camera User Manual − Select from the main menu, and tap the icons to select a display mode. − In live view, tap the focus shortcut key in shortcut bar and switch display mode. In thermal mode, the device displays the thermal view. In fusion mode, the device displays the thermal image of the live view outlined from visual image. -
Page 37: Set Alarm Mode Palettes
Handheld Thermography Camera User Manual Table 3-2 Table of Different Palettes Palettes Description White Hot The hot part is light-colored in view. Black Hot The hot part is black-colored in view. Rainbow The target displays multiple colors. It is suitable for scene without obvious temperature difference. -
Page 38: Set Focus Mode Palettes
Handheld Thermography Camera User Manual Icon Alarm Mode Description According to the set values of Indoor Temp. and Outdoor Temp., the device calculates the insulation value based on the built-in rules, and detects wheteher the insulation value of the target internal surface exceeds Threshold Level (normally 0.6 ~ 0.8). -
Page 39: Adjust Level & Span
Handheld Thermography Camera User Manual Table 3-4 Table 3-3 Icon Description Icon Palettes Mode Description Set the temperature threshold, and the targets with the temperature higher than Above Focus the set value are displayed with fusion palettes. Set the temperature threshold, and targets with the temperature lower than Below Focus the set value are displayed with fusion... -
Page 40: Color Distribution
Handheld Thermography Camera User Manual Table 3-5 Manual Level & Span Mode Mode Description Operation Level adjust 1. Tap an interest area on Only maximum temperature and screen. A circle is displayed the minimum temperature around the area, and the respectively to expand or temperature range re-adjusts reduce... -
Page 41: Adjust Digital Zoom
Handheld Thermography Camera User Manual Table 3-6 Color Distribution Mode Description Linear Linear mode is used to detect small high temperature targets in low temperature background. Linear color distribution enhances and displays more details of high temperature targets, which is good for checking small high temperature defective areas such as cable connectors. -
Page 42: Display Osd Info
Handheld Thermography Camera User Manual Display OSD Info Select , and go to Display Settings to enable the information on-screen display. Table 3-7 Display Settings Function Description Status Icon The device status icons, for example, battery status, memory card, hotspot, etc. Time and Date Device time and date. -
Page 43: Temperature Measurement
Handheld Thermography Camera User Manual Temperature Measurement The temperature measurement function provides the real-time temperature of the scene and display it on the left of your screen. This function is turned on by default. Your device will periodically perform a self-calibration to optimize image quality and measurement accuracy. -
Page 44: Set Image Measurement
Handheld Thermography Camera User Manual Distance The distance between the target and the device. You can customize the target distance or select the target distance as Near, Middle, or Far. Humidity Set the relative humidity of current environment. External Optics Transmittance Set the optics transmittance of external optical material (e.g.: germanium window) to improve the temperature measuring accuracy. -
Page 45: Set Measurement Tool
Handheld Thermography Camera User Manual Figure 4-1 Image Measurement Set Measurement Tool You can set temperature measurement parameters to improve the accuracy of temperature measurement. Before You Start Set parameters such as Humidity, External Optics Transmittance and Set Measurement Reflection Temperature. For detailed explanations, see Parameters 1. -
Page 46: Measure By Custom Spot
Handheld Thermography Camera User Manual Figure 4-2 Temperature Measurement Tools What to do next Set temperature alarm, then alarm actions such as audible warning and flashing alarm will be triggered when the tested temperature exceeds the Temperature Alarm set alarm value. See 4.3.2 Measure by Custom Spot The device can detect the temperature of a custom spot. -
Page 47: Measure By Line
Handheld Thermography Camera User Manual At most ten custom spots are supported. Drag the spot tool list on the left of the screen, or press to view the whole tool list. 6. Optional: Modify the set custom spot tools, hide or display the tools and measurement results, etc. -
Page 48: Measure By Rectangle
Handheld Thermography Camera User Manual Table 4-4 Measurement Parameters of Line Tool Parameters Description Emissivity Set the emissivity of your target. Distance Set the distance between the target and the device. Max./Min./Average Temperature Tap to enable the temperature types display. max. - Page 49 Handheld Thermography Camera User Manual − Tap one corner of the rectangle, and press enlarge or contract the rectangle. − Tap and drag the corner of the rectangle on touch-screen to enlarge or contract it. 4. Tap to modify temperature measurement parameters. Table 4-5 Measurement Parameters of Rectangle Tool Parameters Description...
-
Page 50: Measure By Circle
Handheld Thermography Camera User Manual 4.3.5 Measure by Circle 1. Tap to generate a default circle. 2. Move the circle to the required position. − Tap the circle, and press to move the circle up/down/left/right. − Tap and drag the circle on touch-screen to move it to the required position. -
Page 51: Measure Δt And Δt Alarm
Handheld Thermography Camera User Manual 7. Optional: Modify the circle tools, hide or display the tools and measurement results, etc. Tap to enter the editing interface and modify temperature measurement parameters such as emissivity and distance. Tap to hide or display the tool and measurement results. Tap to delete the tool. -
Page 52: Temperature Alarm
Handheld Thermography Camera User Manual 3. Optional: Repeat above steps to set other ΔT tools. 4. Optional: Modify the ΔT tools, hide or display the tools and measurement results, etc. Tap to enter the editing interface and modify ΔT tool parameters such as emissivity and distance. -
Page 53: 4.5 Calculate Area Size
Handheld Thermography Camera User Manual Audible Warning: The device beeps when target temperature exceeds the alarm threshold. Flashing Alarm: The flash light flashes when target temperature exceeds the alarm threshold. If you set rectangle and circle tools to measure temperature, the alarm threshold and linkage method settings only works in the measured areas. -
Page 54: Clear All Measurements
Handheld Thermography Camera User Manual Make sure the lens is parallel to the target when measuring the area size. Result The target size is displayed above the rectangle. Clear All Measurements to clear all set temperature measurement tools. -
Page 55: Condensation Alarm
Handheld Thermography Camera User Manual Condensation Alarm Condensation Alarm marks the surface in green where the relative humidity exceeds the set threshold. 1. Tap in live view to enter alarm palettes setting interface. 2. Tap to show more options. 3. Tap to enter condensation alarm interface. -
Page 56: Route Inspection
Install the software to your PC. The PC should support WLAN function. 1. Open HIKMICRO Inspector. 2. Create inspect points and routes. See the user manual of HIKMICRO Inspector for instructions. 3. Connect your device and PC to the same LAN. Available methods as below: −... -
Page 57: Perform Route Inspection
HIKMICRO Inspector for instructions of applying inspection task to the device. Use HIKMICRO Inspector v1.2.0.100 or newer versions to acquire full product functionality. Otherwise, operations mentioned below may not be available. Contact our technical support to get the software. - Page 58 Handheld Thermography Camera User Manual 2. Press to enter the inspection task list. 3. Tap to select a task to start. The font of task in progress is blue on the list. 4. Browse the inspect points and check the inspection requirements for each point.
- Page 59 What to do next You can delete inspection tasks by selecting a task and tapping Upload the results to the PC client after finishing the route inspection. See the user manual of HIKMICRO Inspector for instructions.
-
Page 60: Upload Inspection Result And View Report
The task status is shown in Completion. 4. Click on a finished task name to show result details. Figure 6-4 Inspection Results 5. Optional: Check a task or the desired inspect points and click Report for further analysis and report generation in HIKMICRO Analyzer. - Page 61 Handheld Thermography Camera User Manual HIKMICRO Analyzer should be installed in your PC. Download the https://www.hikmicrotech.com/en/industrial- program from products/hikmicro-analyzer-software/ For the operations instructions in HIKMICRO Analyzer, read the user manual from Help > User Manual. Please keep HIKMICRO Analyzer up-to-date for the best compatibility and user experience.
-
Page 62: Picture And Video
Handheld Thermography Camera User Manual Picture and Video Insert memory card into the device, then you can record videos, capture snapshots, and mark and save important data. Device does not support capturing or recording when the menu is shown. When the device is connected to your PC, it does not support capturing or recording. - Page 63 Handheld Thermography Camera User Manual Table 7-1 Capture Modes Capture Mode Description Capture One Image Press once to capture one image. Scheduled Capture Camera captures snapshots according to the set the interval and number for scheduled capture. 3. Press to return to the live view interface. 4.
- Page 64 Handheld Thermography Camera User Manual Description QR Code Note. Scan QR code to add information: 1. Tap QR Code Note and the device enters the scanning mode. 2. Aim the scanning frame at a QR code. Device reads the code and save the code information. 3.
- Page 65 Handheld Thermography Camera User Manual Description Picture Note. Add visual image notes for captured radiometric images: 1. Tap in live view to enter Capture Settings. 2. Switch on Edit before Saving. 3. Press button or Tap in the shortcut bar in live view to capture snapshots.
-
Page 66: Record Video
Handheld Thermography Camera User Manual − Scheduled Capture: A counter display in top of the screen showing the completed amount of capturing. − Optional: You can set more capture settings as demanded. Table 7-3 More Optional Capture Settings Objective Settings Select , and go to Capture Settings. - Page 67 Radiometric Video Raw thermal data is attached in videos saved in .hrv formats. They can only be played and further analyzed with HIKMICRO Analyzer. When the storage space is smaller than 500 MB, radiometric video recording is not allowed. Accidentally stopped recordings are not saved.
-
Page 68: Filename Header And File Naming
Handheld Thermography Camera User Manual View and Manage Check the saved videos from in menu mode. See Local Files for more information. Filename Header and File Naming It is available to set the rules for file naming before picture capture and video recording. -
Page 69: Manage Albums
The file extension is determined by the frame rate of a video. Radiometri File Use HIKMICRO Analyzer to play and analyze c Videos Name.hrv the file. Please upgrade the software to the latest version, otherwise the .hrv file may not be supported. -
Page 70: Manage Files
Handheld Thermography Camera User Manual Task Operations 4. Tap to delete the old name, and enter the new name for the album by touching the screen. 5. Tap to finish. 1. Press to enter Albums. 2. Select the album you want to use as the default saving album. -
Page 71: Edit Images
Handheld Thermography Camera User Manual Task Operations 2. Tap to select the album storing the files to be deleted. 3. In the album, tap , and tap the files to be deleted. 4. Tap . A prompt box appears on the interface. 5 Tap OK to delete the files. - Page 72 Handheld Thermography Camera User Manual Figure 7-2 Edit Image 3. Select an option and complete corresponding operations. Table 7-8 Image Editing Description Description Editing text note. Add a new text note or change the existed note, and press to save the settings. Editing voice note.
-
Page 73: Import And Manage Tag Note Templates
Tag note templates are generated on the client software HIKMICRO Analyzer. Copy the templates of json format to the storage of your device, then you can use and manage the templates. -
Page 74: Export Files To Hikmicro Viewer
1.2 for more details. 1. Connect the device to HIKMICRO Viewer. 2. Tap On-Device Files in the home screen of HIKMICRO Viewer to select videos and snapshots. When the device is connected via USB cable, it does NOT support On- Device Files viewing. - Page 75 Handheld Thermography Camera User Manual Tap in the home screen of HIKMICRO Viewer to the Albums. Tap the thumbnail image on the lower left corner in Live View interface of HIKMICRO Viewer, and tap on the upper right corner to the Albums.
-
Page 76: Distance Detection
Handheld Thermography Camera User Manual Distance Detection The laser range finder consists of a laser transmitter and a laser receiver. The device detects the distance to a target by measuring the time it takes for a laser pulse to reach the target and return to the laser receiver. This time is converted to a distance, which is displayed on the screen. -
Page 77: Geographic Location Display
In an outdoor space, wait for a moment for the device to display its location. The location information is also attached in captured radiometric images. You can read the location by HIKMICRO Analyzer. Location display is only supported by models with satellite positioning modules. -
Page 78: Direction Display
Magnetic Declination Correction correction. See for instructions. The direction information is also attached in captured radiometric images. You can read the direction by HIKMICRO Analyzer. 10.1 Calibrate Compass Compass calibration is a must for correction direction display. You need to calibrate the compass when you enable the function for the first time. -
Page 79: Magnetic Declination Correction
Handheld Thermography Camera User Manual a) Calibrate Compass During calibration, keep moving and rotating the device to make sure that the device faces every possible directions. Calibration Level indicates the validity of calibration, higher level means more accurate compass reading. Calibration succeeds when the status bar in the live view interface shows, and Calibrated Level turns to 3. -
Page 80: Device Connections
Handheld Thermography Camera User Manual Device Connections 11.1 Connect Bluetooth You can record and hear the sound contained in the videos or images via Bluetooth headsets after pairing the device with Bluetooth headsets successfully. 1. Select , and go to Connections > Bluetooth. 2. -
Page 81: Connect Device To Wi-Fi
Handheld Thermography Camera User Manual 11.3 Connect Device to Wi-Fi 1. Select , and go to Connections > WLAN. 2. Tap to enable Wi-Fi, and the searched Wi-Fi will be listed. b) Wi-Fi List 3. Select Wi-Fi to connect to and a soft keyboard is displayed. 4. - Page 82 1. a. Tap QR Code. A QR code is displayed. Using hotspot QR 2. b. Scan the QR code with HIKMICRO Viewer to code join the hotspot. When setting the password, do not tap space, or the password may be incorrect.
-
Page 83: Thermal View Mobile Client Connection
2. Connect your phone to the Wi-Fi network that the device is in. 3. Tap + > Add Device > Connect to add the device to HIKMICRO Viewer. 4. Optional: Scan QR code on the device with HIKMICRO Viewer. - Page 84 Handheld Thermography Camera User Manual 4. Optional: Scan QR code of device hotspot with HIKMICRO Viewer. 1) Turn on the device hop spot, and a QR code will pop up. 2) Launch HIKMICRO Viewer to tap + -> Scan QR Code.
-
Page 85: Set Led Light
Handheld Thermography Camera User Manual System Settings 12.3 Set LED Light In live view mode, press to enable/disable the LED light. Or tap the swipe-down menu. 12.4 Set Unit Select , and go to Device Settings > Unit to set the temperature unit and distance unit. -
Page 86: Maintenance
Handheld Thermography Camera User Manual Maintenance 13.1 View Device Information Select , and go to Local Settings > Device Settings > Device Information to view the device information. 13.2 Upgrade Device 13.2.1 Upgrade Device via PC Before You Start Please download the upgrade file from the official website http://www.hikmicrotech.com or contact the custom service and technical support to get the upgrade file first. -
Page 87: Upgrade Device Via Hikmicro Viewer
Handheld Thermography Camera User Manual 13.2.2 Upgrade Device via HIKMICRO Viewer Before You Start Make sure that you have installed HIKMICRO Viewer on your phone. Table 1-1 Please see for installation. 1. Launch the client on your phone. 2. Upgrade the device. You can choose one of the following path: ... -
Page 88: About Calibration
Handheld Thermography Camera User Manual When you restart the device, tap Save Logs again to enable the function. When you need to export the logs to the deskhelp, open the disk on your PC to copy and paste the .tar files stored in the log folder in the root directory of the SD card. -
Page 89: Appendix
Handheld Thermography Camera User Manual Appendix 14.1 Scan the following QR code to get device common FAQ. - Page 90 The information contained in the Manual is subject to change, without notice, due to firmware updates or other reasons. Please find the latest version of this Manual at the HIKMICRO website (www.hikmicrotech.com/). Please use this Manual with the guidance and assistance of professionals trained in supporting the Product.
- Page 91 DOCUMENTATION, WHETHER BASED ON BREACH OF CONTRACT, TORT (INCLUDING NEGLIGENCE), PRODUCT LIABILITY, OR OTHERWISE, IN CONNECTION WITH THE USE OF THE PRODUCT, EVEN IF HIKMICRO HAS BEEN ADVISED OF THE POSSIBILITY OF SUCH DAMAGES OR LOSS. YOU ACKNOWLEDGE THAT THE NATURE OF THE INTERNET PROVIDES...
- Page 92 Handheld Thermography Camera User Manual Regulatory Information These clauses apply only to the products bearing the corresponding mark or information. FCC Information Please take attention that changes or modification not expressly approved by the party responsible for compliance could void the user’s authority to operate the equipment.
- Page 93 Handheld Thermography Camera User Manual EU Conformity Statement This product and - if applicable - the supplied accessories too are marked with "CE" and comply therefore with the applicable harmonized European standards listed under the Directive 2014/30/EU (EMCD), Directive 2014/35/EU (LVD), Directive 2011/65/EU (RoHS), Directive 2014/53/EU.
- Page 94 Handheld Thermography Camera User Manual For the device without a supplied battery, use the battery provided by a qualified manufacturer. Refer to the product specification for detailed battery requirements. Directive 2012/19/EU (WEEE Directive): Products marked with this symbol cannot be disposed of as unsorted municipal waste in the European Union.
- Page 95 Handheld Thermography Camera User Manual This equipment complies with IC RSS-102 radiation exposure limits set forth for an uncontrolled environment. (i) The device for operation in the band 5150-5250 MHz is only for indoor use to reduce the potential for harmful interference to co-channel mobile satellite systems;...
- Page 96 Handheld Thermography Camera User Manual (i)Les dispositifs fonctionnant dans la bande 5150-5250 MHz sont réservés uniquement pour une utilisation à l'intérieur afin de réduire les risques de brouillage préjudiciable aux systèmes de satellites mobiles utilisant les mêmes canaux. (ii) Le gain d'antenne maximal autorisé pour les appareils dans la bande 5725-5825 MHz doivent respecter le pire limites spécifiées pour le point-à- point et l'exploitation non point à...
- Page 97 Facebook: HIKMICRO Thermography LinkedIn: HIKMICRO Instagram: hikmicro_thermography YouTube: HIKMICRO Thermography E-mail: support@hikmicrotech.com Website: https://www.hikmicrotech.com UD38341B...
Need help?
Do you have a question about the SP Series and is the answer not in the manual?
Questions and answers