Hikmicro SP Series User Manual
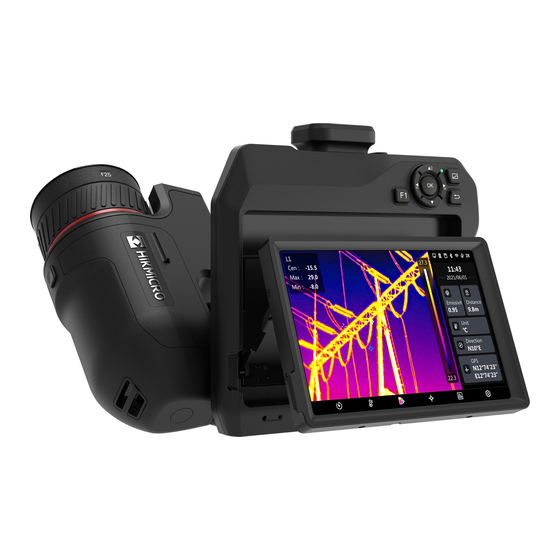
Handheld thermography camera
Hide thumbs
Also See for HIKMICRO SP Series:
- Quick start manual (274 pages) ,
- User manual (97 pages) ,
- Quick start manual (185 pages)
Table of Contents
Advertisement
Quick Links
Advertisement
Table of Contents

Related Manuals for Hikmicro HIKMICRO SP Series


Summary of Contents for Hikmicro HIKMICRO SP Series
- Page 1 Handheld Thermography Camera HIKMICRO SP Series User Manual...
- Page 2 INTERRUPTION, OR LOSS OF DATA, CORRUPTION OF SYSTEMS, OR LOSS OF DOCUMENTATION, WHETHER BASED ON BREACH OF CONTRACT, TORT (INCLUDING NEGLIGENCE), PRODUCT LIABILITY, OR OTHERWISE, IN CONNECTION WITH THE USE OF THE PRODUCT, EVEN IF HIKMICRO HAS BEEN ADVISED OF THE POSSIBILITY OF SUCH DAMAGES OR LOSS.
- Page 3 Handheld Thermography Camera User Manual PRODUCTION OF CHEMICAL OR BIOLOGICAL WEAPONS, ANY ACTIVITIES IN THE CONTEXT RELATED TO ANY NUCLEAR EXPLOSIVE OR UNSAFE NUCLEAR FUEL-CYCLE, OR IN SUPPORT OF HUMAN RIGHTS ABUSES. IN THE EVENT OF ANY CONFLICTS BETWEEN THIS MANUAL AND THE APPLICABLE LAW, THE LATER PREVAILS.
- Page 4 Handheld Thermography Camera User Manual Regulatory Information FCC Information Please take attention that changes or modification not expressly approved by the party responsible for compliance could void the user’s authority to operate the equipment. FCC compliance: This equipment has been tested and found to comply with the limits for a Class B digital device, pursuant to part 15 of the FCC Rules.
- Page 5 Handheld Thermography Camera User Manual 2006/66/EC (battery directive): This product contains a battery that cannot be disposed of as unsorted municipal waste in the European Union. See the product documentation for specific battery information. The battery is marked with this symbol, which may include lettering to indicate cadmium (Cd), lead (Pb), or mercury (Hg).
- Page 6 Handheld Thermography Camera User Manual Symbol Conventions The symbols that may be found in this document are defined as follows. Symbol Description Indicates a hazardous situation which, if not avoided, will or could Danger result in death or serious injury. Indicates a potentially hazardous situation which, if not avoided, Caution could result in equipment damage, data loss, performance...
- Page 7 Handheld Thermography Camera User Manual Safety Instruction These instructions are intended to ensure that user can use the product correctly to avoid danger or property loss. Laws and Regulations ● Use of the product must be in strict compliance with the local electrical safety regulations. Transportation ●...
- Page 8 ● The pollution degree is 2. Technical Support The https://www.hikmicrotech.com portal will help you as a HIKMICRO customer to get the most out of your HIKMICRO products. The portal gives you access to our support team, software and documentation, service contacts, etc. Emergency ●...
- Page 9 Handheld Thermography Camera User Manual length is 650 nm, and the power is less than 1 Mw. The laser meets the IEC60825-1:2014 standard. Laser maintenance: It is not necessary to maintain the laser regularly. If the laser does not work, the laser assembly needs to be replaced in the factory under warranty.
-
Page 10: Table Of Contents
Handheld Thermography Camera User Manual Contents Chapter 1 Overview........................1 1.1 Device Description ......................... 1 1.2 Main Function ........................1 1.3 Appearance ..........................3 Chapter 2 Preparation ........................ 8 2.1 Charge Device ........................8 2.1.1 Charge Device via Cable Interface ................8 2.1.2 Charge Device via Charging Base ................ - Page 11 Handheld Thermography Camera User Manual 4.1.1 Set Unit ........................21 4.2 Set Temperature Range ...................... 21 4.3 Set Thermography Rule ....................... 22 4.3.1 Set Point Rule ......................22 4.3.2 Set Line Rule ......................23 4.3.3 Set Area Rule ......................23 4.3.4 Set Temperature Difference Rule ................
- Page 12 Handheld Thermography Camera User Manual Chapter 6 Distance Detection ....................33 Chapter 7 Connect Bluetooth ....................34 Chapter 8 Set LED Light ......................35 Chapter 9 Cast Screen....................... 36 Chapter 10 Thermal View APP Connection ................37 10.1 Connect via Wi-Fi ....................... 37 10.2 Connect via Hotspot ......................
-
Page 13: Chapter 1 Overview
Device supports multiple palettes, and you can set the palette mode according to the alarm function. Client Software Connection ● Mobile Phone: Use HIKMICRO Viewer to see live image, capture, and recording, etc. on your phone. HIKMICRO Viewer Android HIKMICRO Viewer iOS ●... - Page 14 Handheld Thermography Camera User Manual image, capture, recording, and receive alarm message, etc. on your PC. Bluetooth Device can be connected to headset via Bluetooth, and you can hear the voice in the recording or capture.
-
Page 15: Appearance
Handheld Thermography Camera User Manual 1.3 Appearance... - Page 16 Handheld Thermography Camera User Manual...
- Page 17 Handheld Thermography Camera User Manual Figure 1-1 Appearance Table 1-1 Button and Interface Description Description Function Menu Mode: Press , and to select parameters. Press OK to confirm. Navigation Button Non-Menu Mode: Press to turn on/off the LED light supplement. ...
- Page 18 Handheld Thermography Camera User Manual Description Function Focus Button Press to start focus. Press: measure the distance with laser once Laser Button Hold: measure the distance with laser continuously Hand Strap Attachment Mount the hand strap. Point Neck Strap Attachment 16 &...
- Page 19 Handheld Thermography Camera User Manual Caution The laser radiation emitted from the device can cause eye injuries, burning of skin or inflammable substances. Before enabling the light supplement function, make sure no human or inflammable substances are in front of the laser lens.
-
Page 20: Chapter 2 Preparation
Handheld Thermography Camera User Manual Chapter 2 Preparation 2.1 Charge Device 2.1.1 Charge Device via Cable Interface Before You Start Please make sure the battery is installed before charging. Steps 1. Lift the cover of cable interface. 2. Plug in the cable, and connect the power supply to charge the battery. Figure 2-1 Charge the Battery via Type-C Cable 2.1.2 Charge Device via Charging Base Steps... -
Page 21: Mount Hand Strap
Handheld Thermography Camera User Manual 3. The left and right indicators show the charging status of the batteries. – Solid red: charging normally. – Solid green: fully charged. 4. Draw the battery from the charging base, and disconnect charging base from the power supply. Figure 2-2 Charge the Battery via Charging Base 2.2 Mount Hand Strap Steps... -
Page 22: Change Interchangeable Lens
Handheld Thermography Camera User Manual Figure 2-4 Thread the Hand Strap Through Attachment Points 3. Thread hand strap through the hand strap buckle, and fasten the hand strap. Figure 2-5 Fasten the Hand Strap 4. Adjust the tightness of the hand strap as needed. 2.3 Change Interchangeable Lens An interchangeable lens is an additional thermal lens that can be mounted to the device to change the original focal length to different ranges, so as to obtain different FOVs and scene scopes. - Page 23 Handheld Thermography Camera User Manual Figure 2-6 Release the Lens 2. Remove the interchangeable lens carefully. Figure 2-7 Remove the Lens 3. Align the two white index marks on the device and the lens. Figure 2-8 Align the White Index Marks 4.
-
Page 24: Tilt Lens And Screen
Handheld Thermography Camera User Manual Figure 2-9 Mount the Lens 5. Rotate the lens clockwise to fix it. The lens makes a click when it locks in place. Figure 2-10 Fix the Lens 2.4 Tilt Lens and Screen You can tilt the lens and screen for different observation angles, as shown in Figure 2-11. Figure 2-11 Tilt Lens and Screen... -
Page 25: Power On/Off
Handheld Thermography Camera User Manual 2.5 Power On/Off Power On Remove the lens cover, and hold for over three seconds to turn on the device. You can observe the target when the interface of the device is stable. Note It may take at least 30 s until the device is ready for using when you power on it. Power Off When the device is turned on, hold for three seconds to power off the device. -
Page 26: Menu Description
Handheld Thermography Camera User Manual Figure 2-13 Button Control ● In menu mode, press , and to select parameters. ● Press to confirm. 2.7 Menu Description In the observation interface, tap the screen to show the menu bar, and swipe down to call the swipe-down menu. -
Page 27: Chapter 3 Display Settings
Handheld Thermography Camera User Manual Chapter 3 Display Settings 3.1 Focus Adjust the lens focal length properly before you set any other configurations, or it may affect the image display and temperature accuracy. 3.1.1 Focus Lens Steps 1. Power on the device. 2. -
Page 28: Auto Focus
Handheld Thermography Camera User Manual Note DO NOT adjust the focus ring in this mode, or it will interrupt the focus process. 3.1.3 Auto Focus The device focuses automatically by comparing the brightness, contrast, etc. in current scene. Steps 1. Go to Local Settings → Capture Settings → Focus → Focus Mode to enable Auto Focus. 2. -
Page 29: Set Screen Brightness
Handheld Thermography Camera User Manual 3.2 Set Screen Brightness There are two ways to adjust the screen brightness. Go to Local Settings → Device Settings → Display Brightness to adjust the screen brightness. Or you can drag the brightness adjustment bar in the swipe-down menu. Figure 3-2 Adjust Brightness via Swipe-Down Menu 3.3 Set Display Mode You can set the thermal/optical view of the device. -
Page 30: Set Palettes
Handheld Thermography Camera User Manual 3.4 Set Palettes The palettes allow you to select the desired colors. Steps 1. Select from the main menu. 2. Tap the icons to select a palette type. White Hot The hot part is light-colored in view. Black Hot The hot part is black-colored in view. - Page 31 Handheld Thermography Camera User Manual Status Icon The device status icons, for example, battery status, memory card, hotspot, etc. Time Device time and date. Parameters Thermography parameters, for example, target emissivity, temperature unit, etc. Distance Value Laser-measured target distance. Brand Logo The brand logo is a manufacturer logo displayed on the upper right corner of the screen.
-
Page 32: Chapter 4 Temperature Measurement
Handheld Thermography Camera User Manual Chapter 4 Temperature Measurement The thermography (temperature measurement) function provides the real-time temperature of the scene and display it on the left of your screen. The thermography function is turned on by default. 4.1 Set Thermography Parameters You can set thermography parameters to improve the accuracy of temperature measurement. -
Page 33: Set Unit
Handheld Thermography Camera User Manual 3. Return to previous menu to save the settings. Note You can go to Local Settings → Device Settings → Device Initialization → Measurement Tool Initialization to initialize the temperature measurement parameters. 4.1.1 Set Unit Go to Local Settings →... -
Page 34: Set Thermography Rule
Handheld Thermography Camera User Manual 4.3 Set Thermography Rule You can set thermography parameters to improve the accuracy of temperature measurement. Steps 1. Select from the main menu. 2. Set the point, line, or area rules. 4.3.1 Set Point Rule You can set four types of point thermography rules. -
Page 35: Set Line Rule
Handheld Thermography Camera User Manual 4.3.2 Set Line Rule Steps 1. Select . A line appears on the interface. 2. Press , and , or drag to move the line to the required position. 3. Drag points of the line on the touch-screen to extend or shorten the line. 4. -
Page 36: Set Temperature Difference Rule
Handheld Thermography Camera User Manual 4.3.4 Set Temperature Difference Rule You can set temperature difference rules based on the point, line, and area rules configured. The device will trigger an alarm when the temperature difference between the comparison objects exceeds the set alarm temperature difference threshold. Before You Start ●... -
Page 37: Delete Rules
Handheld Thermography Camera User Manual 4.3.5 Delete Rules Delete All Rules and press to clear all temperature rules. Delete One Rule In the observation interface, tap a rule (point, line or area) and enter the editing mode. Tap Delete to delete the rule. 4.4 Set Temperature Alarm When the temperature of targets triggers the set alarm rule, the device will perform configured actions, such as, marking the alarming area with certain color, flashing the rule area, making an... -
Page 38: Chapter 5 Picture And Video
Handheld Thermography Camera User Manual Chapter 5 Picture and Video Insert memory card into the device, then you can record videos, capture snapshots, and mark and save important data. Note ● Device does not support capturing or recording when the menu is shown. ●... -
Page 39: Record Video
Handheld Thermography Camera User Manual 5.2 Record Video Before You Start Press in live view interface to enable the flashlight in dark environment. Steps 1. In the live view interface, hold to start recording. The recording icon and count down number display in the interface. -
Page 40: Rename An Album
Handheld Thermography Camera User Manual 4. Tap to finish. Note The newly created album becomes the default saving album and appears at the top of the album list. 5.3.2 Rename an Album Steps 1. Press to enter Albums. 2. Select the album to rename. 3. -
Page 41: Manage Files
Handheld Thermography Camera User Manual 2. Tap to select the album storing the files. 3. Tap to select the video or snapshot to view. 4. View the selected file and relevant information. Figure 5-2 View a File Note For more information contained in capture snapshots or videos, you can install the thermography client to analyze them. -
Page 42: Move A File
Handheld Thermography Camera User Manual 2. Tap to select the album storing the files to be deleted. 3. In the album, tap , and tap the files to be deleted. Note You can tap to select all files, and tap to cancel the selection. -
Page 43: Add Text Note On File
Handheld Thermography Camera User Manual 5.5.5 Add Text Note on File Steps 1. Press to enter Albums. 2. Tap to select the album storing the file to be edited. 3. In the album, tap to select the file to be edited. 4. -
Page 44: Export Files
Handheld Thermography Camera User Manual 5.6 Export Files Connect the device to your PC with supplied cable, you can export the recorded videos and captured snapshots. Steps 1. Open the cover of cable interface. 2. Connect the device to your PC with cable and open the detected disk. 3. -
Page 45: Chapter 6 Distance Detection
Handheld Thermography Camera User Manual Chapter 6 Distance Detection The laser range finder consists of a laser transmitter and a laser receiver. The device detects the distance to a target by measuring the time it takes for a laser pulse to reach the target and return to the laser receiver. -
Page 46: Chapter 7 Connect Bluetooth
Handheld Thermography Camera User Manual Chapter 7 Connect Bluetooth You can record and hear the sound contained in the videos or images via bluetooth headsets after pairing the device with bluetooth headsets successfully. Steps 1. Select from the main menu. 2. -
Page 47: Chapter 8 Set Led Light
Handheld Thermography Camera User Manual Chapter 8 Set LED Light Press in the live view to enable/disable the LED light. Or tap the flashlight button on the swipe-down menu. -
Page 48: Chapter 9 Cast Screen
Handheld Thermography Camera User Manual Chapter 9 Cast Screen You can connect the device to your PC via a type-C cable, and cast the real-time live view of the device to your PC through the UVC alarm client. Then you can synchronously view the live view and parameters such as the maximum temperature, the distance, and the emissivity on your PC. -
Page 49: Chapter 10 Thermal View App Connection
Handheld Thermography Camera User Manual Chapter 10 Thermal View APP Connection The device supports both Wi-Fi connection and hotspot. Connect the device to HIKMICRO Viewer, and you can control the device via mobile client. 10.1 Connect via Wi-Fi Before You Start Download and install HIKMICRO Viewer on your phone. -
Page 50: Connect Via Hotspot
Handheld Thermography Camera User Manual 10.2 Connect via Hotspot Before You Start Download and install HIKMICRO Viewer on your phone. Steps 1. Select from the main menu. 2. Go to Local Settings → Connect → Hotspot. 2. Tap to enable the hotspot function. The hotspot name is the last 9 digits of the device serial No. -
Page 51: Chapter 11 Position Settings
Handheld Thermography Camera User Manual Chapter 11 Position Settings The device supports GPS and compass functions. You can locate the device position and determine the observation direction with these functions. The position and direction information is displayed on the right of the live view interface. 11.1 Enable GPS Steps 1. -
Page 52: Chapter 12 Maintenance
Handheld Thermography Camera User Manual Chapter 12 Maintenance 12.1 View Device Information Go to Local Settings → Device Information to view the device information. 12.2 Set Date and Time Steps 1. Go to Local Settings → Device Settings → Time and Date. 2. -
Page 53: Chapter 13 Appendix
0.98 Hard Paperboard 0.90 White Paper 0.90 Water 0.96 13.2 Device Command Scan the following QR code to get device common serial port commands. Note that the command list contains the commonly used serial port commands for HikMicro thermal cameras. -
Page 54: Device Communication Matrix
Handheld Thermography Camera User Manual 13.3 Device Communication Matrix Scan the following QR code to get device communication matrix. Note that the matrix contains all communication ports of HikMicro thermal cameras. 13.4 FAQ Scan the following QR code to get device common FAQ. - Page 55 Facebook: HIKMICRO Thermography LinkedIn: HIKMICRO Instagram: hikmicro_thermography YouTube: HIKMICRO Thermography E-mail: info@hikmicrotech.com Website: https://www.hikmicrotech.com/ UD27178B...
Need help?
Do you have a question about the HIKMICRO SP Series and is the answer not in the manual?
Questions and answers