
Related Manuals for Aiwa XR-H66MD


Summary of Contents for Aiwa XR-H66MD
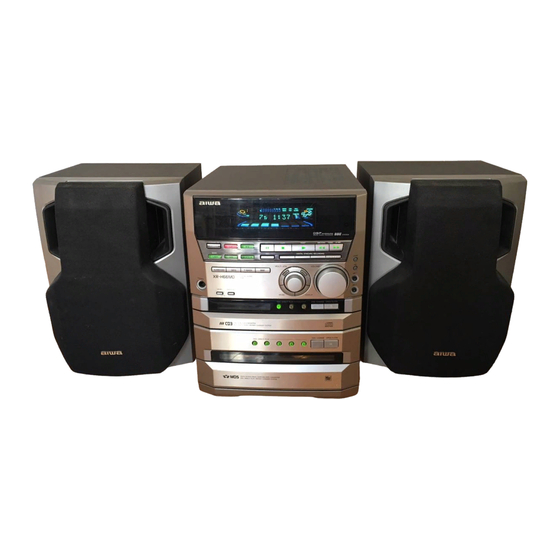
- Page 1 For assistance and information, call toll free I-800-BUY+WIIA. (United States and Puerto Rico) ilrl!srr Wuaki 87-NB5-903-11 IGITAL AUDIO 980120AYK-H-U-0...
-
Page 2: Precautions
Condensation – Moisture may form on the CD pickup lens WARNING when: - The unit is moved from a cold spot to a warm spot REDUCE RISK FIRE ELECTRIC - The heating system has just been turned on SHOCK, DO NOT... -
Page 3: Table Of Contents
AUDIO ADJUSTMENTS ............. 6 Foryourconvenience, record the model number and serial number (you will find them on the rear of your set) in the space provided RADIO RECEPTION below. Please refer to them when you contact your Aiwa dealer in case of difficulty. -
Page 4: Connections
Both speakers can be connected as L (Left) or R (Right). Connect the right and left speakers to the main unit. Connect the right speaker cord to the SPEAKERS R terminals, and left to the SPEAKERS L terminals. - Page 5 AM LOOP terminals. recommended. Connect the outdoor antenna to the FM 75 Q terminals. Connect the AC cord to an AC outlet. To position the antennas I To connect other optional equipment+ page 35. FM feeder antenna: Extend this antenna...
-
Page 6: Remote Control
Press it a second time to turn off the spectrum analyzer indications on the display, the CD and MD lights, and illumination of the DISC DIRECT PLAY buttons. Press It a third [Ime to restore the display and buttons to their original brightness. -
Page 7: Sound
ADJUSTING THE VOLUME To cancel the selected mode Press the SURROUND button until %UR OFF is displayed. Turn the VOLUME control on the main unit, or press the VOLUME button on the remote control. The volume level is displayed as a number from O to MAX (31 ). -
Page 8: Manual Tuning
IF””””””””””’’’’””’”’””””””””””””””””’- When an FM stereo broadcast contains noise Press the MONO TUNER button on the remote control repeatedly so that “MONO lights up on the display. Noise is reduced, although reception is monaural. -
Page 9: Presetting Stations
1. Preset number Frequency Repeat steps 1 and 2. The next station will not be stored if a total of 32 preset stations for all the bands or a total of 18 preset stations for one band have already been stored. -
Page 10: Basic Operations .M
Example: To select the 25th track, press the +10, +10 and 5 buttons. To select the 10th track, press the +10 and O buttons. The selected track starts to play and continues to the end of that disc. -
Page 11: Programmed Play
Example: REPEAT play To select the 25th track, press the +10, +1 O ancl 5 buttons. A single disc or all the discs can be played repeatedly. To select the 10th track, press the +1 O and O buttons. -
Page 12: Basic Operations
To stop play, press the W button. To play one or two mini discs, place the discs on tray 1 and 2. To pause play, press the II button. To resume play, press again. To play three discs or more (up to five discs),... - Page 13 1 Press the DISC CHANGE button. play RANDOM Remove the discs and replace with other discs. All the tracks on one disc or all the discs can be played randomly. Press OPEN/CLOSE button to close disc compartment. play REPEAT A single disc or all the discs can be played releateclly.
-
Page 14: Programmed Play
Press the numbered button and the +10 button to program a track. Example: To select the 25th track, press the +1 O, +1 O and 5 buttons. To select the 10th track, press the +1 O and O buttons. Selected track number... -
Page 15: Recording A Whole Cd
TOC. You may not To stop recording before the end of the CD be able to play a mini disc if the TOC is not recorded correctly. Press the button. Recording... -
Page 16: Recording Only One Track Of A Cd
F- button or the numbered buttons on the remote control to select the track to record. 6 Press the CD El MD button to start recording. The track being played returns to the start of the track and recording to the MD starts. -
Page 17: Recording Three Cds Continuously
(TOC) of the recording is recorded to the MD. Be sure to load the three MDs into trays 1, 2, and 3. Trays 4 and 5 cannot be used for recording. Be sure not to operate the unit or the remote... -
Page 18: Auto Fiirsttracks Recording Of Cds
The first track of the CD loaded in tray 1 is recorded. Then the first track of the CD in tray 2 and the first track of the CD in tray 3 are recorded. Recording to the MD stops automatically... -
Page 19: Programmed Recording Of Cds
(1 to 5) to select the MD to record. If MD play starts, press the button to stop play. Load a CD (or CDs). To load a CD on tray 3, press the DISC CHANGE button to rotate the trays. See page 9 for more information about how to load CDs. -
Page 20: Equipment
TAPE PLAY (MD) jacks, press the TAPE button so that “TAPE” is displayed. To record from a CD, press the CD button and load a CD. :Index mark Press the MODE button. Time mark function “Mark MODE?’r is displayed for 10 seconds. - Page 21 Wait until the source displayed. Start recording. To record from the radio, press the II button. To record from connected equipment, press the II button, and start playback of the connected equipment. To stop recording Press the button.
-
Page 22: Extended (Monaural) Recording
You can also start recording by following steps 10 and 11 below. Twice as long as the time printed on the MD can be obtained using the monaural recording mode. IllPress button. You can use the remote control. -
Page 23: Whatls An Md
*TOC: An abbreviation of Table Of Contents TYPE OF MD “TOC Full” is displayed even if a disc is not fully recorded on. There are two types of MDs: “Optical discs” and “Magneto-optical If there are lots of emphasis... -
Page 24: Registering The Disc Title And Track Title
TOC data is not recorded properly and the edited contents on a disc can not be played. (2)Turn the MULTI JOG control to select a desired character. A disc cannot be edited: - when a prerecorded disc is inserted. -
Page 25: Dividing A Track
When you press the MD AOPEN/CLOSE button, “TOC EDIT” mark. is displayed and the contents (TOC) of the recording Example: recorded. To devide the 5th track into two parts at 2 minutes 30 seconds. A track cannot be divided when an inserted disc already contains 254 tracks. -
Page 26: Combining Two Tracks
If the tracks are titled COMBINING TWO TRACKS If both of the tracks are titled, the title of the lower number track remains, If only one track is titled on the tracks to be combined, this title remains. You can combine... -
Page 27: Changing The Order Of The Tracks
Select or play back the track that you want to move by turning the MULTI JOG control or using the numbered buttons on the remote control. Example: To move the 3rd track, select or play back the 3rd track. Press the EDIT button repeatedly until “Move” is displayed. -
Page 28: Erasing Tracks
If you erase all the tracks, you cannot retrieve them again. to check that it is all right to erase the track. Make sure to check that it is all right to erase all tracks. To cancel, press the button. -
Page 29: Microphone Mixing
4 seconds. When the power is turned off, MPX-Lch is restored. To adjust echo, press the ECHO button, and turn the VOLUME To change the time lag setting in Auto Vocal Fader or control within 4 seconds, Auto Multiplex function... -
Page 30: Cd Karaoke Program
5 Repeat step 3 to reserve other tracks during play. Karaoke functions may not operate correctly with the following kinds of CDs. CD being played Track being played - Those with monaural sound - Those recorded with strong echoes - Those with the vocal part recorded... -
Page 31: Setting The Clock
If the clock display flashes This is caused by a power interruption. The current time needs 1,2,3,4 Press the CLOCK button on the remote control, and press the II button within 4 seconds. Day of the week A: A.M. P: P.M. -
Page 32: Setting The Timer
The day of the week cannot be specified for the timer playback. and press the 11 button. If you use the unit after setting the timer, repeat steps 6 and 7 If the TUNER is selected, the band cannot... -
Page 33: Setting The Sleep Timer
1 Press the SLEEP button. 2 Within 4 seconds, press the ++ or * button to specify the time until the power is turned off. Each time the button is pressed, the time changes between and 240 minutes in 5-minute steps. -
Page 34: Setting The Timer Recording
Up to iack, five settings can be stored. “Din should be displayed, To record from the radio using the timer, first preset the desired station. When “TU” is selected, go to step 6. Numbered buttons When “AU” or “Di” is selected, skip to step 7. - Page 35 10 Load a recordable MD in the tray designated step 7. 11 Adjust the volume and tone for recording to your preference. If the volume level is set to 6 or more, it is automatically reset to 5 when the power is turned off.
-
Page 36: Connecting Optional Equipment
(turntables, LD players, MD players, VCRs, TV, etc.). TAPE PLAY JACKS Connect the red plug to the R jack, and the white plug to the L jack. This unit can input analog sound signals from a cassette deck through these jacks. -
Page 37: Listening To External Sources
Keep a cartridge in the attached case. AUX/D-lN button, Do not open the shutter of the cartridge to touch the disc directly. Repeat the procedure to select one of the names. If the disc inside becomes soiled, it is very difficult to clean. -
Page 38: Specifications
1710 kHz (10 kHz (93/8 X ls3/8 101/4 step) 3.4 kg (7 lb 8 Weight OZ.) 531 kHz to 1602 kHz (9 kHz step) 350 pV/m Usable sensitivity Specifications and external appearance are subject to change Loop antenna... -
Page 39: Troubleshooting Guide
Move the unit away from the television. Is there a bad connection? (+ page 3) Sound is intermittent There may be a short circuit in the speaker terminals. Is the unit placed on an unstable surface with a lot of vlbratlo Disconnect... -
Page 40: Md Guide Messages
Replace record. Temp Over The temperature of the unit is too high. Leave the unit in a cool place for a while before operating it again. Operate the unit at moderate room temperature. The surrounding... -
Page 41: Parts Index
PARTS INDEX Instructions about each part on the main unit or remote control are indicated on the pages following each part name. FUNCTION (5,19,21 ,36) CD, MD, TUNER/BAND, TAPE, AUX/D-lN POWER (5,7) —k ,-i:s:z:.~~,up [ (7,8,9,11 ,15,23,24) SURROUND ‘7 GEQ (6) .REC... -
Page 42: Precauciones
Calor – No utilice esta unidad cerca de fuentes de calor, alimentacion de CA de la toma de CA si la unidad no va a ser incluyendo salidas de aire caliente, estufas u otros aparatos utilizada durante varies meses o mas. - Page 43 - La unidad no parece funcionar normalmente, EDICION DE MINIDISCOS - Launidad muestraun cambioconsiderableen sus prestaciones. - La unidad se ha caido o la caja se ha estropeado, REGISTRO DISCOS YTITULOS DECANClONES ..23 DE TITULOS DE NO TRATE DE REPARAR LA UNIDAD USTED MISMO.
- Page 44 CONEXIONES Antes de conectar el cable de alimentacion de CA La tension nominal de su unidad, mostrada en el panel trasero es una CA de 120 V. Compruebe que la tension nominal sea la misma que la empleada en su Iocalidad.
- Page 45 Antena de cuadro de AM: Muevala a la position en la que se escuche mejor. Para que se pare la antena de AM sobre una superficie Fije el gancho en la ranura. Asegtirese de conectar correctamente Ios cables de altavoz.
-
Page 46: Control Remoto
Iargo periodo Cuando se conecta el cable electrico de CA la pantalla produce tiempo, quite Ias pilas para evitar una posible fuga de electrolito. una demostracion de Ias func]ones de la unidad. Cuando El control remoto no puede funcionar... -
Page 47: Ajustes De Audio
Pulse el boton T-BASS. Utilization de Ios auriculares El nivel cambia cada vez que se pulse el boton. Seleccione de Ios tres niveles o la position de cancelacion segtin Conecte auriculares con clavija estereo... -
Page 48: Sintonizacion Manual
La btisqueda automatic puede no pararse en emisoras cuyas seriales scan muy debiles. Cuando una emisora de radio de FM en estereo tenga ruidos de estatica Pulse repetidamente el boton MONO TUNER del control remoto para que se encienda “MONO en la pantalla. -
Page 49: Preajuste De Emisoras
Para seleccionar el ntimero de preajuste 10, pulse Ios botones +loyo. Para seleccionar el ntimero de preajuste 15, pulse Ios botones +loy5, Seleccion de un numero de preajuste en la tmicfad principal Esta unidad puede memorizar un total de 32 emisoras... -
Page 50: Operaclones Basicas
Ios discos. Coloque el/ Para buscar un punto particular durante la reproduction, Ios disco(s) con el Iado de la etiqueta hacia arriba. mantenga pulsado el boton y sueltelo en el punto deseado. -
Page 51: Programada
REPRODUCTION ALEATORIA/ Cuando el boton PRGM se pulse una vez en el paso 1 la unidad se pondra en el modo PROGRAMA REPETITION DE REPRODUCTION KARAOKE EN DISCO COMPACTO (consulte la pagina 29). Utilice el control remoto. Pulse el boton CD [) IRECT PLAY y Iuego pulse... -
Page 52: De Minidiscos
(segun se indica con un i NO! en la figura anterior), boton DISPLAY o e! boton TITLE DISPLAY. Esto puede provocar una averia del aparato. Para comprobar el titulo del disco... - Page 53 1 Pulse el boton MD DIRECT PLAY y pulse uno de Ios botones numerados 1 a 5 antes de que pasen tres segundos, para Repetition de reproduction seleccionar un disco. disco o todos Ios discos podran reproducirse repetidamente.
-
Page 54: Programada
El programa tambien se borra cuando quite el disco. Para arladir canciones al programa Repita el paso 3 en el modo de parada. La cancion se programara despues de la ultima cancion programada. Para cambiar Ias canciones programadas Borre el programa y repita todos [OS pasos de programacion. -
Page 55: De Minidiscos
(Consulte la pagina 27.) Para cambiar la indicaci6n durante la grabacion GRABACION DE TODO UN DISCO Pulse el boton DISPLAY. Cac~a vez que pulse el boton, la pantalla cambia en el siguiente orden. COMPACTO Numero-de cancion y tiempo... -
Page 56: Grabacion De Una Sola Cancion De Un Disco Compacto
(Consulte la pagina 27.) Para cambiar la indication durante la grabacion Pulse el boton DISPLAY. Cada vez que pulse el boton, la pantalla cambia en el siauiente orden. (1) Numero-de cancion y tiempo transcurrido del disco ,———... -
Page 57: Grabacion Continua De Tres Discos Compactos En Tres Minidiscos
DISPLAY anterior. (Consulte la pagina. 27.) DISPLAY Para cambiar la indicaci6n durante la grabacion DISC Pulse el boton DISPLAY. Cada vez que pulse el boton, la pantalla CHANG2E cambia en el siguiente orden. Oclooc? >(1) Nfimero de cancion y tiempo... -
Page 58: Grabacion Automatica De Las Primeras Canclones De Discos Compactos
(Consulte la pagina 27.) Para cambiar la indication durante la grabacion Pulse el boton DISPLAY. Cada vez que pulse el boton, la pantalla cambia en el siguiente orden. Coloque un minidisco grabable en una bandeja. bia en el siguiente orden. -
Page 59: Grabacion P Rogramada D Ediscos Compactos
30 canciones de cualquiera de Ios discos compactos colocados. Para grabar en un minidisco que ya esta grabado hay una seccion sin grabar en el minidisco, la nueva grabacion empieza automaticamente desde el final de la grabacion hecha previamente. -
Page 60: Grabacion D Elaradioo Deunequipo Conectado
Para grabar de la radio, pulse el boton se entra una setial de sonido despues de una seccion en blanco sintonice una emisora. de mas de 2 segundos. Para grabar de un equipo conectado, realice 10siguiente: . Para grabar de un equipo conectado a la toma DIGITAL IN... - Page 61 MARK del control remoto durante la grabacion. Para cambiar la indication en la pantalla durante la grabacion Pulse el boton DISPLAY. Cada vez que pulse el boton, la pantalla cambia en el siguiente orden. (1) Fuente AUX) (Ejemplo: (2) Tiempo...
-
Page 62: Grabacion Extendida (Monoaural)
Para parar la grabacion colocacion de minidiscos. Pulse el boton Pulse uno de Ios botones MD DISC DIRECT PLAY Cuando se para la grabacion, aparece “TOC EDIT” y se registra en el minidisco el ~ndice (TOC) de la grabacion. - Page 63 Pero un Aparece “TOC* Full” aunque el tiempo de grabacion minidisco se puede utilizar para grabar y reproducer 74 minutes ha alcanzado su tiempo de grabacion maximo en el de dates tales como Ios de un disco compacto.
- Page 64 Para agregar un caracter entre dos caracteres Primero coloque un espacio entre dos caracteres con el boton P y el boton X. Luego cambie el espacio por el caracter deseado, registrandolo. Para registrar el titulo de una cancion, gire el...
- Page 65 5, 7 ............- P’ , .- ..-. -.. -- — ....Coloque un minidisco. Consulte...
-
Page 66: De Minidiscos
“ numerados Coloque un minidisco. Consulte la pagina 11 para mas detalles sobre la colocacion de minidiscos. Pulse uno de Ios botones MD DISC DIRECT PLAY (1 a 5) para seleccionar el minidisco que desea editar. CN?@f2Zi3a reproducirse el minidisco,... -
Page 67: Cambio Del Orden De Las Canclones
Coloque un minidisco. Consulte la pagina 11 para mas detalles sobre la colocacion de minidiscos. Pulse uno de Ios botones MD DISC DIRECT PLAY (1 a 5) para seleccionar el minidisco que desea editar. Si empieza a reproducirse el minidisco,... -
Page 68: Borrado De Canclones
Antes de que pase 1 minute, pulse de nuevo el Pulse el boton para cancelar. boton ENTER. 5 Antes de aue pase 1 minute, pulse de nuevo el La cancion seleccionada se borrara y todo Ios ntimeros boton ENTER. -
Page 69: Mezcla Microfonica
Ias funciones de desvanecimiento El sonido del canal izquierdo se oye por ambos altavoces y el sonido del canal derecho se silencia voz o multiplex de acuerdo con el tipo de disco ~g~p=c solo cuando entrada de audio el , utilizado. ‘t-\”~’... -
Page 70: De Karaoke Con Disco Compacto
(Consulte pagina 10). Para cancelar la reproduction programada, pulse el boton Pulse el boton DISC DIRECT PLAY y Iuego pulse uno de Ios botones numerados 1 a 3 para seleccionar un disco compacto. Luego, pulse Ios botones numerados y el boton para programar una cancion. -
Page 71: Puesta En Hora Del Reloj
Esto se debe a que hubo un torte electrico. La hors tendra que ponerse de nuevo. Pulse el boton CLOCK del control remoto y pulse el boton 11 antes de clue ~asen 4 sectundos. Dfa de la A: A.M. .semana P: P.M. -
Page 72: Ajuste Del Temporizador
TIMER hasta que Para escuchar la radio, sintonice una emisora. aparezca @ en la pantalla y Iuego pulse el boton Para escuchar el equipo conectado, prepare el equipo para II antes de que pasen 6 secfundos. su reproduction. -
Page 73: Ajuste Del Temporizador Para Dormer
Antes de aue ~asen 4 seaundos, pulse el boton * para especificar el tiempo tras el cual se desconectara el aparato. Cada vez que se pulse el boton, el tiempo cambiara entre 5 y 240 minutes en pasos de 5 minutes. SLEEP Tiempo... -
Page 74: Ajuste De La Grabacion Con Temporizador
Pulse repetidamente el boton TIMER hasta que Para grabar una emisora no prefijada, seleccione “PO. aparezca @ y REC en la pantalia y pulse II antes puede especificar posteriormente la emisora en el paso 9. de uue Dasen 6 seuundos. Designe... - Page 75 Debe haber un intervalo de un minuto o mas entre un programa y el siguiente, Si dos programas se superponen, el programa que empieza despues se cancelara.
-
Page 76: Conexion De Un Equipo Opcional
Conecte la clavija roja a la toma R y la blanca a la toma L. TOMAS TAPE PLAY Cuando conecte un giradiscos Este aparato puede recibir seiiales de sonido ana16gicas de una Utilice un giradiscos... -
Page 77: Escucha De Fuentes De Sonido Externas
Ias otras fuentes, ajuste de la siguiente disco. Si no, puede entrar polvo en el interior o e! disco puede forma. rayarse. Obturador del disco... - Page 78 Este equlpo se ha comprobado y determlnado que cumple con auriculares de 32 ohmios o mas Ios Iimites de dispositivo digital de clase B, segun la parte 15 de CD DIGITAL OUT Ias Normas de la FCC. Estos Ifmltes se han dlsehado para...
-
Page 79: Guia Para La Solucion De Problemas
Se produce una indication erronea o un mal funcionamiento. grabaciones del disco? (+ pagina ~ Vuelva a ajustar la unidad como se indica mas abajo. SECCION DEL SINTONIZADOR Hay un ruido de estatica constante en forma de onda. conectada correctamente... -
Page 80: Mensajes Guia De Minidiscos
Utilice la unidad con temperatures moderadas la habitation. demasiado baja. Combie por un disco grabable. PB Disc (Disco Se trata de grabar o editar un disco con muslca pregrabado) pregrabada (disco optico). Mueva la Iengueta de protection contra Protected (Protegldo) El disco esta protegido contra grabaciones. - Page 81 INDICE DE LAS PARTES Las instrucciones sobre cada parte del aparato o control remoto estan en Ias paginas que se mencionan a continuation nombre de la parte. FUNCTION (5,19,21 ,36) II SET (8,9,11 ,20,21 ,23,24) CD, MD, TUNER/BAND, CLEAR (8,9,1 4-21 ,23-27)
- Page 82 L’appareil ne doit pas &re sujet de la mise a la terre du mat, de la structure de support et soumis a des temperatures inferieures a 5°C ou superieures du conducteur arrivant a I’unite de decharge...
- Page 83 Raccordements ..............3 - Un corps etranger ou un Iiquide est entre clans I’appareil Telecommande ..............5 - L’appareil a ete expose a la pluie ou a de I’eau Information preliminaires ..........5 - L’appareil ne semble pas fonctionner normalement - L’appareil...
-
Page 84: Raccordements
Contri51ez la chaine et Ies accessoires. Important Raccordez d’abord Ies enceintes, Ies antennes et tous Ies appareils en option. Branchez Ie cordon d’alimentation secteur en dernier. Les deux enceintes avant sent identiques et peuvent 6tre... - Page 85 I’antenne AM aux bornes AM LOOP. Raccordez h?cordon secteur a une prise secteur. Pour positioner Ies antennes Pour raccorder d’autres appareils en option + page Antenne-fil Deployez cette antenne a I’horizontale de maniere a former T et fixez ses extremities au mur.
-
Page 86: Telecommande
INFORMATIONS PRELIMINAIRES TELECOMMANDE Mise en place des piles Detachez Ie couvercle du Iogement des piles a I’arriere de la telecommande et inserez deux piles R6 (taille AA). DIMMER o c, oE3._..l R6(AA) Replacement des piles La portee maximale de la telecommande, c’est-a-dire... -
Page 87: Reglagessonores
(hors service) Reglage du son pendant I’enregistrement d’un minidisque Le volume de sortie et Ie timbre du son fourni par Ies enceintes ou Ie casque peuvent 6tre ajustes ces reglages n’ont aucun effet sur I’enregistrement. FRAN~ALS... -
Page 88: Accord Manuel
MONO TUNER de la telecommande pour que “MONO” apparaisse sur I’afficheur. Le bruit est reduit, mais la reception est monophonique. Pour retablir la reception stereophonique, appuyez sur la touche pour que MONO disparaisse. Quand “MONO”... -
Page 89: Prereglages Des Stations
Ies quatre secondes qui suivent, sur la touche II. pour selectionner une station. Les numeros de prereglage de toutes Ies stations de la gamme, Appuyez sur la touche pour memoriser superieurs au numero annul~, diminuent d’une unite. -
Page 90: Operations De Base
Ie haut. au point souhaite. Pour Iocaliser Ie debut d’une plage, appuyez a plusieurs Pour ecouter un ou deux disques, posez Ies disques sur Ies reprises sur la touche ++ ou -, ou tournez la molette MULTI plateaux 1 et 2. -
Page 91: Lecture Programmed
Supprimez Ie programme et refaites toutes Ies operations Utilisez la telecommande. precedences. 1 Appuyez deux fois sur la touche PRGM en mode Pour ecouter toutes Ies piages programm6es d’arr~t. Apres la programmation des plages, appuyez a plusieurs reprises “PRGM” s’allume. -
Page 92: Operations De Base
I’indication du temps de lecture, appuyez une nouvelle fois sur Ne pas poser plus d’un disque sur un plateau de disque la touche DISPLAY ou sur la touche TITLE DISPLAY, Posez toujours Ies minidisques avec la fleche... - Page 93 Deux barres allumees: Pas encore contrble sommaire du minidisque (TOC) n’a pas encore ete Iu) Pow connaltre Ie type des disques qui n’ont pas encore ete contr61es Appuyez sur la touche DISC CHECK de la telecommande mode d’arrtd. Les disques...
-
Page 94: Lecture Programmed
Ie temps restant selectionner une plage. Appuyez une fois sur la touche PRGM en mode d’arrtit. PRGM Appuyez sur Ies touches numeriques et sur la touche +10 pour programmer une plage. Exemple:... - Page 95 L’enregistrement numerique des signaux audio de disques Posez un disque compact sur Ie plateau 1. compacts sur Ies minidisques n’entralne aucune degradation Voir page 9 pour de plus amples information sur la mise en la qualite sonore. Vous pouvez utiliser...
- Page 96 Voir page 11 pour de plus amples information sur la mise en place des minidisques. Appuyez sur une des touches MD DISC DIRECT PLAY (1 a 5) pour selectionner Ie minidisque Iequei enregistrer. Si la lecture de minidisque commence, appuyez sur la touche pour I’arreter.
- Page 97 (TOC) enregistre sur Ie minidisque. Veillez a poser trois minidisques clans Ies plateaux 1, 2 et 3. plateaux 4 et 5 ne peuvent 6tre utilises pour I’enregistrement. Veiliez a n’effectuer aucune operation quand “TOC EDIT” est affiche. FRANQAIS 16...
- Page 98 Ies plateaux. Voir page 9 pour de plus amples information sur la mise en place des disques compacts. Appuyez sur la touche CD SINGLE F lMD pour commencer I’enregistrement. Quand I’enregistrement commence, la touche DISC DIRECT PLAY correspondent...
- Page 99 I’afficheur. Appuyez sur la touche CD DIRECT PLAY de la telecommande touches numeriques 1 a 3 en I’espace de 3 secondes pour selectionner un CD. Appuyez ensuite sur Ies touches numeriques sur la touche +10 pour programmer une plage. Repetez I’etape...
-
Page 100: Appareil
, un index s’inscrit automatiquement Pour enregistrer a partir d’un autre appareil, procedez de la quand un signal audio est fourni apres un espace vierge de plus fa~on suivante: de 2 secondes. Pour enregistrer a partir d’un appareil raccorde a la prise... - Page 101 I’appareil ou sur la touche TRACK MARK de la telecommande pendant I’enregistrement. Pour changer I’affichage pendant I’enregistrement Appuyez sur la touche DISPLAY. A chaque pression sur la touche, I’affichage change clans I’ordre suivant. 1) Source (Exemple: AUX) 2) Temps d’enregistrement...
- Page 102 En I’espace de 10 secondes, appuyez sur la ENREGISTREMENT LONGUE touche ENTER et tournez la molette MULTI JOG pour selectionner un mode d’inscription d’index. DUREE (MONOPHONIQUE) Pour I’inscription automatique d’index au debut de chaque plage, selectionnez “Mark: AUTO?”, Pour I’inscription d’index...
-
Page 103: Qu'est.ce Qu'unminidisque
II existe deux types de minidisques: “Les disques optiques” Le temps restant sur un disque peut ne pas augmenter Ies “disques magneto-optiques”. Avec ces deux types de disques, bien que plusieurs courtes plages aient ete des faisceaux... - Page 104 Veillez a n’effectuer aucune operation quand “TOC EDIT” est affiche. Appuyez sur une des touches MD DISC DIRECT Pour changer un caractere PLAY (1 a 5) pour selectionner Ie minidisque Appuyez a plusieurs reprises sur la touche ou * jusqu’a...
-
Page 105: Division D'une Plaqe
JOG pour ajuster Ie point de division. Quand vous recherchez Ie point avec la molette MULTI JOG, tournez la molette vers la droite pour avancer et vers la gauche pour revenir en arriere. Si [e point de division n’a pas besoin d’~tre ajuste,... -
Page 106: Reunion De Deux Plages
Exemple: plus petit numero reste. Pour reunir la 2’ et la 3’ plage en effagant I’index au debut de Si une seule des deux plages a reunir a un titre, ce titre reste. la 3’ plage. Vous pouvez reunir plage... - Page 107 10 secondes, appuyez sur la touche ENTER. PLAGES Tournez la molette MULTI JOG pour selectionner Ie numero de plage ou vous voulez deplacer plage. Vous pouvez modifier I’ordre des plages apres I’enregistrement. Exemple: La 3’ plage est placee en Ire position.
-
Page 108: Effacement De Plages
Posez un minidisque. Voir page 11 pour de plus amples information sur la mise en place des minidisques. Appuyez sur une des touches MD DISC DIRECT PLAY (1 a 5) pour selectionner Ie minidisque vous voulez editer. Posez un minidisque. -
Page 109: Mixage Microphone
‘~ @ Multiplex (MPX-Lch) Le son de la voie gauche est transmis par Ies deux ,Appuyez sur la touche CD et posez un disque VF–.– enceintes, et Ie son de la voie droite est coupe. ‘<[ Pour entendre Ie son de la voie droite, voir ci-dessous. -
Page 110: Programmation De Disques Compacts Pour Ie Karaoke
Avant ou pendant la lecture d’un disque compact, vous pouvez pression, Ie numero de disque et Ie numero de plage sent affiches reserver jusqu’a 15 plages qui seront Iues apres la plage actuelle. clans I’ordre de la reservation Chaque plage reservee est annulee quand elle est terminee. - Page 111 L’horloge doit 6tre remise a I’heure. Appuyez touche CLOCK telecommande, puis sur la touche II clans Ies 4 secondes aui suivent. Jour de la semaine A: matin P: apres-midi Appuyez sur la touche U ou W pour designer...
-
Page 112: Reglage De La Minuterie
Pour ecouter posez un minidisque. Pour ecouter la radio, accordez une station. jusqu’a ce que 0 apparaisse sur I’afficheur, puis Pour ecouter un autre appareil raccorde a la chaine, appuyez sur la touche en I’espace de 6 preparez I’appareil pour la lecture. - Page 113 UtiliSez la telecommande, Appuyez sur la touche SLEEP. En I’espace de 4 secondes, appuyez sur la touche ou - pour designer Ie temps jusqu’a mise hors tension.
-
Page 114: Programmation D'enregistrements Avec La Minuterie
Designez I’heure de la mise sous tension PROGRAMMATION appuyant sur la touche - ou -, puis appuyez sur la touche 11. Repetez la m~me operation pour D’ENREGISTREMENTS AVEC LA designer Ies minutes de la mise sous tension. MINUTERIE 6:30 A.M. - Page 115 Appuyez a plusieurs reprises sur la touche TIMER pour que ~ Si Ie niveau du volume est regle sur 6 ou plus, il reviendra disparaisse de I’afficheur. automatiquement a 5 a la mise hors tension de I’appareii. Appuyez sur la touche POWER pour eteindre I’appareil.
-
Page 116: Raccordement D'appareils Optionnels
L. CD DIGITAL OUT (OPTICAL). @?!?!!L~? % ., prises TAPE Ne raccordez pas I’appareil simultanement aux OUT et aux prises AUX. Sinon du bruit sera audible et un mauvais fonctionnement peut s’ensuivre. Prises SURROUND SPEAKERS Raccordez des enceintes surround optionnelles, d’impedance... -
Page 117: Ecoute De Sources Externes
Ies cartouches clans Ieur etui. Ne pas ouvrir I’obturateur de la cartouche et toucher directement Quand I’appareil est sous tension, appuyez sur la touche POWER tout en tenant la touche AUX/D-l N enfoncee. Ie disque. Si Ie disque a I’interieur... - Page 118 Antenne cadre Antenne DOLBY LABORATORIES LICENSING CORPORATION Section Amplificateur AUTORISE LICENSE D’EXPLOITATION 60 watts par voie, min. RMS a 6 BREVETS D’INVENTION AMERICAINS ET ETRANGERS. Puissance de sortie* ohms, de 50 Hz a 20 kHz, avec moins distortion Systeme...
-
Page 119: En Cas De Probleme
Ies points suivants. ~ Attendez environ une heure et ressayez. Le son est parasite. Generalities L’appareil est place trop pres d’un objet generant un champ Absence de son. magnetique puissant, comme un televiseur. Le cordon secteur n’est pas raccorde correctement. -
Page 120: Messages D'aide De La Platine Md
Remplacez Ie dlsque par un dlsque enregistrable. disque preenregistre (disque optique). Full II y a trop de plages ou de donnees Effacez des plages. draccentuation pour pouvoir enregistrer ou editer Ie disque, ou Ie disque est plein. Mettez I’appareil... -
Page 121: Nomenclature
NOMENCLATURE Les instructions correspondent a chaque touche de I’appareil de la telecommande se trouvent aux pages indiquees a la suite de chaque nom. II SET (8,9,11 ,20,21 ,23,24) CLEAR (8,9,14-21 ,23-27) >PRESET (8,9,11 ,23) 4< -/TUNINGl<<DOWNF>lUP (7,8,9,11,15,23,24) .REC (20,21) CDFIMD... - Page 124 For assistance and information, Cil// ~u// he l-800-BUY-A/WA. (United States and Puerto Rico) AIWA CO.,LTD. Printed in Japan...
Need help?
Do you have a question about the XR-H66MD and is the answer not in the manual?
Questions and answers