Table of Contents
Advertisement
Quick Links
SERVICE MANUAL
MD/CD
STEREO SYSTEM
SYSTEM
XR-HG7MD
This Service Manual is the "Revision Publishing" and replaces "Simple Manual"
(S/M Code No. 09-008-349-4T1).
If requiring information about the CD mechanism, see Service Manual of AZG-1
(S/M Code No. 09-001-335-3NE).
If requiring information about the MD mechanism, see Service Manual of AZG-T
(S/M Code No. 09-007-348-1N2).
XR-HG7MD
BASIC TAPE MECHANISM : AZM-1 A1
BASIC CD MECHANISM : AZG-1 SB3RNMD
BASIC MD MECHANISM : AZG-TD
MD/CD
CASSEIVER
CX-NHG7MD
S/M Code No. 09-008-349-4R1
REMOTE
SPEAKER
CONTROLLER
RC-ZAS18
SX-WNH81
EZ,K
Advertisement
Table of Contents

Subscribe to Our Youtube Channel
Related Manuals for Aiwa XR-HG7MD


Summary of Contents for Aiwa XR-HG7MD
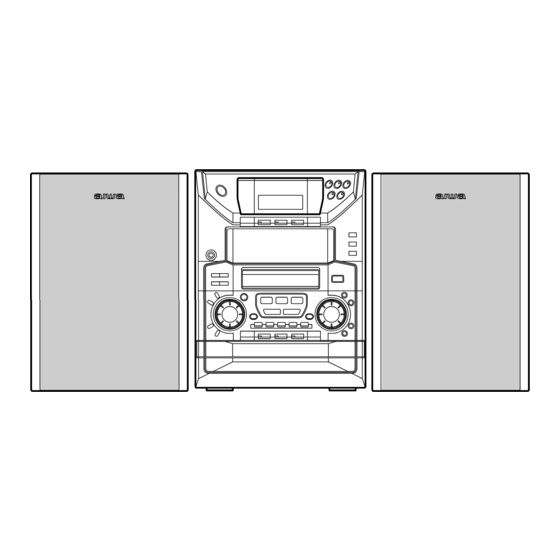
- Page 1 XR-HG7MD EZ,K SERVICE MANUAL BASIC TAPE MECHANISM : AZM-1 A1 MD/CD BASIC CD MECHANISM : AZG-1 SB3RNMD STEREO SYSTEM BASIC MD MECHANISM : AZG-TD MD/CD REMOTE SYSTEM SPEAKER CASSEIVER CONTROLLER RC-ZAS18 XR-HG7MD CX-NHG7MD SX-WNH81 This Service Manual is the "Revision Publishing" and replaces "Simple Manual"...
-
Page 2: Specifications
SPECIFICATIONS Main unit CX-NHG7MD Compact disc player section FM tuner section Laser Semiconductor laser (λ = 780 nm) Tuning range 87.5 MHz to 108 MHz D-A converter 1 bit dual Usable sensitivity (IHF) 16.8 dBf Signal-to-noise ratio 85 dB (1 kHz, 0 dB) Antenna terminal 75 ohms (unbalanced) Harmonic distortion... -
Page 3: Protection Of Eyes From Laser Beam During Servicing
PROTECTION OF EYES FROM LASER BEAM DURING SERVICING This set employs laser. Therefore, be sure to follow carefully the CAUTION instructions below when servicing. Use of controls or adjustments or performance of procedures other than those specified herein may result in hazardous WARNING! radiation exposure. -
Page 4: Note On Before Starting Repair
NOTE ON BEFORE STARTING REPAIR • CD service position Remove the CABI, STEEL. Remove the five screws (BVT2+3-10) A. Turn over the unit and remove the CABI, BOTTOM. Remove the two FFCs (13P and 6P) the CD block from the hook of the CABI, BOTTOM. Loosen the two screws (QT2+3-12) B of the AZG-1 CABI, FR. - Page 5 Remove the hooks in the direction of the arrow. (The hooks are used at the both sides.) Pull the CABI, BOTTOM up to the diagonally top right and remove it. HOOK Lay down the unit and remove the 3ZG-2 mechanism. Extend the 3ZG-2 mechanism using the respective extension jigs.
-
Page 6: Test Mode
TEST MODE <CD>... -
Page 7: Md Test Mode
MD TEST MODE 1. Starting up the MD Test Mode While pressing the MD function button, insert the AC plug into the outlet. Notes: 1) Mechanical abnormalities are ignored while the test mode is starting up. If any abnormality occurs, disconnect the plug immediately. 2) During test mode operation, playback and recording are not possible. -
Page 8: Display Indication
7. Checking the Loading Mechanism and OWH To check the operations of the loading mechanism and OWH, follow the procedure given below. Method 1: Insert the MO disk into the desired slot of magazines 1 to 3 and press the MD DISC DIRECT PLAY button of the slot. After loading, confirm that the OWH moves up. -
Page 9: Electrical Adjustment
ELECTRICAL ADJUSTMENT All the adjustments and checks of the MD block are performed in the test mode. When “No Adjust” appears on the display, follow sections 1 through 3 to adjust. 1. Temperature Compensation Adjustment Normally, do not perform the temperature compensation adjustment. If the adjustment value is extensively different, perform the adjustment as given below in a suitable environment for measuring the correct temperature near the unit. - Page 10 5) Press the DISPLAY once again. Confirm that the values of “f**t##s33” are within the range shown below. (hexadecimal) f “**” ...... 1A to 40 t “##” ....... 0C to 30 s “33” ....0C to 30 FOCUS GAIN TRACKING GAIN SLED GAIN 6) After adjustment, press the STOP button to return the display to “ALL SVoFF”.
- Page 11 5. Record/Playback Error Rate Check (MO DISC) • Test point: Check the test point on the display. • Test disk: MDW-74 1) Load the MDW-74. 2) Move the pickup to the center of the disk using the B.SKIP button and F.SKIP button. 3) Press the CD function button.
-
Page 12: Disassembly Instructions
DISASSEMBLY INSTRUCTIONS DISASSEMBLY INSTRUCTION Removing the MD Block Remove the PANEL, REAR in advance. Remove the two screws. PANEL, REAR Remove the two screws. Release the hook 1 and remove the AZG-26 in the order of 2™3. AZG-26 AZG-26 Remove the four screws and remove the AZG-21 from the HLDR, MD. - Page 13 Disassembling the MD block Remove the AZG-21. Remove the two screws (UT2+2.6-6 GLD) D from the PLATE, SHLD REAR. Remove the PLATE, SHLD REAR. Remove the four screws (U+2+2.6-6) E from the PLATE, SHLD TOP. Remove the PLATE, SHLD TOP. PLATE, SHLD TOP PLATE, SHLD REAR Remove the four screws (UT2+2.6-6 GLD) F and remove the PLATE, SHLD BOTTOM.
-
Page 14: Service Position
SERVICE POSITION MD service position Place the MD block in the service position as follows. Connect the MD block with the interface board using the extension FFC as shown to place the MD block into the service position. FFC, 8P-1.0 SV-J00-043-010 FFC, 14P-1.0 SV-J00-044-010... - Page 15 Disassembling the elevator Rotate the WORM-WHL, JT (the gear shown by the arrow below) counterclockwise to move the elevator to the top position. Note: If the PANEL, SHLD BOTTOM is not removed, the elevator cannot be removed. WORM-WHL, JT Remove the FF-CABLE, 9P 1.0 from the LOAD C.B. FF-CABLE, 9P 1.0...
- Page 16 3) While lifting up the elevator slightly, remove an end of the shaft of the elevator from the guide hole of the CHAS ASSY, SHLD. Remove the other end of the shaft and tilt the elevator as shown below. While tilting the elevator, short the shorting land. SHAFT CHAS ASSY, SHLD Remove the PICK UP, FFC and the MECHA C.B, FFC, then remove the elevator block.
- Page 17 Disassembling the elevator block Remove the screw (UT2+2.6-6 GLD) G and the screw (VTT+2-4) H. Then remove the HLDR, MECHA SUB. HLDR, MECHA SUB Remove the four screws (S-SCREW, MD T) I and remove the ZZG-1 from the HLDR ASSY, MECHA. ZZG-1 HLDR ASSY, MECHA...
-
Page 18: Plate, Slide R
3) Remove the two screws (VTT+2-4) A. Remove the PLATE ASSY, SLIDE L and the PLATE, SLIDE R in the direction of the arrow. Remove the screw (VW+1.7-5 W/O MFZN2C) B. Remove the HEAD, OWH RF325-74A. Re-assembling: Align the axis of the PLATE ASSY, SLIDE L with the arrow mark of the CAM, LOAD. CAM, LOAD HEAD, OWH RF325-74A PLATE ASSY,... - Page 19 Remove the CAM, LOAD in the direction of the arrow. Re-assembling: Move the LEVER ASSY, CAM in the direction of the arrow mark as much as it can be moved. Move the reference hole of the CAM, LOAD closer to the axis of the LEVER, SW H as close as possible. Align the CAM, LOAD with the gear of the GEAR, IDLER2.
- Page 20 Removing the DECK Block Remove the MD block and PANEL, DECK in advance. Remove the four screws and remove the PT. Remove the four screws and remove the AZM-1. To open or close the tray, rotate the PULLEY. CLOSE OPEN...
-
Page 21: Electrical Main Parts List
ELECTRICAL MAIN PARTS LIST REF. NO PART NO. KANRI DESCRIPTION REF. NO PART NO. KANRI DESCRIPTION C0026 87-010-406-080 CAP,E 22-50 M 11L SME C0027 87-010-406-080 CAP,E 22-50 M 11L SME 87-020-454-010 IC,DN6851 C0028 87-010-406-080 CAP,E 22-50 M 11L SME 87-A21-417-010 IC,STK490-310 C0031 87-010-263-080... - Page 22 REF. NO PART NO. KANRI DESCRIPTION REF. NO PART NO. KANRI DESCRIPTION C0380 87-010-406-080 CAP,E 22-50 M 11L SME C0810 87-010-196-080 C-CAP,S 0.1-25 Z F C2012 C0386 87-010-196-080 C-CAP,S 0.1-25 Z F C2012 C0811 87-010-403-080 CAP,E 3.3-50 M 11L SME C0388 87-012-156-080 C-CAP,S 220P-50 J CH GRM...
- Page 23 REF. NO PART NO. KANRI DESCRIPTION REF. NO PART NO. KANRI DESCRIPTION CN0001 87-A60-996-010 CONN,13P V BLK TAC-L13X-A3 C0184 87-010-197-080 C-CAP,S 0.01-25 K B C2012 CN0091 87-A60-109-010 CONN,2P V S2M-2W C0185 87-010-182-080 C-CAP,S 2200P-50 K B C2012 CN0101 87-A60-996-010 CONN,13P V BLK TAC-L13X-A3 C0186 87-010-197-080 C-CAP,S 0.01-25 K B C2012...
- Page 24 REF. NO PART NO. KANRI DESCRIPTION REF. NO PART NO. KANRI DESCRIPTION S0343 87-A90-095-080 SW,TACT EVQ11G04M WH0101 87-A90-459-010 HLDR,WIRE 2.5-5P S0344 87-A90-095-080 SW,TACT EVQ11G04M S0345 87-A90-095-080 SW,TACT EVQ11G04M S0346 87-A90-095-080 SW,TACT EVQ11G04M Q SURROUND C.B S0347 87-A90-095-080 SW,TACT EVQ11G04M C0701 87-010-402-080 CAP,E 2.2-50 M 11L SME SW0162...
-
Page 25: Chip Resistor Part Code
REF. NO PART NO. KANRI DESCRIPTION REF. NO PART NO. KANRI DESCRIPTION C0016 87-010-403-080 CAP,E 3.3-50 M 11L SME 87-A90-248-010 SW,MICRO ESE11SH2CXQ CN0001 87-A61-110-010 CONN,9P V TID-A 87-A90-248-010 SW,MICRO ESE11SH2CXQ CN0002 87-A61-108-010 CONN,5P V TID-A 87-A90-248-010 SW,MICRO ESE11SH2CXQ !PT0001 8A-NF8-608-010 PT,ANF-8 EZ !PT0002 8A-NF8-662-010 PT,SUB ANF-8 (E) - Page 26 WIRING-1 (AMP 1F C.B) JW141 JW142...
- Page 27 SCHEMATIC DIAGRAM-1 (AMP1F SECTION) AMP 1F C. B OVERLOAD DET 28.5 THERMAL PROTECTOR 11.1 21.3 -22.7 POWER -28.5 1/8W Q204 THERMAL PROTECTOR 43.6 11.1 21.3 Q101,102 21.3 OVERLOAD -22.7 POWER -43.6 -22.7 SIGNAL : PB Q151 OVERLOAD Q401,402 CUT OFF DC DET 43.6 28.5...
- Page 28 SCHEMATIC DIAGRAM-2 (MAIN 1/3 SECTION) CN601 TYK-B 30P (X) MAIN C. B 1/3 (FUNCTION/POWER SUPPLY SECTION) 11.1 Q111 Q112 11.7 2SC3052 2SC3052 F C645 Q111,112 Q101,102 100p LOW FREQ HIGH FREQ R650 L/R CHANNEL MUTE MUTE IC601 BD3876KS2 FUNCTION SELECTOR/ T-BASS/GEQ Q601,608 VSS REG...
- Page 29 SCHEMATIC DIAGRAM-3 (MAIN 2/3 SECTION) SCHEMATIC DIAGRAM-4 (Q SURROUND SECTION) MAIN C. B 2/3 (DECK SECTION) Q358,359 Q357,361 BIAS OSC BIAS OSC SW ON: 4.5 Q SURROUND C. B OFF: 0 ON: AC27.9 OFF: 0 11.1 ON: 0 BEAT SW OFF: 10.5 Q351,353-355 REC/PB SW...
- Page 30 SCHEMATIC DIAGRAM-5 (MAIN 3/3 SECTION) MAIN C. B 3/3(TUNER SECTION) L801 L802 DC BALANCE/MONO AM IF ADJ. DISTORTION ADJ. FM BAND SW FM DET-N 1/8W FM IF AMP 75Ω 1/8W (COAXIAL) MW/LW LOOP ON:8,OFF:0 ON:8 OFF:0 Q953 AM PACK2 2SK360 E L951(3/3) MW RF AMP AM PACK2...
- Page 31 WIRING-2 (MAIN C.B) TC942 JR835 1 3 5 8 R995...
- Page 32 SCHEMATIC DIAGRAM-6 (FRONT SECTION) FRONT C. B -3.2 VOLUME TUNE IFC KEYSCAN TUNE SIG 180k SYSTEM CONTROLLER MULTI JOG SENS SQCLK O-SREQ Q501-506 LEVEL SHIFT uCOM OSC ADJ. SPECTRUM ANALYZER 1/8W POWER SW 11.7 Q251-253 MOTOR AVDD SW DRIVER Q281-284 Q141,154,155 DECK TRAY VDD REG...
- Page 33 SCHEMATIC DIAGRAM-7 (TUNER SECTION) WIRING-3 (DECK C.B) DECK C.B Q004,005 TUNER C. B CIRCUIT CANCEL SW RELAY C.B Q001-003 FROM FRONT C.B TUNE SW CN252 MOTOR-1 C.B FC252 SWITCH C.B (LOADING MOTOR)
- Page 34 WIRING-4 (FRONT C.B Top View)
- Page 35 WIRING-5 (FRONT C.B Bottom View)
- Page 36 SCHEMATIC DIAGRAM-8 (PT SECTION) WIRING-6 (PT C.B) PT C. B PT, ANF-8EZ G5SBA60L 2200/50 2200/50 SDT-S-112LMR ON: 11.2 11.7 3.9k 5.6k PT, SUB ANF-8(E) 120k 1SS133 120k Q001,002 RESET 470/25 C014 3.3/50 AC230V 50Hz...
- Page 37 IC DESCRIPTION IC, µPD784975 Pin No. Pin Name Description AVDD – Power supply I-KEY1 Tact key matrix 1 input I-KEY2 Tact key matrix 2 input I-KEY3 Tact key matrix 3 input I-KEY4 Tact key matrix 4 input I-RE-VOL Waveform input for VOL rotary encoder I-RE-MULT1 Waveform input for JOG rotary encoder I-CDSW...
- Page 38 Pin No. Pin Name Description VDD0 – Power supply ____________ RESET Reset input O-POWER System power control output I-TP-CL DECK MECHA clamp sw input O-STB Main IC control STB output I-TM-BASE Reference signal input for clock O-CDDATA/ During CD FUNC, CD DSP control serial data output/During TUNER FUNC, RDS I-RDSDATA serial data input I-DISH-RVS...
- Page 39 Pin No. Pin Name Description FL segment P7 output O-SPEANA-A/P6 FL segment P6 output/Spectrum analyser BPF switching control A output O-SPEANA-B/P5 FL segment P5 output/Spectrum analyser BPF switching control B output O-SPEANA-C/P4 FL segment P4 output/Spectrum analyser BPF switching control C output FL segment P3 output FL segment P2 output FL segment P1 output...
-
Page 40: Ic Block Diagram
IC BLOCK DIAGRAM-2 IC, BD3876KS2... - Page 41 IC, BA7762AFS IC, M61506FP...
- Page 42 IC, BU2099FV IC, MM1454XFBE VREF QSurround BIAS ROUT LOUT...
- Page 43 ADJUSTMENT < TUNER SECTION > < DECK SECTION > MAIN C.B 1. Clock frequency Check 10. Tape Speed Adjustment Settings : • Test point : TP2 Settings : • Test tape : TTA–100 Method : Set to AM 1602kHz and check that the test point is •...
-
Page 44: Mechanical Exploded View
MECHANICAL EXPLODED VIEW 1/1 AZG-T HT- SINK PLATE,SHLD 85-58 2T CHAS, MAIN PLATE,PT AZG-1 AZM-1... -
Page 45: Mechanical Main Parts List
MECHANICAL MAIN PARTS LIST 1/1 REF. NO PART NO. KANRI DESCRIPTION REF. NO PART NO. KANRI DESCRIPTION 1 8A-DB6-011-010 PANEL,TRAY 36 8A-DB6-224-010 GUIDE,PLAY 2 8A-DB6-010-010 PANEL,DECK 37 87-NF5-203-110 GUIDE,FL(*) 3 8A-DB6-008-010 WINDOW,DISPLAY 38 8A-DB6-051-010 PANEL,REAR EZ 4 8A-DB6-004-010 WINDOW,FR 39 8Z-NB6-040-010 CABI,STEEL K 5 8A-DB6-012-010 KNOB,RTRY VOL... - Page 46 TAPE MECHANISM MAIN PARTS LIST 1/2 <6ZM-4 YR4NF> REF. NO PART NO. KANRI DESCRIPTION 1 86-ZM1-218-210 1C CHAS ASSY,R 2 82-ZM1-258-210 0E SPR-T,PINCH L 3 82-ZM1-341-210 1A LVR ASSY,PINCH L2 4 82-ZM1-333-210 0E PLATE,LINK2 5 82-ZM1-266-310 0E LVR,DIR 6 82-ZM1-214-010 0E SPR-T,DIR 7 82-ZM1-206-910 1A CHAS,HEAD 8 86-ZM1-219-010 0E CLR,REEL SLIP 9 82-ZM1-269-210 0E SPR-T,BRG...
-
Page 47: Tape Mechanism Exploded View
TAPE MECHANISM EXPLODED VIEW 1/2 <6ZM-4 YR4NF> DECK C.B HLDR,IC HLDR,MOTOR L CUSH-G DIA 3.7-9-3.2 SHAFT,REEL RELAY C.B PLATE, SHLD HLDR WIRE 3 SH,1.63-3.2 -0.5 SLT... -
Page 48: Speaker Parts List
PANEL,FR L 3 8A-NSY-003-010 PANEL,BA R 4 8A-NSY-004-010 PANEL,BA L 5 8A-NSY-005-010 GRILLE,FRAME ASSY 6 8A-NSY-011-010 RING,W 7 8A-NSY-012-010 COVER, REAR 8 8A-NSJ-006-010 BADGE,AIWA S35 9 88-NS5-610-010 CORD,SPKR 10 88-NS5-611-010 CORD,SPKR B/L 11 8A-NS0-604-010 SPKR,M 120 12 8A-NS6-604-010 SPKR,W 200 6ZM-4... -
Page 49: Speaker Disassembly Instructions
SPEAKER DISASSEMBLY INSTRUCTIONS Type.1 Type.4 Insert a flat-bladed screwdriver into the position indicated by the TOOLS arrows and remove the panel. Remove the screws of each speaker 1 Plastic head hammer unit and then remove the speaker units. 2 ( – ) flat head screwdriver 3 Cut chisel How to Remove the PANEL, FR Type.2... - Page 50 2–11, IKENOHATA 1–CHOME, TAITO-KU, TOKYO 110-8710, JAPAN TEL:03 (3827) 3111 92004 Printed in Singapore...
Need help?
Do you have a question about the XR-HG7MD and is the answer not in the manual?
Questions and answers