Table of Contents
Advertisement
Quick Links
Advertisement
Table of Contents

Subscribe to Our Youtube Channel
Related Manuals for Olimpia splendid MAESTRO 12 HP RVU


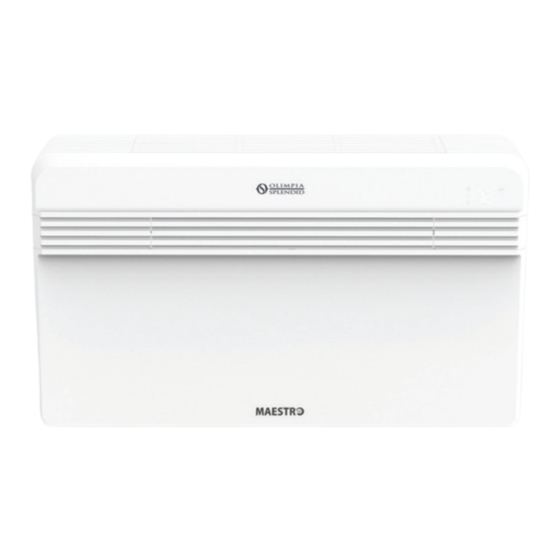
Summary of Contents for Olimpia splendid MAESTRO 12 HP RVU
-
Page 2: Table Of Contents
TABLE OF CONTENTS SYMBOLS USED IN THIS MANUAL AND THEIR MEANING WARNING WARNINGS AND SAFETY RULES DESCRIPTION OF THE UNIT To identify actions that, if not performed correctly, may cause Structure ................5 general accidents, personal injury or death. Technical properties............6 Dimensions ............... - Page 3 Wi-Fi board structure ........ 52 10.1.3 Technical data .......... 52 10.1.4 Wi-Fi board installation ......52 COMPONENTS 10.2 OLIMPIA SPLENDID App ..........53 Electronic expansion valve (EXV)........32 10.2.1 Download and install the app ....53 4-way valve ..............32 10.2.2 Smartphone app configuration ....
-
Page 4: Warnings And Safety Rules
WARNINGS AND SAFETY RULES WARNING WARNING READ INSTRUCTIONS ELECTROCUTION HAZARD Carefully read this manual before performing any Ensure that that the electrical outlet is configured to operation on the unit. match the device connector. If not, consult a certified electrician. Failure to follow these instructions may cause - Do not use plug adapters. -
Page 5: Description Of The Unit
DESCRIPTION OF THE UNIT Structure DESCRIPTION DESCRIPTION Top grille Condenser battery group Main body Pump group Flap IPM board Right wing Power board Left wing Main board Display Condenser fan Remote control Base ON/OFF switch Compressor group Evaporator group Evaporator fan –––––––––––––––––––––––––––––––––––––––––––––––––––––––––––––... -
Page 6: Technical Properties
Technical properties DESCRIPTION MAESTRO PRO 12 HP RVU Model 02283 Power supply voltage V AC / Phase / Hz 208 / 203-1-60 Power supply voltage (min.-max.) V AC 187 / 253 Rated cooling / heating capacity (1) BTU/Hr. 8,300 / 8,500 Rated cooling / heating capacity (2) BTU/Hr. -
Page 7: Dimensions
Maestro Pro 12 HP RVU Dimensions DESCRIPTION MAESTRO PRO 12 HP RVU Dimensions (excluding packaging) inches 35.5” x 20.4” x 8.5” (mm) (900 x 518 x 215) Dimensions (including packaging) inches 38.6” x 24” x 13” (mm) (980 x 609 x 330) Weight (excluding packaging) lbs. -
Page 8: Control Panel
2.4.1 Operating conditions Control panel FUNCTION DISPLAY LED5 LED1 Standby 18-30°C Cooling ON BLUE 64-86 F 16-30°C Heating ON RED 61-86 F Dehumidify ON BLUE Automatic Max. fan speed Mid fan speed Min. fan speed Automatic fan speed Timer on Warning –... -
Page 9: Remote Control
2.5.2 Display Remote control The remote control is the interface between the unit and the end user. It is very important to learn all the functions, the use of the various commands and the meaning of the symbols used on the remote control. 2.5.1 Buttons –––––––––––––––––––––––––––––––––––––––––––––––––––––––––––––... -
Page 10: Silent Mode
2.5.3 SILENT mode 2.5.5 Energy BOOST / ENABLE System It is possible to select this mode from the remote control (button 3) or from the serial port. It may be used only in combination with cooling or heating mode. When cooling mode is activated with a low noise level, the external fan and the internal fan are forced to operate at low speed. - Page 11 Release the MODE button and press it again until the parameter PI is selected. Release the MODE button and press it again for 2 seconds. Press the + or – buttons to select the desired configuration. With PI = 0, the input serves as SYSTEM ENABLE. When the contact is open, climate control is forced into standby mode.
-
Page 12: Operating Logic
OPERATING LOGIC Cooling Heating Compressor: adjustment and shut off in relation to the setpoint and ambient Compressor: adjustment and shut off in relation to the setpoint and ambient temperature. temperature. COMPRESSOR COMPRESSOR COMPRESSOR COMPRESSOR Internal fan: in automatic mode. Internal fan: Internal exchanger minimum temperature control. MINIMUM SPEED Ambient temperature <... -
Page 13: Dehumidifier
Dehumidifier Fan only It is possible to select dehumidifier only mode only from the infrared receiver It is possible to select this mode only from the infrared receiver (“5”), from the (“5”) or from the serial port (not from the display); the messages LED6=’-‘ and display (“4”) or from the serial port;... -
Page 14: Thermoactuator
Thermoactuator Condensate discharge pump The following table presents the cooling/dehumidification thermoactuator logic: Conditions for turning on the pump in cooling and dehumidification mode. ACTION TAKEN BY THE BOARD ON THE MAESTRO Only when compressor is on ACTUATOR AND EXTERNAL FAN MOTOR IN COOLING AND DEHUMIDIFICATION MODE If the “on”... -
Page 15: Electrical Diagram
ELECTRICAL DIAGRAM DESCRIPTION MAESTRO PRO 12 HP RVU V AC Power supply voltage (min. 187, max. 253) Phase Hertz ––––––––––––––––––––––––––––––––––––––––––––––––––––––––––––– MAESTRO PRO INVERTER 12HP RVU... -
Page 16: Refrigerant Circuit
REFRIGERANT CIRCUIT Cooling refrigerant circuit with 4-way valve HOUSE OUTSIDE COOLING EXPANSION VALVE Heating refrigerant circuit with 4-way valve HOUSE OUTSIDE HEATING EXPANSION VALVE DESCRIPTION TYPE QUANTITY Refrigerant gas charge (from the factory) R-410 A 0.58 NOTE: The refrigerant circuit is hermetically sealed. ––––––––––––––––––––––––––––––––––––––––––––––––––––––––––––––––––––... -
Page 17: Installation
INSTALLATION Supplied components Position 6.2.1 Ceiling installation NOTE Verify that the parameter “P0” Is set to “UP” for this type of installation. 6.2.2 Floor installation Ref. DESCRIPTION Qty. MAESTRO PRO 12HP RVU Remote control with batteries Use & maintenance pamphlet and warranty Adhesive insulating strip External grilles for the air intake and outlet including chains and kit for grille installation... -
Page 18: Mounting
Mounting SIPHON TANK 6.3.1 Drilling wall mounting holes 6.3.3 Connecting condensate drain to the unit 6.3.2 Condensate drain ––––––––––––––––––––––––––––––––––––––––––––––––––––––––––––––––––––... -
Page 19: Air Intake
6.3.4 Air intake 6.3.5 External grille ––––––––––––––––––––––––––––––––––––––––––––––––––––––––––––– MAESTRO PRO INVERTER 12HP RVU... -
Page 20: Location Of Holes On The Unit
6.3.6 Location of holes on the unit CAUTION CUT HAZARD Careful attention must be paid to reduce as much as possible any sharp edges, to use gloves or other hand protection when handling the unit. Failure to follow these instructions may cause slight to moderate personal injury. -
Page 21: Electrical Connections
Electrical connections Turning on the unit WARNING RISK OF ELECTROCUTION AND/OR OPERATION OF THE UNIT Failure to follow this warning may cause personal injury or death and/or damage to the unit. - The unit MUST BE connected to an effective ground. -
Page 22: Alarm Diagnostics
ALARM DIAGNOSTICS LED alarm codes 7.2.1 IPM board alarms When an alarm occurs, the compressor shuts off and the display shows an alarm code. The following table shows the number of yellow and red The alarm may be reset automatically in 3 minutes (if LEDs. -
Page 23: Error 1 - Outside Air Temperature Sensor Fault
IPM board alarms 7.3.2 ERROR 2 – Outside exchanger temperature sensor fault 7.3.1 ERROR 1 – Outside air temperature sensor fault ERROR 2 Outside exchanger ERROR 1 temperature sensor fault Outside air temp sensor fault Correctly connect Is the sensor Correctly connect the sensor to the Is the sensor... -
Page 24: Error 3 - Compressor Outlet Temperature Sensor Fault
7.3.3 ERROR 3 – Compressor outlet temperature sensor fault 7.3.4 ERROR 4 – Compressor current protection Winding ERROR 3 Dimension Ø 0.4 Ø 0.4 Ø 0.4 Compressor outlet temperature (AWG / mm (inch) (0.015”) (0.015”) (0.015”) sensor fault Type MW30-C MW30-C MW30-C Revolutions... -
Page 25: Error 5 - Ipm-Dpu Communication Error
7.3.5 ERROR 5 – IPM–DPU communication error 7.3.6 ERROR 6 – Power supply overcurrent ERROR 5 ERROR 6 IPM–DPU communication error Power supply overcurrent Contact electrical supply vendor Verify wiring – white/yellow communication (CN500 IDU Connect it correctly board connection) Is it correctly connected? Replace IPM board... -
Page 26: Error 8 - Dc Over/Under-Voltage
7.3.8 ERROR 8 – DC over/under-voltage 7.3.9 ERROR 9 - Voltage anomaly ERROR 8 ERROR 9 DC over/under voltage Voltage anomaly Verify correct Is the pressure gauge Verify absorption. installation Replace Is it between 1.5A IPM board and 16A? Verify voltage between Verify DC+ and DC- Verify voltage between... -
Page 27: Error 10 - High External Heat Exchanger Temperature (Hte)
7.3.10 ERROR 10 – High external heat exchanger temperature (HTE) ERROR 10 High external heat exchanger temperature (HTE) Is the external exchanger temperature > 70°C? Are the air intake/outlet tubes free of obstructions? Does the external Check for mechanical blockage Are the values fan rotate correctly? and the board input/output... -
Page 28: Error 11 - Dc Over/Under-Voltage
7.3.11 ERROR 11 - DC over/under-voltage 7.3.13 ERROR 13 – High compressor outlet temperature ERROR 11 ERROR 13 DC over/under voltage High compressor outlet temperature Perform voltage and current verification (Ref.: ERROR 6) Check sensor Is the discharge (Ref.: ERROR 3) temp greater than 110°C? Inspect... -
Page 29: Error 14 - Ambient Temperature Sensor Fault
7.3.14 ERROR 14 – Ambient temperature sensor fault 7.3.16 ERROR 16 – Low internal exchanger temperature ERROR 14 ERROR 16 Ambient temperature sensor fault Low internal exchanger temperature Is the sensor Connect the sensor to connected Is the internal the board correctly correctly? Check sensor exchanger battery... -
Page 30: Error 17 - High Internal Exchanger Temperature (Hti)
7.3.17 ERROR 17 – High internal exchanger temperature (HTI) 7.3.18 ERROR 19 – Internal fan motor damage ERROR 17 ERROR 19 High internal exchanger Internal fan motor damage temperature (HTI) Is the internal heat Are mechanical Check sensor exchanger temperature Remove blockage obstructions present (Ref. -
Page 31: Error 20 - High Water Level
7.3.19 ERROR 20 – High water level ERROR 20 High water level What is the COOLING HEATING operating mode of the air conditioner? Is the battery Position drain / Is the condensate drain Clean the battery clean? tube installed and clear of clear the obstruction obstructions? Is the distributor clear of... -
Page 32: Error 21 - Eeprom Read Error
COMPONENTS 7.3.20 ERROR 21 – EEPROM read error WARNING ERROR 21 ELECTROCUTION HAZARD EEPROM read error Before performing any maintenance or cleaning, disconnect the electrical power source from the unit. Failure to follow these instructions may cause electrical shock, serious injury or death. Verify IDU Board connection Electronic expansion valve (EXV) -
Page 33: Ipm Board
IPM board ODU board EEPROM parameters DESCRIPTION Unit Value Low noise max compressor frequency (equal same Cooling and Heating) Heating max 230V AC current MAIN board limit (if overtaken exceeded frequency is reduced) Cooling max 230V AC current limit (if overtaken exceeded frequency is reduced) Percentage of CURRENT LIMIT... -
Page 34: Display
Display Internal air probe POSITION DESCRIPTION HELI XH-2Y (Alternative) White CWB TJC3 White 1 Housing (Alternative) JST XhP-2 White (Alternative) HELI XH-27 2 Clamp CWB TJC3 Alternative JSTSXH-001T-P0.6 Alternative 3 Temp. probe R25 – 10KOhm ±3% Thermoactuator and shutoff valve B25/100 = 3988 K ±0.5% Oper. -
Page 35: Odu Probe
8.11 ODU probe 8.12 Level sensor POSITION DESCRIPTION 1 Housing JST XHP-2 2 Clamp JST SXH-001T-P0.6 KELIAN G08061500012 -30°C ÷ +105°C 8.13 Basin resistance kit R0 15kΩ ±2% Alternative B0/100 3450 k ±2% cavo 26AWG 105°C 3 Ext. temp. 300V probe BEILU 150-532-87010 -30°C ÷... -
Page 36: 8.15 Compressor
8.15 Compressor 8.17 External fan WIRING Wire dimension inch Ø 0.015” Ø 0.015” Ø 0.015” (AWG / mm2) (0.4) (0.4) (0.4) Wire type MW30-C MW30-C MW30-C Spire Volts Power supply Amps CN 708 Blue – Brown V AC CC Resistance ±10% at Speed control 20°C CN 700... -
Page 37: 8.19 Condenser Battery
8.19 Condenser battery 8.22 Pressure gauge 8.20 Flap motor 8.21 Condensate distributor assembly ––––––––––––––––––––––––––––––––––––––––––––––––––––––––––––– MAESTRO PRO INVERTER 12HP RVU... -
Page 38: Disassembly Of Components
DISASSEMBLY OF COMPONENTS WARNING NOTE RISK OF ELECTROCUTION RISK OF FIRE Before performing any maintenance or cleaning, The use of a torch requires extreme caution. Follow all suggested disconnect the unit from electrical power. safety precautions and protect surrounding areas with fireproof materials. -
Page 39: Filter Removal
Filter removal Remove the air purification filter (green) and the carbon filter (black) from the filter assembly. Remove the upper mesh plate (1). Housing cover removal Remove the face plates (1) by sliding it to the outside. Rotate the flap forward (2). Grasp the tabs (2), pull upwards and remove the filter assembly. -
Page 40: Front Cover Removal
Open the upper grille and remove the mounting screws (1). Remove the housing cover. Front cover removal Remove the mounting screws (2) behind the flap and the mounting screws (3) from the back. Remove all the mounting screws (1). ––––––––––––––––––––––––––––––––––––––––––––––––––––––––––––––––––––... -
Page 41: Removal Of The Back Of The Unit
Remove the cover (2). Remove the back of the unit (3), paying attention to the connections and the external air probe. Removal of the back of the unit External fan removal Remove the housing cover (Ref. “9.2 Housing cover removal” Remove the housing cover (Ref. -
Page 42: Internal Fan Removal
Carefully remove the external fan (2) and undo the electrical Remove the fan (2), being careful not to break the tabs. connections. Internal fan removal Removal of electronic IDU front cover Remove the housing cover (Ref. “9.2 Housing cover removal” Remove all the mounting screws (1). -
Page 43: Display Inverter Board Removal
Display inverter board removal 9.10 MAIN board removal Remove the connectors. Remove the front cover (Ref. “9.3 Front cover removal” on Loosen all the mounting screws (1). p. 40). Carefully remove the display inverter board (2) from its seat. Remove the electronic IDU front cover (Ref. “Removal of electronic IDU front cover”... -
Page 44: Odu Electronic Assembly Removal
9.12 ODU electronic assembly removal 9.13 Power board removal Remove the cover (Ref. “9.11 Electronic ODU cover removal” Remove the cover (Ref. “9.11 Electronic ODU cover removal” on p. 43). on p. 43). Disconnect all the electrical couplers and loosen the mounting Disconnect all the electrical couplers and loosen the mounting screws (1). -
Page 45: Pump Group - Sensors - Shutoff Valve Removal
9.15 Pump–sensors–shutoff valve assembly removal 9.16 Wiring cover removal Remove the condensate tube (2). Remove the mounting screw (1) from the cover and the Remove the mounting screws (1). condensate tube (2). Carefully remove the assembly (3), paying attention to the Loosen the cover (3), being careful to not damage the mounting wiring. -
Page 46: Thermoactuator And Shutoff Valve Removal
9.17 Thermoactuator and shutoff valve removal 9.18 Pump removal Remove the wiring cover (Ref. “9.15 Pump – sensors – shutoff Remove the wiring cover (Ref. “9.15 Pump-sensors-shutoff valve assembly removal” on p. 45). valve assembly removal” on p. 45). Disconnect the couplings (5) from the thermoactuator and Pull on the tabs (1) to loosen the pump (2) and remove it, remove the mounting screws (6). - Page 47 Remove the pump-sensors-shutoff valve assembly (Ref. “9.5 Rotate the condensate distributor assembly (6) and remove it. Pump-sensors-shutoff valve assembly removal” on p. 45). Disconnect the condensate drain tube (2). NOTE: Be careful not to break the coupling point (A). NOTE: To clean the condensate distributor group, it is suggested that it be filled with water, agitate it and empty it.
-
Page 48: Charging/Discharging Refrigerant
9.20 Charging/discharging refrigerant Position the charging valve and tube (6) to connect to the charge/discharge tube and solder it in place. The use of a section of tubing with a larger diameter as a union 9.20.1 Unit with rear charging between the two (7) is advised. -
Page 49: Condenser Battery Removal
9.21 Condenser battery removal 9.22 Evaporator battery removal Remove the cover (Ref. “9.2 Housing cover removal” on p. 39). Remove the cover (Ref. “9.2 Housing cover removal” on p. 39). Remove the front cover (Ref. “9.3 Front cover removal” on Remove the rear cover (Ref. -
Page 50: Compressor Removal
9.23 Compressor removal Remove the evaporator battery (5), being careful to not flatten the tabs. Remove the cover (Ref. “9.2 Housing cover removal” on p. 39). Remove the front cover (Ref. “9.3 Front cover removal”) on p. 40). Remove the rear cover (Ref. “9.4 Removal of the back of the unit”... -
Page 51: Float Removal
NOTE: Ensure that the evaporator assembly is stable before Unscrew the mounting bolts at the base of the compressor (6). proceeding. Carefully remove the compressor (7). Remove the screws and loosen the electrical connections cover (3). Disconnect the wires (4). 9.24 Float removal Remove the wiring cover (Ref. -
Page 52: External Connections
EXTERNAL CONNECTIONS 10.1.4 Wi-Fi board installation 10.1.4.1 Connection cable position 10.1 Wi-Fi kit B1018 Connect the communications cable from the kit to the CN5 connector. 10.1.1 Overview Wi-Fi kit B1018 allows control of the operation of the climate control unit to which it is connected, using commands issued by the app installed on a smartphone, iPhone, tablet or iPad. -
Page 53: Olimpia Splendid App
10.2.1 Download and install the app Temperature control: Set the desired ambient temp. The OLIMPIA SPLENDID app may be downloaded to your Temperature setting indicator: Display the selected device directly from the Google Play Store or the Apple App ambient temperature Store. -
Page 54: Climate Control Settings
Commented [DF3]: If screenshots are available from must be within Bluetooth communications range. the OLIMPIA SPLENDID app localized into English, the translator can insert them if the client provides them. ––––––––––––––––––––––––––––––––––––––––––––––––––––––––––––––––––––... - Page 55 10.2.4.2 Wi-Fi configuration Select CONFIGURE Wi-Fi to: verify the Wi-Fi signal strength detected for the B1018 kit installed in the unit; set the Network name (SSID) and password for the Wi-Fi network to be joined. 10.2.4.3 Advanced settings Select ADVANCED to: set the position of the unit;...
-
Page 56: Anomaly Diagnostics
10.3 Anomaly diagnostics DESCRIPTION LED1 LED1 LED1 LED4 (Green) (Red) (Yellow) (Yellow) Communications problems between the Flashing Wi-Fi board and climate control unit Wi-Fi network configured but with no Flashing Internet connection Wi-Fi network NOT configured Bluetooth not working Flashing Enabling contact OPEN DESCRIPTION... -
Page 57: Regular Maintenance
REGULAR MAINTENANCE 11.3 Condensate water outlet WARNING ELECTROCUTION RISK Before performing any maintenance or cleaning, disconnect the unit from electrical power. Failure to follow these instructions may cause electrical shock, serious injury or death. 11.1 Filter replacement To ensure effective internal air filtration and correct operation of your climate control unit, it is necessary to periodically clean the air filter. -
Page 58: Table Of Probe Values
TABLE OF PROBE VALUES 12.1 Sensors table ALL SENSORS EXCEPT FOR THE COMPRESSOR PROBE (10 kOHM 25 C) RT(kΩ) RT(kΩ) RT(kΩ) RT(kΩ) °C °C °C °C 206,060 37,883 9,563 3,055 192,672 35,890 9,147 2,944 180,253 34,015 8,752 2,837 168,725 32,251 8,377 2,735 158,019... -
Page 59: Compressor Probe Table
12.2 Compressor probe table ALL SENSORS EXCEPT FOR THE COMPRESSOR PROBE (10 kOHM 25 C) kΩ kΩ kΩ kΩ °C °C °C °C 542.7 75.2 15.7 511.9 71.9 15.2 68.6 14.6 455.9 65.6 14.1 430.5 62.7 13.6 406.7 13.1 384.3 57.4 12.7 363.3...
Need help?
Do you have a question about the MAESTRO 12 HP RVU and is the answer not in the manual?
Questions and answers