Table of Contents
Advertisement
Quick Links
Advertisement
Table of Contents

Related Manuals for Olimpia splendid MULTIFLEXI DUCTED 9 HP HE


Summary of Contents for Olimpia splendid MULTIFLEXI DUCTED 9 HP HE
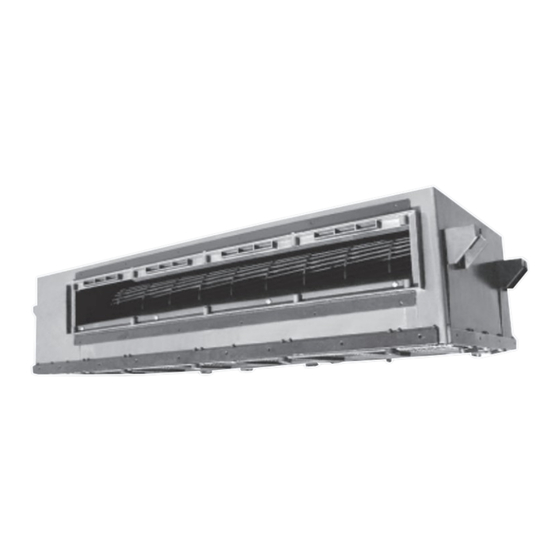
- Page 1 MULTIFLEXI INVERTER DUCTED 9 HP HE DUCTED 12 HP HE ISTRUZIONI PER INSTALLAZIONE, USO E MANUTENZIONE INSTRUCTIONS FOR INSTALLATION, USE AND MAINTENANCE HANDBUCH FÜR INSTALLATION, GEBRAUCH UND WARTUNG INSTRUCCIONES PARA LA INSTALACIÓN, USO Y MANTENIMIENTO...
-
Page 2: Table Of Contents
GENERALITÁ GENERAL INFORMAZIONI GENERALI GENERAL INFORMATION SIMBOLOGIA SYMBOLS 1.2.1 Pittogrammi redazionali 1.2.1 Editorial pictograms 1.2.2 Pittogrammi relativi alla sicurezza 1.2.2 Safety pictograms 1.2.3 Uso previsto 1.2.3 Envisaged use 1.2.4 Zone di rischio 1.2.4 Hazardous zones 1.2.5 Avvertenze 1.2.5 Warnings 1.2.6 Immagazzinamento 1.2.6 Storage... - Page 3 ALLGEMEINES GENERALIDADES ALLGEMEINE INFORMATIONEN INFORMACIÓN GENERAL SYMBOLGEBUNG SIMBOLOGÍA 1.2.1 Veranschaulichende Piktogramme 1.2.1 Pictogramas descriptivos 1.2.2 Sicherheits-Piktogramme 1.2.2 Pictogramas correspondientes a la seguridad 1.2.3 Vorgesehener Einsatz 1.2.3 Uso previsto 1.2.4 Gefahrenbereiche 1.2.4 Zonas de riesgo 1.2.5 Warnhinweise 1.2.5 Advertencias 1.2.6 Einlagerung 1.2.6 Almacenamiento 1.2.7...
- Page 4 MODALITA' RAFFREDDAMENTO/ COOLING/DEHUMIDIFICATION/HEATING/ DEUMIDIFICAZIONE/RISCALDAMENTO/SOLO VENTILATION ONLY MODE VENTILAZIONE REGOLAZIONE DELL'OROLOGIO ADJUSTING THE CLOCK FUNZIONAMENTO DEL TIMER TIMER OPERATION 3.10 ESEMPIO DI IMPOSTAZIONE DEL TIMER 3.10 EXAMPLES OF TIMER SETTINGS 3.11 RESET E FUNZIONE DEL PULSANTE LOCK 3.11 RESET AND LOCK BUTTON FUNCTION 3.12 FUNZIONAMENTO PROVVISORIO 3.12...
- Page 5 BETRIEBSART KÜHLUNG/ENTFEUCHTUNG/ MODO REFRIGERACIÓN/ HEIZUNG/NUR BELÜFTUNG DESHUMIDIFICACIÓN/CALENTAMIENTO/SÓLO VENTILACIÓN EINSTELLUNG DER UHR REGULACIÓN DEL RELOJ TIMER-BETRIEB FUNCIONAMIENTO DEL TEMPORIZADOR 3.10 BEISPIEL FÜR EINE TIMER-EINSTELLUNG 3.10 EJEMPLO DE REGULACIÓN DEL TEMPORIZADOR 3.11 RESET UND FUNKTION DES TASTERS CLOCK 3.11 REINICIO Y FUNCIÓN DEL BOTÓN LOCK 3.12 PROVISORISCHER BETRIEB 3.12...
-
Page 6: Informazioni Generali
OLIMPIA SPLENDID. OLIMPIA SPLENDID is absolutely forbidden. Le macchine possono subire aggiornamenti e quindi presentare The appliances could be subject to updating and therefore appear... - Page 7 Documento reservado en conformidad con la ley; se prohíbe la Verbot der Reproduktion oder Weitergabe an Dritte ohne reproducción o transmisión de datos a terceros sin explícita ausdrückliche Genehmigung de Firma OLIMPIA SPLENDID. autorización de la empresa OLIMPIA SPLENDID. Die Maschinen können Aktualisierungen unterliegen und Teile Las máquinas están sujetas a actualizaciones y, por lo tanto,...
-
Page 8: Simbologia
Should components need replacing, always use OLIMPIA esclusivamente ricambi originali OLIMPIA SPLENDID. SPLENDID original spare parts. IMPORTANTE! IMPORTANT! Per prevenire ogni rischio di folgorazione è indispensabile staccare To avoid any risk of electric shock always remove the master plug l’interruttore generale prima di effettuare collegamenti elettrici ed... - Page 9 Maschinen befinden, betrieben werden. Bei Auswechselung von Komponenten verwenden Sie En caso de sustitución de componentes, utilice ausschließlich Originalersatzteile von OLIMPIA SPLENDID. exclusivamente repuestos originales OLIMPIA SPLENDID. WICHTIG! ¡IMPORTANTE! Zur Vorbeugung jeglicher Stromschlaggefahr ist unbedingt der Para prevenir todo riesgo de electrocución es indispensable...
-
Page 10: Pittogrammi Relativi Alla Sicurezza
Improper use of the appliances (outside or inside) (esterna ed interna) con eventuali danni causati a persone, cose o with eventual damage to persons, animals or property excludes animali esulano la OLIMPIA SPLENDID da ogni responsabilità. OLIMPIA SPLENDID from any liability or responsibility. 1.2.4... - Page 11 Gebrauch der Geräte (Innen- und Außeneinheit) aparatos (interior y exterior) y los eventuales daños causados a entbindet OLIMPIA SPLENDID aus jeglicher Haftung für eventuelle personas, cosas o animales no son responsabilidad de OLIMPIA Schäden an Personen, Gegenständen oder Tieren.
-
Page 12: Immagazzinamento
3 days of receipt of the goods and enclosing presentando documentazione fotografica. photographic evidence. Analoga informazione inviarla tramite fax anche a OLIMPIA SPLENDID. Send a copy by fax to OLIMPIA SPLENDID. Nessuna informazione concernente danni subiti potrà essere presa No complaints will be accepted if made more than three days after in esame dopo 3 giorni dalla consegna. - Page 13 Vorlage der Fotodokumentation. presentando la documentación fotográfica correspondiente. Senden Sie die analoge Information auch per Fax an OLIMPIA Envíe la misma información por telefax a OLIMPIA SPLENDID. SPLENDID. Ninguna información de daños será tomada en consideración Nach Ablauf von 3 Tagen ab der Auslieferung können keine una vez transcurridos 3 días desde la entrega.
-
Page 14: Installazione
INSTALLAZIONE INSTALLATION AVVERTENZE WARNINGS - Non dirigere il flusso d’aria fredda direttamente sulle persone, e - Never direct the airflow directly onto persons and do not allow the non lasciar diminuire troppo la temperatura ambiente, perché ciò room temperature to fall too low as this could cause health può... - Page 15 INSTALLATION INSTALACIÓN WARNHINWEISE ADVERTENCIAS - Richten Sie den Kaltluftstrom nicht direkt auf Personen und kühlen - No dirija el flujo de aire frío directamente sobre las personas y Sie die Raumtemperatur nicht zu stark ab, da dies zu no haga disminuir demasiado la temperatura ambiente, ya que gesundheitlichen Problemen führen könnte.
- Page 16 - Il metodo di cablaggio deve essere in linea con lo standard locale. - The wiring must be in line with local standards. - Il cavo di alimentazione e il cavo di collegamento non sono forniti. - The power supply cable and connection cable are not supplied. - Installare un sezionatore di corrente;...
- Page 17 - Die Verkabelungsmethode muss in Übereinstimmung mit dem - El método de cableado debe responder al estándar local. örtlichen Standard stehen. - Los cables de alimentación y conexión no están incluidos en el - Versorgungskabel und Anschlusskabel gehören nicht zum suministro.
-
Page 18: Montaggio Unita' Interna
MONTAGGIO UNITA’ INTERNA (fig. 2) MOUNTING THE INDOOR UNIT (fig. 2) ATTENZIONE ATTENTION Assicurarsi di aver letto attentamente le presenti Istruzioni Make sure that these instructions have been read carefully prima di iniziare l'installazione. L'inosservanza delle before starting the installation. Failure to observe the presenti istruzioni potrebbe provocare ferite gravi o morte, instructions could lead to malfunctions of the appliance, disfunzioni dell'apparecchio e/o danni alle cose. - Page 19 MONTAGE DER INNENEINHEIT (Abb. 2) MONTAJE DE LA UNIDAD INTERIOR (Fig. 2) ACHTUNG ATENCIÓN Stellen Sie sicher, diese Anleitungen vor dem Beginn mit Lea atentamente las presentes instrucciones antes de der Installation sorgfältig durchgelesen zu haben. Die comenzar la instalación. La inobservancia de las presentes Nichtbeachtung dieser Anweisungen könnte zu schweren instrucciones puede provocar heridas graves o incluso la Verletzungen bis hin zum Tod, zu Fehlfunktionen des...
-
Page 20: Installazione Dell'unita' Interna
INSTALLAZIONE UNITA' INTERNA INSTALLATION OF THE INDOOR UNIT 2.3.1 Avvertenze di installazione Installation Precautions Scegliere il migliore percorso di accesso. Select the best access route. Spostare l'unità il più possibile nell'imballo originale. Keep the unit in its original packing for as long as possible Se il condizionatore è... - Page 21 INSTALLATION DER INNEINHEIT INSTALACIÓN DE LA UNIDAD INTERIOR Installationshinweise Advertencias para la instalación 2.3.1 Wählen Sie den bestmöglichen Zugangsweg Elija el mejor recorrido de acceso. Versetzen Sie die Einheit möglichst in der Originalpackung. Desplace la unidad lo más posible en su embalaje original. Wenn das Klimagerät auf einem metallischen Teil des Gebäudes Si el acondicionador es instalado en una parte metálica del installiert wird, ist dies den geltenden Vorschriften gemäß...
-
Page 22: Installazione Dell'unità
2.3.3 Installazione dell'unità Installing the unit Installazione dei bulloni di sospensione ø 10 (4 bulloni) Installation of the ø 10 suspension bolts (4 bolts) Stabilire la posizione dei bulloni di sospensione con l'ausilio del Establish the position of the suspension bolts with the help of grafico 7 design 7 Per l'installazione utilizzare bulloni per sospensione ø... - Page 23 Installation der Einheit Instalación de la unidad 2.3.3 Installation der Aufhängungs-Schraubbolzen ø 10 (4 Schraubbolzen). Instalación de los pernos de suspensión ø 10 (4 pernos) Ermitteln Sie die Position der Aufhängungs-Bolzen anhand der Establezca la posición de los pernos de suspensión con la Graphik 7 ayuda del gráfico 7.
-
Page 24: Appendere L'unità Interna
2.3.4 Appendere l'unità interna Hanging the indoor unit Fig. 7 Fig. 7 1 Bullone per sospensione 1 Suspension bolt 2 Dado (alto) 2 Nut (high) 3 Rondella (alto) 3 Washer (high) 4 Asola di installazione 4 Installation slot 5 Rondella (basso) 5 Washer (low) 6 Dado (basso) 6 Nut (low) - Page 25 Aufhängen der Inneneinheit Colgar la unidad interior 2.3.4 Abb. 7 Fig. 7 1 Aufhängungs-Schraubbolzen 1 Perno de suspensión 2 Mutter (oben) 2 Tuerca (arriba) 3 Unterlegscheibe (oben) 3 Arandela (arriba) 4 Installationsschlitz 4 Ranura de instalación 5 Unterlegscheibe (unten) 5 Arandela (abajo) 6 Mutter (unten) 6 Tuerca (abajo) Installieren Sie den Aufhängungsbolzen im "U"...
-
Page 26: Pannello Ingresso Aria Del Box Ritorno Aria
2.3.5 Pannello ingresso aria del box ritorno aria (fig. 10) Air inlet panel of the air return box (fig. 10) ATTENZIONE ATTENTION La griglia di ingresso aria e la direzione di ingresso dell'aria devono The air inlet grill and the air inlet direction must be parallel. See essere parallele. - Page 27 Lufteinlassblende der Luftrückführungs-Box (Abb. 10) Panel entrada aire del box retorno aire (Fig. 10) 2.3.5 ACHTUNG ATENCIÓN Der Lufteinlassrost und die Lufteinlassrichtung müssen parallel La rejilla de entrada de aire y la dirección de entrada del aire liegen. Siehe Abb. 10 Pos. A. Die Abb. 10 Pos. B ist fehlerhaft und deben ser paralelas.
-
Page 28: Tubazioni Scarico Condensa
2.5.1 Tubazioni scarico condensa Condensation discharge pipe Avvertenze Warnings Il tubo scarico condensa deve essere isolato termicamente per The condensation discharge pipe must be thermally insulated evitare la formazione di condensa. Un collegamento errato delle to prevent the build up of condensation. An incorrect connection tubazioni scarico condensa può... - Page 29 Kondenswasserabflussleitungen Tuberías de descarga de condensación 2.5.1 Warnhinweise Advertencias Die Kondenswasserabflussleitung ist thermisch zu isolieren, El tubo de descarga de condensación debe estar aislado um die Bildung von Kondenswasser zu vermeiden. Ein térmicamente para evitar la formación de condensación. Una fehlerhafter Anschluss der Kondenswasserabflussleitungen conexión errónea de las tuberías de descarga de condensación kann zu Wasseraustritten ins Innere des Raums führen.
-
Page 30: Test Drenaggio
2.5.2 Test drenaggio (fig. 17) Drainage test (fig. 17) - Controllare che il tubo di drenaggio non sia ostruito. - Check that the drainage pipe is not obstructed. - Gli edifici di nuova costruzione dovrebbero eseguire questo test - Newly built constructions should have this test done before prima di coprire il soffitto. - Page 31 Entwässerungs-Test (Abb. 17) Test drenaje (Fig. 17) 2.5.2 - Stellen Sie sicher, dass das Entwässerungsrohr nicht verstopft - Controle que el tubo de drenaje no esté obstruido. ist. - Los edificios nuevos deberían realizar este test antes de cubrir - In Neubauten sollte dieser Test vor der Abdeckung der Decke el techo.
-
Page 32: Procedura Di Connessione Dei Tubi
INSTALLAZIONE DEL TUBO DI CONNESSIONE (fig. 18) INSTALLATION OF THE CONNECTING PIPE (fig. 18) Verificare che il dislivello tra l'unità interna e quella esterna, la Check that the drop between the indoor and outdoor unit, the length lunghezza del tubo refrigerante ed il numero di curve corrisponda of the coolant pipe and the number of curves corresponds with the alle seguenti specifiche: following specifications:... - Page 33 INSTALLATION DES ANSCHLUSSSCHLAUCHES (Abb. 18) INSTALACIÓN DEL TUBO DE CONEXIÓN (Fig. 18) Stellen Sie sicher, dass die Fallhöhe zwischen der Inneneinheit und Verifique que el desnivel entre las unidades interior y exterior, la der Außeneinheit, die Länge des Kühlmittelschlauches und die longitud del tubo de refrigerante y el número de curvas respondan Anzahl der Krümmungen folgenden Spezifikationen entsprechen: a las siguientes especificaciones:...
-
Page 34: Informazioni Sul Tubo Pieghevole
2.6.2 Informazioni sul tubo pieghevole Information on the flexible pipe - L'angolo di curvatura non deve superare i 90° - The angle of the bend must not exceed 90° - Eseguire una curvatura del tubo con ampio raggio. - Make a wide-radius bend in the pipe. - Non piegare il tubo più... - Page 35 Informationen zum biegsamen Rohr (Schlauch) Informaciones sobre el tubo plegable 2.6.2 - Der Krümmungswinkel darf 90° nicht überschreiten. - El ángulo de curvatura no debe superar los 90 °. - Führen Sie eine Krümmung des Rohrs mit weitem Radius aus. - Realice una curva del tubo de amplio radio.
-
Page 36: Connessione Del Tubo Del Refrigerante
CONNESSIONE DEL TUBO DEL REFRIGERANTE COOLANT PIPE CONNECTION Svasatura (fig. 21) Flaring (fig. 21) - Tagliare un tubo con un tagliatubi. - Cut a pipe with a pipe-cutter - Inserire un dado svasato nel tubo e svasare il tubo. - Insert a flared nut into the pipe and flare the pipe 1 inclinazione 1 slope 2 grezzo... - Page 37 ANSCHLUSS DES KÜHLMITTELSCHLAUCHS CONEXIÓN DEL TUBO DE REFRIGERANTE Bördelung (Abb. 21) Avellanado (Fig. 21) - Schneiden Sie einen Schlauch mit einem Rohrschneider zu. - Corte un tubo con un cortatubos. - Führen Sie eine Senkschraube in den Schlauch und bördeln - Coloque una tuerca avellanada en el tubo y abocarde el tubo.
-
Page 38: Controllo Perdite
2.7.2 Controllo perdite Leakage check Controllare tutte le giunzioni con un rilevatore di perdite o del sapone Check all the joints with a leak detector or with soap (fig.23). (fig.23). Valvola di arresto bassa Stop valve down Valvola di arresto alta Stop valve up C,D Giunti del tubo di connessione all'unità... - Page 39 Kontrolle auf Undichtigkeiten Control de pérdidas 2.7.2 Prüfen Sie alle Dichtungen mit einem Detektor oder Seifenwasser Controle todos los empalmes con un detector de pérdidas o agua (Abb. 23) jabonosa (Fig. 23). Arretierventil unten Válvula de parada baja Arretierventil oben Válvula de parada alta C,D Kupplungen des Inneneinheit-Anschlussschlauches C,D Empalmes del tubo de conexión a la unidad interior.
- Page 40 ATTENZIONE: ATTENTION: - Cercare nella documentazione dell'unità esterna un foglio adesivo - Together with the documentation of the outside unit there is an con 2 etichette.Staccare l'etichetta inferiore (fig. 26) e incollarla adhesive sheet containing 2 labels. Remove the lower label in prossimità...
- Page 41 ACHTUNG: ATENCIÓN: - Ermitteln Sie in der Dokumentation der Außeneinheit ein Blatt mit 2 - Busque en la documentación de la unidad exterior una hoja Haftetiketten. Lösen Sie die untere Etikette (Abb. 26) und kleben adhesiva con 2 etiquetas. Despegue la etiqueta inferior (fig. 26) diese in die Nähe des Lade- und/oder Nachfüllpunkts.
-
Page 42: Cablaggi
CABLAGGI (fig. 27) CABLING (fig. 27) 1 Quadro elettrico 1 Electrical panel 2 Vite 2 Screw ATTENZIONE ATTENTION Non toccare il condensatore anche se è stata staccata Do not touch the condenser even if the power supply has been l'alimentazione, perché vi è ancora presenza di tensione e c'è il disconnected because voltage is still present and there is a rischio di elettrocuzioni. - Page 43 VERKABELUNGEN (Abb. 27) CABLEADOS (Fig. 27) 1 Elektrische Schalttafel 1 Cuadro eléctrico 2 Schraube 2 Tornillo ACHTUNG ATENCIÓN Berühren Sie den Kondensator auch dann nicht, wenn die No toque el condensador incluso si ha sido desconectada la Stromversorgung weggenommen wurde, da noch Spannung alimentación, ya que aún hay tensión y existe el riesgo de anliegt und die Gefahr von Stromschlägen besteht.
- Page 44 Togliere il pannello di protezione delle parti elettriche dell'unità Remove the safety panel of the outdoor unit electrical parts. esterna. Connect the connecting cables to the terminals respecting the Collegare i cavi di connessione ai terminali rispettando la numbering shown on the terminal boards indoor and outdoor numerazione riportata sulle morsettiere delle unità...
- Page 45 Entfernen Sie die Schutzblende der elektrischen Teile der Quite el panel de protección de las partes eléctricas de la Außeneinheit. unidad exterior. Verbinden Sie die Anschlusskabel mit den Klemmen. Beachten Conecte los cables de conexión a los terminales respetando Sie dabei die Nummerierung auf der Klemmleiste der Außen- la numeración indicada en las cajas de bornes de las unidades und der Inneneinheit.
-
Page 46: Wire Controller
WIRE CONTROLLER WIRE CONTROLLER 3.1.1 Prescrizioni di sicurezza Safety advice - Leggere attentamente queste indicazioni prima di effettuare - Carefully read these instructions before starting the installation. l'installazione. - Respect all the indications, as they are extremely important - Rispettare queste indicazioni, perché sono molto importanti. - Meaning of the signs: - Significato dei segni: ATTENZIONE... - Page 47 WIRE CONTROLLER WIRE CONTROLLER Sicherheitsvorschriften Prescripciones de seguridad 3.1.1 - Lesen Sie diese Angaben aufmerksam vor der Durchführung - Lea atentamente estas indicaciones antes de la instalación. der Installation. - Respete estas indicaciones, ya que son muy importantes. - Halten Sie diese Anweisungen ein, da diese sehr wichtig sind. - Significado de los símbolos: - Bedeutung der Zeichen: ACHTUNG...
-
Page 48: Altre Prescrizioni
3.1.2 Altre prescrizioni Other advice Luogo di Installazione Installation place Non installare in luoghi in cui olio, vapore, gas sulfurei, o altro possano Never installing places where oil, vapour, sulphuric or other gases provocare deformazioni o malfunzionamento. as this could result in malfunctions or deformations Preparazione prima dell'Installazione Preparation before the Installation 1. - Page 49 Sonstige Vorschriften Otras prescripciones 3.1.2 Installationsort Lugar de instalación Installieren Sie das Gerät nicht an Orten, wo Öl, Dampf, No instale el aparato en lugares en los que la presencia de aceite, Schwefelgase oder sonstige Substanzen Verformungen oder vapor, gases sulfurados u otras sustancias pueden provocar Fehlfunktionen herbeiführen können.
-
Page 50: Installazione Wire Controller
3.1.3 Installazione Wire Controller Wire Controller Installation 1. La linea del Wire Controller è a bassa tensione. Non collegarlo 1. The Wire Controller has a low voltage line. Never connect to a mai ad una linea standard 220V/380V, né inserirlo nello stesso standard 220V/380V line, or insert it in the line Wiring Tube. - Page 51 Installation Wire Controller Instalación del Wire Controller 3.1.3 1. Die Leitung des Wire Controller liegt an Niederspannung. 1. La línea del Wire Controller es de baja tensión. Jamás lo conecte Schließen Sie den Controller niemals an eine Standardleitung a una línea estándar 220 V/380 V ni lo introduzca en el mismo 220V/380V an und setzen ihn auch nicht in dieselbe Wiring Tube Wiring Tube de la línea.
- Page 52 Note: Note: - Non serrare mai troppo le viti per evitare di rovinare la protezione - Never over-tighten the screws to avoid ruining the safety device o il display. or the display. - Non tagliare i fili durante l'installazione della protezione del Wire Controller.
- Page 53 Hinweise: Notas: - Ziehen Sie die Schrauben niemals zu stark fest, um die - Jamás apriete demasiado los tornillos para no deteriorar la Beschädigung des Schutzes oder des Displays zu vermeiden. protección o el display. - Schneiden Sie die Leiter während der Installation des Wire - No corte los cables durante la instalación de la protección del Controller Schutzes nicht ein.
- Page 54 NOME E FUNZIONE DEGLI INDICATORI SUL WIRE CONTROLLER NAME AND FUNCTION OF THE INDICATORS ON THE WIRE (fig. 32) CONTROLLER (fig. 32) 1 MODE DISPLAY 1 MODE DISPLAY Visualizza la modalità operativa in corso, comprende AUTO, Displays the operating mode in progress, including AUTO, COOL, DRY, HEAT, FAN ONLY.
- Page 55 BEZEICHNUNG UND FUNKTION DER ANZEIGEN AUF DEM WIRE NOMBRE Y FUNCIÓN DE LOS INDICADORES PRESENTES CONTROLLER (Abb. 32) EN EL WIRE CONTROLLER (Fig. 32) 1 MODE DISPLAY 1 MODE DISPLAY Zeigt die laufende Betriebsart an, möglich sind AUTO, COOL, Visualiza el modo operativo en curso: AUTO, COOL, DRY, DRY, HEAT, FAN ONLY.
- Page 56 WIRE CONTROLLER E RELATIVE FUNZIONI (fig. 33) WIRE CONTROLLER AND RELATIVE FUNCTIONS (fig. 33) 1 PULSANTE MODE 1 MODE BUTTON Seleziona la modalità del condizionatore. Selects the conditioner mode. 2 PULSANTE FAN SPEED 2 FAN SPEED BUTTON Premere per selezionare la velocità del ventilatore. Press to select the fan speed.
- Page 57 WIRE CONTROLLER UND ZUGEHÖRIGE FUNKTIONEN (Abb. 33) WIRE CONTROLLER Y FUNCIONES CORRESPONDIENTES (Fig. 33) 1 TASTER MODE Wählt die Betriebsart des Klimageräts. BOTÓN MODE Selecciona el modo del acondicionador. 2 TASTER FAN SPEED Drücken zur Wahl der Ventilatorgeschwindigkeit BOTÓN FAN SPEED Pulse este botón para seleccionar la velocidad del ventilador.
- Page 58 RICEVITORE SEGNALI SUL CONTROLLER (fig. 34) SIGNAL RECEIVER ON THE CONTROLLER (fig. 34) A Connessione all'unità interna del quadro principale Controller A Connection of the main electrical control panel to the indoor Elettrico unit B Ricevitore segnale B Signal receiver C Spia funzionamento C Operating warning light D Pulsante funzionamento manuale...
- Page 59 SIGNALEMPFÄNGER AUF DEM CONTROLLER (Abb. 34) RECEPTOR DE SEÑALES EN EL CONTROLLER (Fig. 34) A Anschluss der elektrischen Controller-Hauptschalttafel an die A Conexión a la unidad interior del cuadro principal Controller Inneneinheit Eléctrico B Signalempfänger B Receptor de señal C Kontrollanzeige C Piloto de funcionamiento D Handbetriebstaster D Botón de funcionamiento manual...
- Page 60 STATO INIZIALE DEL WIRE CONTROLLER WIRE CONTROLLER INITIAL STATUS Quando il controller centrale viene collegato all'alimentazione per la When the control unit is connected to the power supply for the first prima volta, tutti i simboli sull'LCD saranno accesi per 2 secondi. time, all the symbols on the LCD display will light up for 2 seconds.
- Page 61 ANFANGSZUSTAND DES WIRE CONTROLLER ESTADO INICIAL DEL WIRE CONTROLLER Wenn der Zentral-Controller zum ersten Mal gespeist wird, sind alle Cuando el Controller central es conectado a la alimentación por Symbole auf der LCD für 2 Sekunden eingeschaltet. Anschließend primera vez, todos los símbolos del LCD permanecen encendidos erscheint automatisch die Uhrzeit "0:00".
-
Page 62: Regolazione Dell'orologio
REGOLAZIONE DELL'OROLOGIO ADJUSTING THE CLOCK Prima di avviare il condizionatore, regolare l'orologio del wire Before starting the conditioner, adjust the clock on the wire controller seguendo le procedure riportate in questo paragrafo. controller by following the procedures detailed in this paragraph. L'orologio sul wire controller visualizzerà... - Page 63 EINSTELLUNG DER UHR REGULACIÓN DEL RELOJ Stellen Sie vor dem Start des Klimageräts die Uhr des Wire Controller Antes de encender el acondicionador, regule el reloj del Wire unter Befolgend der in diesem Abschnitt angegebenen Verfahren. Controller siguiendo los procedimientos descritos en este párrafo. Die Uhr auf dem Wire Controller zeigt die Uhrzeit unabhängig davon, El reloj del Wire Controller visualiza la hora, independientemente ob das Klimagerät in Betrieb ist oder nicht, an.
-
Page 64: Esempio Di Impostazione Del Timer
3.10 ESEMPIO DI IMPOSTAZIONE DEL TIMER (fig. 35) EXAMPLES OF TIMER SETTINGS (fig. 35) TIMER OFF TIMER OFF (Funzionamento Arresto) (Operation Stop) La funzione Timer OFF è utile quando ci si corica. Il condizionatore The Timer OFF function is useful when you take a nap because si arresterà... - Page 65 BEISPIEL FÜR EINE TIMER-EINSTELLUNG (Abb. 35) EJEMPLO DE REGULACIÓN DEL TEMPORIZADOR (Fig. 35) 3.10 TIMER OFF TIMER OFF (Betrieb Stillstand) (Funcionamiento Parada) Die Funktion Timer OFF ist nützlich während der Schlafenszeit. La función TIMER OFF es útil durante el sueño. El acondicionador Das Klimagerät schaltet sich automatisch zur eingestellten Uhrzeit se apaga automáticamente a la hora regulada.
-
Page 66: Reset E Funzione Del Pulsante Lock
TIME ON TIME OFF TIME ON TIME OFF (Arresto Funzionamento Arresto) (Stop Operation Stop) Questa funzione è utile se si desidera avviare il condizionatore This function is useful for starting the conditioner when you wake quando ci si sveglia e arrestarlo quando si esce da casa. up and stopping it when you leave home. - Page 67 TIME ON TIME OFF TIME ON TIME OFF (Stillstand Betrieb Stillstand) (Parada Funcionamiento Parada) Diese Funktion ist nützlich, wenn der Start des Klimageräts beim Esta función es útil para encender el acondicionador al despertarse Wecken und das Abschalten beim Verlassen der Wohnung y apagarlo al salir del hogar.
-
Page 68: Indicazioni E Significati Del Wire
3.13 INDICAZIONI E SIGNIFICATI DEL WIRE CONTROLLER WIRE CONTROLLER INDICATIONS AND THEIR MEANINGS 1. Significati degli indicatori LCD: 1. Meaning of the LCD indicators: INDICATORE MODALITA' SIGNIFICATO DELL'INDICATORE INDICATOR MODE MEANING OF THE INDICATOR LAMPEGGIANTE Il wire controller sta trasmettendo il FLASHING The wire controller is transmitting a segnale al condizionatore. - Page 69 ANZEIGEN DES WIRE CONTROLLER UND DEREN BEDEUTUNG INDICACIONES Y SIGNIFICADOS DEL WIRE CONTROLLER 3.13 1. Bedeutung der LCD Anzeigen: 1. Significados de los indicadores LCD: ANZEIGE BETRIEBSART BEDEUTUNG DER ANZEIGE INDICADOR MODO SIGNIFICADO DEL INDICADOR BLINKLICHT Der Wire Controller überträgt das INTERMITENTE El Wire Controller está...
-
Page 70: Regolazione Del Flusso Dell'aria
3.14 REGOLAZIONE DEL FLUSSO DELL'ARIA ADJUSTING THE AIR FLOW Dato che l'aria fredda va verso il basso e l'aria calda verso l'alto, per As cold air falls and hot air rises, it is advisable to adjust the angle migliorare gli effetti del raffreddamento e del riscaldamento, è of the slats to optimise the cooling and heating effects so that the opportuno regolare l'angolazione delle feritoie in modo che la room temperature is natural and uniform in order to guarantee... - Page 71 EINSTELLUNG DES LUFTSTROMS REGULACIÓN DEL FLUJO DE AIRE 3.14 Da die Kaltluft nach unten strömt und die Warmluft nach oben, Dado que el aire frío va hacia abajo y el aire caliente hacia arriba, empfiehlt es sich, zur Verbesserung der Kühl- und Heizwirkung die para mejorar los efectos de la refrigeración y del calentamiento, Winkelstellung der Schlitze so zu regulieren, dass die es oportuno regular el ángulo de las ranuras de tal modo que la...
-
Page 72: Manutenzione
3.15 MANUTENZIONE MAINTENANCE Il filtro dell'aria bloccato riduce gli effetti del raffreddamento/ A blocked air filter will reduce cooling/heating efficiency. riscaldamento. 3.15.1 Pulizia dell'unità interna Cleaning the indoor unit Scollegare l'alimentazione elettrica principale prima di effettuare la Disconnect the mains electrical supply before cleaning. pulizia. - Page 73 WARTUNG MANTENIMIENTO 3.15 Ein verstopfter Luftfilter reduziert die Wirkung der El filtro de aire bloqueado reduce los efectos del Kühlung/Heizung. refrigeración/calentamiento. Reinigung der Inneneinheit Limpieza de la unidad interior 3.15.1 Trennen Sie die elektrische Hauptstromversorgung vor der Desconecte la alimentación eléctrica principal antes de realizar Durchführung der Reinigung.
-
Page 74: Manutenzione
Attenzione: Attention: Non asciugare il filtro dell'aria esponendolo ad insolazione diretta Do not dry the air filter under direct sunlight or with flames. o con del fuoco. 5. Installare nuovamente il filtro 5. Re-install the filter 6. Installare e chiudere la griglia di ingresso aria seguendo, in ordine 6 Install and close the air inlet grill following steps 1 and 2 in the inverso le fasi 1 e 2 e collegare i cavi del quadro comandi ai reverse orders of and connect the control box cables to the... - Page 75 Achtung: Atención: Trocknen Sie den Luftfilter nicht, indem Sie diesen direkter No seque el filtro de aire exponiéndolo al sol directo o al fuego. Sonnenstrahlung oder Feuer aussetzen. 5. Installieren Sie den Filter erneut. 5. Coloque nuevamente el filtro. 6. Installieren Sie den Lufteingangsrost und schließen diesen. Gehen 6.
-
Page 76: Anomalie
ANOMALIE ANOMALIES SUGGERIMENTI PER L'ELIMINAZIONE GUASTI SUGGESTIONS FOR TROUBLESHOOTING Arrestare immediatamente il condizionatore nel caso si verifichi If any of the following anomalies should occur, stop the una delle seguenti anomalie. Scollegare l'alimentazione elettrica conditioner immediately. Disconnect the mains power supply e contattare il servizio di assistenza più... - Page 77 STÖRUNGEN ANOMALÍAS HINWEISE ZUR FEHLERBEHEBUNG SUGERENCIAS PARA LA REPARACIÓN DE AVERÍAS Stellern Sie beim Eintreten einer der folgenden Störungen die Apague inmediatamente el acondicionador si se verifica una Klimaanlage unverzüglich ab. Trennen Sie die elektrische de las siguientes anomalías. Desconecte la alimentación Stromversorgung und nehmen Sie Kontakt mit der nächsten eléctrica y contacte con el servicio de asistencia más cercano.
-
Page 78: Problemi Estranei Al Condizionatore
PROBLEMI ESTRANEI AL CONDIZIONATORE PROBLEMS OUTSIDE THE CONDITIONER Se si verifica una delle seguenti situazioni, il condizionatore sta If one of the following should occur, but the conditioner is running funzionando correttamente. correctly. 1. Protezione comune del compressore 1. Common compressor safety device Protezione del compressore - Il compressore non si riavvia per Compressor safety device - the compressor does not restart 3 minuti dopo che è... - Page 79 NICHT AUF DAS KLIMAGERÄT ZURÜCKZUFÜHRENDE PROBLEME PROBLEMAS AJENOS AL ACONDICIONADOR Wenn eine der folgenden Situationen eintritt, das Klimagerät korrekt Si se verifica una de las siguientes situaciones, el acondicionador está arbeitet. funcionando correctamente. 1. Gemeinsamer Kompressorschutz 1. Protección común del compresor Kompressorschutz - Der Kompressor schaltet sich 3 Minuten nach Protección del compresor - El compresor no se reenciende durante 3 dem Ausschalten nicht wieder ein.
- Page 80 SCHEMA ELETTRICO UNITA’ INTERNA (fig. 43) INDOOR UNIT WIRING DIAGRAM (fig. 43) CODICE TITOLO CODE TITLE nero black bianco white Y / G giallo/verde yellow/green giallo yellow rosso marrone brown blue CODICE TITOLO CODE TITLE VENTILATORE INTERNO INSIDE FAN ROOM TEMP.
- Page 81 ELEKTRISCHER SCHALTPLAN INNENEINHEIT (Abb. 43) ESQUEMA ELÉCTRICO UNIDAD INTERIOR (Fig. 43) CODE BEZEICHNUNG CÓDIGO TÍTULO Schwarz negro Weiß blanco Y / G Gelb/Grün amarillo/verde Gelb amarillo R o t rojo Braun marrón Blau azul CODE BEZEICHNUNG CÓDIGO TÍTULO VENTILATOR INNEN VENTILADOR INTERIOR ROOM RAUMTEMPERATUR...
- Page 82 NOTE NOTES...
- Page 83 HINWEIS NOTA INVERTER DUCTED...
Need help?
Do you have a question about the MULTIFLEXI DUCTED 9 HP HE and is the answer not in the manual?
Questions and answers