Table of Contents
Advertisement
Quick Links
Advertisement
Table of Contents

Subscribe to Our Youtube Channel
Related Manuals for Olimpia splendid MAESTRO PRO 12 HP-EVUNX


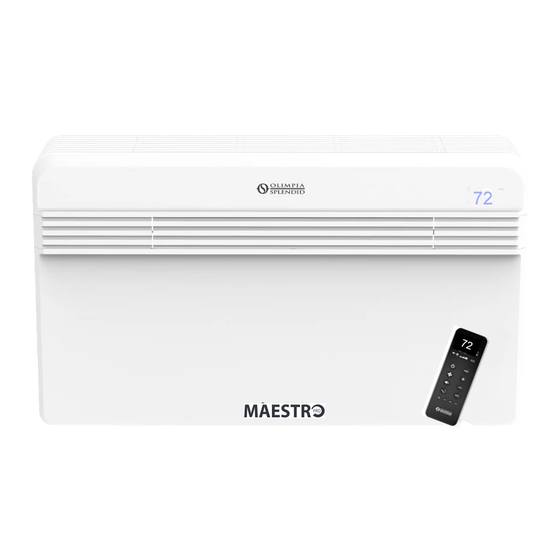
Summary of Contents for Olimpia splendid MAESTRO PRO 12 HP-EVUNX
- Page 1 12 HP - EVUNX SERVICE MANUAL...
-
Page 2: Table Of Contents
Included ........19 OLIMPIA SPLENDID S.p.A. Via Industriale 1/3 Cellatica (BS) 25060 Italy Position . - Page 3 ERROR 27 - DC overvoltage ....35 11.1 OLIMPIA SPLENDID APP ..... .59 8.3.26 ERROR 28 - DC undervoltage .
-
Page 4: Warnings And Safety Rules
WARNINGS AND SAFETY RULES WARNING WARNING READ THE INSTRUCTIONS DANGER OF ELECTROCUTION Read this manual carefully before performing any Ensure the power voltage and frequency match operation on the unit. those indicated on the unit’s identification plate. If Failure to do so could cause damage, injury or they do not, consult an authorized electrician. -
Page 5: Unit Description
UNIT DESCRIPTION Structure REF. DESCRIPTION REF. DESCRIPTION Safety thermostats Upper grill Compressor unit Display Left cover MAIN board Frame Condenser battery unit Pump unit Wire grill Basin heating cable Right cover Remote control Base POWER board Condenser fan IPM board Evaporator unit Electric resistance relay Evaporator fan... -
Page 6: Technical Characteristics
Technical characteristics Description MAESTRO PRO 12 HP EVUNX Model 02451 Power voltage VACc/Phase/Hz 208/230-1-60 Power voltage (min-max) 187/253 Nominal cooling/heating capacity (1) Btu/h 7,400/7,300 Maximum cooling/heating capacity (2) Btu/h 10,700/10,200 Nominal energy consumption - cooling Nominal energy consumption - heating Combined energy efficiency ratio - cooling (3) CEER Estimated performance coefficient... -
Page 7: Maestro Pro 12 Hp Evunx Dimensions
Maestro Pro 12 HP EVUNX dimensions 904 (35.6”) 216 (8.5”) 48 (1.9”) 805 (31.7”) 8” 8” 6.4” 442 (17.4”) 140 (5.5”) 1 = 1mm 472 (18.6”) 261 (10.3”) mm (Inch) DESCRIPTION MAESTRO PRO 12 HP EVUNX 900 x 518 x 215 Dimensions (excluding packaging) (inches) (35.5”... -
Page 8: Control Panel
2.4.1 Operating conditions Control panel FUNCTION DISPLAY LED2 LED1 Stand-by 18÷30°C MODE Display Cooling BLUE 64÷86°F 16÷30°C Heating 61÷86°F Dehumidification BLUE MODE Display Automatic Maximum fan speed Medium fan speed DESCRIPTION ON/OFF Minimum fan speed - Press to select speed - Press and hold to activate/deactivate Reduce setpoint temperature Automatic fan speed... -
Page 9: Remote Control
FUNCTION DISPLAY LED2 LED1 Remote control Temperature unit - CEL- The remote control serves as the interface between the unit and SIUS the user. It is very important that you learn all of the functions, how to use the commands and the meaning of the symbols used. Temperature unit - FAHRENHEIT 2.5.1... -
Page 10: Display
2.5.2 Display 2.5.3 SILENT mode This mode can be selected on the remote control (key 3) or on the serial port, and can be used only in combination with cooling or heating modes. When cooling mode is enabled with noise reduction, the external and internal fans are forced to operate at low speed. -
Page 11: Warning
2.5.5 Energy BOOST / System ENABLE has no effect when the unit is in fan, dehumidifier or automatic mode. 2.5.5.1 System ENABLE WINDOW contact Contact open: the unit is in stand-by and cannot be enabled using the remote control or the touch pad. Contact closed: the unit is ready and can be enabled. -
Page 12: User Menu Interface
USER MENU INTERFACE How to select a temperature unit (Celsius or High/low wall installation configuration Fahrenheit) The unit can be installed either high or low on a wall. Depending How to set the unit on the installation location (high or low), the electronic configu- ration may need to be modified to optimize the deflector angles. -
Page 13: Operating Logic
OPERATING LOGIC Heating with resistances Cooling Electric resistances: switch on and off based on a setpoint and Compressor: modulation and shutdown based on setpoint and ambient temperature. ambient temperature. ELECTRIC RESISTANCE ELECTRIC RESISTANCE COMPRESSOR COMPRESSOR Tset -1°C Tset +1°C Tset -1°C Tset +1°C Internal fan: automatic mode Internal fan: automatic mode... -
Page 14: Defrost
Defrost Defrost frequency COMPRESSOR Min. Fre. Min. Fre. 4 VALVE EXTERNAL Remote speed control Remote speed control INTERNAL Hot air stop in heating mode Open heating Open heating Open defrost 4-valve TIME Start delay Start Defrost Defrost End Defrost Activation conditions: Stop conditions: –... -
Page 15: Dehumidifier
Dehumidifier Fan only Dehumidification mode can be selected only on the infrared recei- Fan mode can be selected only on the infrared receiver (key 10), ver (key 10) or on the serial port (not on the display); the following on the display (key 5) or on the serial port; DISPLAY ‘--’ and LE- message is displayed: DISPLAY ‘-’... -
Page 16: Thermal Actuator
Thermal actuator Condensation drainage pump In FAN mode Pump activation conditions for cooling and dehumidification: The condensation valve is always closed. Only when compressor is enabled In AUTOMATIC mode FLOAT SWITCH PUMP Pump and condensation valve management depends on the ope- rating mode (cooling, heating or fan). -
Page 17: Circuit Diagram
CIRCUIT DIAGRAM DESCRIPTION MAESTRO PRO 12 HP EVUNX 208/230 AC Volt Power voltage (min 187 - max 253) Phase Hertz MAESTRO PRO 12HP EVUNX... -
Page 18: Coolant Circuit
COOLANT CIRCUIT Cooling refrigerant circuit with four-way valve EXTERNAL COOLING HOUSE EXPANSION VALVE Heating refrigerant circuit with four-way valve EXTERNAL HEATING HOUSE EXPANSION VALVE DESCRIPTION TYPE QUANTITY Coolant charge (factory) 0,42 NOTE: The coolant circuit is sealed. -
Page 19: Installation
INSTALLATION Included Position 7.2.1 Ceiling installation min 60 2,4” MODE 3,2” MODE WARNING Check that for this type of installation, parameter “P0” is set to “uP” REF. DESCRIPTION MAESTRO PRO 12HP EVUNX 7.2.2 Floor installation Remote control, batteries included User and Maintenance Manual & warranty Adhesive insulating strip External air input and output grills, including chains and grill installation kit... -
Page 20: Assembly
Assembly SIPHON TANK 7.3.1 Drilling holes in walls 300mm 12” 7.3.3 Connecting condensation drainage to the unit 7.3.2 Condensation drainage 3°... -
Page 21: Air Conduit
7.3.4 Air conduit ø202 8” ø162 6,5” 7.3.5 External grills 5,1” MAESTRO PRO 12HP EVUNX... -
Page 22: Location Of Holes On The Unit
7.3.6 Location of holes on the unit ATTENTION DANGER OF CUTTING We have taken great care to minimize the num- ber of sharp edges. However, you should still wear gloves or other hand protection when handling the unit. Failure to follow these instructions could cause mi- nor or moderate injuries. -
Page 23: Electrical Connections
Electrical connections Turning on the unit WARNING DANGER OF ELECTROCUTION AND/OR UNIT OPERATION Failure to follow these instructions could cause injury or death and/or damage to the unit. – The unit MUST be grounded. – Do not use extension cords. –... -
Page 24: Alarm Diagnostic
ALARM DIAGNOSTIC 8.1.2 Internal alarms When there is an alarm, the compressor shuts off and an alarm code is displayed. The alarm can be automatically reset in three minutes (if condi- DESCRIPTION DISPLAY tions are normal), or by restarting the unit (using the ON/OFF key). Internal temperature sensor failure (Troom) An LED on the main IPM board indicates the alarm displayed. -
Page 25: Ipm Board Alarms
8.3.2 Error 2 - External exchanger temperature sen- IPM board alarms sor failure 8.3.1 ERROR 1 - External air temperature sensor fai- lure ERROR 2 External exchanger temperature sensor failure ERROR 1 External air sensor failure Connect the sensor correctly sensor connected Connect the to the board... -
Page 26: Error 3 - Compressor Drainage Temperature Sensor Failure
8.3.3 ERROR 3 - Compressor drainage temperature 8.3.4 ERROR 4 - POWER board high temperature sensor failure protection Start-up ERROR 3 Dimension Ø 0.4 Ø 0.4 Ø 0.4 (AWG / mm (inch) (0,015”) (0,015”) (0,015”) Compressor drainage temperature sensor failure Type MW30-C MW30-C... -
Page 27: Error 5 - No Communication Between Ipm-Idu Boards
8.3.5 ERROR 5 - No communication between IPM-I- 8.3.6 ERROR 6 - Incorrect compressor start-up (pha- DU boards se loss, inverted rotation) ERROR 6 Incorrect compressor start-up ERROR 5 No IPM-IDU board communication Check power Contact voltage electricity Are values within the the safety supplier Reset... -
Page 28: Error 8 - Dc Over/Under Voltage
8.3.8 ERROR 8 - DC over/under voltage 8.3.9 ERROR 9 - Current anomaly ERROR 8 ERROR 9 DC over/under voltage Current anomaly Check Does the absorption. Replace IPM pressure switch Check installation Is it between 1.0A board activate? and 16A? Check Reset the safety... -
Page 29: Error 10 - External Exchanger Temperature Too High (Hte)
8.3.10 Error 10 - External exchanger temperature too high (HTE) ERROR 10 External exchanger temperature too high (HTE) Check external exchanger external exchanger temperature sensor probe temperature greater (ERROR 2) than 64°C? the air inlet/ Repair hoses outlet hoses clear of obstructions? Does Check mechanical blocks and... -
Page 30: Error 11 - Dc Over/Under Voltage
8.3.11 ERROR 11 - DC over/under VOLTAGE 8.3.13 ERROR 13 - Compressor drainage temperature too high ERROR 11 DC over/under voltage ERROR 13 Compressor drainage temperature too high Check voltage and current (ref. ERROR 6) Is the compressor Check sensor drainage temperature (Ref. -
Page 31: Error 14 - Ambient Temperature Sensor Failure
8.3.14 ERROR 14 - Ambient temperature sensor fai- 8.3.16 ERROR 16 - Internal air exchanger temperature too low lure ERROR 16 ERROR 14 Internal air exchanger Ambient temperature sensor temperature too low failure Connect the sensor connected sensor correctly to the internal Check sensor correctly? -
Page 32: Error 17 - Internal Exchanger Temperature Too High (Hti)
8.3.17 ERROR 17 - Internal exchanger temperature 8.3.18 ERROR 19 - Internal fan motor failure too high (HTI) ERROR 19 Internal fan error ERROR 17 Internal exchanger temperature too high (HTI) there Remove blockage mechanical Is the Check sensor internal exchanger blockages? temperature greater (Ref. -
Page 33: Error 20 - High Water Level
8.3.19 ERROR 20 - High water level ERROR 20 High water level alarm COOLING HEATING which mode is the unit operating? the battery Clean battery condensation clean? drainage hose Provide drainage/ installed and free of clear obstruction obstructions? distributor clear of Clean distributor obstructions? the thermal... -
Page 34: Error 21 - Eeprom Reading Error
8.3.20 ERROR 21 - EEPROM reading error 8.3.22 ERROR 24 - External temperature too high for heating mode ERROR 24 ERROR 21 External temperature too high EEPROM reading error for heating mode Check IDU board connection External Operating outside temperature is product limits greater than 33°C... -
Page 35: Error 25 - Internal Ambient Temperature Too Low For Cooling Mode
8.3.23 ERROR 25 - Internal ambient temperature too 8.3.25 ERROR 27 - DC overvoltage low for cooling mode ERROR 27 DC overvoltage ERROR 25 Internal ambient temperature too low for cooling mode Does the pressure Check installation switch activate? External Operating outside temperature is product limits... -
Page 36: Error 28 - Dc Undervoltage
8.3.26 ERROR 28 - DC undervoltage 8.3.27 ERROR 30 - Compressor current protection ERROR 28 ERROR 30 DC undervoltage Compressor current protection Does Check Replace IPM the pressure Check installation absorption. board switch activate? Over 16A? Check Check U-V-W voltage terminals between DC+ Correct... -
Page 37: Error 31/32 - Driver Board Ac Voltage Protection Too High/Low
8.3.28 ERROR 31/32 - Driver board AC voltage pro- 8.3.29 ERROR 50 - Electric resistance error tection too high/low ERROR 50 ERROR 31/32 Electric resistance error Driver board AC voltage pro- tection too high/low Check electric resistance connection Does Check the pressure installation switch activate? -
Page 38: Components
COMPONENTS IPM board WARNING DANGER OF ELECTROCUTION Disconnect from power source before performing maintenance or cleaning. Failure to follow these instructions could cause electrical shock, serious injury or death. EXV - electronic expansion valve EEPROM parameters DESCRIPTION U.M. VALUE Maximum low-noise compressor frequency (same yellow black blue... -
Page 39: Odu Board
ODU board Display Thermal actuator and shutter MAIN board External air probe EEPROM parameters Default DESCRIPTION MIN IDU fan speed 950 Rpm MAX IDU fan speed 1050 Rpm MAESTRO PRO 12HP EVUNX... -
Page 40: Internal Air Probe
Internal air probe 9.11 ODU probe POSITION DESCRIPTION HELI XH-2Y (Alternative) White White CWB TJC3 Housing (Alternative) White JST XhP-2 (Alternative) HELI XH-2Y Terminal CWB TJC3 (Alternative) POSITION DESCRIPTION JSTSXH-001T-P0,6 (Alternative) Housing TJC3-6Y CWB R25 - 10 KOhm ±3% Probe Terminal TJC3-TER CWB B25/100 = 3988 K ±0.5%... -
Page 41: Level Sensor
9.12 Level sensor 9.15 Compressor 9.13 Basin resistance CABLES Cable dimension (AWG/ Ø 0,4 Ø 0,4 Ø 0,4 mm2) (inch) (0,015”) (0,015”) (0,015”) Cable type MW30-C MW30-C MW30-C Coils Volt CC resistance ±10% at 20°C Ω 9.16 Internal fan 9.14 Pump MAESTRO PRO 12HP EVUNX... -
Page 42: External Fan
9.17 External fan 9.19 Reinforced electric resistances GND - RED = 310 vdc 9.20 Thermostats GND - WHITE = 15 vdc GND - YELLOW = 1,5-6 vdc GND - BLUE = 0-15 vdc (OUTPUT) ù 9.18 Evaporator battery... -
Page 43: Condenser Battery
9.21 Condenser battery 9.24 Pressure switch 9.22 Flap motor 9.23 Condensation distributor unit MAESTRO PRO 12HP EVUNX... -
Page 44: Component Disassembly
10 COMPONENT DISASSEMBLY WARNING WARNING DANGER OF ELECTROCUTION DANGER OF FIRE Disconnect from power source before performing Use extreme caution when using a blowtorch. Follow all recom- maintenance or cleaning. mended safety instructions and protect the surrounding area with fireproof material. Keep a fire extinguisher within reach. Failure to follow these instructions could cause Failure to follow these instructions could cause moderate or se- electrical shock, serious injury or death. -
Page 45: Removing The Filter
Remove the air purification filter (green) and the charcoal filter 10.1 Removing the filter (black) from the filter unit. Lift the upper grate (1). GREEN BLACK 10.2 Removing the frame Remove the bezels (1), sliding them outward. Seize the tabs (2), pull upward and remove the filter unit. MAESTRO PRO 12HP EVUNX... -
Page 46: Removing The
Open the upper grill and remove the screws (1). Remove the frame 10.3 Removing the front cover Remove the screws (2) behind the grill and the screws (3) on the Remove all screws (1). bottom. -
Page 47: Removing The Back
Remove the cover (2). Remove the back (3), taking care not to disconnect the con- nections or the external air probe. 10.4 Removing the back 10.5 Removing the external fan Remove the frame (ref. “10.2 Removing the frame” a pagina 45). Remove the frame (ref. -
Page 48: Removing The Internal Fan
Gently remove the external fan (2) and disconnect the electrical Gently remove the fan (2), taking care not to break the blades. connections. 10.7 Removing the front IDU electronic cover 10.6 Removing the internal fan Remove all screws (1). Remove the frame (ref. “10.2 Removing the frame” a pagina 45). Remove the front IDU electronic cover (2) and remove the con- Remove the back (ref. -
Page 49: Removing The Display Inverter Board
10.8 Removing the display inverter board. 10.10 Removing the MAIN board Disconnect the connectors. Remove the front cover (ref. “10.3 Removing the front cover” a Remove all screws (1). pagina 46). Gently remove the display inverter board (2) from its slot. Remove the front IDU electronic cover (ref. -
Page 50: Removing The Odu Electronic Unit
10.12 Removing the ODU electronic unit 10.14 Removing the IPM board Remove the cover (ref. “10.11 Removing the ODU electronic co- Remove the ODU electronic unit (ref. “10.12 Rimozione gruppo ver” a pagina 49). elettronica ODU” a pagina 49). Disconnect all electrical connectors and remove the screws (1). Disconnect all electrical connectors and remove the screws (1). -
Page 51: Removing The Pump/Sensors/Shutter Unit
10.16 Removing the pump/sensors/shutter unit 10.17 Removing the cable cover Remove the condensation hose (2). Remove the screws (1) from the cover and the condensation hose Remove the screws (1). (2). Gently remove the unit (3), taking care not to detach the cables. Remove the cover (3), taking care not to damage the tabs (4). -
Page 52: Removing The Thermal Actuator And Shutter
10.18 Removing the thermal actuator and shutter 10.19 Removing the pump Remove the cable cover (ref. “10.16 Removing the pump/sensors/ Remove the cable cover (ref. “10.16 Removing the pump/sensors/ shutter unit” a pagina 51). shutter unit” a pagina 51). Disconnect the thermal actuator connectors (5) and remove the Use the tabs (1) to disconnect the pump (2) and remove it, taking screws (6). - Page 53 pump/sensors/shutter unit” a pagina 51). Rotate the condensation distributor unit (6) and remove it. Disconnect the condensation drainage hose (2). N.B.: Take care not to break the attachment tip (A). N.B.: To clean the condensation distributor unit, fill it with water, shake and pour the water out.
-
Page 54: Charging/Discharging Coolant
tor (7). 10.21 Charging/discharging coolant NOTE: Protect the components during welding. 10.21.1 Unit with rear charge The unit with rear charge has an access opening to the coolant drainage hoses. Gently rotate the coolant charge/discharge hose (1). NOTE: Before inserting the internal valve, cool the hose using a damp cloth to prevent it from burning. -
Page 55: Removing The Condenser Battery Unit
10.22 Removing the condenser battery unit 10.23 Removing the evaporator battery Remove the frame (ref. “10.2 Removing the frame” a pagina 45). Remove the frame (ref. “10.2 Removing the frame” a pagina 45). Remove the front cover (ref. “10.3 Removing the front cover” a Remove the back (ref. -
Page 56: Removing The Compressor
Remove the evaporator battery (5), taking care not to crush the 10.24 Removing the compressor fins. Remove the frame (ref. “10.2 Removing the frame” a pagina 45). Remove the front cover (ref. “10.3 Removing the front cover” a pagina 46). Remove the back (ref. -
Page 57: Removing The Pump Switches
Unscrew the bolts from the compressor base (6). Remove the screws and remove the electrical connection cap Gently remove the compressor (7). (3). Disconnect the cables (4). 10.25 Removing the pump switches Remove the cable cover (ref. “10.18 Removing the thermal actua- tor and shutter”... -
Page 58: Removing Electric Resistances
10.26 Removing electric resistances 10.27 Removing the safety thermostats Remove the frame (ref. “10.2 Removing the frame” a pagina 45). Remove the frame (ref. “10.2 Removing the frame” a pagina 45). Remove the front cover (ref. “10.3 Removing the front cover” a Remove the front cover (ref. -
Page 59: External Connections
Contact the original supplier for assistance. 11.1.1 App download and installation You can download the OLIMPIA SPLENDID app to your device from Google Play Store or Apple Store. See the information provided in Play Store or Apple Store for sup- ported operating systems. -
Page 60: Login
11.1.4 Login – Select your device from a category in the list. If you have already registered: – Click on “Log in”. – Enter your e-mail address, then click on “Log in”. – Ensure the device is connected to the Wi-Fi router you want to use. -
Page 61: Scenes
– Select “Confirm indicator rapidly blinks” for “EZ” mode, and – Once the device is connected, you can rename it and select the press “Next”. room in which it is located. – Select “Confirm indicator slowly blinks” for “AP” mode, and press “Next”. - Page 62 – Select “Tap-to-run” if you want one more commands to be exe- cuted when you select the desired activity.
-
Page 63: Regular Maintenance
12 REGULAR MAINTENANCE WARNING 12.3 Drain condensation water DANGER OF ELECTROCUTION Disconnect from power source before performing maintenance or cleaning. Failure to follow these instructions could cause electrical shock, serious injury or death. 12.1 Replacing filter It is important to clean the air filter regularly to guarantee effective internal air filtration and correct operation of your air conditioner. -
Page 64: Probe Value Tables
13 PROBE VALUE TABLES 13.1 Sensor table ALL SENSORS EXCEPT FOR COMPRESSOR PROBE (10 KOHM 25 C) TX °C RMIN (KΩ) RNOM (KΩ) RMAX (KΩ) TX °C RMIN (KΩ) RNOM (KΩ) RMAX (KΩ) TX °C RMIN (KΩ) RNOM (KΩ) RMAX (KΩ) 333.6 349.2 365.4... -
Page 65: Compressor Probe Table
13.2 Compressor probe table COMPRESSOR DISCHARGE PROBE TX °C RMIN (KΩ) RNOM (KΩ) RMAX (KΩ) TX °C RMIN (KΩ) RNOM (KΩ) RMAX (KΩ) TX °C RMIN (KΩ) RNOM (KΩ) RMAX (KΩ) 873.7 908.5 944.6 34.96 35.43 35.91 3.663 3.797 3.935 820.9 853.0 886.3... - Page 67 MAESTRO PRO 12HP EVUNX...
- Page 68 CONTACT INFORMATION: Olimpia Splendid USA 870 International Parkway Suite 120 Flower Mound, TX 75022 TECHNICAL SUPPORT Phone: (800) 408-5196 Ext 103 Email: techsupport@olimpiasplendidusa.com...
Need help?
Do you have a question about the MAESTRO PRO 12 HP-EVUNX and is the answer not in the manual?
Questions and answers