Moxa Technologies EtherDevice EDS-528E Series Quick Installation Manual
Hide thumbs
Also See for EtherDevice EDS-528E Series:
- Quick installation manual (18 pages) ,
- User manual (123 pages) ,
- User manual (38 pages)

Related Manuals for Moxa Technologies EtherDevice EDS-528E Series


Summary of Contents for Moxa Technologies EtherDevice EDS-528E Series
- Page 1 EDS-528E Series Quick Installation Guide Moxa EtherDevice™ Switch Version 2.2, January 2021 Technical Support Contact Information www.moxa.com/support 2021 Moxa Inc. All rights reserved. P/N: 1802005280013 *1802005280013*...
-
Page 2: Package Checklist
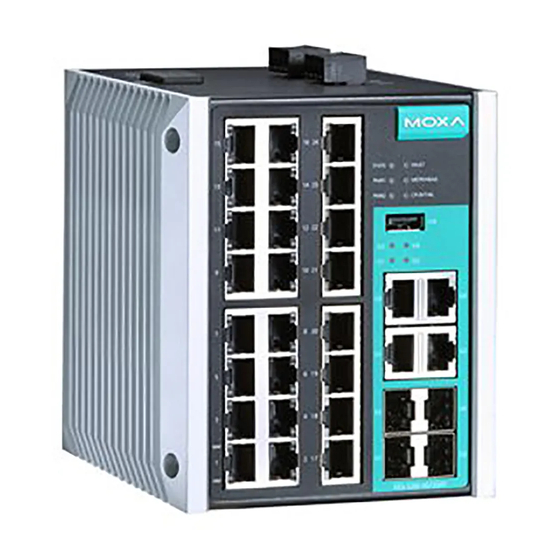
Package Checklist The EDS-528E is shipped with the following items. If any of these items are missing or damaged, please contact your customer service representative for assistance. • 1 EDS-528E Ethernet switch • USB cable • Protective caps for unused ports •... - Page 3 Panel Views of EDS-528E-LV 1. Reset button 2. USB console port 3. DIP switches for Turbo Ring, Ring Master, and Ring Coupler 4. Grounding screw 5. 4-pin terminal block for digital input and power input 2 6. 4-pin terminal block for relay output and power input 1 7.
- Page 4 Panel Views of EDS-528E-HV 1. Reset button 2. USB console port 3. DIP switches for Turbo Ring, Ring Master, and Ring Coupler 4. Grounding screw 5. 5-pin terminal block for power input 1 and ground for surge protection 6. 4-pin terminal block for relay output and digital input 7.
-
Page 5: Mounting Dimensions
Mounting Dimensions Unit = mm (inch) - 5 -... -
Page 6: Din-Rail Mounting
DIN-Rail Mounting The metal DIN-rail kit is fixed to the back panel of the EDS-528E when you take it out of the box. Mount the EDS-528E on corrosion-free mounting rails that meet the EN 60715 standard. Installation STEP 1: Insert the upper lip of the DIN rail into the DIN-rail mounting kit. STEP 2: Press the EDS-528E series towards the DIN rail until it snaps into place. -
Page 7: Wall Mounting (Optional)
Wall Mounting (Optional) For some applications, you will find it convenient to mount the Moxa EDS-528E on a wall, as shown in the following illustrations: STEP 1: Remove the aluminum DIN-rail attachment plate from the rear panel of the EDS-528E, and then attach the wall mount plates with M3 screws, as shown in the figure at the... -
Page 8: Wiring Requirements
Wiring Requirements WARNING Do not disconnect modules or wires unless power has been switched off or the area is known to be non-hazardous. The devices may only be connected to the supply voltage shown on the type plate. The devices are designed for operation with a Safety Extra-Low Voltage. - Page 9 Grounding the Moxa EDS-528E Grounding and wire routing help limit the effects of noise due to electromagnetic interference (EMI) and Electromagnetic Susceptibility (EMS). Run the ground connection from the ground screw to the grounding surface prior to connecting devices. EDS-528E-LV: EDS-528E-HV: ATTENTION This product is intended to be mounted to a well-grounded...
-
Page 10: Wiring The Relay Contact
Wiring the Relay Contact The EDS-528E series has one relay output. This relay contact uses two contacts of the terminal block on the EDS-528E’s top panel. Refer to the next section for detailed instructions on how to connect the wires to the terminal block connector, and how to attach the terminal block connector to the terminal block receptor. -
Page 11: Wiring The Power Input
Wiring the Power Input (Universal high-voltage (HV) model: 110/220 VDC/VAC) The EDS-528E-4GTXSFP-HV model (110/220 VDC/VAC) has one set of power inputs (PWR 1)—Pin 1 (V-/Neutral) and Pin 5 (V+/Line). Properly insert the 5-pin terminal block connector prongs into the terminal block receptor on the EDS-528E-4GTXSFP-HV unit. -
Page 12: Communication Connections
STEP 3: Insert the plastic terminal block connector prongs into the terminal block receptor, which is located on the EDS-528E’s top panel. Communication Connections Each EDS-528E switch has 4 types of communication ports: • 1 USB console port (type B connector) •... -
Page 13: 10/100Baset(X) Ethernet Port Connection
10/100BaseT(X) Ethernet Port Connection The 10/100BaseT(X) ports located on the EDS-528E’s front panel are used to connect to Ethernet-enabled devices. Most users will choose to configure these ports for Auto MDI/MDI-X mode, in which case the port’s pinouts are adjusted automatically depending on the type of Ethernet cable used (straight-through or cross-over), and the type of device (NIC-type or HUB/Switch-type) connected to the port. -
Page 14: 1000Baset Ethernet Port Connection
1000BaseT Ethernet Port Connection 1000BaseT data is transmitted on differential TRD+/- signal pairs over copper wires. MDI/MDI-X Port Pinouts Signal TRD(0)+ TRD(0)- TRD(1)+ TRD(2)+ TRD(2)- TRD(1)- TRD(3)+ TRD(3)- 100/1000BaseSFP (mini-GBIC) Fiber Port The Gigabit Ethernet fiber ports on the EDS-528E are 100/1000BaseSFP fiber ports, which require using 100M or 1G mini-GBIC fiber transceivers to work properly. -
Page 15: Reset Button
Reset Button The Reset Button supports two functions. One is to reset the Ethernet switch to factory default settings by pressing and holding the Reset button for 5 seconds. Use a pointed object, such as a straightened paper clip or toothpick, to depress the Reset button. This will cause the STATE LED to blink once a second. -
Page 16: Led Indicators
“Turbo Ring V2” DIP Switch Settings DIP 1 DIP 2 DIP 3 DIP 4 ON: Enables the ON: Enables this ON: Enables the ON: Activates default “Ring EDS as the Ring default “Ring DIP switch 1, 2, Coupling Master. Coupling” port. and 3 to (backup)”... - Page 17 Color Status Description 1. The signal contact is open. 2. ABC Loading/Saving Fail. 3. The port is being disabled because the ingress multicast and broadcast FAULT packets exceed the ingress rate limit. 4. Incorrect loop connection in a single switch. 5.
-
Page 18: Specifications
Color Status Description TP port’s 10 Mbps link is active. Amber Blinking Data is being transmitted at 10 Mbps. (TP) TP port’s 10 Mbps link is inactive. TP/SFP combo port’s 100 Mbps link is 100M active. (TP/ Amber Blinking Data is being transmitted at 100 Mbps. combo TP/SFP combo port’s 100 Mbps link is ports) - Page 19 Power Input Voltage LV Model: 12/24/48/-48 VDC, redundant dual inputs HV Model: 110/220 VDC/VAC Input Current LV Model: 0.47 A @ 24 VDC HV Model: 0.21/0.13 A @110/220 VAC 0.11/0.055 A @ 110/220 VDC Connection LV Model: 2 removable 4-contact terminal blocks HV Model: 1 removable 5-contact and 1 removable 4-contact terminal blocks Inrush current...
Need help?
Do you have a question about the EtherDevice EDS-528E Series and is the answer not in the manual?
Questions and answers