Table of Contents
Advertisement
Available languages
Available languages
Quick Links
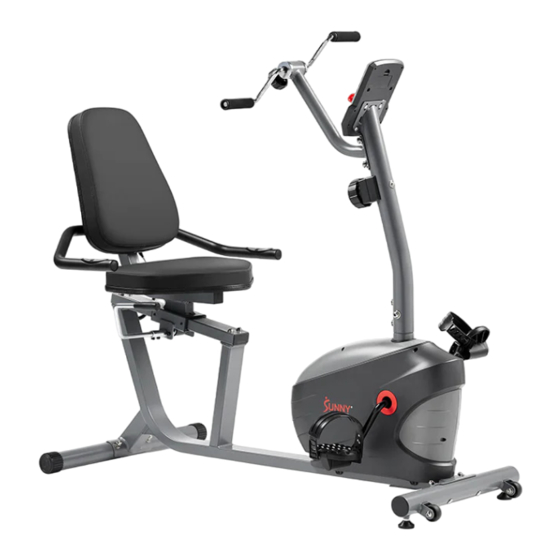
SMART MAGNETIC RECUMBENT BIKE
English, Pages 1~14
Español, Páginas 15~28
Français, Pages 29~42
Deutsch, Seiten 43~56
Italiano, Pagine 57~70
WITH HAND CYCLE
SF-RB423034
USER MANUAL
IMPORTANT! Please retain owner's manual for maintenance and adjustment instructions.
Your satisfaction is very important to us, PLEASE DO NOT RETURN UNTIL YOU HAVE
CONTACTED US: support@sunnyhealthfitness.com or 1-877-90SUNNY (877-907-8669).
IMPORTANTE Por favor, conserve el manual del propietario para las instrucciones de
mantenimiento y ajuste. Su satisfacción es muy importante para nosotros, POR FAVOR NO
DEVUELVA EL PRODUCTO HASTA QUE SE HAYA COMUNICADO CON NOSOTROS:
support@sunnyhealthfitness.com o 1-877-90SUNNY (877-907-8669).
IMPORTANT ! Veuillez conserver le manuel du propriétaire pour les instructions d'entretien et
de réglage. Votre satisfaction est très importante pour nous, VEUILLEZ NE PAS
RETOURNER AVANT DE NOUS AVOIR CONTACTE : support@sunnyhealthfitness.com ou
1-877-90SUNNY (877-907-8669).
WICHTIG! Bitte bewahren Sie das Benutzerhandbuch für Wartungs- und
Einstellanweisungen auf. Ihre Zufriedenheit ist uns sehr wichtig. BITTE SENDEN SIE NICHT
ZURÜCK, BEVOR SIE UNS KONTAKTIERT HABEN: support@sunnyhealthfitness.com
oder 1-877-90SUNNY (877-907-8669).
IMPORTANTE! Conservare il manuale d'uso per le istruzioni di manutenzione e regolazione.
La vostra soddisfazione è molto importante per noi, VI PREGO DI NON RESTITUIRE IL
PRODOTTO PRIMA DI AVERCI CONTATTATO: support@sunnyhealthfitness.com o
1-877-90SUNNY (877-907-8669).
Advertisement
Table of Contents

Related Manuals for Sunny SF-RB423034


Summary of Contents for Sunny SF-RB423034
- Page 1 SMART MAGNETIC RECUMBENT BIKE WITH HAND CYCLE SF-RB423034 USER MANUAL IMPORTANT! Please retain owner’s manual for maintenance and adjustment instructions. English, Pages 1~14 Your satisfaction is very important to us, PLEASE DO NOT RETURN UNTIL YOU HAVE CONTACTED US: support@sunnyhealthfitness.com or 1-877-90SUNNY (877-907-8669).
-
Page 2: Important Safety Information
IMPORTANT SAFETY INFORMATION We thank you for choosing our product. To ensure your safety and health, please use this equipment correctly. It is important to read this entire manual before assembling and using the equipment. Safe and effective use can only be achieved if the equipment is assembled, maintained and used properly. -
Page 3: Pre-Assembly Check List
PRE-ASSEMBLY CHECK LIST Before you start to assemble, please make sure all parts are included. Description Spec. Qty. Description Spec. Qty. Main Frame Seat Front Stabilizer Backrest Φ55.5xM8x18 Rear Stabilizer Adjustment Knob Handlebar Post Support Tube Handlebar Meter TZ-4112 Rail Manual Adjustment Handle Hardware Package... -
Page 4: Hardware Package
HARDWARE PACKAGE Ordering Replacement Parts (U.S. and Canadian Customers only) Please provide the following information in order for us to accurately identify the part(s) needed: ✓ The model number (found on cover of manual) ✓ The product name (found on cover of manual) ✓... - Page 5 ASSEMBLY INSTRUCTIONS We value your experience using Sunny Health and Fitness products. For assistance with parts or troubleshooting, please contact us at support@sunnyhealthfitness.com or 1-877-90SUNNY (877-907-8669). STEP 1 Remove the 2 Paper Tubes (No. E) from the Main Frame (No. 1) Remove the 4 Carriage Bolts (No.
- Page 6 We value your experience using Sunny Health and Fitness products. For assistance with parts or troubleshooting, please contact us at support@sunnyhealthfitness.com or 1-877-90SUNNY (877-907-8669). STEP 3 Connect the Pulse Extension Wire 2 (No. 65) to the Pulse Extension Wire 1 (No. 64) and connect the Sensor Wire (No.
- Page 7 We value your experience using Sunny Health and Fitness products. For assistance with parts or troubleshooting, please contact us at support@sunnyhealthfitness.com or 1-877-90SUNNY (877-907-8669). STEP 4 Screw the Adjustment Knob (No. 50) onto the Support Tube (No. 51). Remove 4 Arc Washers (No. 19), 4 Spring Washers (No.
- Page 8 We value your experience using Sunny Health and Fitness products. For assistance with parts or troubleshooting, please contact us at support@sunnyhealthfitness.com or 1-877-90SUNNY (877-907-8669). STEP 5 Lock the Rail (No. 8) to the Main Frame (No. 1) with 4 Bolts (No. 15) and 4 Flat Washers (No.
- Page 9 We value your experience using Sunny Health and Fitness products. For assistance with parts or troubleshooting, please contact us at support@sunnyhealthfitness.com or 1-877-90SUNNY (877-907-8669). STEP 6 Remove 2 Screws (No. 17), 2 Spring Washers (No. 26), 2 Flat Washers (No. 25) and Rear Fixing Plate (No. 9) from Seat Bracket (No.
-
Page 10: Adjustment Guide
ADJUSTMENT GUIDE ADJUSTING THE LEVEL If at any point the bike does not feel leveled, you can adjust the Adjustment Pads (No. 53) on the Front Stabilizer (No. 2). ADJUSTING THE SEAT POSITION To move the Seat (No. 40) forward or backward, while seated on the bike, put your feet on the floor. -
Page 11: Battery Installation And Replacement
BATTERY INSTALLATION & REPLACEMENT Battery Battery Cover BATTERY INSTALLATION 1. Take out 2 AAA batteries from meter box. 2. Press down on the buckle of battery cover on the Meter (No. 66), then remove battery cover. 3. Install 2 AAA batteries into the battery case on the back of the Meter (No. 66). Pay attention to the battery + and –... -
Page 12: Function Buttons
EXERCISE METER FUNCTION BUTTONS: MODE: Press the button to select TMR (TIME), DST (DISTANCE), and CAL (CALORIES) to preset. Press the button for selection function display value on LCD or enter after setting. Press the button and hold for 3 seconds to reset all values except odometer to zero. -
Page 13: App Connection
7. CAL (CALORIES): Accumulates calories burned during training from 0.0 to 9999 (Cal). The user may also preset the target calories before training by pressing the SET & MODE buttons. Each setting increment is 1 Cal and will automatically count down from target value during exercise. -
Page 14: Parts List
PARTS LIST Description Spec. Qty. Description Spec. Qty. Main Frame Pulse Sensor Φ55.5xM8x18 Front Stabilizer Adjustment Knob Rear Stabilizer Support Tube Φ25x104 Handlebar Post Crank Sleeve Φ38x18 Seat Bracket Adjustment Pad Φ32.7xΦ25.3x60 Handlebar Plastic Spacer Crank Cover 0.5x55x55 Upper Block 38x34x36.2 Φ25x38 Rail... - Page 15 Description Spec. Qty. Description Spec. Qty. Screw M6x15 Phillips Head Screw M6x10 Screw ST4.2x19 Allen Wrench S10,S13,S14,S1 Screw ST4.2x18 Spanner 5,S17 Φ1.6xΦ15xL47.2 Spring Allen Wrench Φ50 D17xΦ22x0.5 Sealing Ring Flat Washer Spring Washer Adjusting Bolt M6x36 Φ12x61 Magnetic Board Axle Support Plate Magnetic Board Screw...
-
Page 16: Información De Seguridad Importante
INFORMACIÓN DE SEGURIDAD IMPORTANTE Le agradecemos que haya elegido nuestro producto. Para garantizar su seguridad y su salud, utilice este equipo correctamente. Es importante que lea este manual en su totalidad antes de montar y utilizar el equipo. Sólo se puede lograr un uso seguro y eficaz si el equipo se monta, se mantiene y se utiliza correctamente. - Page 17 LISTA DE COMPROBACIÓN PREVIA AL MONTAJE Antes de empezar a montar, asegúrese de que se incluyen todas las piezas. n.º Descripción Espec. Cant. n.º Descripción Espec. Cant. Bastidor Principal Asiento Estabilizador Delantero Respaldo Φ55.5xM8x18 Estabilizador Trasero Pomo de Ajuste Poste del Manillar Tubo de Soporte Manillar Contador...
- Page 18 PAQUETE DE HARDWARE Pedido de piezas de repuesto (sólo para clientes de EE.UU. y Canadá) Proporcione la siguiente información para que podamos identificar con precisión la(s) pieza(s) necesaria(s): ✓ El número de modelo (se encuentra en la portada del manual) ✓...
-
Page 19: Instrucciones De Montaje
INSTRUCCIONES DE MONTAJE Valoramos su experiencia con los productos Sunny Health and Fitness. Para obtener asistencia con piezas o solución de problemas, póngase en contacto con nosotros en support@sunnyhealthfitness.com o 1-877-90SUNNY (877-907-8669). PASO 1 Retire los 2 Tubos de Papel (n.º E) del Bastidor Principal (n.º... - Page 20 Valoramos su experiencia con los productos Sunny Health and Fitness. Para obtener asistencia con piezas o solución de problemas, póngase en contacto con nosotros en support@sunnyhealthfitness.com o 1-877-90SUNNY (877-907-8669). PASO 3 Conecte el Cable de Extensión de Pulso 2 (n.º 65) al Cable de Extensión de Pulso 1 (n.º...
- Page 21 Valoramos su experiencia con los productos Sunny Health and Fitness. Para obtener asistencia con piezas o solución de problemas, póngase en contacto con nosotros en support@sunnyhealthfitness.com o 1-877-90SUNNY (877-907-8669). PASO 4 Atornille el Pomo de Ajuste (n.º 50) en el Tubo de Soporte (n.º 51).
- Page 22 Valoramos su experiencia con los productos Sunny Health and Fitness. Para obtener asistencia con piezas o solución de problemas, póngase en contacto con nosotros en support@sunnyhealthfitness.com o 1-877-90SUNNY (877-907-8669). PASO 5 Fije el Riel (n.º 8) al Bastidor Principal (n.º 1) con 4 Pernos (n.º 15) y 4 Arandelas Planas (n.º...
- Page 23 Valoramos su experiencia con los productos Sunny Health and Fitness. Para obtener asistencia con piezas o solución de problemas, póngase en contacto con nosotros en support@sunnyhealthfitness.com o 1-877-90SUNNY (877-907-8669). PASO 6 Retire los 2 Tornillos (n.º 17), las 2 Arandelas Elásticas (n.º 26), las 2 Arandelas Planas (n.º...
- Page 24 GUÍA DE AJUSTE AJUSTE DEL NIVEL Si en algún momento la moto no se siente nivelada, puede ajustar las Almohadillas de Ajuste (n.º 53) en el Estabilizador Delantero (n.º 2). AJUSTE DE LA POSICIÓN DEL ASIENTO Para mover el Asiento (n.º 40) hacia adelante o hacia atrás, estando sentado en la bicicleta, apoye los pies en el suelo.
- Page 25 INSTALACIÓN Y SUSTITUCIÓN DE BATERÍAS Batería Tapa de la Batería INSTALACIÓN DE LA BATERÍA 1. Saque 2 baterías AAA de la caja del contador. 2. Presione hacia abajo la hebilla de la tapa de la batería del Contador (n.º 66) y, a continuación, retire la tapa de la batería.
- Page 26 CONTADOR DE EJERCICIO BOTONES DE FUNCIÓN: MODE: Pulse el botón para seleccionar TMR (TIEMPO), DST (DISTANCIA) y CAL (CALORÍAS) para preajustar. Pulse el botón para que la función de selección muestre el valor en la pantalla LCD o introdúzcalo después del ajuste.
- Page 27 7. CAL (CALORÍAS): Acumula las calorías quemadas durante el entrenamiento de 0.0 a 9999 (Cal). El usuario también puede preajustar las calorías objetivo antes del entrenamiento pulsando los botones SET y MODE. Cada incremento de ajuste es de 1 Cal y contará automáticamente hacia abajo desde el valor objetivo durante el ejercicio.
-
Page 28: Lista De Piezas
LISTA DE PIEZAS n.º Descripción Espec. Cant. n.º Descripción Espec. Cant. Bastidor Principal Respaldo Estabilizador Manivela B0.5x20 Delantero Estabilizador Φ50 Tapa Trasero D12xΦ24x1 Poste del Manillar Arandela Plana Φ24xT3x520 Soporte del Asiento Agarre de Espuma Manillar Empuñadura Φ12.5 Tapa Manivela 0.5x55x55 Tapón Riel... - Page 29 n.º Descripción Espec. Cant. n.º Descripción Espec. Cant. Φ39x24 Rueda Loca Arandela Elástica Varillaje de la Eje de la Pizarra Φ12x61 Rueda Loca Magnética Sensor Asiento Pizarra Magnética Cinturón 330 PJ6 Imán 40x25x10 Tapa del Cinturón D6xΦ16x1.5 Arandela Plana Izquierdo Φ14xΦ10xM8x20.
- Page 30 INFORMATIONS IMPORTANTES EN MATIÈRE DE SÉCURITÉ Nous vous remercions d'avoir choisi notre produit. Pour garantir votre sécurité et votre santé, veuillez utiliser cet appareil correctement. Il est important de lire l'intégralité de ce manuel avant d'assembler et d'utiliser l'appareil. Une utilisation sûre et efficace n'est possible que si l'équipement est assemblé, entretenu et utilisé...
- Page 31 LISTE DE CONTRÔLE POUR LE PRÉ-ASSEMBLAGE Avant de commencer l'assemblage, assurez-vous que toutes les pièces sont incluses. Nº Description Spec. Qté. Nº Description Spec. Qté. Cadre Principal Siège Stabilisateur Avant Dossier Φ55.5xM8x18 Stabilisateur Arrière Bouton de Réglage Tige de Guidon Tube de Support Guidon Compteur...
- Page 32 PAQUET DE MATÉRIEL Commande de pièces de rechange (clients américains et canadiens uniquement) Veuillez fournir les informations suivantes afin que nous puissions identifier avec précision la ou les pièces nécessaires : ✓ Numéro du modèle (sur la couverture du manuel) ✓...
-
Page 33: Instructions D'assemblage
INSTRUCTIONS D'ASSEMBLAGE Nous apprécions votre expérience d'utilisation des produits Sunny Health and Fitness. Pour obtenir de l'aide concernant les pièces ou le dépannage, veuillez nous contacter à l'adresse support@sunnyhealthfitness.com ou au 1-877-90SUNNY (877-907-8669). ÉTAPE 1 Retirer les 2 Tubes de Papier (Nº E) du Cadre Principal (Nº... - Page 34 Nous apprécions votre expérience d'utilisation des produits Sunny Health and Fitness. Pour obtenir de l'aide concernant les pièces ou le dépannage, veuillez nous contacter à l'adresse support@sunnyhealthfitness.com ou au 1-877-90SUNNY (877-907-8669). ÉTAPE 3 Connectez le Fil d'Extension d'Impulsion 2 (Nº 65) au Fil d'Extension d'Impulsion 1 (Nº...
- Page 35 Nous apprécions votre expérience d'utilisation des produits Sunny Health and Fitness. Pour obtenir de l'aide concernant les pièces ou le dépannage, veuillez nous contacter à l'adresse support@sunnyhealthfitness.com ou au 1-877-90SUNNY (877-907-8669). ÉTAPE 4 Visser le Bouton de Réglage (Nº 50) sur le Tube de Support (Nº...
- Page 36 Nous apprécions votre expérience d'utilisation des produits Sunny Health and Fitness. Pour obtenir de l'aide concernant les pièces ou le dépannage, veuillez nous contacter à l'adresse support@sunnyhealthfitness.com ou au 1-877-90SUNNY (877-907-8669). ÉTAPE 5 Verrouillez le Rail (Nº 8) au Cadre Principal (Nº...
- Page 37 Nous apprécions votre expérience d'utilisation des produits Sunny Health and Fitness. Pour obtenir de l'aide concernant les pièces ou le dépannage, veuillez nous contacter à l'adresse support@sunnyhealthfitness.com ou au 1-877-90SUNNY (877-907-8669). ÉTAPE 6 Retirer 2 Vis (Nº 17), 2 Rondelles Élastiques (Nº...
- Page 38 GUIDE D'AJUSTEMENT RÉGLAGE DU NIVEAU Si, à un moment donné, le vélo n'est pas à niveau, vous pouvez ajuster les Coussin de Réglage (Nº 53) sur le Stabilisateur Avant (Nº 2). RÉGLAGE DE LA POSITION DU SIÈGE Pour déplacer le Siège (Nº 40) vers l'avant ou vers l'arrière, en étant assis sur le vélo, posez vos pieds sur le sol.
- Page 39 INSTALLATION ET REMPLACEMENT DES BATTERIES Batterie Couvercle de la Batterie INSTALLATION DE LA BATTERIE 1. Retirer 2 batteries AAA du boîtier de l'appareil. 2. Appuyer sur la boucle du couvercle des batteries sur le Compteur (Nº 66), puis retirer le couvercle des batteries.
-
Page 40: Boutons De Fonction
COMPTEUR D'EXERCICE BOUTONS DE FONCTION : MODE: Appuyez sur le bouton pour sélectionner TMR (TEMPS), DST (DISTANCE) et CAL (CALORIES) à prérégler. Appuyez sur le bouton pour que la fonction de sélection affiche la valeur sur l'écran LCD ou entrez après le réglage. - Page 41 7. CAL (CALORIES) : Accumule les calories brûlées pendant l'entraînement de 0,0 à 9999 (Cal). L'utilisateur peut également prérégler les calories cibles avant l'entraînement en appuyant sur les boutons SET & MODE. Chaque incrément de réglage est de 1 cal et le décompte se fait automatiquement à...
-
Page 42: Liste De Pièces
LISTE DE PIÈCES Nº Description Spec. Qté. Nº Description Spec. Qté. Φ50 Cadre Principal Capuchon d'Extrémité D12xΦ24x1 Stabilisateur Avant Rondelle Plate Φ24xT3x520 Stabilisateur Arrière Poignée en Mousse Tige de Guidon Poignée Φ12.5 Support de Siège Bouchon Guidon Bouchon Carré 60x30x1.5 Couvercle de 0.5x55x55 Capteur d'Impulsion... - Page 43 Nº Description Spec. Qté. Nº Description Spec. Qté. Couvercle de Ceinture Tableau Magnétique Gauche Couvercle de Ceinture Aimant 40x25x10 Droite Φ60xΦ30x8.5 D6xΦ16x1.5 Couvercle de Manivelle Rondelle Plate Φ14xΦ10xM8x2 Écrou 4.5x32x32 Φ22.6xΦ28x2.5 D10xΦ14x1 Rondelle Rondelle Plate Φ45xH3.5 Φ17xΦ25x0.3 Ecrou de Blocage-L Rondelle Ondulée Roulement à...
-
Page 44: Wichtige Sicherheitsinformationen
WICHTIGE SICHERHEITSINFORMATIONEN Wir danken Ihnen, dass Sie sich für unser Produkt entschieden haben. Um Ihre Sicherheit und Gesundheit zu gewährleisten, bitten wir Sie, dieses Gerät richtig zu benutzen. Es ist wichtig, dass Sie dieses Handbuch vor dem Zusammenbau und der Verwendung des Geräts vollständig lesen. Eine sichere und effektive Nutzung kann nur erreicht werden, wenn das Gerät ordnungsgemäß... - Page 45 CHECKLISTE VOR DEM ZUSAMMENBAU Bevor Sie mit dem Zusammenbau beginnen, vergewissern Sie sich bitte, dass alle Teile vorhanden sind. Beschreibung Spez. Anz. Beschreibung Spez. Anz. Hauptrahmen Sitz Vorderer Stabilisator Rückenlehne Φ55.5xM8x18 Hinterer Stabilisator Einstellknopf Lenkersäule Stützrohr Lenker Messgerät TZ-4112 Schiene Handbuch Verstellgriff Hardware-Paket...
- Page 46 HARDWARE-PAKET Bestellung von Ersatzteilen (nur für Kunden aus den USA und Kanada) Bitte geben Sie die folgenden Informationen an, damit wir das/die benötigte(n) Teil(e) genau identifizieren können: ✓ Die Modellnummer (auf dem Umschlag des Handbuchs zu finden) ✓ Der Produktname (auf dem Umschlag des Handbuchs zu finden) ✓...
- Page 47 MONTAGEANLEITUNG Wir schätzen Ihre Erfahrung mit den Produkten von Sunny Health and Fitness. Wenn Sie Hilfe bei der Beschaffung von Ersatzteilen oder bei der Fehlersuche benötigen, wenden Sie sich bitte an support@sunnyhealthfitness.com oder 1-877-90SUNNY (877-907-8669). SCHRITT 1 Entfernen Sie die 2 Papierrohren (Nr. E) vom Hauptrahmen (Nr.
- Page 48 Wir schätzen Ihre Erfahrung mit den Produkten von Sunny Health and Fitness. Wenn Sie Hilfe bei der Beschaffung von Ersatzteilen oder bei der Fehlersuche benötigen, wenden Sie sich bitte an support@sunnyhealthfitness.com oder 1-877-90SUNNY (877-907-8669). SCHRITT 3 Verbinden Sie das Impuls- Verlängerungsdraht 2 (Nr.
- Page 49 Wir schätzen Ihre Erfahrung mit den Produkten von Sunny Health and Fitness. Wenn Sie Hilfe bei der Beschaffung von Ersatzteilen oder bei der Fehlersuche benötigen, wenden Sie sich bitte an support@sunnyhealthfitness.com oder 1-877-90SUNNY (877-907-8669). SCHRITT 4 Schrauben Sie den Einstellknopf (Nr.
- Page 50 Wir schätzen Ihre Erfahrung mit den Produkten von Sunny Health and Fitness. Wenn Sie Hilfe bei der Beschaffung von Ersatzteilen oder bei der Fehlersuche benötigen, wenden Sie sich bitte an support@sunnyhealthfitness.com oder 1-877-90SUNNY (877-907-8669). SCHRITT 5 Befestigen Sie die Schiene (Nr. 8) am Hauptrahmen (Nr.
- Page 51 Wir schätzen Ihre Erfahrung mit den Produkten von Sunny Health and Fitness. Wenn Sie Hilfe bei der Beschaffung von Ersatzteilen oder bei der Fehlersuche benötigen, wenden Sie sich bitte an support@sunnyhealthfitness.com oder 1-877-90SUNNY (877-907-8669). SCHRITT 6 Entfernen Sie 2 Schrauben (Nr. 17), 2 Federscheiben (Nr.
- Page 52 EINSTELLANLEITUNG EINSTELLEN DES NIVEAUS Wenn sich das Fahrrad an irgendeiner Stelle nicht nivelliert anfühlt, können Sie die Einstellpads (Nr. 53) am Vorderen Stabilisator (Nr. 2) einstellen. EINSTELLEN DER SITZPOSITION Um den Sitz (Nr. 40) nach vorne oder hinten zu verstellen, stellen Sie Ihre Füße auf den Boden, während Sie auf dem Fahrrad sitzen.
- Page 53 EINBAU UND AUSTAUSCH VON BATTERIEN Batterieabdeckung Batterie BATTERIEANLAGE 1. Nehmen Sie 2 AAA-Batterien aus der Messgerätebox. 2. Drücken Sie auf die Schnalle der Batterieabdeckung am Messgerät (Nr. 66) und nehmen Sie die Batterieabdeckung ab. 3. Legen Sie 2 AAA-Batterien in das Batteriefach auf der Rückseite des Messgerät (Nr. 66) ein. Achten Sie vor dem Einlegen der Batterien auf die + und - Pole.
- Page 54 TRAININGSMESSGERÄT FUNKTIONSTASTEN: MODE: Drücken Sie die Taste, um TMR (ZEIT), DST (DISTANZ) und CAL (KALORIEN) zur Voreinstellung auszuwählen. Drücken Sie die Taste, um den Wert der Auswahlfunktion auf dem LCD-Display anzuzeigen, oder geben Sie ihn nach der Einstellung ein. Drücken Sie die Taste und halten Sie sie 3 Sekunden lang gedrückt, um alle Werte außer dem Kilometerzähler auf Null zurückzusetzen.
- Page 55 7. CAL (KALORIEN): Sammelt die während des Trainings verbrannten Kalorien von 0,0 bis 9999 (Cal). Der Benutzer kann die Zielkalorien vor dem Training auch durch Drücken der SET- und MODE-Tasten voreinstellen. Jeder Einstellschritt entspricht 1 Cal und wird während des Trainings automatisch vom Zielwert heruntergezählt.
- Page 56 TEILELISTE Beschreibung Spez. Anz. Beschreibung Spez. Anz. Φ12.5 Hauptrahmen Stopfen Vorderer Stabilisator Vierkant-Stopfen 60x30x1.5 Hinterer Stabilisator Pulssensor Φ55.5xM8x18 Lenkersäule Einstellknopf Sitzhalterung Stützrohr Φ25x104 Lenker Kurbelhülse Φ38x18 Kurbelabdeckung 0.5x55x55 Einstellpads Φ32.7xΦ25.3x60 Schiene Kunststoffdistanzstück Hintere Oberer Block 38x34x36.2 Befestigungsplatte Φ12x544 Φ25x38 Kleine Kurbel Exzenterrad Verstellgriff Schraube...
- Page 57 Beschreibung Spez. Anz. Beschreibung Spez. Anz. Φ45xH3.5 D10xΦ14x1 Sicherungsmutter-R Unterlegscheibe Φ25.2xΦ38x1 Φ17xΦ25x0.3 Große Unterlegscheibe Welle Unterlegscheibe Φ200x40, 2.5kgs Schwungrad Kreuzschlitzschraube M6x10 Φ200 Riemenscheibe Inbusschlüssel S10,S13,S14,S Schraube M6x15 Schraubenschlüssel 15,S17 Schraube ST4.2x19 Inbusschlüssel D17xΦ22x0.5 Schraube ST4.2x18 Unterlegscheibe Φ1.6xΦ15xL47.2 Feder Justierbolzen M6x36 Φ50 Dichtungsring Trägerplatte...
-
Page 58: Importanti Informazioni Sulla Sicurezza
IMPORTANTI INFORMAZIONI SULLA SICUREZZA Vi ringraziamo per aver scelto il nostro prodotto. Per garantire la vostra sicurezza e la vostra salute, vi invitiamo a utilizzare questa apparecchiatura in modo corretto. Prima di assemblare e utilizzare l'apparecchiatura, è importante leggere il presente manuale nella sua interezza. Un utilizzo sicuro ed efficace è... - Page 59 LISTA DI CONTROLLO PRE-MONTAGGIO Prima di iniziare l'assemblaggio, accertarsi che tutte le parti siano incluse. Descrizione Spec. Qtà. Descrizione Spec. Qtà. Telaio Principale Sedile Stabilizzatore Anteriore Schienale Φ55.5xM8x18 Stabilizzatore Posteriore Manopola di Regolazione Posto Manubrio Tubo di Supporto Manubrio Misuratore TZ-4112 Guida Manuale...
- Page 60 PACCHETTO HARDWARE Ordinazione di parti di ricambio (solo per clienti statunitensi e canadesi) Si prega di fornire le seguenti informazioni per consentirci di identificare con precisione i pezzi di ricambio necessari: ✓ Il numero del modello (riportato sulla copertina del manuale) ✓...
-
Page 61: Istruzioni Di Montaggio
ISTRUZIONI DI MONTAGGIO Apprezziamo la vostra esperienza nell'uso dei prodotti Sunny Health and Fitness. Per assistenza sui ricambi o per la risoluzione dei problemi, contattateci all'indirizzo support@sunnyhealthfitness.com o al numero 1-877-90SUNNY (877-907-8669). FASE 1 Rimuovere i 2 Tubi di Carta (n. E) dal Telaio Principale (n. - Page 62 Apprezziamo la vostra esperienza nell'uso dei prodotti Sunny Health and Fitness. Per assistenza sui ricambi o per la risoluzione dei problemi, contattateci all'indirizzo support@sunnyhealthfitness.com o al numero 1-877-90SUNNY (877-907-8669). FASE 3 Collegare il Filo di Prolunga per Impulso 2 (n. 65) al Filo di Prolunga per Impulso 1 (n.
- Page 63 Apprezziamo la vostra esperienza nell'uso dei prodotti Sunny Health and Fitness. Per assistenza sui ricambi o per la risoluzione dei problemi, contattateci all'indirizzo support@sunnyhealthfitness.com o al numero 1-877-90SUNNY (877-907-8669). FASE 4 Avvitare la Manopola di Regolazione (n. 50) sul Tubo di Supporto (n. 51).
- Page 64 Apprezziamo la vostra esperienza nell'uso dei prodotti Sunny Health and Fitness. Per assistenza sui ricambi o per la risoluzione dei problemi, contattateci all'indirizzo support@sunnyhealthfitness.com o al numero 1-877-90SUNNY (877-907-8669). FASE 5 Bloccare la Guida (n. 8) al Telaio Principale (n. 1) con 4 Bulloni (n. 15) e 4 Rondelle Piatte (n.
- Page 65 Apprezziamo la vostra esperienza nell'uso dei prodotti Sunny Health and Fitness. Per assistenza sui ricambi o per la risoluzione dei problemi, contattateci all'indirizzo support@sunnyhealthfitness.com o al numero 1-877-90SUNNY (877-907-8669). FASE 6 Rimuovere le 2 Viti (n. 17), le 2 Rondelle Elastica (n. 26), le 2 Rondelle Piatte (n.
- Page 66 GUIDA ALLA REGOLAZIONE REGOLAZIONE DEL LIVELLO Se in qualsiasi momento la bicicletta non sembra livellata, è possibile regolare i Cuscinetto di Regolazione (n. 53) sullo Stabilizzatore Anteriore (n. 2). REGOLAZIONE DELLA POSIZIONE DELLA SELLA Per spostare la Sedile (n. 40) in avanti o indietro, mentre si è...
-
Page 67: Installazione Della Batteria
INSTALLAZIONE E SOSTITUZIONE DELLA BATTERIA Batteria Coperchio della Batteria INSTALLAZIONE DELLA BATTERIA 1. Estrarre 2 batterie AAA dalla scatola dello misuratore. 2. Premere la fibbia del coperchio della batteria sullo Misuratore (n. 66), quindi rimuovere il coperchio della batteria. 3. Installare 2 batterie AAA nell'alloggiamento della batteria sul retro dello Misuratore (n. 66). Prima dell'installazione, prestare attenzione ai poli + e - delle batterie. - Page 68 MISURATORE DI ESERCIZIO PULSANTI FUNZIONE: MODE: Premere il pulsante per selezionare TMR (TEMPO), DST (DISTANZA) e CAL (CALORIE) da preimpostare. Premere il pulsante per visualizzare il valore della funzione di selezione sul display LCD o inserire dopo l'impostazione. Premere il pulsante e tenerlo premuto per 3 secondi per azzerare tutti i valori, tranne il contachilometri.
- Page 69 automaticamente dal valore target durante l'esercizio. NOTA: questi dati sono una guida approssimativa che non può essere utilizzata per il trattamento medico. 8. ODO (ODOMETRO): Visualizza la distanza totale accumulata da 0,0 a 9999 M (miglia). L'utente può anche premere il pulsante MODE per visualizzare il valore del odometro. 9.
-
Page 70: Elenco Parti
ELENCO PARTI Descrizione Spec. Qtà. Descrizione Spec. Qtà. Telaio Principale Sedile Stabilizzatore Schienale Anteriore Stabilizzatore Manovella B0.5x20 Posteriore Φ50 Posto Manubrio Tappo Terminale D12xΦ24x1 Staffa del Sedile Rondella Piatta Impugnatura in Φ24xT3x520 Manubrio Schiuma Coperchio della 0.5x55x55 Impugnatura Manovella Φ12.5 Guida Tappo Piastra di Fissaggio... - Page 71 Descrizione Spec. Qtà. Descrizione Spec. Qtà. Φ50 Bullone M5x60 Anello di Tenuta Dado Esagonale Rondella Elastica Tavola Magnetica Φ39x24 Φ12x61 Ruota Folle Asse Tirante Ruota Folle Tavola Magnetica Sensore Sedile Magnete 40x25x10 D6xΦ16x1.5 Cintura 330 PJ6 Rondella Piatta Φ14xΦ10xM8x2 Coperchio della Vite Cintura Sinistro Coperchio della...
-
Page 72: Exploded Diagram
EXPLODED DIAGRAM Version: 2.0...
Need help?
Do you have a question about the SF-RB423034 and is the answer not in the manual?
Questions and answers