Table of Contents

Related Manuals for Sunny SF-E1405


Summary of Contents for Sunny SF-E1405
-
Page 1: User Manual
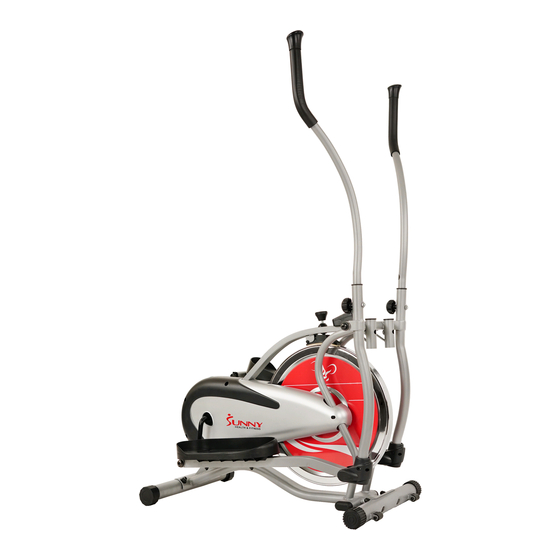
FLYWHEEL ELLIPTICAL TRAINER USER MANUAL SF-E1405 IMPORTANT: Read all instructions carefully before using this product. Retain owner’s manual for future reference. For customer service, please contact: support@sunnyhealthfitness.com... -
Page 2: Important Safety Information
IMPORTANT SAFETY INFORMATION We thank you for choosing our product. To ensure your safety and health, please use this equipment correctly. It is important to read this entire manual before assembling and using the equipment. Safe and effective use can only be assured if the equipment is assembled, maintained, and used properly. -
Page 3: Exploded Drawing
EXPLODED DRAWING... -
Page 4: Parts List
PARTS LIST PART PART SPEC QUANTITY QUANTITY Φ16*112 ,1/2" LEFT HINGE BOLT φ28*φ16*16 BUSHING 1 1/2" SPRING WASHER 1/2" LEFT LOCK NUT ADJUSTABLE END CAP 62*42 GB/T 12-1988 M8X62 CARRIAGE BOLT REAR STABILIZER 1/2" RIGHT LOCK NUT RIGHT HINGE BOLT Φ16*112 ,1/2"... - Page 5 PART QUANTITY SPEC 7/8'' FIXING WASHER (L) COLLAR BALL/COLLAR HOUSING Φ44.5(P COLLAR HOUSING Φ55.5*16 L=1000 L=1000 SENSOR FIXING WASHER (R) 15/16'' Φ40*2.5 WASHER (R) CHAIN WHEEL d=3.2,P=6.35,,Z=100 CRANK Φ16*140 FIXING NUT 1 GB/T 6177.2-2000 M10*1.0 GB/T 41-2000 FIXING BOLT M6*55 FIXING NUT 2 GB/T 6173-2000 M10*1.0 (H=5.0mm) LONG FIXING TUBE...
-
Page 6: Hardware Package
HARDWARE PACKAGE (#30) (#32) (#31) Hinge Screw D Shape Washer Spring Washer 3/8”*20 Ø28*5 – 2 PCS Ø19.5*Ø11.5*3 – 2 PCS 2 PCS (#35) Wave Washer Ø26*Ø16*0.3 (#42) Spindle Bar (#14) Bolt M8*50 4 PCS 1 PC 4 PCS (#10) Nylon Nut M8*9 4 PCS (#9)Right Hinge Bolt (#1) Left Hinge Bolt... -
Page 7: Assembly Instructions
ASSEMBLY INSTRUCTIONS STEP 1: Attach the Front Stabilizer (No. 24) and the Rear Stabilizer (No. 7) to the Main Frame (No. 36) using 4 Bolts (No. 6), 4 Arc Washers (No. 12) & 4 Domed Nuts (No. 13). Place the Front Stabilizer (No. 24) and Rear Stabilizer (No. 7) against the Main Frame (No. - Page 8 Pedal Tube (No. 21 & No. 19) & the Right and Left Crank (No. 51). This will ensure the stability and durability of the Sunny Flywheel Elliptical Trainer. In order to install hinge bolt properly, keep it perfectly straight as the bolt goes through the pedal tubing and the crankshaft.
- Page 9 TIPS: For an easy assembly of the Right Hinge Bolt (No. 9), you may turn the Crank (No. 51) to the front to make it horizontal. Doing this will allow you to easily screw the Right Hinge Bolt (No. 9) into the hole of the Crank (No.
- Page 10 STEP 3: Unscrew the Lock Nuts (No. 10) from the Hex Head Bolt (No. 14) before assembling the pedals. Attach the Left Pedal (No. 23L) and the Right Pedal (No. 23R) to their corresponding Pedal Tube (No. 19 & No. 21). Line up the holes in the pedal with the holes on the pedal tube.
- Page 11 STEP 4: Attach Left & Right Handlebar (No. 38 & No. 40) to the Left & Right Swing Bar (No. 27 & No. 29). Locate the height that’s comfortable for the user and make sure both handlebars are set at the same height. Lock each handlebar in place with Lock Knob (No.
- Page 12 STEP 5: Connect the Wire (No. B1) from the front support tube to the Computer Wire (No. B2) then fix the Computer (No. 60) onto the hole of the Main Frame (No. 36).
-
Page 13: Function Key
OPERATING THE EXERCISE METER Our computerized meter on the Sunny Flywheel Elliptical allows the user to tailor a personalized workout by monitoring their progress. During a workout, the display console will alternately and repeatedly display your Time, Speed, Distance, Calories, and Pulse. -
Page 14: Troubleshooting
TROUBLESHOOTING PROBLEM SOLUTION There is no display on the meter. Remove the computer console and verify the wire that comes from the computer console is properly connected to the wire that comes from the main frame. Verify that the batteries are correctly positioned and are in proper contact with the battery springs. -
Page 15: Exercise Instructions
EXERCISE INSTRUCTIONS NOTE Using the Sunny Flywheel Elliptical Trainer provides you with several benefits, it will improve your physical fitness, tone muscle and in conjunction with calorie controlled diet help you lose weight. 1. THE WARM-UP PHASE: This stage helps to get the blood flowing around the body while also loosening and preparing the muscles for workout. -
Page 16: The Cool-Down Phase
MUSCLE TONING To tone muscle while using the (Sunny Flywheel Elliptical Trainer) you will need to set the resistance level to high, this will increase the strain on leg muscles which will result in shorter training sessions, as the work load being increased will decrease the time required for the muscles to obtain an adequate workout.
Need help?
Do you have a question about the SF-E1405 and is the answer not in the manual?
Questions and answers