Advertisement
Quick Links
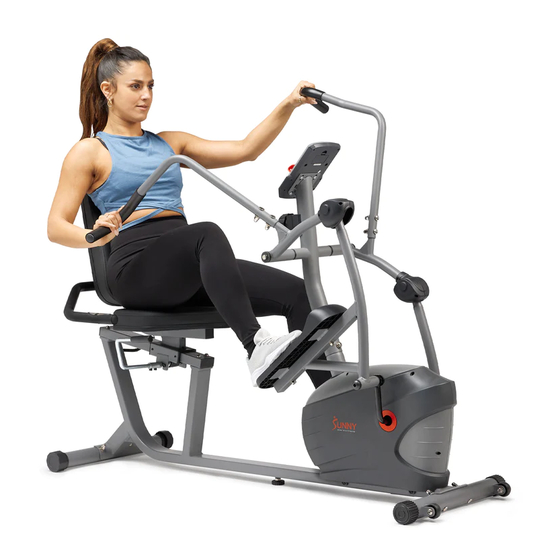
PERFORMANCE INTERACTIVE SERIES
RECUMBENT ELLIPTICAL
SF-RBE420035
USER MANUAL
IMPORTANT! Please retain owner's manual for maintenance and adjustment instructions. Your
satisfaction is very important to us, PLEASE DO NOT RETURN UNTIL YOU HAVE CONTACTED
US: support@sunnyhealthfitness.com or 1-877-90SUNNY (877-907-8669).
Advertisement

Related Manuals for Sunny PERFORMANCE INTERACTIVE SF-RBE420035


Summary of Contents for Sunny PERFORMANCE INTERACTIVE SF-RBE420035
- Page 1 PERFORMANCE INTERACTIVE SERIES RECUMBENT ELLIPTICAL SF-RBE420035 USER MANUAL IMPORTANT! Please retain owner’s manual for maintenance and adjustment instructions. Your satisfaction is very important to us, PLEASE DO NOT RETURN UNTIL YOU HAVE CONTACTED US: support@sunnyhealthfitness.com or 1-877-90SUNNY (877-907-8669).
- Page 2 IMPORTANT SAFETY INFORMATION We thank you for choosing our product. To ensure your safety and health, please use this equipment correctly. It is important to read this entire manual before assembling and using the equipment. Safe and effective use can only be achieved if the equipment is assembled, maintained, and used properly.
- Page 3 PRE-ASSEMBLY CHECK LIST Before you start to assemble, please make sure all parts are included. Description Spec. Qty. Description Spec. Qty. Main Frame Long Axle 2L/R Swing Bar 1pr. Nut Cap 3L/R Pedal Support Tube 1pr. 49L/R Pedal 1pr. Handlebar Post Nut Cap 5L/R Handlebar...
- Page 4 HARDWARE PACKAGE Ordering Replacement Parts (U.S. and Canadian Customers only) Please provide the following information in order for us to accurately identify the part(s) needed: ✓ The model number (found on cover of manual) ✓ The product name (found on cover of manual) ✓...
- Page 5 ASSEMBLY INSTRUCTIONS We value your experience using Sunny Health and Fitness products. For assistance with parts or troubleshooting, please contact us at support@sunnyhealthfitness.com or 1-877-90SUNNY (877-907-8669). STEP 1: Remove 2 Paper Tubes (No. E), 4 Carriage Bolts (No. 16), 4 Arc Washers (No. 36) and 4 Cap Nuts (No.
- Page 6 We value your experience using Sunny Health and Fitness products. For assistance with parts or troubleshooting, please contact us at support@sunnyhealthfitness.com or 1-877-90SUNNY (877-907-8669). STEP 2: NOTE: Make sure the Tension Controller (No. 72a) is at the lowest level before you connect the cable.
- Page 7 We value your experience using Sunny Health and Fitness products. For assistance with parts or troubleshooting, please contact us at support@sunnyhealthfitness.com or 1-877-90SUNNY (877-907-8669). STEP 3: Remove 2 Hex Screws (No. 26), 2 Spring Washers (No. 37), 2 Flat Washers (No. 33) and 2 Wave Washers (No.
- Page 8 We value your experience using Sunny Health and Fitness products. For assistance with parts or troubleshooting, please contact us at support@sunnyhealthfitness.com or 1-877-90SUNNY (877-907-8669). STEP 4: Attach the Left Pedal Support Tube (No. 3L) to the left side of the Crank (No. 41) with 1 Left Hinge Bolt (No.
- Page 9 We value your experience using Sunny Health and Fitness products. For assistance with parts or troubleshooting, please contact us at support@sunnyhealthfitness.com or 1-877-90SUNNY (877-907-8669). STEP 5: Attach 2 Handlebars (No. 5L/R) to 2 Swing Bars (No. 2L/R) with 4 Bolts (No. 24) , 4 Arc Washers (No.
- Page 10 We value your experience using Sunny Health and Fitness products. For assistance with parts or troubleshooting, please contact us at support@sunnyhealthfitness.com or 1-877-90SUNNY (877-907-8669). STEP 7: Remove 1 Screw (No. 20), 1 Spring Washer (No. 37) and 1 Flat Washer (No.
- Page 11 We value your experience using Sunny Health and Fitness products. For assistance with parts or troubleshooting, please contact us at support@sunnyhealthfitness.com or 1-877-90SUNNY (877-907-8669). STEP 8 Remove 4 Screws (No. 34) from the Meter (No. 14) with Spanner (No. 122).
- Page 12 ADJUSTMENT GUIDE ADJUSTING THE BALANCE In order to achieve a smooth and comfortable ride, you must ensure that the recumbent elliptical is stabled and secured. If you notice that the recumbent elliptical is unbalanced during use, you should adjust the Rear End Caps (No. 56) located on the rear stabilizer until the recumbent elliptical becomes levelled with the floor surface.
- Page 13 BATTERY INSTALLATION & REPLACEMENT Battery Battery Cover BATTERY INSTALLATION 1. Take out 2 AAA batteries from meter box. 2. Press the buckle of battery cover on the Meter (No. 14), then remove battery cover. 3. Install 2 AAA batteries into the battery case on the back of the Meter (No. 14). Pay attention to the battery + and –...
- Page 14 EXERCISE METER FUNCTION BUTTONS: MODE: Press the button to select TIME, DISTANCE, and CALORIES to preset. Press the button for selection function display value on LCD or enter after setting. Press the button and hold for 3 seconds to reset all values except odometer to zero.
- Page 15 7. CALORIES: Accumulates calories burned during training from 0.0 to 9999 (Cal). The user may also preset the target calories before training by pressing the SET & MODE buttons. Each setting increment is 1 Cal. Automatically counts down from targeting value during exercise. NOTE: This data is a rough guide which cannot be used in medical treatment.
- Page 16 EXPLODED DIAGRAM 1 EXPLODED DIAGRAM 2...
- Page 17 PARTS LIST Description Spec. Qty. Description Spec. Qty. Φ13×B2 Main Frame Spring Washer 2L/R Swing Bar 1pr. 46L/R Nylon Nut B0.5×20 1pr. 3L/R Pedal Support Tube 1pr. Handle Fixed Plate Handlebar Post Nut Cap 5L/R Handlebar 1pr. 49L/R Pedal 1pr. Cardan Joint Nut Cap Seat Rail...
- Page 18 Description Spec. Qty. Description Spec. Qty. Φ3.5×Φ18.5×L43.5 Φ14×Φ10×M8x20.5 Spring Screw Φ1.6×Φ15×L47.2 Hex Bolt M5×60 Spring Hex Nut Sealing Ring Idler Wheel Plug Idler Wheel Magnetic Board Linkage Axle Sensor Wire Magnetic Board Belt Pulley Magnet D6×Φ16×1.5 97L/R Belt Cover 1pr. Flat Washer D10×Φ14×1 Crank Cover...
Need help?
Do you have a question about the PERFORMANCE INTERACTIVE SF-RBE420035 and is the answer not in the manual?
Questions and answers