Advertisement
Quick Links
RISER
®
BEFORE INSTALLATION
READ INSTRUCTIONS CAREFULLY BEFORE STARTING INSTALLATION. REMOVE
CONTENTS FROM BOX AND VERIFY ALL PARTS ARE PRESENT. FAILURE TO
IDENTIFY DAMAGE BEFORE INSTALLATION COULD LEAD TO A REJECTION OF
ANY CLAIM. IF MISSING PARTS OR ANY DAMAGE FOUND, PLEASE TAKE A
PICTURE FOR THE CLAIM PURPOSE. TO FILE YOUR CLAIM, PLEASE VISIT:
WWW.TYGERAUTO.COM/CONTACT
TORQUE VALUES
Fastener Size
Class 8.8 Torque (ft-lbs)
6mm
8mm
10mm
12mm
14mm
Passenger/Right
Rear Bracket (Same
as Driver/Left Front
Bracket
Passenger/Right
Center Mounting Bracket
Front
TG-RS6D60078
Class 10.9 Torque (ft-lbs)
6-7
15-16
31-32
54-55
87-88
125-126
Passenger/Right
Front Mounting Bracket
Driver/Left 6inch Tyger Sidebar
Customer Support: www.TygerAuto.com/Contact
x1
x1
x2
x2
x1
x1
x6
x12
x12
x12
x12
x6
x6
6-7
x10
22-23
x20
44-45
x10
78-79
x4
x2
x1
Driver/Left
Front Mounting Bracket
1/5
Parts List
Driver/Left 6inch Tyger Sidebar
Passenger/Right 6inch Tyger Sidebar
Driver Front/Passenger Rear Mounting Brackets
Passenger Front/Driver Rear Mounting Brackets
Driver/Left Center Mounting Bracket
Passenger/Right Center Mounting Brackets
8mm Bolt/Nut Plate
8mm x 30mm Hex Bolts
8mm x 25mm Combo Bolts
8mm x 24mm OD x 2mm Flat Washers
8mm Lock Washers
8mm Hex Nuts
8mm Plastic Retainers
6mm x 25mm Button Head Bolts
6mm x 18mm OD x 1.6mm Flat Washers
6mm Flange Nuts
16mm x 60mm Large Spacer
16mm x 34mm Small Spacer
4mm Hex Wrench
Driver/Left
Rear Bracket (Same
as Passenger/Right
Front Bracket
Driver/Left
Center Mounting Bracket
V210922
Advertisement

Subscribe to Our Youtube Channel
Summary of Contents for Tyger RISER TG-RS6D60078
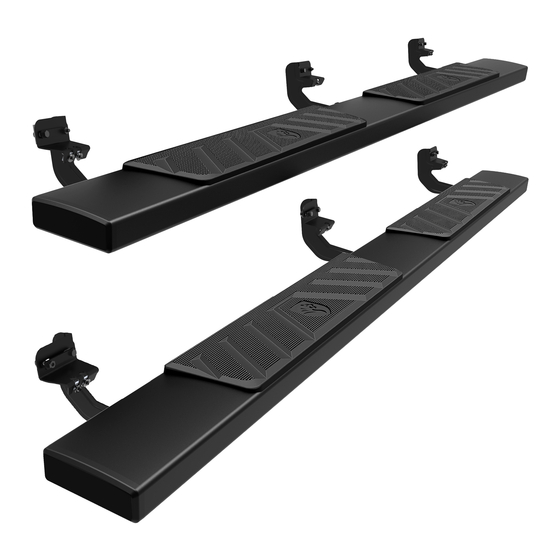
- Page 1 RISER ® Parts List Driver/Left 6inch Tyger Sidebar TG-RS6D60078 Passenger/Right 6inch Tyger Sidebar Driver Front/Passenger Rear Mounting Brackets Passenger Front/Driver Rear Mounting Brackets BEFORE INSTALLATION Driver/Left Center Mounting Bracket READ INSTRUCTIONS CAREFULLY BEFORE STARTING INSTALLATION. REMOVE Passenger/Right Center Mounting Brackets CONTENTS FROM BOX AND VERIFY ALL PARTS ARE PRESENT.
- Page 2 PROCEDURE: REMOVE CONTENTS FROM BOX. VERIFY ALL PARTS ARE PRESENT. READ INSTRUCTIONS CAREFULLY BEFORE STARTING INSTALLATION. DRILLING MAY BE REQUIRED. STEP 1 Starting at the driver side-front of the vehicle, remove the (Fig 2) 8mm Bolt-Nut Plate, NOTE: sealing tape covering the factory holes in the side of the inner 8mm Bolt-Nut Plate is not required panel (Fig 1).
- Page 3 b. Thread (1) 8mm Plastic Retainer onto the threaded end and d. Remove the 8mm Hex Bolt from the nut on the Bolt Plate from down tight against the body panel (Fig 5). STEP 2a. Rotate the Bolt on the Bolt Plate until the threaded nut NOTE: The Plastic Retainer is designed to keep the Bolt/Nut Plate lines up with the remaining hole in the Mounting Bracket and from falling into the body panel and to aid in Bracket installation.
- Page 4 (2) 8mm Hex Bolts (2) 8mm Lock Washers STEP 4 (2) 8mm Flat Washers Move along the side of the body panel to the center mounting location (Fig 11). Repeat STEPs 1-3 to install (1) Driver/Left Center Mounting Bracket to the center mounting location. Front Note that you will be using small spacer and one set of hardware instead for the pinch weld location.
- Page 5 Properly level and adjust the Tyger Sidebar and fully tighten all hardware. 2009-12 models requiring drilling through pinch trim: a. Level the Tyger Sidebar to the vehicle. Make sure all (3) Brackets are tight against the bottom of the body panel and tighten all mounting hardware.


Need help?
Do you have a question about the RISER TG-RS6D60078 and is the answer not in the manual?
Questions and answers