
Related Manuals for Televes Multimetter FSM 450


Summary of Contents for Televes Multimetter FSM 450
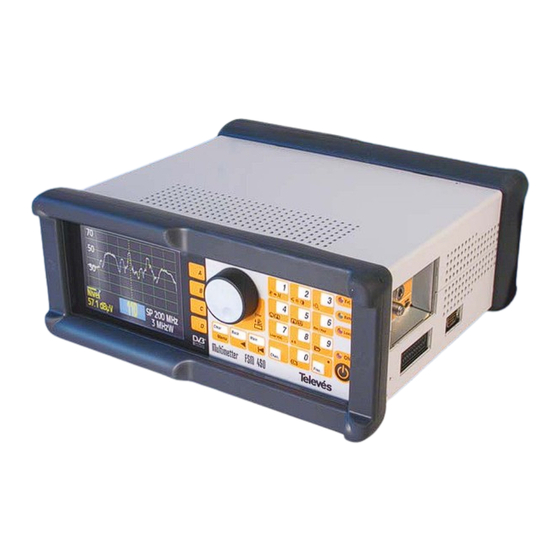
- Page 1 Field Strength Meter Multimetter FSM 450 U s e r M a n u a l Ref. 5922 w w w . t e l e v e s . c o m...
-
Page 3: Table Of Contents
Multimetter FSM 450 Ref. 5922 Index .......... - Page 4 Multimetter FSM 450 Ref. 5922 3.3.2.6.1.- Changing the battery ......... .
- Page 5 Multimetter FSM 450 Ref. 5922 3.3.4.3.2.- Digital ............
-
Page 6: Installation
Multimetter FSM 450 Ref. 5922 SAFETY MEASURES Before using the equipment, read the user manual and read the section on SAFETY MEASURES. symbol on the equipment indicates: “SEE USER MANUAL”. This manual may also contain the Caution or Warning symbols. -
Page 7: Power Supply
Multimetter FSM 450 Ref. 5922 1.2.- POWER SUPPLY The FSM 450 has two operation modes; external powering or battery powered. 1.2.1.- External powering A DC adapter is provided with the equipment which allows you to connect the equipment to the mains, both for normal operation as well as for charging the batteries. - Page 8 Multimetter FSM 450 Ref. 5922 While the equipment is charging the battery, the Battery (11) LED will flash. In any case, the equipment will stop charging once this is complete. The equipment is constantly monitoring the status of the batteries and it informs the user of their status via an LED icon (Battery (11)) and an audio signal.
-
Page 9: Start-Up
Multimetter FSM 450 Ref. 5922 Note on charging the battery: => Whenever possible, it is advisable to recharge the batteries completely. In other words, when the recharging process begins, do not interrupt it, until the batteries are 100% full. => If you are not going to use the equipment for a while, the battery level should not be very low. -
Page 10: Product Description
Multimetter FSM 450 Ref. 5922 2.- PRODUCT DESCRIPTION The FSM 450 is a portable meter with a 5” coloured screen which features all of the basic functions that are necessary to guarantee a high level of quality in an analogue or digital RTV installation. -
Page 11: Specifications
Multimetter FSM 450 Ref. 5922 2.1.- SPECIFICATIONS Next, you can see a list of the main specifications of the FSM 450. Monitor: Screen TFT 5" colour Standard Multistandard: PAL (B, G, D, K, I), SECAM (B, G, D, K, L) - Page 12 Multimetter FSM 450 Ref. 5922 Battery status: An LED, an onscreen icon and a buzzing noise indicating a low battery. External powering connection: Via a DC adapter provided with the FSM. External powering: 12 - 14,8V Maximum consumption: Batteries recharged using provided adapter for car lighter...
- Page 13 Multimetter FSM 450 Ref. 5922 Environmental working conditions: Height: Up to 2000 m Temperature margin: From 0 to 40 º C Maximum relative humidity: 80 % (Up to 31ºC), in a linear decrease until 50% at 40º C. Accessories included:...
-
Page 14: Element Description
Multimetter FSM 450 Ref. 5922 2.2.- ELEMENT DESCRIPTION The front panel features the following elements: Figure 3.- Front panel (1) Monitor TFT 5" colour screen (2) Short cut buttons Each of these buttons correspond to one of the menu functions that can be seen onscreen at that moment. - Page 15 Multimetter FSM 450 Ref. 5922 (4) Clear/Menu This makes the menu buttons appear and disappear from onscreen. It is also used to close the windows that appear in the middle of the screen (measurement windows, parameter selection windows, etc). (5) Back...
- Page 16 Multimetter FSM 450 Ref. 5922 (9) Freq Selects the frequency tuning mode. If there is a measurement window open and the equipment was previously in the channel tuning mode, when you press the Freq button, the information regarding the tuned channel disappears and the video carrier frequency of that channel appears in its place.
- Page 17 Multimetter FSM 450 Ref. 5922 (24) Switching analyser / TV viewing modes (Button 5) This lets you change from the TV mode to the analyser mode and vice versa. (25) Printing measurements (Button 8) This automatically prints the measurement on an RS-232 printer.
- Page 18 Multimetter FSM 450 Ref. 5922 Side view: 30 31 V.max. 24 V 12 ... 14,8 V I.max. 400 mA SCART RS-232 Figure 5.- The connectors on the side panels (30) RF input Input connector for the signal with an impedance of 75 ohm.
-
Page 19: How To Use The Product
Multimetter FSM 450 Ref. 5922 3.- HOW TO USE THE PRODUCT 3.1.- THE MENU As explained previously, the different functions of the equipment have been placed in hierarchical order, so that they are very user-friendly. The menu texts appear onscreen, superimposed over the picture, which can be the demodulated picture from the tuned TV channel (TV mode) or the spectrum (analyser mode). - Page 20 Multimetter FSM 450 Ref. 5922 Config. Auto Monitor Language Dsconnect Paramtres Informa. Clock Scart Battery Battery Brigh. Colour Volume Contrast Change Regenerat. Mode Sel. Audio Channel View Mode Measure Carrier Search (types) Measure Search Sync. Teletext Analogue Digital Next Prev.
-
Page 21: Tuning Modes
Multimetter FSM 450 Ref. 5922 3.2.- TUNING MODES The FSM 450 has 2 tuning modes: by channel or by frequency. To select one or the other, use the Chan. (channel tuning) and Freq. (frequency tuning). If using the channel tuning option, the measurements taken will be done on the video carrier of that channel. -
Page 22: Measurement Configuration
Multimetter FSM 450 Ref. 5922 3.3.1.- Measurement configuration By using the functions in this menu you can set the parameters that affect the measurements that you are going to take. All of the windows that are opened with the different functions of the “Measurement Configuration”... -
Page 23: 2.1.- Lnb
Multimetter FSM 450 Ref. 5922 Current status of the equipment Options. These are selected by using the rotating knob and Indicates the power that is are activated when this being supplied knob is pressed Indicates if the 22KHz tone is activated... - Page 24 Multimetter FSM 450 Ref. 5922 Current status of the equipment Options. Indicates the power that is being These are selected by supplied to the preamplifiers using the rotating knob and are activated when Indicates if the 22KHz tone is this knob is pressed...
-
Page 25: 2.2.- Diseqc
Multimetter FSM 450 Ref. 5922 3.3.1.2.2. DiSEqC (satellite band only): The Diseqc protocol lets you work with multiswitches that have up to 16 inputs. To do so, when the meter is in the satellite band, you must enable, in the powering menu, the current and tone that corresponds to the desired polarity and satellite band. -
Page 26: 3.- Channels And Standards
Multimetter FSM 450 Ref. 5922 3.3.1.3.- Channels and Standards 3.3.1.3.1.- Standard This allows you to select the colour standard. The standards that are available are as follows: PAL B/G, PAL D/K, PAL I, SECAM B/G, SECAM L and SECAM D/K. -
Page 27: 3.3.- Video Invertion
Multimetter FSM 450 Ref. 5922 3.3.1.3.3.- Video invertion This function lets you select if the video signal that comes from a satellite band is inverted (ON) or not (OFF). By default, this option is OFF. It is useful when watching the video of satellites from the C band. -
Page 28: 4.- Memory Logger
Multimetter FSM 450 Ref. 5922 3.3.1.4.- Memory Logger. This section describes how to access a series of functions that let you turn the majority of processes that you carry out with the meter into automatic operations. On screen you will see a window with a list of the meter memories. If no memories have been recorded, the window will be empty. -
Page 29: 4.1.1- Save
Multimetter FSM 450 Ref. 5922 To configure the equipment according to the stored parameters in a specific menu, simply press button (or go to the CONF. MEASURE => MEMORIES LOGGER => MEMORIES menu), select the desired memory from the list and press If there isn't any memory in the meter, the message "NO MEMORIES"... -
Page 30: 4.1.2.- Delete
Multimetter FSM 450 Ref. 5922 When the user confirms that s/he wants to save the memory, the message "MEMORY SAVED" will appear onscreen. The maximum number of memories that the meter can store is 100. If the memory capacity is full, the message "MEMORY FULL"... -
Page 31: 4.1.3.- Edit
Multimetter FSM 450 Ref. 5922 3.3.1.4.1.3.- How to Edit a Name This function enables the user to modify the name of any memory, whether it has been saved or whether it is a new memory that the user wishes to save. -
Page 32: 4.2.- Macromeasurements
Multimetter FSM 450 Ref. 5922 3.3.1.4.2.- Macromeasurements A MACROMEASUREMENT is a group of a specific number of memories (different measurements), that the meter will be able to execute automatically and add the results to a specific measurement LOG. You can configure up to 100 different MACRO MEASUREMENTS! (automatic measurements with different memories). - Page 33 Multimetter FSM 450 Ref. 5922 When the is pressed, the MACRO OPTIONS menu is displayed. Figure 21.- Macro options Use the rotating knob to choose the different options of this menu: - Run Macro. Starts the execution of the selected Macromeasurement. If the selected macromeasurement does not contain any memory, the meter will display the following message "MACRO EMPTY".
- Page 34 Multimetter FSM 450 Ref. 5922 Figure 23.- Change to satellite connector The other possibility that can be chosen using the button is the Broadband outlet where the equipment carries out the Macromeasurement in both bands with no interruptions. If you press...
- Page 35 Multimetter FSM 450 Ref. 5922 To execute the Macromeasurement again in a new outlet, press again. If you want to finish the Macromeasurement, press any button. Figure 25.- Continue or cancel Macromeasurement - LOG options. This option lets us select the possibility of continuing with a LOG which we had previously created or of starting with a new one, in this case the equipment will suggest a name for the new "LOG"...
- Page 36 Multimetter FSM 450 Ref. 5922 - Edit LOG name. This function lets the user modify the name of the new LOG. Figure 27.- Editing the LOG name Note: If we are executing a Macromeasurement, the function "Automatic shut-down" will be postponed until the end of this process.
-
Page 37: 4.2.1.- New Macro
Multimetter FSM 450 Ref. 5922 3.3.1.4.2.1.- New Macro This option lets us create new Macromeasurements using the memories inside the meter. A window opens and the name of a Macromeasurement appears with the cursor flashing. The name that the equipment proposes to identify each Macromeasurement is: “MAC” and a two- digit number which will be the lowest number available at that time. -
Page 38: 4.2.2.- Edit Macro
Multimetter FSM 450 Ref. 5922 At the bottom of the window, we will be able to see some important information about each memory that has been selected and the number of memories that we are putting into the Macromeasurement. When we have finished the selection process, we must press CONFIRM and then . -
Page 39: 4.3.- View Data Logs
Multimetter FSM 450 Ref. 5922 3.3.1.4.3.- View DATA LOGS In this section you can see the results of the Macromeasurements that were executed. The meter will display a window with a list of the DATA LOGS. At the bottom of the window you will see the content of each one. -
Page 40: 4.3.1.- Erase Logs
Multimetter FSM 450 Ref. 5922 3.3.1.4.3.1 3.3.1.4.3.2 Figure 31.- Measurements in each outlet 3.3.1.4.3.1.- Erase LOGS This option lets you erase the selected LOGS. To do this, use the rotating knob to mark the LOGS, selecting them using . The marked registers will appear in yellow, then press the button (CONFIRM) and complete the erasing process by pressing . -
Page 41: Equipment Configuration
Multimetter FSM 450 Ref. 5922 3.3.2.- Equipment configuration The functions in this menu set all of the parameters that are related to the meter’s configuration. All of the windows that open in the different functions in the “Equipment Configuration” menu can be closed by using the Clear button. -
Page 42: 2.- Automatic Shut-Down
Multimetter FSM 450 Ref. 5922 3.3.2.2.- Automatic shut-down The equipment has the option of automatically turning off once a certain programmable time of inactivity has elapsed. This period of inactivity that can be selected ranges from 1 to 59 minutes. The user can also disable this function (OFF). The equipment has a default value for this period of inactivity of 15 minutes. -
Page 43: 3.1.- Volume
Multimetter FSM 450 Ref. 5922 3.3.2.3.1.- Volume (short cut button Use the rotating knob to increase or decrease the volume. The volume screen appears as follows: Figure 36.- Selection of volume 3.3.2.3.2.- Brightness (short cut button This increases or decreases the brightness of the picture onscreen. It operates in the same way as the volume control. -
Page 44: 5.- Scart
Multimetter FSM 450 Ref. 5922 3.3.2.5.- Scart A window opens that allows you to select the control of the signals of the SCART: Figure 38.- Scart options Scart auto: Normal operating mode of the scart, in other words, when there is a signal in the scart, it is automatically seen onscreen. -
Page 45: 6.- Information About The Equipment
Multimetter FSM 450 Ref. 5922 - If the meter has a digital measurement window open (Power or C/N) it will be impossible to see the scart signal, although this may be in auto mode. Therefore, if you wish to see the scart signal, make sure that the meter is not carrying out a digital measurement. -
Page 46: 6.1.- Changing The Battery
Multimetter FSM 450 Ref. 5922 3.3.2.6.1.- Changing the battery When the installer wishes to change the batteries, it is necessary to inform the equipment so that it can modify the charging and discharging algorithm so as to optimize their lifespan and duration while in use. -
Page 47: 6.2.- Battery Regeneration
Multimetter FSM 450 Ref. 5922 · Do not connect the positive terminal to the negative terminal of a battery with a metal object, the battery could re-heat, emit hydrogen gas, undergo spillage, burn or explode. · The user should use batteries provided by Televés, which are appropriate for this equipment. - Page 48 Multimetter FSM 450 Ref. 5922 Figura 42.- Meter indication Once this process has finished, the ON light will switch off and the battery light will switch on. If, after this process, it is not possible to see an increase in the battery life, it is advisable to...
-
Page 49: Tv Mode
Multimetter FSM 450 Ref. 5922 3.3.3.- TV mode (short cut button When this menu is selected, the equipment switches automatically to TV mode, in other words, the user will see the demodulated television signal of the tuned channel onscreen. 3.3.3.1 3.3.3.2... -
Page 50: 1.2.- Synchronism
Multimetter FSM 450 Ref. 5922 Figura 44.- Indication via bars 3.3.3.1.2.- Synchronism This option displays the representation of the synchronism burst on the left-hand side of the screen. If a digital measurement is being carried out (power, C/N, BER, MPEG), it will not be possible to see the synchronism burst, as the meter supposes that the tuned channel is digital and therefore does not represent this burst. -
Page 51: 1.3.- Measurement Windows
Multimetter FSM 450 Ref. 5922 3.3.3.1.3.- Measurements window (short cut button When this option is selected, the window that corresponds to the last measurement that was carried out, opens. In other words, if the last measurement that was carried out was the C/N (for example), the C/N window will open and the C/N measurement will be carried out in the tuned channel. -
Page 52: 1.4.- Teletext
Multimetter FSM 450 Ref. 5922 3.3.3.1.4.- Teletext When this function is selected, the teletext information of the tuned channel will appear onscreen (if the channel does not dispose of this information, NO TTX will appear). The representation level of the teletext function is 1.5 Figure 47.- Teletext window... -
Page 53: 2.1.- Analogue
Multimetter FSM 450 Ref. 5922 3.3.3.2.1.- Analogue measurements (short cut button The corresponding submenu is as follows: 3.3.3.2.1.1 3.3.3.2.1.2 3.3.3.2.1.3 3.3.3.2.1.4 Figure 49.- Analogue measurements 3.3.3.2.1.1.- Level If the channel tuning mode has been selected, this function will measure the carrier level of the tuned channel. -
Page 54: 2.1.2.- V/A
Multimetter FSM 450 Ref. 5922 Channel tuning mode: information on the tuned channel Signal level 22 KHz tone. In this case, it is disabled Preamplifier powering (OFF) Audio carrier (MHz above the video carrier) Colour standard Bandwidth of the measurement filter Channel plan Figure 51.- Extended form... -
Page 55: 2.1.3.- Automatic C/N
Multimetter FSM 450 Ref. 5922 If we press the Chan. button, the information on the tuned channel will appear. The frequency that is used to carry out the video level measurement will be the video carrier of the channel that the equipment searches for automatically. -
Page 56: 2.1.3.1.- Channel Bw
Multimetter FSM 450 Ref. 5922 C/N measurement Tuned frequency Channel bandwidth Figure 56.- Automatic C/N measurement. Frequency tuning If in channel tuning mode, you will be able to see the channel with the carrier that is being used to carry out the level measurement. As has already been explained in the section regarding the V/A ratio measurement, if the equipment is in frequency tuning mode, the level measurement will be carried out in the frequency that the user has tuned, and so it will be the user’s... -
Page 57: 2.1.4.- Referenced C/N
Multimetter FSM 450 Ref. 5922 3.3.3.2.1.4.- Referenced C/N When this function is selected, the video signal automatically disappears from the screen. This is because the equipment has to carry out the noise measurement in the reference frequency. Because of this, the button is not enabled. -
Page 58: 2.1.4.1.- Reference Frequency
Multimetter FSM 450 Ref. 5922 3.3.3.2.1.4.1.- Reference frequency By pressing this option, the noise frequency is highlighted in the window (dark background). You can vary the noise frequency by using the rotating knob. Once the reference frequency has been selected, if you press the Freq. button, the current frequency is erased and the you can enter the frequency that you want by using the number pad. -
Page 59: 2.2.- Digital
Multimetter FSM 450 Ref. 5922 3.3.3.2.2.- Digital measurements (short cut button When a digital measurement is selected, the image from the TV signal will disappear from the screen, and a warning message will appear that indicates that this is a digital measurement. -
Page 60: 2.2.1.1.- Channel Bw
Multimetter FSM 450 Ref. 5922 To change this parameter, the following submenu appears: 3.3.3.2.2.1.1.- Channel bandwidth If this option is pressed, the value of the bandwidth is selected in the channel power window. You can change this value by using the rotating knob: Channel BW Tuned frequency. - Page 61 Multimetter FSM 450 Ref. 5922 3.3.3.2.2.4.1 3.3.3.2.2.4.3 3.3.3.2.2.4.2 Terrestrial band Satellite band Figure 65.- Options for the BER measurements The window that opens when any of the modulations is selected is the same, however the type of modulation varies: BER before Viterbi...
-
Page 62: 2.2.4.1.- Cofdm
Multimetter FSM 450 Ref. 5922 3.3.3.2.2.4.1.- COFDM (only terrestrial band) Carry out the BER measurement of the digital terrestria signals with COFDM modulation. The submenu for this type of modulation is the following: 3.3.3.2.2.4.1.1 3.3.3.2.2.4.1.2 3.3.3.2.2.4.1.3 Figure 67.- COFDM measurements 3.3.3.2.2.4.1.1.- Parameters... - Page 63 Multimetter FSM 450 Ref. 5922 When the rotating knob is pressed, the window that corresponds to the selected parameter opens: Possible options that can be selected with the Spectrum Inversion parameter using the rotating knob Figure 69.- COFDM parameter options In the Offset option, if the COFDM channel has a frequency deviation, you can apply an offset (0, 1/6, 2/6, 3/6, -1/6, -2/6, -3/6, Auto) to correct this deviation.
-
Page 64: 2.2.4.1.2.- Ber
Multimetter FSM 450 Ref. 5922 3.3.3.2.2.4.1.2.- BER When this function is selected, the error packet window closes and the BER measurement window appears again. 3.3.3.2.2.4.1.3.- MPEG By pressing on this option, the MPEG decoding is enabled. The message "STARTING MPEG"... - Page 65 Multimetter FSM 450 Ref. 5922 Figura 72.- Channel information Note: It is possible to change service at any moment by using the rotating knob. To change channnel press...
-
Page 66: 2.2.4.2.- Qam
Multimetter FSM 450 Ref. 5922 3.3.3.2.2.4.2.- QAM (only terrestrial band) When this function is selected, the equipment measures the BER of a digital signal with QAM modulation. The information window is identical to the previous one. The submenu for this function is the following: 3.3.3.2.2.4.2.1... -
Page 67: 2.2.4.2.2.- Ber
Multimetter FSM 450 Ref. 5922 3.3.3.2.2.4.2.2.- BER When this function is selected, the parameters window closes and the BER measurement window appears again. 3.3.3.2.2.4.2.3.- MPEG By enabling this option, the user enters the MPEG decoding mode in a QAM channel. The operation mode is similar to MPEG of COFDM (see 3.3.3.2.2.4.1.4). -
Page 68: 2.2.4.3.- Qpsk
Multimetter FSM 450 Ref. 5922 3.3.3.2.2.4.3.- QPSK (only the satellite band) This function measures the BER of a digital signal with QPSK modulation. The information window is exactly the same as the window for the QAM and COFDM modulations. The submenu is the following: 3.3.3.2.2.4.3.1... -
Page 69: 3.- Channel Search
Multimetter FSM 450 Ref. 5922 3.3.3.3.- Channel search (short cut button The FSM 450 features an automatic channel search function. The search is carried out according to a certain threshold as defined by the user in the Search Level. It also depends on whether the meter is in channel tuning mode or frequency tuning mode. -
Page 70: 3.1.- Search Level
Multimetter FSM 450 Ref. 5922 3.3.3.3.1.- Search level This parameter defines the threshold that the video carrier must surpass for the equipment to tune a specific channel when carrying out an automatic search. When this function is selected, a window opens onscreen, and the value of the search level can be modified using the rotating knob. -
Page 71: 4.- Selecting The Audio Carrier
Multimetter FSM 450 Ref. 5922 3.3.3.4.- Selecting the Audio Carrier The options that appear here depend on the band and on the colour standard that has been selected: Band Terrestrial Satellite PAL B/G 5.50 & 5.74 PAL D/K 6.50 & 6.74 PAL I 6.00... -
Page 72: Spectrum
Multimetter FSM 450 Ref. 5922 3.3.4.- Spectrum (short cut button If this menu is chosen, the meter passes straight to the spectrum analyzer mode. In this mode you can see the signal spectrum according to the selected span and the tuned frequency. The lower part of the screen (under the spectrum) is used to display the parameters, measurements, etc. -
Page 73: 1.- Reference Level
Multimetter FSM 450 Ref. 5922 The information about the tuned frequency or channel appears at the bottom of the screen. If the equipment is in frequency mode, the central frequency of the spectrum will appear. If we turn the rotating knob, we can change the central frequency, in other words, we move the spectrum to one side or the other. -
Page 74: 2.- Span
Multimetter FSM 450 Ref. 5922 Figure 83.- Reference level 3.3.4.2.- Span This function lets you vary the range of frequencies that is represented by the spectrum. The information for the selection of the parameter is displayed on the lower right-hand part of the screen. -
Page 75: 3.- Measurements
Multimetter FSM 450 Ref. 5922 3.3.4.3.- Measurements The measurements are displayed at the bottom of the screen. While any measurement is being viewed, the tuned frequency can be varied by turning the rotating knob. This means that the measurement can be carried out with different frequencies or channels. -
Page 76: 3.1.3.- Automatic C/N
Multimetter FSM 450 Ref. 5922 Figure 85.- A/V carrier ratio 3.3.4.3.1.3.- Automatic C/N The C/N measurement is also displayed on the lower part of the screen. As is the case with the V/A measurement, the carrier level is measured in the spectrum’s central frequency The equipment selects the frequency that is used to measure the noise. -
Page 77: 3.1.4.1.- Reference Frequency
Multimetter FSM 450 Ref. 5922 parameters are displayed on the lower left-hand part of the screen; the level measurement disappears for a moment, and once the desired value has been selected (by pressing the rotating knob), the level measurement re-appears:... -
Page 78: 3.2.- Digital
Multimetter FSM 450 Ref. 5922 3.3.4.3.2.- Digital 3.3.4.3.2.1.- Channel power The channel power is displayed on the lower left-hand part of the screen. For this measurement, the meter takes the spectrum’s central frequency (the tuned frequency) to be the central frequency of the digital channel. -
Page 79: 3.2.2.- C/N Automática
Multimetter FSM 450 Ref. 5922 3.3.4.3.2.1.1 Figure 89.- Bandwidth of the digital channel 3.3.4.3.2.2.- Automatic C/N The automatic C/N measurement for digital channels is the same as for analogue channels. This function has the following submenu: 3.3.4.3.2.2.1.- Channel bandwidth When this parameter is selected, the information about the channel power measurement disappears and the channel bandwidth appears in its place. - Page 80 Multimetter FSM 450 Ref. 5922...
-
Page 81: Error Warnings
Multimetter FSM 450 Ref. 5922 3.4.- ERROR WARNINGS When the equipment detects an error in any of the modules or components, it warns the user through a series of messages as can be seen below: · NO BAT. : This message appears when the equipment is switched on and no batteries are detected. - Page 82 Multimetter FSM 450 Ref. 5922 · NO POWERING: This message appears when the user tries to charge the batteries and there is no external powering. · SHORT CIRCUIT: This message appears when the equipment detects a shortcircuit in the “F” connector. The equipment will also emit a noise.
-
Page 83: Description Of The Inputs And Outputs
Multimetter FSM 450 Ref. 5922 4.- DESCRIPTION OF THE INPUTS AND OUTPUTS 4.1.- RF INPUT The RF input is through the connector (30) on the side panel. The maximum signal level should never exceed 130 dBµV. This connector is easily replaced when this becomes necessary. -
Page 84: Scart Connector
Multimetter FSM 450 Ref. 5922 4.3.- SCART (DIN EN 50049) Figure 91.- SCART Also known as a PERITEL connector (in compliance with standard NF-C92250). The signals in this connector are as follows: PIN Nº SIGNAL SPECS. PIN Nº SIGNAL SPECS. -
Page 85: Maintenance
Multimetter FSM 450 Ref. 5922 5.- MAINTENANCE 5.1.- REPLACING THE BATTERY The battery should be replaced when its capacity (fully-charged) has diminished considerably. To ensure that the equipment operates correctly, it should be provided by Televés, as it should incorporate the appropriate protective features. - Page 86 Multimetter FSM 450 Ref. 5922 WARNING Avoid any type of shortcircuit between the cables to the battery as this could cause serious damage to the equipment. Note: Remember to dispose of the batteries in the appropriate places provided Ni-MH...
-
Page 87: Cleaning Instructions
Multimetter FSM 450 Ref. 5922 5.2.- CLEANING INSTRUCTIONS WARNING Before cleaning the cover, make sure that the equipment is disconnected. Do not use scented hydrocarbons or chlorinated solvents. These products may harm the materials used for the cover. The cover can be cleaned with a bit of normal cleaning liquid and water, using a soft damp cloth. -
Page 88: Appendix 1.- Batteries
Multimetter FSM 450 Ref. 5922 APPENDIX 1.- Battery Below is a list of the safety measures that must be taken into account as regards the battery: This equipment contains a Ni-MH battery packet. · The charging of the battery should always be carried out with the battery located inside the meter and using the DC adapter that is provided with the equipment. -
Page 89: Appendix 2.- Channel Plans
Multimetter FSM 450 Ref. 5922 APPENDIX 2.- Channels Plan CCIR 48,25 E05 175,25 S16 266,25 S29 367,25 471,25 575,25 679,25 783,25 55,25 E06 182,25 S17 273,25 S30 375,25 479,25 583,25 687,25 791,25 62,25 E07 189,25 S18 280,25 S31 383,25 487,25... - Page 90 Multimetter FSM 450 Ref. 5922 The frequencies in this channel plan require the use of a universal LNB ASTRA 19 ASTRA HL ASTRA HH ASTRA VL ASTRA VH 1464 1120 1744 1479 1139 1763 1494 1158 1782 1008 1509 1178...
- Page 91 Multimetter FSM 450 Ref. 5922 ASTRA 28º 1097 1120 1256 1392 1529 1666 1802 1112 1139 1276 1412 1548 1685 1822 1023 1126 1158 1295 1432 1568 1704 1841 1038 1141 1178 1314 1451 1588 1724 1860 1053 1156 1198...
- Page 92 Multimetter FSM 450 Ref. 5922 AMAZONAS 1498 1376 1306 1184 1119 1010 1225 1489 1367 1254 1180 1062 1492 1428 1315 1245 1123 1058 1532 SIRIUS 5º 1121 1223 1358 1473 1703 1865 2034 2091 1139 1243 1377 1492 1722...
- Page 93 Multimetter FSM 450 Ref. 5922 GUARANTEE Televés S.A. offers a one year guarantee, beginning from the date of purchase for countries in the EEC. For the batteries and due to the characteristics of this article, the guarantee period is limited to six months.
- Page 95 Multimetter FSM 450 Ref. 5922 TECHNICAL ASSISTANCE At the end of the manual, there is a complete list of our closest Technical Assistance points, their telephone numbers and emails which can be used for any request or question. REPAIR SERVICE 1º- In order to facilitate the identification of the failure, use the following table:...
- Page 96 Multimetter FSM 450 Ref. 5922 Label to identify bulk for delivery to the Technical Assistance points.
- Page 97 Multimetter FSM 450 Ref. 5922...
- Page 98 S.op.Viale Liguria 24 20068 Peschiera Borromeo (MI) Italia Tel.: (+39)-0251650604 (RA) Fax: (+39)-0255307363 televes.it@televes.com TELEVES MIDDLE EAST FZE P.O. Box 17199 JEBEL ALI FREE ZONE DUBAI, UNITED ARAB EMIRATES Tel.: 9714 88 343 44 Fax: 9714 88 346 44 televes.me@televes.com Rúa B.
- Page 100 Field Strength Meter Multimetter FSM 450 U s e r M a n u a l Ref. 5922 w w w . t e l e v e s . c o m...
Need help?
Do you have a question about the Multimetter FSM 450 and is the answer not in the manual?
Questions and answers