
Related Manuals for Stel T300 AC/DC


Summary of Contents for Stel T300 AC/DC
- Page 1 6948300000 MANUALE DI ISTRUZIONE PER SALDATRICE INSTRUCTION MANUAL FOR WELDING MACHINE T300 AC/DC Info : www.stelgroup.it - tel. +39 0444 639525...
- Page 2 The RoHS Directive 2011/65/EU The Ecodesign Directive 2009/125/EC Type of equipment TIG Welding Equipment Type of designation 601894000L – T300 AC/DC Brand name or trade mark STEL Manufacturer or his authorized representatives established within the EEA: Name, address, phone, website: STEL s.r.l...
- Page 3 6948300000 SICUREZZE WARNING LO SHOCK ELETTRICO PUÒ UCCIDERE Disconnettere macchina dalla rete alimentazione prima di intervenire sul generatore. - Non lavorare con i rivestimenti dei cavi deteriorati. - Non toccare le parti elettriche scoperte. - Assicurarsi che tutti i pannelli di copertura del generatore di corrente siano ben fissati al loro posto quando la macchina è...
-
Page 4: Descrizione Generale
È apparecchiature spedite STEL sono state l’avvicinamento alla macchina da parte di persone sottoposte ad un rigoroso controllo di qualità. Tuttavia portatori di stimolatori elettrici (PACE MAKERS). se la Vs. apparecchiatura non dovesse funzionare correttamente, rivolgetevi al Vs. concessionario DESCRIZIONE GENERALE autorizzato. -
Page 5: Dati Tecnici
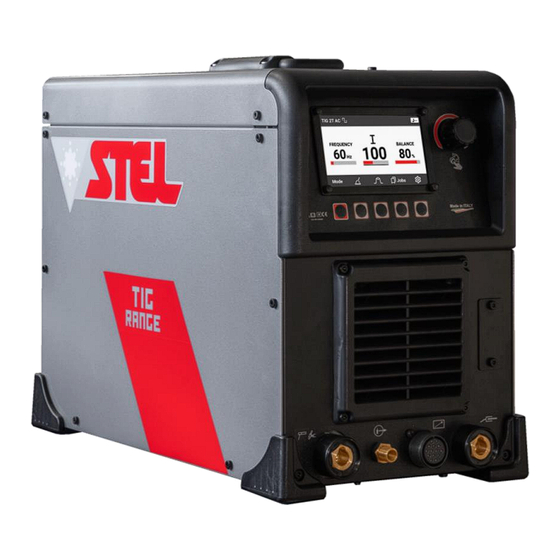
Riferimento alla normativa di costruzione Il generatore funziona con queste tensione di B) DATI DISALDATURA alimentazione: Simbolo del processo di lavoro T300 AC/DC 230V±15% 1F Simbolo per generatori idonei ad operare in ambiente a rischio accresciuto di scossa elettrica. e Fuse rating di... - Page 6 6948300000 SOLLEVAMENTO DESCRIZIONE PANNELLO ATTENZIONE FRONTALE T300 AC/DC 24,5 Kg / 54, lb Sollevamento manuale Per sollevare manualmente il generatore servirsi delle due apposite maniglie. Sollevamento tramite gancio e cinghia Fig.1 Per il sollevamento con gancio e cinghia usare esclusivamente i le maniglie come indicato nel Pulsante MODE;...
- Page 7 6948300000 DISPOSIZIONE IMPOSTAZIONE MANUAL SALDATURA AD 1) Premere il pulsante (Fig.1, rif.2) ELETTRODO - Premere il pulsante MODE (Fig.1,rif.1); - Apparirà la seguente schermata di MODE SELECTION; 2) Selezionare la funzione Manual tramite l'encoder (Fig.1,rif.6). 3) Per confermare la scelta premere l'encoder (Fig.1,rif.6).
- Page 8 6948300000 IMPOSTAZIONE EASY SET 1) Premere il pulsante (Fig.1, rif.3) 2) Selezionare la funzione EASY SET tramite l'encoder (Fig.1,rif.6). 3) Per confermare la funzione selezionata premere l'encoder (Fig.1,rif.6). 8) Selezionare il diametro dell’elettrodo tramite l'encoder (Fig.1,rif.6). 9) Per confermare la scelta premere l'encoder (Fig.1,rif.6).
- Page 9 6948300000 V.R.D. REGOLAZIONE PARAMETRI PULSAZIONE La sigla V.R.D. sta per VOLTAGE REDUCTION (Solo in MODALITÀ MANUAL) DEVICE che non è altro che un sistema per la riduzione della tensione a vuoto. Quando si installa il V.R.D. in una saldatrice esso riduce la tensione a vuoto massima ad una tensione di sicurezza che normalmente è...
- Page 10 6948300000 - Premere l’encoder (Fig.1,rif.6 ) per confermare la scelta del processo di saldatura; TIG DC 1) Premere il pulsante (Fig.1,rif.2). 5) Ruotare l’encoder (Fig.1,rif. 6) per modificare il valore del Duty Cycle; 6) Premere l’encoder (Fig.1,rif.6) per passare alla schermata di regolazione della CORRENTE DI BASE ;...
- Page 11 6948300000 variazione di corrente percepibile anche con il TIG 2T ( DC ) minimo movimento della torcia. ES: si può iniziare a saldare lontano dal pezzo senza scaldare troppo, poi man mano che ci si avvicina la corrente e quindi l'apporto termico aumenta...
- Page 12 6948300000 4) Qui è possibile regolare il valore del tempo 13) Qui è possibile regolare il valore della corrente (secondi) che si rimane nell’Initial Amps. finale ( % ) che è in percentuale rispetto alla 5) Ruotare l'encoder (Fig.1, rif.6) fino a corrente di saldatura.
- Page 13 6948300000 21) Premere il pulsante HOME per tornare alla Il primo parametro della Low Speed è schermata principale; FREQUENCY ( Frequenza di Pulsazione ) TIG 2T DOUBLE PULSE (DC) Il TIG doppio impulso combina due tipi di pulsazione. Una pulsazione lenta e una veloce. I vantaggi del Double Pulse sono: - Maggiore velocità...
- Page 14 6948300000 TIG 2T DYNAMIC POWER (DC) Questa funzione permette di mantenere costante il prodotto Tensione x Corrente. La corrente di saldatura aumenta al diminuire della tensione dell'arco. Al contrario, se aumenta la tensione diminuisce la corrente di saldatura. Il valore dell'arco Dinamico è regolabile da un minimo di 0,1 V/A ad un massimo di 25 V/A Ampere per ogni variazione di 1Volt sia positiva E’...
- Page 15 6948300000 Tra le due funzioni c’è differenza : Più alto è il valore A/V e più alta sarà la la STANDARD : è la classica funzione Puntatura variazione di corrente al variare della lunghezza d’arco. FAST TACK : viene utilizzato per unire lamiere sottili.
- Page 16 6948300000 TIG SETTINGS DC Dalla schermata principale è possible accedere al menu TIG SETTINGS DC. Qui è possible regolare il tempo che l’arco rimane acceso. Premere l’encoder per andare alla regolazione della funzione successiva. ( TIME OFF ) 1) Premere il pulsante (Fig.1, rif.3).
- Page 17 6948300000 TIG AC MODE 1) Premere il pulsante MODE (Fig.1,rif.2). 7) Ruotando l’encoder selezionare il tipo di forma d’onda; SQUARE WAVE (onda quadra): La forma d'onda standard per tutte le moderne saldatrici TIG inverter. L'onda quadra offre potenza, controllo 2) Ruotando l’encoder selezionare TIG 2T ; dell'arco e aspetto del cordone eccellenti.
- Page 18 6948300000 Questa è la schermata principale quando si attiva Questa è la schermata principale quando si attiva la MODALITÀ AC la modalità MIX AC/DC Premendo il pulsante (Fig.1, rif.3). Verrà visualizzata la schermata con la regolazione della saldatura. Frequenza AC Corrente Balance AC Per impostare i parametri AC FREQUENCY e AC...
- Page 19 6948300000 TIG AC SETTINGS SALVATAGGIO e RICHIAMO PARAMETRI DI SALDATURA Dalla schermata principale è possibile accedere al ( JOB MODE ) TIG SETTINGS AC. Questa funzione permette di memorizzare e di richiamare in qualsiasi momento 8 parametri di saldatura. SALVATAGGIO PARAMETRI Premere il pulsante ( Fig.1, rif.3 );...
-
Page 20: Comando A Distanza
6948300000 BLOCCO PARAMETRI SALDATURA I parametri di saldatura salvati possono essere bloccati. Questo significa potranno essere modificati. 1) Premere il pulsante JOBS (Fig.1,rif.4) per entrare nella schermata JOBS LIST. 2)Premere il pulsante LOCK (Fig.1,rif.5) per bloccare i parametri di saldatura. Quando parametri vengono... -
Page 21: Factory Reset
6948300000 AUTO : il gruppo di raffreddamento è ON DEMAND e verrà attivato dalla macchina solo durante la saldatura. REMOTE TIG : abilitazione CAD REMOTE DIRECTION : gestisce il verso della regolazione corrente nel CAD MINIMUM AMPS TIG : è possibile impostare la regolazione della corrente minima AC CURRENT READING : lettura del valore di corrente ( MAX o AVG ) - Page 22 6948300000 Premere il pulsante RESET (Fig.1,rif.2) Premere il pulsante YES (Fig.1,rif.4) per avviare il RESET Quando il RESET terminerà apparirà la seguente schermata : DISPOSIZIONE PER SCRICCATURA 5) Premere il pulsante MODE (Fig1,rif.6); Per le applicazioni di scriccatura vengono impiegati 6) Ruotare l’encoder e selezionare la funzione generalmente generatori con una tensione del CAC-A GOUGING...
- Page 23 6948300000 DUTY CYCLE E SMALTIMENTO SOVRATEMPERATURA APPARECCHIATURE Il ciclo di intermittenza è la percentuale di utilizzo ELETTRICHE ED della saldatrice su 10 minuti che l’ operatore deve ELETTRONICHE rispettare per evitare che scatti il blocco di erogazione per sovratemperatura. smaltire apparecchiature elettriche assieme ai rifiuti normali! ottemperanza...
- Page 24 6948300000 must be free from damage to the insulation. BARE SAFETY CABLES ARE DANGEROUS. Do not use the ELECTRIC SHOCK CAN KILL machine if the power cable is damaged; it must be - Disconnect the power supply before working on replaced immediately.
-
Page 25: General Characteristics
Complaints for faulty goods: All the equipment inflammable gases or combustible vapours. shipped by STEL is subjected to strict quality control. However, if your equipment does not work GENERAL properly, consult your authorised dealer. CHARACTERISTICS TECHNICAL DATA... -
Page 26: Installation
Degree of protection . qualified person at an approved service centre. EARTHING T300 AC/DC - To ensure user protection the welding machine must absolutely be correctly connected to the earth Efficiency system... -
Page 27: Stick Welding
6948300000 INSTRUCTION FOR STICK WELDING INSECURE POSITIONING Failure to properly secure the machine can cause - Press the button MODE (Fig.1,ref.1) to enter in personal injury. If machine is in an insecure the Mode Selection menu position do not attempt to switch on. Do not put the machine on an unlevelled surface greater than 10°. - Page 28 6948300000 MANUAL MODE SET UP EASY SET MODE SET UP 1) From the main screen of the STICK mode press 1) Press the button (Fig.1, ref.3) 2) Select EASY SET function turning the encoder the button (Fig.1, ref.2) (Fig.1,ref.6). 3) To confirm the choice press the encoder (Fig.1,ref.6).
- Page 29 6948300000 3) To change the value of the chosen function, press the encoder (Fig.1,ref. 6) and turn it; V.R.D. initials V.R.D. stand VOLTAGE REDUCTION DEVICE, which is a system for reducing the no-load voltage (OCV). When the V.R.D. is installed in a welding machine it reduces the maximum no-load voltage to a safety voltage which is normally less than 18V.
-
Page 30: Tig Welding
6948300000 PULSE PARAMETERS ADJUSTMENT (Only in MANUAL MODE) 5) Turn the encoder (Fig.1,rif. 6) to modify the Duty Cycle value; 6) Press the encoder (Fig.1,rif.6) to jump to the next function BASE CURRENT ; 1) Press the button (Fig.1,rif.3) to enter in the menu ;... - Page 31 6948300000 therefore the heat input increases... TIG WELDING DC 4) Turn the encoder (Fig.1,rif.6) to select the welding process ; 1) Press the button (Fig.1,rif.2). 5) Press the encoder (Fig.1,rif.6) to confirm the choice and jump in to the next page; 2) Use the encoder to select the Welding Mode (Fig.1, ref 6) ;...
- Page 32 6948300000 TIG 2T ( DC ) 4) Here it is possible to regulate the time (seconds) to stay in the Initial Amps; 5) Turn the encoder (Fig.1, rif.6) for regulate the 1) Press the button ( Fig.1,rif.3), to access value; to the TIG - MAIN SETTINGS menu and the 6) For regulate the next parameter ,Slope Up, following screen will appear :...
- Page 33 6948300000 TIG 2T DOUBLE PULSE (DC) Double pulse TIG combines two types of pulsation. A slow and a fast pulse The advantages of Double pulse are: Higher welding speed Deeper penetration Arc more concentrated Better control of heat input The most suitable applications for double pulse TIG are: Thin materials Corner joints...
- Page 34 6948300000 It is adjustable from 0,4 a 10 Hz , turning the It is adjustable from 20 a 1000 Hz turning the encoder ; encoder. 6) Press the encoder to jump to the next 3) Press the encoder l'encoder per passare al parametro successivo.
- Page 35 6948300000 TIG 2T DYNAMIC POWER (DC) This function allows you to keep the Voltage x Current product constant. The welding current increases as the arc voltage decreases. On the contrary, if the voltage increases the welding current decreases. The Dynamic arc value is adjustable from a minimum of 0.1 V/A to a maximum of 25 V/A Ampere for each 1Volt variation, both positive and negative.
- Page 36 6948300000 Between the two functions there is a difference. Here it is possible regulate the time the arc stays STANDARD : it is a normal Spot welding Press the encoder to go to the next regulation. ( TIME OFF ) FAST TACK : This function is used for joining thin sheet metal.
- Page 37 6948300000 TIG SETTINGS DC TIG AC MODE From the main page it is possible to access to the 1) Press the button MODE (Fig.1,ref.2) ; TIG SETTINGS DC menu; 2) Select TIG 2T turning the encoder ; 3) Press the encoder to confirm the choice ; 1) Push the button (Fig.1, ref.3).
- Page 38 6948300000 This is the main page of AC mode 7) Turning the encoder it is possible to select the wave form ; SQUARE WAVE : The standard wave form for all modern inverter TIG welding machines. The square wave offers excellent power, arc control, and bead appearance.
- Page 39 6948300000 This is the main page of MIX AC/DC mode TIG SETTINGS AC From the main screen it is possible to access to the TIG SETTINGS AC. you will Pressing the button (Fig.1, ref.3) see the screen with weld parameter adjustments.
- Page 40 6948300000 ALL Manufacturers are keeping a high AC zero crossing current 80-100A. This allows the arc to stay alive under all conditions, however it introduces quite a bit of energy (raises the average current) and leads to a lot of noise. This now can be adjusted and in lower amperage ranges (below 150 Amp) it can be set to a significant lower zero crossing current, as low as...
-
Page 41: Machine Setup
6948300000 RECALL WELDING SETTINGS MACHINE SETUP 1) Press the button JOBS ( Fig.1, ref.4) to go in the From every welding mode, pressing the button JOB LIST page. ( Fig.1,ref.5 ) it is possible to go into the 2) Using the encoder ( Fig.1,ref.6) select the MACHINE SETUP menu. - Page 42 6948300000 FACTORY RESET CAC-A ( GOUGING ) If it is necessary to do a factory reset press the Gouging applications use a welding power button ( Fig.1,ref.5) to go into the settings supplies with an open circuit voltage higher than menu.
-
Page 43: Disposal Of Electrical And Electronic Equipment
6948300000 If the machine goes in overtemperature you will see the following message on the screen. 6) Press the button MODE (Fig1,rif.6); 7) Turn the encoder and select select the function CAC-A GOUGING After 4 minutes ( necessary for cooling ) the message vanish. - Page 44 6948300000 WIRING DIAGRAM: T300 AC/DC...
- Page 45 6948300000 EXPLODED VIEW: T300 AC/DC...
-
Page 46: Spare Parts
6948300000 SPARE PARTS Position Part # Description 66172500 Screen Protection 6610430L Front Fan Cover 6611570L Plastic Frame 64274000 Welding Socket 6205840K Cover USB 63197000 + 6318500 Gas Outlet Tig Torch 61462100 Remote Control Receptacle 14 pin 61450900 USB Pcb 601959000L Logic Front Panel Group 65089700 Lem Probe... - Page 47 Flat PFC Connector ( 14 way ) 61190200 Encoder 66106200 Knob 650378000 Flat Inverter Connector ( 20 way ) 619350V0 Line Filter PCB 66143600 Left Label Tig Range 66143700 Right Label Tig Range 66116200 Stel Side Label 62108900 Display Protection Frame...
- Page 48 6948300000 CONNECTIONS FRONT Fig. 2 Z – central connector for MIG gun U – connector for tig torch or electrode holder N – gas for tig torch (outlet) Y – remote control receptacle W – WORK (ground) clamp, automatic polarity reversal depending on welding process USB PORT .
- Page 49 6948300000 REAR Fig. 3 P – Power switch Q – Power plug R – Gas hose connection S – Data plate/ Serial Number T – AWC Connection...
- Page 50 6948300000 CAD / TIG TORCH CONNECTION CONNECTOR 14 WAY ‘D’ DESCRIPTION TORCH SWITCH TORCH TRIGGER TORCH SWITCH REMOTE CONTROL CIRCUIT COMMON 0 TO +5VDC INPUT REMOTE CONTROL +5VDC OUTPUT REMOTE CONTROL REMOTE CONTROL +5VDC OUTPUT REMOTE CONTROL. SENSE 220K SENSE 220K CHASSIS COMMON CONNECTOR 14 WAY ‘D’...
- Page 51 6948300000...
- Page 52 6948300000 Info : www.stelgroup.it - tel. +39 0444 639525...
Need help?
Do you have a question about the T300 AC/DC and is the answer not in the manual?
Questions and answers