Sign In
Upload
Download
Table of Contents
Contents
Add to my manuals
Delete from my manuals
Share
URL of this page:
HTML Link:
Bookmark this page
Add
Manual will be automatically added to "My Manuals"
Print this page
×
Bookmark added
×
Added to my manuals
Manuals
Brands
Zebex Manuals
Scanner
Z-5212 Plus
Programming manual
Zebex Z-5212 Plus Programming Manual
2d advanced image scanner
Hide thumbs
1
2
3
Table Of Contents
4
5
6
7
8
9
10
11
12
13
14
15
16
17
18
19
20
21
22
23
24
25
26
27
28
29
30
31
32
33
34
35
36
37
38
39
40
41
42
43
44
45
46
47
48
49
50
51
52
53
54
55
56
57
58
59
60
61
62
63
64
65
66
67
68
69
70
71
72
73
74
75
76
77
78
79
80
81
82
83
84
85
86
87
88
89
90
91
92
93
94
95
96
97
98
99
100
101
102
103
104
105
106
107
108
109
110
111
112
113
114
115
116
117
118
119
120
121
122
123
124
125
126
127
128
129
130
131
132
133
134
135
136
137
138
139
140
141
142
143
144
145
146
147
148
149
150
151
152
153
154
155
156
157
158
159
160
161
162
163
164
165
166
167
168
169
170
171
172
173
174
175
176
177
178
179
180
181
182
183
184
185
186
187
188
189
190
191
192
193
194
195
196
197
198
199
200
201
202
203
204
205
206
207
208
209
210
211
212
213
214
215
page
of
215
Go
/
215
Contents
Table of Contents
Bookmarks
Table of Contents
Table of Contents
System Settings
Default Parameters
Scan Mode
Level Trigger Mode
Sense Mode (Image Change)
Continuous Mode
Sense Mode (Image Change) Sensitivity
Aiming
Trigger
Always on
Off
Illumination
Illumination Mode
Illumination Level
Beep Sound
Good Read Beep
Good Read Beep Frequency
Decode Settings
Decode Area
Specific Area Decoding 75
Specific Area Decoding 50
Specific Area Decoding
Decode Redundancy
Decoding Timeout
Timeout between Decodes (same Barcode)
Time to Standby Mode
Interface Settings
USB HID Keyboard
USB HID Keyboard Enable
HID Function Key Mapping
USB Country Keyboard Types
Country Code Page
Intercharacter Delay
Usb CDC
Baud Rate
Data Bits
Parity Check
Advanced 2D Image Scanner
Stop Bits
Symbology Settings
Enable All Symbologies
Disable All Symbologies
Enable All 1D Symbologies
Enable All 2D Symbologies
Upc-A
UPC-A Preamble
Transmit UPC-A Check Digit
Convert UPC-A to EAN-13
2-Digit / 5-Digit Add-On Code
Add-On Code Required
Upc-E
UPC-E Preamble
Transmit UPC-E Check Digit
Convert UPC-E to UPC-A
2-Digit / 5-Digit Add-On Code
Add-On Code Required
Transmit EAN-8 Check Digit
Convert EAN-8 to EAN-13
2-Digit / 5-Digit Add-On Code
EAN-8 Add-On Code Required
Transmit EAN-13 Check Digit
EAN-13 ISBN Conversion
Issn Ean
2-Digit / 5-Digit Add-On Code
EAN-13 Add-On Code Required
Code 128 / GS1 -128
Set Lengths for Code 128
Code 39
Code 39 Full ASCII Conversion
Code 39 Check Digit Verification
Transmit Start / Stop Character
Set Lengths for Code 39
Convert Code 39 to Code 32
Code 93
Set Lengths for Code 93
Code 11
Check Digit Verification
Transmit Code 11 Check Digit
Advanced 2D Image Scanner
Set Lengths for Code 11
Codabar
Check Digit Verification
Transmit Start/Stop Character
Set Lengths for Codabar
Plessey
Set Lengths for Plessey
Msi
Transmit MSI Check Digit(S)
MSI Check Digit Algorithm
Set Lengths for MSI
Interleaved 2 of 5
Check Character Verification
Set Lengths for Interleaved 2 of 5
Matrix 2 of 5
Set Lengths for Matrix 2 of 5
IATA 2 of 5
Straight 2 of 5
Pharmacode
GS1 Databar 14
GS1 Databar 14 Stacked
Transmit GS1 Databar 14 Ai(01)Digit
GS1 Databar Expanded
GS1 Databar Expanded Stacked
Transmit GS1 Databar Expanded Ai(01)Digit
GS1 Databar Limited
Transmit GS1 Databar Limited Ai(01)Digit
Composite Code-A
Composite Code-B
Composite Code-C
Pdf417
Micro PDF417
Data Matrix
Rectangular Data Matrix
Data Matrix Mirrored
QR Mirrored
Micro QR
Aztec
Aztec Mirrored
Maxicode
Dotcode
Prefix & Suffix
AIM ID Settings
Aim ID
AIM ID Table
Prefix Settings
Prefix for All Symbologies
Symbology Prefix
Suffix Settings
Suffix for All Symbologies
Symbology Suffix
Terminating Character
Data Editing
Caps Lock
Case Conversion
Convert GS Code to Other ASCII Code
Truncate Data
Truncate Leading Data
Truncate Ending Data
Default Settings
Factory Defaults
Custom Defaults
Appendix
Appendix A - Numeric Barcodes
Appendix B - Symbologies Barcodes
Appendix C - ASCII Code Barcodes
Appendix D - Function Key Barcodes
Advertisement
Quick Links
1
Aiming
Download this manual
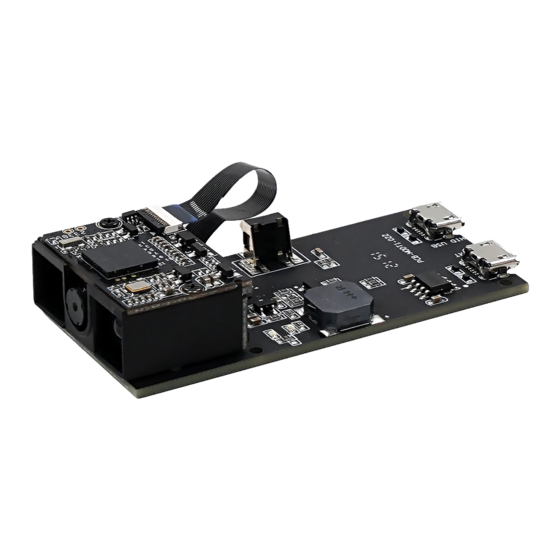
Z‐5212
2D Image Scan Engine
Advanced 2D Image Scanner
i
Table of
Contents
Previous
Page
Next
Page
1
2
3
4
5
Advertisement
Table of Contents
Need help?
Do you have a question about the Z-5212 Plus and is the answer not in the manual?
Ask a question
Questions and answers
Related Manuals for Zebex Z-5212 Plus
Scanner Zebex Z-5132 Installation Manual
2d image scan module (16 pages)
Scanner Zebex Z-6070 Service Manual
Hands-free dual-laser omnidirectional scanner (10 pages)
Scanner Zebex Z-3060 Service Manual
Handheld omnidirectional laser scanner (14 pages)
Scanner Zebex Z-1060 User Manual
Mini personal data collector (28 pages)
Scanner Zebex Z-3151HS User Manual
(77 pages)
Scanner Zebex Z-3191LE Service Manual
Gun type handheld laser scanner (9 pages)
Scanner Zebex Z-8072 Plus Programming Manual
Advanced 2d image scanner (265 pages)
Scanner Zebex Z-6172 Service Manual
Hands-free 2d image reader (8 pages)
Scanner Zebex Z-3251 Service Manual
Handy wireless scanner (10 pages)
Scanner Zebex Z-3250 Service Manual
Handy wireless scanner (8 pages)
Scanner Zebex Z-6910 Programming Manual
Omnidirectional (315 pages)
Scanner Zebex Z-3220 Service Manual
Handheld linear image scanner (7 pages)
Scanner Zebex Z-6180 User Manual
Advanced dual-laser omnidirectional in-counter scanner (44 pages)
Scanner Zebex Z-2170 Plus User Manual
(47 pages)
Scanner Zebex Z-3102 Programming Manual
2d advanced image scanner (215 pages)
Scanner Zebex Magic C Z-3100 User Manual
Advanced handheld ccd scanner (4 pages)
This manual is also suitable for:
Zx-1010
Z-3102
Table of Contents
Save PDF
Print
Rename the bookmark
Delete bookmark?
Delete from my manuals?
Login
Sign In
OR
Sign in with Facebook
Sign in with Google
Upload manual
Upload from disk
Upload from URL


Need help?
Do you have a question about the Z-5212 Plus and is the answer not in the manual?
Questions and answers