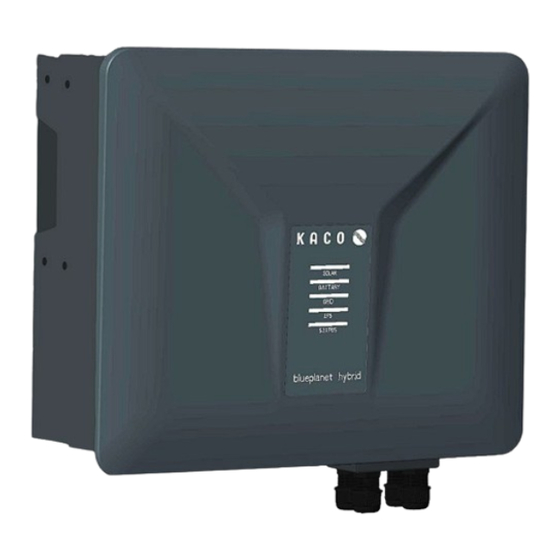
Kaco blueplanet hybrid 6.0 NH3 M2 WM OD IIG0 Manual
Hide thumbs
Also See for blueplanet hybrid 6.0 NH3 M2 WM OD IIG0:
- Operating instructions manual (262 pages) ,
- Manual (93 pages) ,
- Quick installation manual (92 pages)
Table of Contents
Advertisement
Quick Links
MNL_blueplanet
25.0-33.0 NX3_de_20
pp
Manual
English translation of German original
Authorised electrician
Important safety instructions
These instructions form part of the device and must be observed. They are available online on our website and correspond to the current
hardware version. The copyright for these application instructions is held solely by KACO new energy GmbH.
blueplanet hybrid 6.0 NH3 M2 WM OD IIG0
blueplanet hybrid 8.0 NH3 M3 WM OD IIG0
blueplanet hybrid 10.0 NH3 M3 WM OD IIG0
blueplanet hybrid 12.0 NH3 M3 WM OD IIG0
Advertisement
Table of Contents
Troubleshooting

Related Manuals for Kaco blueplanet hybrid 6.0 NH3 M2 WM OD IIG0


Summary of Contents for Kaco blueplanet hybrid 6.0 NH3 M2 WM OD IIG0
- Page 1 Important safety instructions These instructions form part of the device and must be observed. They are available online on our website and correspond to the current hardware version. The copyright for these application instructions is held solely by KACO new energy GmbH.
- Page 2 Legal provisions The information contained in this document is the property of KACO new energy GmbH. Publication, in whole or in part, requires the written permission of KACO new energy GmbH. KACO warranty You can download the current warranty conditions from the Downloads folder on our website at http://www.kaco-...
-
Page 3: Table Of Contents
Photovoltaic feed-in inverter Creating equipotential bonding......35 Connecting the interfaces ........ 35 Table of contents Commissioning ..........44 General information ........1 Requirements ........... 44 Notes regarding this document ......1 Preconditions relating to standards ....44 More information ..........1 Layout of Instructions ......... -
Page 4: General Information
Some of the documents required for the registration and approval of your system are included with the manual. Retention of documents These instructions and other documents must be stored near the system and be available at all times. The current version of the manual can be downloaded from www.kaco-newenergy.com. English translation of German original This document has been produced in several languages. -
Page 5: Target Group
1.3.2 Safety warnings symbols guide DANGER High risk Failure to observe this warning will lead directly to serious injuries or even death. WARNING Potential risk Failure to observe this warning may lead to serious injuries or even death. CAUTION Low-risk hazard Failure to observe this warning will lead to minor or moderate injuries. -
Page 6: Labeling
1.5 Labelling You will find the name plate with the following data for service and other requirements specific to installation on the right side panel of the device: – Device name – Part number – Serial number – Date of manufacture –... -
Page 7: Safety
2 Safety DANGER Lethal voltages are still present in the connections and cables of the device even after the device has been switched off and disconnected! Coming into contact with the lines and/or terminals/busbars in the device can cause serious injury or death. ›... - Page 8 DANGER Danger to life due to burns caused by electric arcs through short-circuit currents! Short-circuit currents in the battery can cause heat accumulation and electric arcs if the battery is short circuited or wrongly installed. Heat accumulation and electric arcs may result in lethal injuries due to burns. ›...
-
Page 9: Intended Use
The device may be operated with PV modules with frames that require protective earthing. The device must only be operated in connection with an intrinsically safe lithium-ion battery approved by kaco. The entire battery voltage range must be completely within the permissible input voltage range of the device. -
Page 10: Protection Features
The requirements of the grid operator must be met for grid connection to take place. The permission of the relevant authorities may also be required in order to secure authorisation to connection to the grid. The device may only be operated with PV arrays (PV modules and wiring) of protection class II pursuant to IEC 61730, application class A. -
Page 11: Description Of The Device
The device can connect to TN and TT grounding system grid. Battery system The device must only be operated in connection with an intrinsically safe lithium-ion battery system approved by KACO. Communication device (Connect- The Communication device (Connect-NH) supports Ethernet communication and WLAN communication. - Page 12 Internet. Cloud server The monitor information is stored at cloud server. KACO blueplanet Smart Cloud The APP can be installed on the smart phone and then review the monitor information. The monitor information also can be review on the computer.
- Page 13 The wiring system of the basic application is an example for grid systems without special requirement: blueplanet hybrid 6.0 NH3 M2 blueplanet hybrid 8.0 NH3 M3 blueplanet hybrid 10.0 NH3 M3 blueplanet hybrid 12.0 NH3 M3 Page 10...
-
Page 14: Integrated Energy Management
3.2 Integrated energy management The energy management mode depends on PV energy and user’s preference. There are four energy management mode can be chosen. 3.2.1 Self-Consumption mode The photovoltaic energy is preferentially used by local load to improve the self- consumption rate and self-sufficiency rate. The energy management during daytime: Case 1: PV power generation is lower than the load power consumption, and the energy of the battery is not available. - Page 15 Case 3: PV power generation is larger than the load power consumption. The energy management during night: Case 1: The energy of the battery is available. Case 2: The energy of the battery is not available. blueplanet hybrid 6.0 NH3 M2 blueplanet hybrid 8.0 NH3 M3 blueplanet hybrid 10.0 NH3 M3 blueplanet hybrid 12.0 NH3 M3 Page 12...
- Page 16 3.2.2 Reserve energy mode The battery is a back-up energy storage device. The battery always charged by PV power if it is not full charged. The battery discharge only when the utility grid loss. Case 1: The energy of the battery is not full charged. Case 2: The energy of the battery is full charged, even at night.
-
Page 17: Compatible Accessories
Force H1 10.65 bis 24.86kWh The current release list can be found in the download area of the KACO new energy homepage. General information on connecting the battery storage unit to the device. Please consult the manual of the battery manufacturer. -
Page 18: Technical Data
4 Technical data 4.1 Electrical data KACO blueplanet hybrid 6.0 NH3 M2 B1 WM 8.0 NH3 M3 B1 WM 10.0 NH3 M3 B1 WM 12.0 NH3 M3 B1 OD IIG0 OD IIG0 OD IIG0 WM OD IIG0 PV Input 9000 W... -
Page 19: General Data
The design must in no case result in a short-circuit current greater than the ISC of the inverter. 4.2 General data KACO blueplanet hybrid 6.0 NH3 M2 B1 WM 8.0 NH3 M3 B1 WM 10.0 NH3 M3 B1 WM 12.0 NH3 M3 B1... -
Page 20: Environmental Data
Installation distance from coast 3000 m Ambient temperature - 25 °C – + 60 °C Ambient temperature(storage) - 40 °C – + 60 °C Protection rating (KACO installation IP66 location) Humidity range (non-condensing) [%] 100% Pollution level inside the enclosure Pollution level outside the enclosure 4.4 Accessories... -
Page 21: Transportation And Delivery
5 Transportation and Delivery Every device leaves our factory in perfect electrical and mechanical condition. Special packaging ensures that the devices are transported safely. The shipping company is responsible for any transport damage that occurs. 5.1 Scope of delivery Article Description Quantity Inverter... -
Page 22: Installation Tool
5.3 Installation tool The codes given in the table below are used in all usage instructions for assembly/installation/maintenance and disassembly for the tools and tightening torques being used. Code (s) Shape of the connector External hexagon Torx Slot Phillips Fig. 3. Form pattern 6 Assembly and preparation 6.1 Choosing the installation location... -
Page 23: Unpacking The Device
Installation surface - Must have adequate load-bearing capacity - Must be accessible for installation and maintenance - Must be made of heat-resistant material (up to 90 °C) - Must be flame resistant - Minimum clearances to be observed during installation [see Fig. 9 on Page21]. Fig. -
Page 24: Fastening The Mount
6.3 Fastening the mount CAUTION Hazard when using unsuitable fixing materials! If unsuitable fixing materials are used, the device could fall and persons in front of the device may be seriously injured. › Use only fixing materials that are suitable for the mounting base. The fastening materials supplied are only suitable for masonry and concrete. -
Page 25: Installing And Securing The Device
6.4 Installing and securing the device CAUTION Risk of injury from improper lifting and transport. If the device is lifted improperly, it can tilt and result in a fall. › Always lift the device vertically using the openings provided. › Use a climbing aid for the chosen installation height. ›... -
Page 26: Installation
7 Installation 7.1 General information DANGER Lethal voltages are still present in the connections and cables of the device even after the device has been switched off and disconnected! Coming into contact with the lines and/or terminals/busbars in the device can cause serious injury or death. -
Page 27: Connecting The Device To The Power Grid
7.3.1 Requirement for supply lines and fuse blueplanet hybrid blueplanet hybrid blueplanet hybrid blueplanet hybrid 6.0 NH3 M2 B1 WM 8.0 NH3 M2/3 B1 10.0 NH3 M2/3 B1 12.0 NH3 M2/3 B1 OD IIG0 WM OD IIG0 WM OD IIG0 WM OD IIG0 PV-side Max. - Page 28 7.4.1 Prepare the grid connection NOTE Terminals are necessary (not included in the delivery scope) to attach the AC cable to the terminal block. The appropriate crimping tools and requirements are outlined in the table provided. Connection area opened. 1.
- Page 29 NOTE If a residual current device (RCD) is necessary due to the installation specification, a Type A RCD device should be used. For questions regarding the appropriate type, please contact the installer or our KACO new energy customer service. Fatma75!2073!r blueplanet hybrid 6.0 NH3 M2 blueplanet hybrid 8.0 NH3 M3 blueplanet hybrid 10.0 NH3 M3 blueplanet hybrid 12.0 NH3 M3...
-
Page 30: Connecting The Eps To The Device
NOTE When the line resistance is high, i.e. long cables on the grid side, the voltage at the grid terminals of the device will increase in feed-in mode. If the voltage exceeds the country-specific grid overvoltage limit value, the device switches off. Ensure that the cable cross-sections are sufficiently large or that the cable lengths are sufficiently short. - Page 31 Fig. 21. EPS connection plug Fig. 22. Strip the insulation from wires Fig. 23. Crimp wire sleeve to the contact Fig. 24. Fix wires at contact carrier Fig. 25. : Place contact carrier in housing Fig. 26. Tightening the cable fitting Legend Cable fitting Outer diameter (φ12.5 to 17.5 mm)
-
Page 32: Connecting The Pv Generator To The Device
If a residual current circuit breaker is necessary due to the installation specification, a type A residual current circuit breaker must be used. For questions regarding the appropriate type, please contact the installer or our KACO new energy customer service. - Page 33 NOTE: Before proceeding with the isolation ensure that you do not cut any individual wires. 1. Insert isolated wires with twisted ends carefully up to the connection. NOTE: Wire ends must be visible in the spring. 2. Close the spring so that the spring latches and slide insert into sleeve. 3.
- Page 34 7.6.3 Recommended standard connection Fig. 31. Assignment of all MPP trackers Fig. 32. Assignment of only two MPP trackers Possible connection of MPP trackers PV1, PV2 and PV3 Two DC strings for each MPP tracker Two DC strings for two MPP tracker The MPP voltages of the two DC strings can be different.
- Page 35 7.6.4 Designing the PV generator CAUTION Damage to components due to faulty configuration! In the expected temperature range of the PV generator the values for the no-load-voltage and the short circuit current must never exceed the values for U and I in accordance with the technical data.
-
Page 36: Connecting The Battery Storage Unit To The Device
Closing the unused DC connectors All existing strings are connected to the device. NOTE: Meet the requirements of protection class IP65 by closing the unused plug connectors with the enclosed protective caps. 1 Press down the clamping bracket and push the forcing nut up to the thread. - Page 37 Fig. 38. Tightening the wires Fig. 39. Tightening the cable fitting Legend Contact plug- Negative crimp contact Contact plug+ Positive crimp contact Cable fitting You have completed assembly. NOTE: Before proceeding with the isolation ensure that you do not cut any individual wires. 1.
-
Page 38: Creating Equipotential Bonding
7.8 Creating equipotential bonding NOTE Depending on the local installation specifications, it may be necessary to earth the device with a second ground connection. To this end, the threaded bolt on the underside of the device can be used. The device has been installed on the mount. ... - Page 39 7.9.2 LAN cable connection (Optional WLAN) The device has been installed on the mount and remove the cap on the COM 0 connector. 1. Open the communication unit by pressing in the two release tabs on the housing (Fig. 44). 2.
- Page 40 Interfaces connections All interfaces are located on the communication circuit board on the bottom of device under the interface cover. The device is equipped with a communication interface, which is used to connect communication cables such as lithium battery, electricity meter and parallel machine. The interface configuration of the communication interface is shown. (see Fig.
- Page 41 Com port Description Function RJ45-1 RJ45-2 RS485 port The RS485 interfaces used to the product parallel operation. RJ45-5 RJ45-6 The PIN1、PIN2 of RS485 interface used to connect the product to the third-party RJ45-3 Monitor device monitor device. If you don't want to use communication device, the third party monitor device can be used.
- Page 42 Fig. 50. Communication leads through the cable Fig. 51. Secure the communication cable to corresponding Fig. 52. Attach the AC/COM cover terminals Fig. 53. Tighten the nut 1 Housing base –communication side 4 Sealing ring 2 Screws for mounting 5 Nut 3 Cover for interface connection 7.9.4 RS485 cable connect to the Smart-Meter &...
- Page 43 NOTE The Smart-Meter must support the MODBUS protocol and communicates with baud rate 9600, parity “None”, Stop-Bits “1” Ensure that individual wires at the terminal contact of the Smart-Meter are attached with the correct torque and cannot work loose. Attach protective cover if fitted. The RS485 cable is connected to the device and the Smart-Meter have been firmly installed on a mounting ...
- Page 44 Terminal-4 Fig. 55. RS485 cable connect to the CT 7.9.5 BMS Connection BMS is used to communicate with the connected compatible lithium battery. The RS-485/CAN interface used to connect the BMS (Battery Manage System) of the battery. If the communication interface of the BMS is CAN interface, the pins for CAN interface can be chosen to connect, otherwise the pins for RS485 interface can be chosen to connect.
- Page 45 The digital input of the device is intended for connection of a Powador-protection device. When using devices from other manufacturers or in combination with KACO inverters, interface switches as a minimum must be used for shutting down devices from other manufacturers.
- Page 46 Select < Functions > to go to the next screen. Select < NS-Protection > Enable the < NS-Protection > function. (See Chapter 9.9.19 on page 90) » NA Protection operation is enabled. NOTE In Austria grid code, Pin6 can be defined as GND, and pin5 can be defined as Remote off. The inverter will turn off after the Pin 5 and Pin 6 is short, and the inverter will operate normally after the Pin 5 and Pin 6 is open.
-
Page 47: Commissioning
8 Commissioning 8.1 Requirements DANGER Lethal voltages are still present in the connections and cables of the device even after the device has been switched off and disconnected! Coming into contact with the lines and/or terminals/busbars in the device can cause serious injury or death. -
Page 48: Initial Start-Up
9.9.21. 9.3 Authorisation NOTE In order to use the full range of functions of the “KACO NH Setup” app, you should accept all requested authorisations. The app does not use these authorisations to record the user’s telephone data. -
Page 49: Operating System And System Configuration
9.4 Operating system and system configuration The corresponding, free APP KACO NH Setup from the relevant APP store can be installed on a mobile terminal unit (smartphone or tablet PC) with an Android operating system, version 9.0 or newer or IOS operating system version 11.0 or newer. -
Page 50: Signal Elements
Option 2: Set-up via local network Fig. 62. Set up Communication device (Connect-NH) via local network – WiFi 2.4G Table: 2. NOTE Please note the additional documents for the communication structure with and without data logger. These can be found in the download area on our homepage in the device order under application note. 9.5 Signal elements There are status LEDs on the Communication device and on the inverter housing that indicate the operating status. - Page 51 password for the local WLAN network is the registration key found on the name plate Blue LED is off: The communication device forms a hot spot for a direct communication connection. Reasons for this could be. Modbus TCP mode, no client connect to stick •...
- Page 52 Fig. 64. LEDs on device Operating status on the device SOLAR BATTERY GRID Status Description The blue LED is on. The device operates normally and the solar energy, battery energy and grid are available. EPS Port is operation normally. The blue LED is blink. There are several scenarios: a.
-
Page 53: Connecting To The Device
Note: The initial connection is generally made via a hotspot. The “KACO NH Setup” APP from the Android/iOS Store has been installed and opened on your mobile end device. The Communication Device is connected to the COM0 port of the device. - Page 54 Note: The connection is established exclusively via the hotspot until step 6. This is how long your mobile end device must be kept near the Communication Device. 4. Confirm the WLAN network of the Communication Device by tapping the B… number displayed.
- Page 55 However, if the signal quality of the network is insufficient or non-existent, you can connect the unit using a hotspot connection. The “KACO NH Setup” APP from the Android/iOS Store has been installed and opened on your mobile end device.
-
Page 56: Menu Of The Communication Device
9.7 Menu of the Communication Device Note: In both cases you now have access to the Communication Device. This is where you can make settings that do not directly affect the function of the inverter. Note: Observe the step-by-step procedure for initial commissioning in chapter 9.2 on Page 45 Note: After completing or exiting initial start-up, the serial-number-based password is required to set further parameters. - Page 57 connection with the hotspot of the Communication Device by entering the registration code on the label as a password. Note: Data is transferred after approx. 30-60 minutes. Fig. 79. Select available network Fig. 80. Change network 9.7.2 Configure network parameter Note: Here you can assign a static IP address to the inverter so that your router always uses the same address.
- Page 58 Note: The time communicated by the network is GMT. You should now adjust the time zone depending on the installation location. This time is also used for the display on “KACO blueplanet Smart Cloud” portal. <Communication Device> menu is open.
- Page 59 Fig. 88. Select Time Zone Fig. 89. Set Time Zone 9.7.4 Resetting a faulty connection <Communication Device> menu is open. Note: The Communication Device is restarted via the <Restart Communication Device > icon. Set values on the device are not reset. 1.
- Page 60 Fig. 92. Observe the note on resetting Fig. 93. Observe the note on the Communication Device! restarting the Communication Device NOTE The following settings are reset when the Communication Device is reset: • Network Configuration • Feedin and Meter Settings •...
- Page 61 9.7.5 View available inverters All inverters are connected via a Communication Device. <Communication Device> menu is open. 1. Select < Select Inverter >. 2.Press the <Scan inverters > button. Note: Up to 5 inverters can be connected to one Communication Device. When the button is pressed, the Communication Device scans the connected inverters and...
- Page 62 9.7.6 Manually adjusting the Modbus address <Communication Device> menu is open. Note: By default, the Modbus address “3” is stored here and should not be changed for an inverter. This value is used for communication with the data logger and Smart-Meter. 1.
- Page 63 The signal is transmitted via an installed RS485 line. 1.Select <Mode>. menu under <Monitoring & Control >. <KACO blueplanet SmartCloud>: data from connected devices is uploaded to the KACO cloud server for evaluation. - <Modbus TCP IP Server>: By default, the Communication Device receives the Modbus TCP or SunSpec commands and a connected data logger responds to them.
- Page 64 9.7.8 Dynamic feed-in <Communication Device > menu opened. The connection shown in the block diagram Fig. 105 has been established. Note: For more information, see Chapter 9.12 on page 96. 1. Click the <Feedin and Meter Settings> menu. 2.
-
Page 65: Menu Of Inverter
Note: The measured values are only displayed for the selected device. A simultaneous evaluation of all inverters can only be carried out via our “KACO blueplanet Smart Cloud” monitoring portal. 2. You can view the current status of the inverter 3. - Page 66 1. Input the password. Note: If you forget your password. Passcode is serial number specific and can be requested at KACO new energy Customer Service. 2. If required, grant write access by » External write access granted via pressing <Confirm>.
- Page 67 Fig. 115. Enter a password Fig. 116. Confirm activation of external write access 9.8.4 Shadow Management The desired device is selected under <Available Inverters> and the <Inverter Details& Settings> menu is opened. Note: Enables optimized MPP tracking for PV module shadow management. After the function is activated, each PV channel is scanned at a 10-minute interval.
- Page 68 9.8.5 Battery Settings The desired device is selected under <Available Inverters> and the <Inverter Details& Settings> menu is opened. 1. Select < Battery Settings>. 2. Select Battery Type. 3. Set < Battery charge maximum>. 4. Set < Battery discharge minimum>. 5.
- Page 69 9.8.7 Custom mode In custom mode, you can configure your own charging and discharging times. You can also define the charging and discharging power. 1. Enter the <charging power> in Wh with which the battery is charged. 2. Enter the <discharging power> in Wh with which the battery is discharged.
-
Page 70: Inverter Parameter Settings
9.9 Inverter parameter settings 9.9.1 Selecting country and grid type The required device is selected in <Available inverters> and the <Settings for> menu is opened in the <Parameter settings> in the <Inverter details & settings> menu. Select <Country / Grid code>. Caution: The following settings can only be made once without a password during initial start-up! - Page 71 9.9.2 Voltage shutdown settings Note: There are three thresholds for overvoltage and undervoltage protection. The first threshold value indicates the lower range. The middle threshold range is freely adjustable. The third threshold value indicates the upper range. The <Settings for> menu is opened. ...
- Page 72 9.9.3 Frequency shutdown settings Note: There are three thresholds for overfrequency and underfrequency protection. The first threshold value indicates the lower range. The middle threshold range is freely adjustable. The third threshold value indicates the upper range. The <Settings for> menu is opened. ...
- Page 73 9.9.4 Connection time settings Note: Set monitoring time when one of the voltage and frequency values has been changed. If the measured values are within the range defined by the selected grid standard, the inverter can start or reconnect. The <Settings for> menu is opened. ...
- Page 74 9.9.5 Connection voltage limits settings Note: The appropriate voltage range for starting can be set according to the requirements of the local grid company. The <Settings for> menu is opened. Select < Grid Settings > to go to the next screen.
- Page 75 9.9.6 Connection frequency limits settings Note: The appropriate frequency range for starting can be set according to the requirements of the local grid company. The <Settings for> menu is opened. Select < Grid Settings > to go to the next screen.
- Page 76 9.9.7 Active power settling time Note: The dynamics of the P(U) control shall correspond with a first-order filter with a configurable time constant between 3 s and 60 s for some country code, e.g. Austria. That means 95% of a new setpoint must be achieved within three times the time constant.
- Page 77 9.9.8 Reactive power settling time Note: The dynamics of the reactive power control shall correspond with a first-order filter with a configurable time constant between 3 s and 60 s . That means 95% of a new setpoint must be achieved within three times the time constant.
- Page 78 9.9.9 Islanding Detection Status The <Settings for> menu is opened. Select < Grid Settings > to go to the next screen. 2.Select < Islanding Detection Status > Activate < Islanding Detection Status > 5. <Confirm> settings. » Islanding detection activated. Fig.
- Page 79 9.9.10 Inverter dynamic network stability setting: LVRT Note: Displays all set parameters in an overview list. The <Settings for> menu is opened. Select < Grid Settings > to go to the next screen. 2. Select <FRT Settings > Select <LVRT >...
- Page 80 9.9.11 Inverter dynamic network stability setting: HVRT Note: Displays all set parameters in an overview list. The <Settings for> menu is opened. Select < Grid Settings > to go to the next screen. 2. Select <FRT Settings > Select <HVRT >...
- Page 81 9.9.12 P(f) settings Note: With a programmable frequency threshold with programmable P range, the inverter can activate the active power response to underfrequency. The <Settings for> menu is opened. Select the <Power Control Settings>. Select the <P(f) Settings>. 3. Select mode > see note below on the 4 modes. 4.
- Page 82 4. Variable gradient and hysteresis: ∆P is the active power as a percentage of the PM; the inverter provides hysteresis in the control of active power response to overfrequency. Note: The intentional delay time for P(f) is only used for the activation of the function in accordance with the frequency via f whereby the intentional delay time plus own dead...
- Page 83 Note: The following 4 modes are available for selection: 1. Fix gradient and non-hysteresis: ∆P is the active power as a percentage of P ; the inverter provides non-hysteresis in the control of active power response to overvoltage. 2. Variable gradient and non-hysteresis: ∆P is the active power as a percentage of the PM;...
- Page 84 Fig. 178. Select power control settings Fig. 179. Select reactive power settings Fig. 180. Select reactive power mode Basis There are four types of reactive power control. Only one mode of operation can be active at any given moment. From the perspective of the grid, the inverter behaves like a load in accordance with the national standard.
- Page 85 9.9.14.1 Cos-phi constant settings Note: In cos ϕ constant mode, the specified power factor is permanently set by the inverter. In doing so, the reactive power level is set in line with Q=P*tan ϕ as a function of the power that continuously generates the specified power factor.
- Page 86 Definition: The coordinates are the active power as a percentage of P and the displacement factor cos-φ. A grid operator can specify two voltage thresholds as a percentage of P to activate or deactivate the function. The voltage thresholds are normally referred to as the “Lock-In”...
- Page 87 9.9.14.4 Q(U) settings Note: Voltage-dependent control Q(U) regulates the reactive power output depending on the voltage. 4 coordinates can be set in order to map the curve. The < Reactive Power Settings > menu is opened. Select the < Q(U) >, and click < Next > 2.
- Page 88 9.9.14.5 Min Cos-Phi for Low Active Power Note: If the Austria safety standard is currently selected by the user, "Min Cos-Phi for Low Active Power" is displayed and can be set. The < Reactive Power Settings > menu is opened.
- Page 89 9.9.15 Active Power Settings (power limitation) Note: During changing in AC operation and control or changing in energy source operation, the active power generated by the inverter shall not exceed a specified gradient expressed as a percentage of the active nominal power of the inverter per minute.
- Page 90 9.9.16 MPPT Parallel Operation Settings Note: MPPT operation is currently not supported. For more information, please contact our KACO customer service. The <Settings for> menu is opened. Select < DC Settings > 2.Select < MPPT Parallel Operation > Activate <...
- Page 91 9.9.17 Min. Insulation Resistance Settings The <Settings for> menu is opened. 1.Select < DC Settings > 2.Select < Min Insulation Resistance > 3.Specify the <Min. Insulation Resistance> 4.Save settings with <Confirm>. » Min. Insulation resistance defined. Fig. 202. Select DC settings Fig.
- Page 92 9.9.18 DC Current Injection Settings The <Settings for> menu is opened. 1.Select < DC Settings > 2.Select < DC Current Injection > 3. Set the <Trip DC Current Injection Time>. 4. Specify the <Trip DC Current Injection>. 5. Save settings with <Confirm>. »...
- Page 93 9.9.19 NS-Protection Settings Note: Depending on the total of the maximum apparent power of all power generation systems and storage systems at a network connection point ∑����Amax,the central network and system protection (NS protection) at the central meter panel may be required.
- Page 94 9.9.20 N-PE Voltage Monitoring Settings Note: The N-PE voltage is used to detect whether the PE line is reliably connected. If there is not a second ground connection to earth the inverter, the N-PE voltage monitoring shall be activated. The <Settings for> menu is opened. ...
- Page 95 - Reactive power control (see Chapter 9.9.8 on page 74) - Trip Overvoltage (10min Average)– protective function - Islanding Detection Status – protective function Active power increase at underfrequency P(f) configuration 4. Confirm selection with < Confirm>. The device then performs a restart with the desired range of functions. »...
-
Page 96: Performing A Firmware Update
Fig. 218. Select report Fig. 219. Select inverter parameter report Fig. 220. View all parameters 9.10 Performing a firmware update 9.10.1 Updating the Communication device Note: The enclosed Communication device required in order to perform the update. The firmware update can only be carried out with adequate DC voltage (300 W). - Page 97 9.10.2 Update the inverter NOTE Make sure that there is sufficient DC voltage (300 V). Also note that the sequence of the firmware update for the associated *bin files must be observed. This process takes approx. 10 minutes. The files must not be renamed.
-
Page 98: Monitoring With "Blueplanet Smartcloud
Note: For monitoring all measurement data for PV and battery systems, you can conveniently use KACO's integrated smartcloud. The KACO server is located in Germany to securely store all sensitive customer data long-term. The <KACO Device Manager> menu has been opened and <KACO Cloud>... -
Page 99: Information On Dynamic Feed-In
9.12 Information on dynamic feed-in 9.12.1 Control behaviour With a system output of 7 kWp and above, a digital feed-in meter or a remote control option is still mandatory at present. Active power limitation is the simplest option here. This can be achieved for all NH3 devices via the Smart-Meter or a data logger. - Page 100 00:00 02:00 04:00 06:00 08:00 10:00 12:00 14:00 16:00 18:00 20:00 22:00 00:00 Uhrzeit [hh:mm] Fig. 231. Diagram of increase in self consumption Legend Regulation command to device 70% + self consumption PV power gained through self consumption Energy requirement of a detached home (green area) PV power lost despite self consumption Using the feed-in meter/data logger for calculations allows more efficient use to be made of the PV system, thus providing more energy for self-consumption.
-
Page 101: Maintenance And Troubleshooting
By connecting up additional consumers, heating, water or energy storage systems, the self consumption and therefore the consumption of the PV current can be increased considerably. This function can however only be used by data logger because this has an S0 output and could therefore connect up additional consumers via a relay circuit. -
Page 102: Shutting Down For Maintenance Work / Troubleshooting
10.2.2 Cleaning the heat sink Do not attempt to eliminate faults that are not described here (in the chapter on troubleshooting). Contact our customer service department. Only perform maintenance work that is described here. Have the proper operation of the device checked at regular intervals by a qualified electrician and always contact the service department of the system manufacturer in case of problems. -
Page 103: Troubleshooting
10.4 Troubleshooting In <Communication device properties>, a pending error is displayed under <Live values>. The error relates to the connected <Master inverter> Error code “N/A” is displayed here if no error has occurred. 10.5 Error code The following solutions are recommended when the error code is displayed: No.: Description No.: ·... - Page 104 If this fault is still being shown, contact the service. The inverter temperature should be above -40℃ No.: E12 Description Step Peak current too high Disconnect the inverter from the AC grid, PV module, battery and reconnect after 5 minutes, check is it solved? If not, disconnect the load, and restart the inverter to check is it solved? If the fault disappear, then connect the load one by one to check which load result this fault?
- Page 105 No.: E38 Description Step Insolation failure Make sure the inverter is reliably grounded. Only Disconnect PV module and restart it to check is the fault on? Remove any abnormality. Only Disconnect battery to check is the fault on? remove any abnormality. Only Disconnect Grid side to check is fault on? remove any abnormality.
- Page 106 No.: W40 Description Step BUS over voltage-software Check actual PV input voltage &AC voltage to make sure the voltage within the voltage range when installing the inverter; If the fault reports during the inverter first installation, and also doesn’t work for more than 6 months after production, then the fault may be caused by energy lack of capacitance.
- Page 107 This warning may occurs when grid frequency or voltage instant un-stable or grid blackout occasionally. If this warning occurs frequently, contact service. No.: W70 Description Step Battery Current High(sw) Disconnect the inverter from the AC grid, PV module and battery, and reconnect after 5 minutes to check is the problem solved? Make exchange of the inverter if complete the above guide with fault is still there.
- Page 108 No.: W178 Description Step EPS Output Over Decrease the load connection to check is this fault disappear? Stop the inverter and restart with no EPS to check is this fault disappear? Make exchange of the inverter if complete the above guide with fault is still there. No.: W180 Description Step...
-
Page 109: Fault During Connection Set-Up And Search
Check the WLAN connection on the mobile end device. If the connection has been lost, reactivate it in the device settings. The window of the “KACO NH Setup” APP has to be closed completely using the overview of all opened windows, so that the “KACO NH Setup”... -
Page 110: Decommissioning And Dismantling
11 Decommissioning and dismantling 11.1 Switching off the device DANGER Lethal voltages are still present in the connections and cables of the device even after the device has been switched off and disconnected! Coming into contact with the lines and/or terminals/busbars in the device can cause serious injury or death. ›... - Page 111 11.2.2 Back-up connection Fig. 236. Loosen and remove back-up battery connection Ensure that the device is completely free of AC/DC voltage. 1. Rotate the latch as shown. 2. Disconnect the connector from the EPS port. 11.2.3 PV-/Battery Connection Fig. 237. Loosen and remove the PV connectors. Ensure that the device is completely free of DC voltage.
-
Page 112: Uninstalling The Device
Ensure that the device is completely free of AC/DC voltage. 1. Rotate the nut of the communication device as shown. 2. Remove the communication device to unlock the account. 11.2.5 DC connection DANGER Destruction of the DC plug connectors DC plug connectors can be destroyed by an arc event if disconnected while still live. -
Page 113: Disassembling The Device
Packaging: Ensure that the transport packaging is disposed of properly. 13 Service and warranty If you need help solving a technical problem with one of our KACO products, please contact our service hotline. Please have the following information ready so that we can help you quickly and efficiently: •... -
Page 114: Appendix
14 Appendix 14.1 EU Declaration of Conformity Page 111 blueplanet hybrid 6.0 NH3 M2 blueplanet hybrid 8.0 NH3 M3 blueplanet hybrid 10.0 NH3 M3 blueplanet hybrid 12.0 NH3 M3... - Page 115 Werner-von-Siemens-Allee 1 · 74172 Neckarsulm · Deutschland · Tel. +49 7132 3818-0 ·· info@kaco-newenergy.de · www.kaco-newenergy.de...
Need help?
Do you have a question about the blueplanet hybrid 6.0 NH3 M2 WM OD IIG0 and is the answer not in the manual?
Questions and answers