BDI CORRIDOR 6521 Instruction Manual
Desk
Hide thumbs
Also See for CORRIDOR 6521:
- Quick start manual (5 pages) ,
- Assembly instructions manual (12 pages)

Related Manuals for BDI CORRIDOR 6521


Summary of Contents for BDI CORRIDOR 6521
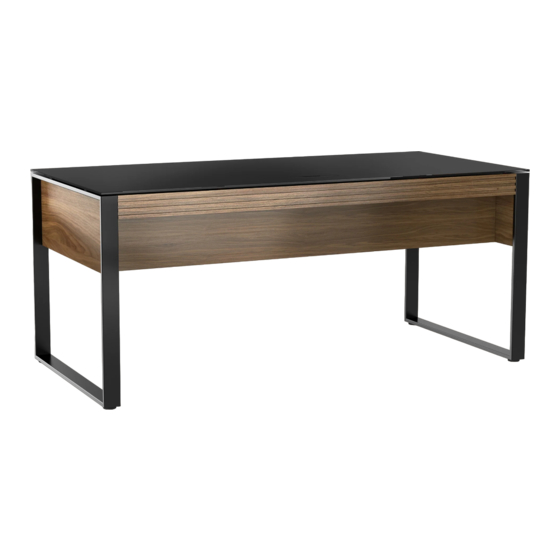
- Page 1 CORRIDOR 6521 ® DESK INSTRUCTION MANUAL LET’S GET STARTED. DESIGN MATTHEW WEATHERLY...
- Page 3 Congratulations on the purchase of your Corridor desk from BDI. Your desk has been designed to provide a lifetime of enjoyment. This manual will provide assembly instructions and other helpful information to ensure you get the most out of your product.
- Page 4 HARDWARE AND COMPONENTS Unpack and identify the parts listed below. The assembly workspace should be a non-marring surface, such as carpet. For missing hardware pieces, please contact BDI Customer Service at customerservice@bdiusa.com. For all other concerns, please contact your BDI retailer.
- Page 5 HARDWARE AND COMPONENTS HARDWARE AND COMPONENTS Center Drawer Liner (C6) QTY: 1 Drawer Assembly (C5) QTY: 1 Side Drawer Liner (C7) QTY: 2 Glass Panel (C8) QTY: 1 Wire Management Lid (C9) QTY: 1 Removable Side Panel (C10) QTY: 2 NEED ASSISTANCE? customerservice@bdiusa.com | 5...
- Page 6 STEP 1. ATTACH WIRE MANAGEMENT TROUGH Aligning the colored dots on the same side, attach Wire Mangement Trough (C2) to HEX WRENCH – T1 Modesty Panel (C1) using Screw (H1). Tighten with Hex Wrench (T1). SCREW – H1 Colored dots 6 | BDIUSA.COM CORRIDOR 6521...
- Page 7 STEP 2. ATTACH LEGS TO MODESTY PANEL ASSEMBLY ASSEMBLY With the legs positioned upside down, match the colored dot on the Left Leg (C3) with the HEX WRENCH – T1 colored dot on the Modesty Panel Assembly and attach using 3 Screws (H2). Keep screws loose until Step 3.
- Page 8 HEX WRENCH – T1 Secure the legs to the sides of the Drawer Assembly (C5) using 4 Screws (H2). SCREW – H2 Tighten all screws from Steps 2 and 3 with Hex Wrench (T1). SCREW – H3 8 | BDIUSA.COM CORRIDOR 6521...
- Page 9 STEP 4. INSTALL BUMPERS AND DRAWER LINERS ASSEMBLY Insert 6 Bumpers (H5) in the 2 center holes and the 4 outer holes of the Drawer Assembly (C5). BUMPER – H5 With the fabric side facing up, insert the Center Drawer Liner (C6) into the Center Drawer, and the 2 Side Drawer Liners (C7) into both side drawers.
- Page 10 With the help of another person, carefully lower the Glass Panel (C8) onto the Drawer Assembly HEX WRENCH – T1 (C5). Attach using 4 Screws (H4) and tighten with Hex Wrench (T1). SCREW – H4 10 | BDIUSA.COM CORRIDOR 6521...
-
Page 11: Fine Tuning
STEP 6. INSTALL WIRE MANAGEMENT LID & SIDE PANELS ASSEMBLY Place the Wire Management Lid (C9) into the opening in the Glass Panel (C8). Magnetically attach the Removable Side Panels (C10) to the Legs (C3 & C4). FINE TUNING Place AC power strip/surge protector (not included) into Wire Management Trough (C2). To level your Corridor Desk, dial down one or more levelers until you attain a level stance. -
Page 12: Care And Maintenance
While BDI’s stained wood finishes are stable in tone & appearance, all finishes are subject to some degree of discoloration with prolonged exposure to direct sunlight. Please avoid positioning your BDI cabinet in any area with ample direct sunlight. -
Page 13: Warranty
Select chairs carry coverage for five (5) years from the date of the product delivery, based on an 8-hour daily use pattern. BDI reserves the right to refine or update its warranty from time to time. See the complete and latest warranty document at www.bdiusa.com/warranty. - Page 14 These distinctive product configurations are protected by US and international patents, trade dress, and/or copyright laws. Corridor & BDI are trademarks of Becker Designed, Inc. All rights reserved. ©2024, BDI | V.06.25.2024 Made in Vietnam.
Need help?
Do you have a question about the CORRIDOR 6521 and is the answer not in the manual?
Questions and answers