Advertisement
Quick Links
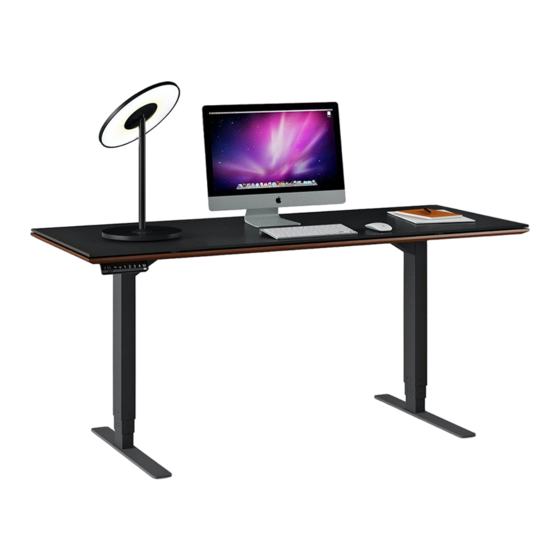
SEQUEL
LIFT DESK
OWNER'S MANUAL
Product Registration
Registering your new BDI product allows us to send you important
product updates, service information and helpful hints related to your BDI
products. Register today, and you will be entered to win free a BINK table
from BDI: www.bdiusa.com/register
Placement and Maintenance
Sequel® Lift Desk is designed for indoor use on level floors. Clean glass
with glass cleaner, and steel parts and wood veneer with a moist cloth.
Your Sequel® Office furniture is engineered for easy assembly. Carefully
follow this procedure to prevent any damage. Do not use power tools
for assembly of this product.
Step 1
Unpack and identify the parts listed below. The assembly workspace
should be a non-marring surface such as carpet. For missing hardware
pieces, please contact BDI Customer Service at customerservice@bdiusa.
com. For all other concerns, please contact your BDI retailer.
C6 Cord Conduit x 1
C1 Leg x 2
C2 Foot x 2
Designed by Matthew Weatherly.
These distinctive product configurations are protected by US and international patents, trade dress, and/or
copyright laws. Sequel & BDI are trademarks of Becker Designed, Inc. All rights reserved. ©2016, BDI
Made in China. 10.10.2018 New Controller
6051/6052
®
bdiusa.com
customerservice@bdiusa.com
T1 5mm Hex Wrench
T2 4mm Hex Wrench
H1 #10 Wood Screw x 4
H2 #6 Wood Screw x 6
H3 M6 x 15mm Screw x 8
H4 M6 x 16mm Screw x 8
H5 1/4-20 x 19mm Screw x 7
H6 Wire clip x 6
H7 Leveler x 4
H8 Glass Bumper x 2
H9 Dual Lock Dot x 8
C9 Grommet cover x 1
C8 Glass Panel x 1
A1 Main Panel x 1
C3 Control Module x 1
C7 Wire tray x 1
C4 Keypad x 1
C5 Power Cord x 1
Tool Required:
Phillips screwdriver
Advertisement

Related Manuals for BDI SEQUEL 6051


Summary of Contents for BDI SEQUEL 6051
- Page 1 Designed by Matthew Weatherly. These distinctive product configurations are protected by US and international patents, trade dress, and/or copyright laws. Sequel & BDI are trademarks of Becker Designed, Inc. All rights reserved. ©2016, BDI Made in China. 10.10.2018 New Controller...
- Page 2 Step 3 - Connect keypad cord into the Control Module and bundle the slack with the hook and loop tie. Step 4 - Secure the keypad cord into the groove using 6 cord clips H6 and 6 wood screws H2. H2 x 6 H6 x 6 bdiusa.com SEQUEL 6051/52 customerservice@bdiusa.com LIFT DESK...
- Page 3 Step 6 - Attach each foot with 4 screws H4 and Hex Wrench T2. Thread in the levelers H7 to the bottom of each foot. H4 x 8 H4 x 4 H7 x 4 C2 x 2 bdiusa.com SEQUEL 6051/52 customerservice@bdiusa.com LIFT DESK...
- Page 4 Optional Drawer Assembly for 6052 Attach the optional drawer (for 6052) using 4 Screws that came with your drawer as shown. H10 x 4 bdiusa.com SEQUEL 6051/52 customerservice@bdiusa.com LIFT DESK...
- Page 5 Refer to the User Manual on Page 13 and follow the Reset Procedure. You may now adjust the height of your desk to make the remaining steps easier. 2 Person Task bdiusa.com SEQUEL 6051/52 customerservice@bdiusa.com LIFT DESK...
- Page 6 The stem of the glass pucks should slip into 5 holes. Secure the glass panel in place from below using 5 Screws H5. Do not over tighten. Place Grommet Cover C9 into the grommet hole. 2 Person Task H5 x 5 bdiusa.com SEQUEL 6051/52 customerservice@bdiusa.com LIFT DESK...
- Page 7 We suggest just behind the metal rails towards the leg closest to your wall outlet. Make sure the area is dust free. Remove the adhesive film and attach the surge protector with the power cord facing the nearest leg. Press firmly to allow the pressure sensitive adhesive to set. bdiusa.com SEQUEL 6051/52 customerservice@bdiusa.com LIFT DESK...
- Page 8 Insert power cord(s) into the Cord Conduit. Remove excess lubricant from legs When new, the legs may have excess lubricant. Extend the legs to their highest position and wipe off excess lubricant with a clean, dry cloth or rag. bdiusa.com SEQUEL 6051/52 customerservice@bdiusa.com LIFT DESK...
- Page 9 Wire Tray to make the monitor arm attach more centrally. Attach the metal Wire Tray C7 to the back edge of the bottom of the desk with 2 Screws H5. Shifted Right Shifted Left C7 Wire Tray H5 x 2 bdiusa.com SEQUEL 6051/52 customerservice@bdiusa.com LIFT DESK...
- Page 10 The Sequel Lift Desk is compatible with most third party monitor arms. Attach your monitor arm on either side of the grommet hole along the back edge, staying at least 1” away from the grommet hole. Optional Monitor Arm (NOT INCLUDED) bdiusa.com SEQUEL 6051/52 customerservice@bdiusa.com LIFT DESK...
- Page 11 Press and hold the DOWN button again until the desk lowers a little bit more, slightly rises and stops. Release the DOWN button. Your desk is now ready for use. “Reset” Down Memory looks like this bdiusa.com SEQUEL 6051/52 customerservice@bdiusa.com LIFT DESK...
- Page 12 Keypad Lock To lock the keypad: Press and hold the “BDI” button for about 8 seconds until the LED display reads “LOC”. The keypad is now locked and cannot be used to move the desk. To unlock the keypad: Press and hold the “BDI”...
-
Page 13: Technical Specifications
To remove the upper/lower limit positions: Press and release the “BDI” button and the LED display should read “S”. Within 5 seconds, press and hold the “BDI” button until the display flashes “555”. The upper and lower limits are now removed. - Page 14 If your desk is not functioning properly it may need to be reset. Follow the RESET procedure above. If your LED readout displays an error message Er1 confirm that all wired connections are secure. Then perform the reset procedure above. bdiusa.com SEQUEL 6051/52 customerservice@bdiusa.com LIFT DESK...
Need help?
Do you have a question about the SEQUEL 6051 and is the answer not in the manual?
Questions and answers