Table of Contents
Advertisement
Quick Links
Installation and Operation Manual
250 rue Copenhague, Saint-Augustin-de-Desmaures (Quebec), Canada, G3A 2H3
Technical services: 1-877-356-6663
This manual is available for free download on the manufacturer's web site. It is a copyrighted document.
Re-sale is strictly prohibited. The manufacturer may update this manual from time to time and cannot be
responsible for problems, injuries, or damages arising out of the use of information contained in any manual
obtained from unauthorized sources.
Printed in Canada
Manuel d'installation et d'utilisation
FP16D SAINT-LAURENT
Safety tested according to ULC-S610
and UL 127 Standards by an accredited laboratory
www.valcourtinc.com
Manufactured by:
Stove Builder International Inc.
READ AND KEEP THIS MANUAL FOR REFERENCE
E-mail: tech@sbi-international.com
46382A
2024-07-05
Advertisement
Table of Contents

Related Manuals for Valcourt SAINT-LAURENT


Summary of Contents for Valcourt SAINT-LAURENT
- Page 1 Manuel d’installation et d’utilisation FP16D SAINT-LAURENT Installation and Operation Manual Safety tested according to ULC-S610 and UL 127 Standards by an accredited laboratory www.valcourtinc.com Manufactured by: Stove Builder International Inc. 250 rue Copenhague, Saint-Augustin-de-Desmaures (Quebec), Canada, G3A 2H3 Technical services: 1-877-356-6663 E-mail: tech@sbi-international.com...
- Page 2 THANK YOU FOR CHOOSING THIS VALCOURT FIREPLACE As one of North America’s largest and most respected wood stove and fireplace manufacturers, VALCOURT takes pride in the quality and performance of all its products. We want to help you get maximum satisfaction as you use this product.
- Page 3 CAUTION BEFORE CLOSING THE WALLS, MAKE SURE THAT THE AIR CONTROL MECHANISM, THE FLUE DAMPER AND DOORS MECHANISM WORK PROPERLY. ALSO MAKE SURE THE DOORSTOP PIN IS REMOVED (SEE DETAIL A). FP16D – Saint-Laurent - Installation and Operation Manual...
-
Page 4: Table Of Contents
Installation of Standoff ........................ 12 1.3.3 Transportation Packaging ......................13 1.3.4 Locating the FP16D – Saint-Laurent Wood Fireplace ..............13 1.3.5 Clearances to combustible materials ................... 13 1.3.6 Raised base installation of more than 4" (R value for the hearth extension not required) ..14 1.3.7... - Page 5 2.2.5 Air Intake Control and Chimney Damper ..................49 Smoking − Causes and Troubleshooting ..................50 2.2.6 Maintaining Your FP16D – SAINT-LAURENT Wood Fireplace ............51 2.3.1 Creosote – Formation and Need for Removal ................51 2.3.2 Chimney Maintenance ......................... 51 2.3.3...
-
Page 6: Part A - Installation
FOR ADDITIONAL HEATING COSTS ASSOCIATED WITH THE USE OF AN ALTERNATIVE HEAT SOURCE. IT IS HIGHLY RECOMMENDED TO BUY THIS PRODUCT FROM A RETAILER WHO CAN PROVIDE INSTALLATION AND MAINTENANCE ADVICES. • DO NOT CONNECT THIS UNIT TO A CHIMNEY FLUE SERVING ANOTHER APPLIANCE. FP16D – Saint-Laurent - Installation and Operation Manual... - Page 7 WARNING: This product can expose you to chemicals including carbon monoxide, which is known to the State of California to cause cancer, birth defects or other reproductive harm. For more information go to www.P65warnings.ca.gov/ FP16D – Saint-Laurent - Installation and Operation Manual...
-
Page 8: Regulations Covering Fireplace Installation
1.1.1 Regulations Covering Fireplace Installation When installed and operated as described in this manual, the FP16D Saint-Laurent wood fireplace is suitable for use as a fireplace appliance in residential installations. In Canada, the CSA B365 Installation Code for Solid Fuel Burning Appliances and Equipment and the CSA C22.1 Canadian National Electrical Code are to be followed in the absence of local code requirements. -
Page 9: Measurements
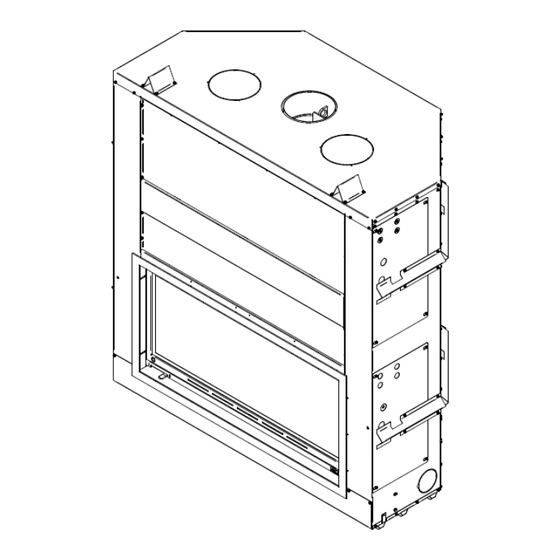
1.2.2 Measurements Figure 1 : Top View Figure 2 : Combustion chamber Figure 3 : Straight narrow overlap faceplate Figure 4 : Straight masonry trim FP16D – Saint-Laurent - Installation and Operation Manual... - Page 10 Figure 5 : Glass surface Figure 6 : Combustion chamber Figure 7 : Door Opening Figure 8 : Door Opening Straight narrow overlap faceplate Straight masonry trim FP16D – Saint-Laurent - Installation and Operation Manual...
- Page 11 Figure 9 : Left side Figure 10 : Left Side Straight narrow overlap faceplate Straight masonry trim Figure 11 : Right side FP16D – Saint-Laurent - Installation and Operation Manual...
-
Page 12: Fireplace Installation
Align the holes of the spacers (A) with the pre-drilled holes on top of the fireplace and secure them with the 8 screws provided (B), as shown. FP16D – Saint-Laurent - Installation and Operation Manual... -
Page 13: Transportation Packaging
We suggest you install the refractory panels after the setting up of the fireplace. To install the refractory panels, see Section 1.3.17 - Moulded Refractory Brick Panels Installation. 1.3.4 Locating the FP16D – Saint-Laurent Wood Fireplace The best location to install your fireplace is determined by considering the location of windows, doors and the traffic flow in the room. -
Page 14: Raised Base Installation Of More Than 4" (R Value For The Hearth Extension Not Required)
• Floor (under the fireplace): 0" 1.3.6 Raised base installation of more than 4" (R value for the hearth extension not required) The FP16D – Saint-Laurent fireplace may be installed directly on the floor or on a raised combustible or non- combustible base. - Page 15 Figure 14 : Raised base installation of more than 4" Figure 15 : Ceiling clearance CLEARANCE MINIMUM MEASUREMENTS 84" (2,13m) minimum 2" (51 mm) FP16D – Saint-Laurent - Installation and Operation Manual...
-
Page 16: Raised Base Installation Of 4" (R Value For The Hearth Extension Not Required)
In the case where (F) would be equal to 4", it is suggested that the sheet metal between the base of the fireplace and floor be in one piece. See Figure 16 : Raised base installation of 4". Figure 16 : Raised base installation of 4" FP16D – Saint-Laurent - Installation and Operation Manual... -
Page 17: Directly On The Floor (R Value For The Hearth Extension Not Required)
K values are not. To find the corresponding R factor to use for some selected materials, see Table 3 : Thermal Characteristics of Common Floor Protection Materials*. CAUTION DO NOT LEAVE CARPET UNDER THE FLOOR PROTECTION IN FRONT OF THE FIREPLACE. FP16D – Saint-Laurent - Installation and Operation Manual... -
Page 18: R-Value Calculations
* Information as reported by manufacturers and other resources. ** For a 1/8" thickness. You cannot «stack» horizontal still air to accumulate R-values; you must separate each layer of horizontal still air with another non-combustible material. FP16D – Saint-Laurent - Installation and Operation Manual... -
Page 19: Minimum Hearth Extension Requirements
− Place 2" x 3" (5 cm x 8 cm) or 2" x 4" (5 cm x 10 cm) headers, only along the upper part of the front, side and back faces. Do not put wood or any combustible material within the area above the fireplace. − Place headers only as required to support the facing and mantel. FP16D – Saint-Laurent - Installation and Operation Manual... - Page 20 Refer to the building code or the local code for regulations concerning the need to install finishing material inside the chase around the fireplace. Figure 19 : Framing MEASUREMENTS 63 1/16" (160,2 cm) 31 11/16" (80,5 cm) Figure 20 : Framing FP16D – Saint-Laurent - Installation and Operation Manual...
-
Page 21: Framing When Installing A Fresh Air Intake Kit
SURROUNDING THE FIREPLACE. IF THE MATERIAL IS THICKER, USE A FACEPLATE GAUGE FOR POSITIONING AND MAKE SURE THAT THE FACEPLATE CAN BE REMOVED AFTER IT HAS BEEN INSTALLED (PLEASE DISMISS IF YOU INSTALL THE MASONRY FACEPLATE OPTION). FP16D – Saint-Laurent - Installation and Operation Manual... - Page 22 Refer to the building code or the local code for regulations concerning the need to install finishing material inside the chase around the fireplace. *The fresh air intake kit may be installed on the left side or on the back. FP16D – Saint-Laurent - Installation and Operation Manual...
-
Page 23: Framing When Installing In A Corner
MEASURMENTS 67" (170,2 cm) 94 3/4" (240,8 cm) Refer to the building code or the local code for regulations concerning the need to install finishing material inside the chase around the fireplace. FP16D – Saint-Laurent - Installation and Operation Manual... -
Page 24: Facing
Figure 24 : Facing LEGEND Combustible material allowed in this area (Example: Drywall) Non-combustible material only in this area (Example: Cement board) MINIMUM MEASUREMENTS 64 3/4" (162.6 cm) 62 9/16" (157.5 cm) FP16D – Saint-Laurent - Installation and Operation Manual... -
Page 25: Installation Of A Combustible Mantel Shelf
Figure 25 : Installation of a Combustible Mantel Shelf SHELF POSITIONING CLEARANCES 84" (1829 mm) 48" (1219 mm) 6" (152 mm) 50" (1270 mm) 8" (203 mm) 52" (1321 mm) 10" (254 mm) 54" (1372 mm) 12" (305 mm) FP16D – Saint-Laurent - Installation and Operation Manual... -
Page 26: Installing A Television Above A Fireplace
SURROUNDING THE FIREPLACE. IF THE MATERIAL IS THICKER, USE A FACEPLATE GAUGE FOR POSITIONING AND MAKE SURE THAT THE FACEPLATE CAN BE REMOVED AFTER IT HAS BEEN INSTALLED (PLEASE DISMISS IF YOU INSTALL THE MASONRY FACEPLATE OPTION). FP16D – Saint-Laurent - Installation and Operation Manual... -
Page 27: Fresh Air Intake Kit
• The insulated flexible pipe and the outside wall termination can be installed over or under the floor level. FP16D – Saint-Laurent - Installation and Operation Manual... - Page 28 STEP 1: Remove the knock out located on the left-hand side of your fireplace. STEP 2: Install 4" adapter included in your fireplace. Align the notch on the adaptor with the one on the fireplace and turn clockwise. Figure 28 : Adapter installation FP16D – Saint-Laurent - Installation and Operation Manual...
- Page 29 Carefully push the insulation and plastic cover back over the pipe. Fix the plastic in place using aluminum tape. Figure 30 : P-Trap Example FP16D – Saint-Laurent - Installation and Operation Manual...
-
Page 30: Installation Of A Gas Lighter
THE FACING OF THE NARROW OVERLAP OR THE MASONRY TRIM SHOULD NEVER COME IN CONTACT WITH MASONRY PRODUCTS SUCH AS MORTAR, ACID OR ANY OTHER PRODUCTS CONTAINING ABRASIVES. DAMAGES AND DISCOLOURATION CAUSED BY THESE PRODUCTS WILL NOT BE COVERED BY THE WARRANTY. FP16D – Saint-Laurent - Installation and Operation Manual... -
Page 31: Straight Narrow Overlap
2. Secure the narrow overlap (A) to the fireplace with 4 screws (B) supplied with the faceplate. Always make sure the faceplate is squared to the fireplace. 3. Make sure that the doors still slide perfectly. FP16D – Saint-Laurent - Installation and Operation Manual... -
Page 32: Masonry Trim
4. Once the trim is installed, you may proceed with the installation of the non-combustible wall (all types of cement board). 5. Install the non-combustible material on top of the cement board and against the exceeding side of the masonry trim (A). FP16D – Saint-Laurent - Installation and Operation Manual... -
Page 33: Moulded Refractory Brick Panels Installation
Figure 35 : Lower Back Panels 3. Place the left and right lower refractory panels (D) and (E). Set them on the floor of the firebox, as shown. Figure 36 : Lower Right and Left Panels FP16D – Saint-Laurent - Installation and Operation Manual... - Page 34 Figure 38 : Upper Left and Right Panels 6. Secure the upper refractory panels retainers (I) using the screws (J) provided with the owner's manual kit. Figure 39 : Panels Retainers FP16D – Saint-Laurent - Installation and Operation Manual...
-
Page 35: Door Adjustment
3. Unscrew the two bolts (Detail A) which are located in the lower left corner of the door (see Figure 26). 4. To adjust, move the door to the left or right as needed. 5. Tighten the 2 bolts. Figure 40 : Door adjustment FP16D – Saint-Laurent - Installation and Operation Manual... -
Page 36: Access Door For Counterweight
To be safe and effective, the chimney must be installed exactly in accordance with the manufacturer’s instructions. Use only components intended for the brand and model of chimney you are using. Never substitute parts from other chimney brands or build your own components. FP16D – Saint-Laurent - Installation and Operation Manual... - Page 37 8” flue, it should be reduced by relining with a listed 8” stainless steel liner. Do not downsize the flue to less than 8”. TABLE 4 : LISTED CHIMNEYS FOR YOUR FP16D - SAINT-LAURENT WOOD FIREPLACE CHIMNEY MANUFACTURER...
-
Page 38: Rafter Protection
Rafter protectors, at the roof level, must be installed with this unit, if the chimney is enclosed at the attic level. Rafter protectors must be made of 22 ga or more galvanized steel and must have at least the dimension presented on the following diagram: FP16D – Saint-Laurent - Installation and Operation Manual... -
Page 39: Chimney Installation Notes
• The FP16D – SAINT-LAURENT is listed only with chimney systems described in TABLE 4 : LISTED CHIMNEYS FOR YOUR FP16D - SAINT-LAURENT WOOD FIREPLACE. - Page 40 16" (410 mm) horizontally, and 18" (460 mm) vertically. This separation is to prevent smoke migrating from one chimney to another. 18" 18" 457.2mm 457.2mm 18" 457.21mm 16" 16" 406.4mm 406.4mm Figure 44 : Multiple Chimneys FP16D – Saint-Laurent - Installation and Operation Manual...
-
Page 41: Chimney Installation Instructions
Always refer to the chimney manufacturer’s Installation manual to ensure a safe installation. Some non- illustrated parts may be required. 1.5.1 Examples of Typical Chimney Installation Figure 45 : Straight Installation Figure 46 : Exterior offset installation Figure 47: Connection to a masonry chimney FP16D – Saint-Laurent - Installation and Operation Manual... -
Page 42: Offset Installation
Mandatory measure of 15 ft. from the bottom of the fireplace to the top of the outside chimney. Figure 48 : Typical Installation FP16D – Saint-Laurent - Installation and Operation Manual... -
Page 43: Installation Instructions
8. Install the chimney cap (G). 9. When a ventilated roof flashing is installed, precautions are to be taken not to caulk or seal the ventilating openings. FP16D – Saint-Laurent - Installation and Operation Manual... -
Page 44: Offset Chimney Installation
30 only in the USA), an angled firestop (A) or wall radiation shield must be installed. Only one is required. Follow the chimney manufacturer’s installation instructions. In cold climate locations, it is recommended that you use the insulated wall radiation shield since it will maintain the home’s thermal barrier. FP16D – Saint-Laurent - Installation and Operation Manual... -
Page 45: Universal Offset Support
2. The clearance to combustible material must be a minimum of 2" between the outside of the masonry and any wood framing or loose insulation. 3. The chimney must be built in accordance with the current building code. 4. No other appliance can be connected to the same chimney. FP16D – Saint-Laurent - Installation and Operation Manual... -
Page 46: Installation Instructions
Note: Make sure the liner exceeds at least 12” (30 cm) the top of masonry chimney. Figure 51 : Masonry Chimney Installation FP16D – Saint-Laurent - Installation and Operation Manual... -
Page 47: Part B - Operation And Maintenance
PART B - OPERATION AND MAINTENANCE 2.1 Fuel The FP16D – SAINT-LAURENT is designed to work best when fuelled with seasoned cordwood. Use solid wood or processed solid fuel fire logs only. Hardwoods are preferred to softwoods since the energy content of wood is relative to its density. -
Page 48: Operating The Fp16D Saint-Laurent Wood Fireplace
Burn one or two small fires to begin the curing and conditioning process. Then build bigger and hotter fires until there is no longer any paint smell from the fireplace. Once the paint smell disappears, your fireplace is ready for serious heating. FP16D – Saint-Laurent - Installation and Operation Manual... -
Page 49: Building A Fire
Your FP16D – SAINT-LAURENT wood fireplace will work best if a thick bed of hot embers is maintained in the bottom of the firebox and a minimum of two large pieces of seasoned fuel are added. Combustion efficiency is largely related to establishing a hot ember bed, and hot firebox temperatures. -
Page 50: Smoking − Causes And Troubleshooting
As the fire burns, air goes up the chimney. This air must be replaced through leakage into the house or through the fresh air kit. When operating the FP16D – Saint-Laurent wood fireplace, open a nearby window temporarily to check if there is adequate air supply replacement. If opening a window solves the problem, the house is under negative pressure. -
Page 51: Maintaining Your Fp16D - Saint-Laurent Wood Fireplace
• The chimney damper and air intake control should be always in the open position when the fireplace is in use. 2.3 Maintaining Your FP16D – SAINT-LAURENT Wood Fireplace 2.3.1 Creosote – Formation and Need for Removal When wood is burned slowly without a flame, it produces tar and other organic vapours which combined with expelled moisture will form creosote. -
Page 52: Dealing With A Chimney Fire
2.3.6 Glass Replacement The glass used in the FP16D – SAINT-LAURENT fireplace is ceramic glass 5 mm thick having dimensions of: 42” x 13 13/16” and tested to reach temperatures up to 1400 ºF. If the glass breaks, it must be replaced with one having the same specification. -
Page 53: Replacement Steps
2.3.6.1 Replacement steps Here are the steps to replace the glass of your FP16D SAINT-LAURENT wood fireplace: WARNING WHEN YOU REMOVE THE GLASS FROM ITS FRAME, DUE TO ITS WEIGHT, THE DOOR WILL SEEK TO GO UPWARDS QUICKLY. 1. Open the glass door (A) with the lock located (E) on right side of the glass door. -
Page 54: Replacing The Glass Gasket
Now pinch the gasket to the glass in a U shape, all around the glass. Reinstall the glass, being careful to centre the glass carefully in the door. Do not over-tighten the screws. FP16D – Saint-Laurent - Installation and Operation Manual... -
Page 55: Plated Finish Maintenance
2.3.9 Glass Care – Cleaning To clean the glass, there are a number of specially designed cleaners. Your authorized Valcourt dealer can recommend a suitable cleaner which is available in your area. Regular household glass cleaners will not clean creosote and they usually contain ammonia that may stain the glass permanently. -
Page 56: Appendix 1: Exploded Diagram And Parts List
APPENDIX 1: EXPLODED DIAGRAM AND PARTS LIST FP16D – Saint-Laurent - Installation and Operation Manual... - Page 57 30109 BOLT HEX. 1/4” – 20 X 1” PL63952 LEFT HAND DOUBLE BOTTOM PL63953 RIGHT HAND DOUBLE BOTTOM 21304 FLOOR REFRACTORY INSULATION SE46382 FP16D INSTRUCTION MANUAL SE64628 MOVING HANDLE PL63954 4” ADAPTOR FP16D – Saint-Laurent - Installation and Operation Manual...
-
Page 58: Valcourt Limited Lifetime Warranty
Paint (peeling), gaskets, insulation, refractory panels* and ceramic fibre blankets. 1 year *Pictures required Shall your unit or a components be defective, contact immediately your VALCOURT dealer. Prior to your call make sure you have the following information necessary to your warranty claim treatment: •...
Need help?
Do you have a question about the SAINT-LAURENT and is the answer not in the manual?
Questions and answers