Advertisement
IMPORTANT! KEEP THIS MANUAL FOR FUTURE REFERENCE!
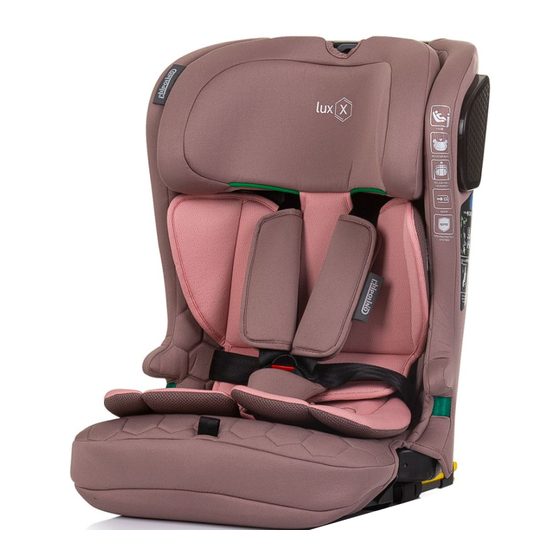
INSTRUCTION MANUAL FOR
USE OF CHILD RESTRAINT SYSTEM
„LUX X"
This child restraint system
is manufactured in compliance
with the requirements of Regulation No 129 of the Economic Commission
for Europe of the United Nations (UN/ECE) — Uniform provisions concerning
the approval of enhanced Child Restraint Systems used on board of motor
vehicles (ECRS), the provisions of the Product safety Directive 2001/95/
EU of the European Parliament and The Council as well as the Consumer
Protection Law of Bulgarian Legislation.
Advertisement
Table of Contents

Subscribe to Our Youtube Channel
Related Manuals for Chipolino LUX X


Summary of Contents for Chipolino LUX X
- Page 1 IMPORTANT! KEEP THIS MANUAL FOR FUTURE REFERENCE! INSTRUCTION MANUAL FOR USE OF CHILD RESTRAINT SYSTEM „LUX X” This child restraint system is manufactured in compliance with the requirements of Regulation No 129 of the Economic Commission for Europe of the United Nations (UN/ECE) — Uniform provisions concerning...
- Page 2 Child restraint system model „LUX X” is suitable for children with height 76-150cm and approximate age 0-12 years: I-Size universal ISOFIX: 76-105 cm / ≤18 kg. I-Size booster seat: 100-150 cm Child height Car seat position Installation method Category ISOFIX +...
- Page 3 WARNING! NEVER USE THE CAR SEAT BEFORE THE CHILD’S AGE EXCEEDS 15 MONTHS! Diagonal belt Lap belt NEVER INSTALL SEAT VEHICLE WITH 2-POINT BELT! INSTALL IT ONLY IN VEHICLE WITH 3-POINT SAFETY BELT (diagonal and lap belt)! IMPORTANT! This car seat is only suitable for installation in vehicles fitted with APPROVED 3-POINT SAFETY BELTS WITH RETRACTOR, meeting the requirements of Regulation no.
-
Page 4: Important Warnings
IMPORTANT! WARNINGS! WARNING! NEVER LEAVE YOUR CHILD UNATTENDED! WARNING! DO NOT USE ANCHOR POINTS OTHER THAN THE ONES DESCRIBED IN THIS MANUAL AND MARKED ON THE RESTRAINT SYSTEM! WARNING! DO NOT USE THE CAR SEAT BEFORE THE AGE OF THE CHILD EXCEEDS 15 MONTHS! ... -
Page 5: Product Features
Do not expose the car seat to direct sunlight to prevent the child from burning, deforming the car seat and especially the plastic parts. The car seat does not replace the child's cot or bed. When a child needs a sleep, you have to place him/her in a suitable baby stroller, baby crib or bed. - Page 6 УКАЗАНИЯ ЗА ИЗПОЛЗВАНЕ НА СИСТЕМАТА ЗА ОБЕЗОПАСЯВАНЕ CAUTION! • Follow exactly the instructions and sequence of installation steps and use of the product described in the text and figures of this manual. • Check the security of fixing after each operation! • ALWAYS CHECK THE SECURITY OF FIXING OF THE SAFETY BELTS! •...
- Page 7 INSTALLATION OF THE CAR SEAT „FORWARD“FACING For child’s height: 76-105 cm 3-point safety belt of the vehicle + 5-point harness of the car seat Top tether Attaching the ISOFIX connectors A. Place the ISOFIX connectors (2) in the ISOFIX hooks (1) between the backrest and the seat. B.
- Page 8 Attaching the top tether А. The top tether hook must be attached at the sport recommended by the vehicle instruction manual. On the figure you can see some possible attachment spots (A, B, C, D). At the attachment spot you will see this symbol B.
- Page 9 Securing the child in the car seat “click” “click” A. Press the button (1) and pull out the shoulder straps (2). CAUTION! Pull the shoulder straps, not the pads. Press the central buckle button (3), to unfasten the harness. Pull up the headrest to your desired height position. When it is fixed you will hear a„click“. Place the child in the seat (5).
- Page 10 INSTALLATION OF THE BOOSTER SEAT „FORWARD“FACING For child’s height: 100-150 cm ISOFIX + 3-point safety belt of the vehicle Preparation of car seat before installation 1. Lengthen the shoulder belts and lift the headrest to its highest position. 2. Unfasten the harness. 3.
- Page 12 1. IMPORTANT! Remove the vehicle seat headrest (if any). 2. Press the ISOFIX adjusting button (1), as shown in the figure and at the same time move the ISOFIX connector to its longest position (2). 3. Attach the ISOFIX connectors to the ISOFIX hooks of the vehicle (3). Press the car seat back until you hear a „click“...
- Page 13 Remove the vehicle seat headrest (if any). Place the child in the car seat. Pass the diagonal belt though the headrest guide (6), and the lap belt through the seat guide (7). Fasten the 3-point vehicle belt (A), until you hear a „click“. Pull the diagonal belt (B and C).
- Page 14 REMOVAL OF UPHOLSTERY Before removing the upholstery you must remove the safety harness. Unfasten the upholstery as shown in the picture A, B and C, and pull out the upholstery from the seat. To put the upholstery back, repeat the same actions in reverse order. CAUTION! Do not use the car seat without its cover! STORING AND TRANSPORTING THE CAR SEAT...
- Page 15 1. Unfasten the 3-point vehicle belt (A-click). Pull the diagonal belt (B). Press (press) the release buttons of the ISOFIX connectors and press (pull) ISOFIX connectors inside. 2. Pull the seat form one side (A), then form the other (B). Fold the seat to the backrest. The car seat is ready for storing and transporting (C).
-
Page 16: Care And Maintenance
CARE AND MAINTENANCE Clean the plastic or metal parts with damp cotton cloth or sponge and mild soap. Upholstery and soft pads may be hand washed at 30 С using mild detergent! Do not bleach! Do not tumble dry! Do not machine wash! Do not iron! ... - Page 17 Bulgaria, Plovdiv, Golyamokonarsko shosse Str. № 1 www.chipolino.com...
Need help?
Do you have a question about the LUX X and is the answer not in the manual?
Questions and answers