Table of Contents
Advertisement
Quick Links
Advertisement
Table of Contents

Related Manuals for LifeFitness IC3


Summary of Contents for LifeFitness IC3
- Page 1 Assembly Instructions Part Number IC-LFICGIC3-01 REV AA | Copyright 2024...
- Page 3 Columbia Centre III, 9525 Bryn Mawr Avenue, Rosemont, IL 60018 • U.S.A. 847.288.3300 • FAX: 847.288.3703 Service phone number: 800.351.3737 (toll-free within U.S.A., Canada) Global Website: www.lifefitness.com International Offices AMERICAS EUROPE, MIDDLE EAST, and AFRICA (EMEA) All Other EMEA Countries and Distributor...
- Page 4 User and Service Documents Link https://lfn.fit/KnowledgeBase https://lfn.fit/SupportDocuments Additional information is available online using the links above. أ علاه إل ر إبط باستخدإم إ لإ ن تر نت على إضافية معلومات تتوفر 点击上面的链接可在线获取更多信息。 Flere oplysninger er tilgængelige online gennem linket ovenfor. Bijkomende informatie is online beschikbaar via bovenstaande link.
-
Page 5: Table Of Contents
Life Fitness, LLC and its affiliated companies and subsidiaries. Disclaimer: Images and specifications are current as of the date of publication and are subject to change. Columbia Center III - 9525 Bryn Mawr Ave., Rosemont, IL 60018 • 847-288-3300 www.lifefitness.com • Part Number IC-LFICGIC3-01 • REV AA • 2024 Page 3 of 31... -
Page 6: Getting Started
1. Getting Started Overview The ICG Indoor Cycle offers an impressive array of features to improve cardiovascular fitness, tone muscles and develop endurance. This high level of reliability can however only be ensured with regular care and maintenance. Adhering to the maintenance procedures outlined in this manual will ensure a maximized stability and prolonged lifespan in return for minimal maintenance effort. - Page 7 WARNING: If you have pre-existing health problems or a disability, it is recommended that you consult your physician, to find the training method which is best suited to you. Incorrect or extensive training can result in serious health injuries. The manufacturer expressly assumes no responsibility for health risks, personal injury, property damage or consequential damages sustained by or through the use of this device, unless it is a case of consequential damage which can be traced back to faulty material and/or manufacturing, and which come under the responsibility of the manufacturer.
-
Page 8: Moving The Indoor Cycle
Moving the Indoor Cycle It is recommended that two people move the Indoor Cycle. To prevent accidents and damage to the plug-in sockets of the handlebars, it is necessary to firmly fix the vertical handlebar adjustment before the cycle is moved. Take extra care when moving the Indoor Cycle over uneven surfaces. -
Page 9: Leveling The Indoor Cycle
Leveling the Indoor Cycle Check the stability of the Indoor Cycle where it is to be operated and if necessary, adjust the leveling feet underneath the front or rear stabilizers to ensure the desired stability. Item Description Leveling Feet WARNING: Do not unscrew the leveling feet more than 0.4" (10 mm). The free-standing indoor cycle shall only be installed and operated on a stable and leveled floor. -
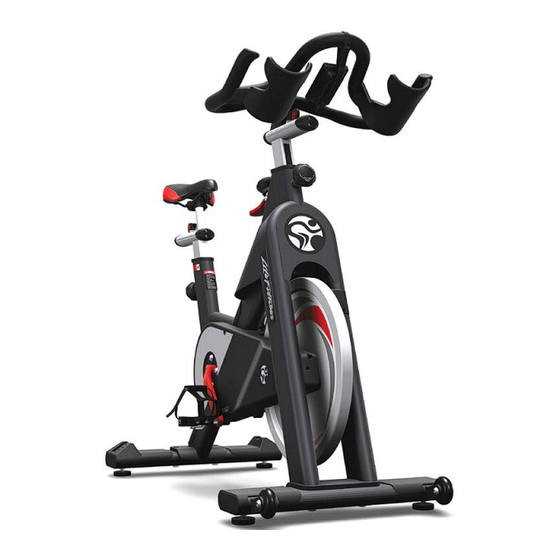
Page 10: Product Overview
2. Product Overview Product Features Item Description Qty. Handlebar Resistance Dial / Emergency Brake Adjustment Knob for Vertical Handlebar Adjustment Flywheel Transport Wheels Dual Sided SPD Pedal Leveling Feet Shroud Adjustment Knob for Vertical Seat Adjustment Thumb Lever for Horizontal Seat Adjustment Seat IMPORTANT: The production code on the tag plate is located on the side of the frame tube of the Indoor Cycle. -
Page 11: Using The Pop Pin Knobs
following paragraphs demonstrate just a few of the most often used adjustment variations of which the Indoor Cycle is capable. It is up to the user to adjust the Indoor Cycle to a riding position best suited to their requirements. WARNING: Do not adjust the seat or handlebar during use of the indoor cycle. -
Page 12: Adjust Seat Height
Adjust Seat Height Sit on the seat and ensure that your hip is not tilted to one side when the pedal has assumed the position as shown below. Item Description Vertical Seat Adjustment Vertical Handlebar Adjustment Place your shoes in the toe clips (cages) on the pedals, or in the SPD cleats if you are using cycling shoes. Start pedaling slowly, until the pedal has reached the position as shown above. -
Page 13: Handlebar Positioning
Handlebar Positioning Set the top of the handlebars to approximately the same height as the seat. If your knees touch the handlebars or if you experience back discomfort when pedaling in the standing riding position for extended periods, the handlebars should be adjusted slightly higher. -
Page 14: Emergency Brake
Emergency Brake To stop the flywheel in the event of an emergency, push down on the resistance knob. Item Description Push Down Resistance Knob NOTE: During training, make sure your shoes are placed in the toe clips (cages) provided or if you are using cycling shoes, that they are connected with the SPD cleats. -
Page 15: Assembly
3. Assembly Tools Required • #2 Phillips screwdriver • 5 mm Allen wrench • 5 mm Allen key socket • 13 mm socket wrench • 17 mm socket wrench • 13 mm open end wrench • 17 mm open end wrench •... - Page 16 Install Rear Stabilizer Assembly Install bolts, washers, cap nuts, and rubber gasket securing rear stabilizer assembly to frame using a 17 mm socket wrench. Item Description Qty. Cap Nut, M10 Washer, M10 Nylon Washer, M10 Rubber Gasket Rear Stabilizer Bolt, M10 x 60 IMPORTANT: Make sure upper washers are installed correctly with the metal washer on top of nylon washer.
- Page 17 While pulling the pop pin knob lift the handlebar stem to the number 3 position and the pop pin knob will engage in the handlebar stem. Item Description Qty. Number 3 Position Pop Pin Knob Lock the handlebar stem into position by turning the pop pin knob in the clockwise direction hand tight. Insert the handlebar assembly into the tube of the handlebar stem.
- Page 18 Connect the wires from the base to the handlebars. Item Description Qty. Base Wires Handlebar Wires 10. Tuck the connected wires into the slot. Carefully position the wires in the slot of the cap and carefully press the plastic cap until it snaps into position. Item Description Qty.
- Page 19 Install Seat Install seat clamp onto seat post. Item Description Qty. Seat Clamp Seat Post Tighten hardware to 5.2 ft-lb (7 Nm). Tighten seat clamp bolts evenly using a 13 mm socket wrench. Make sure seat is level and straight. Tighten hardware to 18.5 ft-lb (25 Nm).
- Page 20 Install Batteries Remove two screws securing battery cover using a Phillips screwdriver. Item Description Qty. Battery Cover Screw Remove battery cover. Remove tab from battery compartment. Install two batteries in the orientation shown. Batteries type is D cell (LR20) 1.5 VDC. Install two screws securing battery cover using a Phillips screwdriver.
- Page 21 Install Pedals The pedal threads are coated with TufLok® to prevent them from becoming loose during use. If pedals are loosened or removed after initial assembly, we recommend using medium-strength Loctite ® #243 when reassembling. Install right pedal into right crank arm. Item Description Qty.
- Page 22 Warning Label Placement Warning labels on the bikes must be replaced by warning labels in your language during the assembly process. Page 20 of 31...
- Page 23 Installation and Setup Instructions stated in this manual must be performed during initial installation of the Indoor Cycle to ensure optimal performance and a long lifespan. Read and follow the following instructions carefully. If the Indoor Cycles are not installed and configured as described, the components may be subjected to excessive wear and tear and the bike may become damaged.
-
Page 24: Specifications
4. Specifications Specifications The IC3 Bike is manufactured, according to EN ISO 20957-1 and EN ISO 20957-10, a Class S product for use in a controlled environment such as sports or fitness facilities under the supervision of a trainer. Life Fitness hereby declares that the radio equipment type LCD console complies with Directive 2014/53/EU. The full text of the EU Declaration of Conformity is available at the following internet address: www.indoorcycling.com/... -
Page 25: Service And Technical Data Approved And Compatible Cleaners
Wipes on the equipment for at least 2 minutes for general disinfection purposes. Contact Customer Support Services to order these cleaners (1-800-351-3737 or email: customersupport@lifefitness.com). Mild soap and water or a mild non-abrasive household cleaner can also be used to clean the display and all exterior surfaces. - Page 26 Weekly Maintenance Cleaning: Depending on how often the Indoor Cycle is used, it must be extensively cleaned once a week. Spray a maintenance spray onto a soft cloth and clean all plastic parts, the entire flywheel, exposed framework parts including stabilizers and the plastic casing. WARNING: Never spray maintenance spray or anything else directly onto the flywheel.
- Page 27 Seat Adjustments To maintain the easy adjustment, the vertical and horizontal seat posts must be regularly cleaned and lubricated. Position the vertical seat post in the uppermost position. Item Description Vertical Seat Post Spray with maintenance spray and rub down the entire exterior surfaces including the horizontal post with a soft cloth.
- Page 28 Spray the handlebar posts with maintenance spray and rub down the entire exterior surfaces including the horizontal post with a soft cloth. Clean sweat residues off the contact surfaces. Monthly Maintenance Connecting Elements During regular maintenance and care procedures, all bolts, nuts etc. on the Indoor Cycle must be checked to ensure that they are properly tightened and function correctly.
-
Page 29: How To's
Verify the symptom and review the operating instructions. The problem may be unfamiliarity with the product and its features and workouts. Locate and write down the serial number of the unit which is located on the top right of the front stabilizer. Contact Customer Support Services at http://www.lifefitness.com. Page 27 of 31... -
Page 30: Spare Parts
Spare Parts Item Part Number Description 110-01-00113-01 Handlebar Including Console Bracket 320-00-00019-01 ICG LCD Coach-by-color Connect Console 110-01-00122-01 Handlebar Mounting Kit 120-01-00076-01 Sport Seat Black Including Seat Clamp 150-01-00005-04 Combination Pedal Set, SPD Compatible Page 28 of 31... -
Page 31: Spare Parts - Stabilizer
Spare Parts - Stabilizer Item Part Number Description 140-02-00024-01 Front Stabilizer Weldment 140-01-00003-01 Transportation Wheel Kit 140-03-00020-01 End Cap 190-01-00027-01 Leveling Feet, Rubber 75° shore 140-02-00025-01 Rear Stabilizer Weldment 140-01-00028-01 Front And Rear Stabilizer Mounting Hardware Page 29 of 31... -
Page 32: Warranty
6. Warranty What is Covered This Life Fitness Family of Brands commercial exercise equipment product is warranted to be free of all defects in material and workmanship. Who is Covered The original purchaser or any person receiving the product as a gift from the original purchaser. Warranty will be voided on subsequent transfers. - Page 33 Warranty Information 5 Years Warranty Frame construction and welding 3 Years Warranty Powder coating (paint cracks, corrosion) handlebar and seat post assembly Aluminum parts and PVC coating Belt drive system Bottom bracket assembly Flywheel and hub assembly Cranks Pedals (excluded binding systems and straps) Insert sleeves for handlebars and seat post Brake system Leveling feet...
Need help?
Do you have a question about the IC3 and is the answer not in the manual?
Questions and answers