
Subscribe to Our Youtube Channel
Related Manuals for Still FM-4W 20


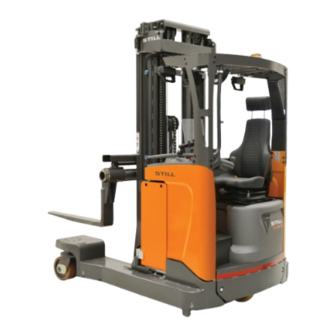
Summary of Contents for Still FM-4W 20
- Page 1 Original instructions Reach truck FM-4W 20 FM-4W 25 first in intralogistics EN - 260048 - 03/2024 Publication No: OM24GBRE1AR7...
- Page 2 The content of this manual is protected by copyright law and may not be copied, fully or in part, without written permission. The material has undergone careful examination with regard to correctness. We reserve the right to make changes. This is a translation from the original English version of the publication; should any discrepancy in translation occur, refer to the original English publication for clarification.
-
Page 3: Table Of Contents
TABLE OF CONTENTS INTRODUCTION ............ 1 Floor spot (option) ........10 Hydraulic functions........10 Operation and Maintenance Manual...... 1 Instrument panel and armrest ...... 14 Conversion table for forklift truck models ....1 Operator seat........... 15 Mini-wheel..........16 TRUCK MODIFICATION .......... 2 Midi-wheel (option)........ - Page 4 TABLE OF CONTENTS Lithium-ion battery .......... 29 10 DRIVING INSTRUCTIONS ........53 General information........29 Starting the truck ..........53 Description of the operating and display Driving instructions.......... 53 unit of the charger ........31 Charging..........33 Switching off the truck ........55 Battery maintenance and inspection....
- Page 5 TABLE OF CONTENTS Safety instructions for maintenance ....61 Getting in and out..........87 Working at height ........61 Driving the truck ..........87 Precautionary measures during Driving in public areas........ 87 repairs............ 61 Distance between vehicles......87 Maintenance intervals ........62 Pinch risk ..........
- Page 6 TABLE OF CONTENTS Moving the forks ..........94 Noise levels ..........103 Normal operating conditions......95 Vibrations............ 103 Exceptional operating conditions ......95 Climatic conditions ........103 Work in hazardous environments ....... 95 Work platforms ..........103 Parking ............95 Overhead guard ...........
-
Page 7: Introduction
Contact your truck supplier for information. STILL GmbH, Berzeliusstrasse 4 , 22113 Hamburg , Germany. Our products are continuously being improved, we therefore reserve the right to make alterations without prior notice. -
Page 8: Truck Modification
2 TRUCK MODIFICATION • approves and makes appropriate changes to the capacity plate Truck modification (s), decals, tags and Instruction Handbook. Truck modification • affixes a permanent and readily visible label to the truck stating the manner in which the truck has been modified or altered, NOTE together with the date of the modification or alteration, and the name and address of the organization which performed the task. -
Page 9: Environmental Considerations
3 ENVIRONMENTAL CONSIDERATIONS Environmental considerations We respect the environment The majority of our products consist of steel, and can be completely recycled. Environmental impact All products have an impact on the environment throughout their entire life cycle. We strive to minimise total energy consumption during production and recycling. -
Page 10: The Supervisor
• good visibility, adequate lighting and approved routes The supervisor must supply, and the truck operator must sign • use in still air. If draughts or wind are present, load handling and for, the following relevant operation and maintenance manual. -
Page 11: Truck Operator
5 TRUCK OPERATOR • North America: Users shall follow the requirements of the Truck Operator applicable part of ANSI/ITSDF B56. Authorization to operate a truck The employer must ensure that the employee has the required Inspection of the truck training and knows what must be observed in order to avoid risks while working. -
Page 12: Machine Plates
6 MACHINE PLATES Actual capacity plate Machine plates In addition to the machine plate the truck has one actual capacity Machine plate/Actual capacity plates plate which stipulates the permissible combinations of lift heights, load weights and load centre distance. The machine plate and the actual capacity plate both contain important information that is vital for operating the machine. -
Page 13: Location Of Machine Plates
6 MACHINE PLATES (mm) (kg) (mm) Fig. 2. Actual capacity plate Q Load capacity corresponding to D Load centre distance from fork back to the centre of gravity of each height H the load Two different load centre distances can be given and are identified with a distance value Fig. -
Page 14: Description Of The Truck
7 DESCRIPTION OF THE TRUCK Description of the truck Driver environment Controls Four-way reach truck Fig. 5. Foot control Left-foot switch (safety C Speed Controller Fig. 4. Four-way reach truck function) Brake pedal D Battery lock for carriage- mounted battery The four-way reach truck is an electric truck specially adapted for handling long and bulky loads and different types of load carriers. -
Page 15: Rear View Camera System For Sideways Driving (Option)
7 DESCRIPTION OF THE TRUCK Rear view camera system for sideways driving (option) Fig. 6. Ergologic controls and dashboard Fig. 7. Rear view camera monitor Display Switch (see Switches table) Ergologic joystick Handle for battery plug C Emergency stop G Lever for battery changing The four-way truck can be equipped with a rear view camera system (optional) system which gives the driver a better reverse view during... -
Page 16: Floor Spot (Option)
7 DESCRIPTION OF THE TRUCK Floor spot (option) WARNING Do not look into the light source. Looking continuously, straight into, the floor spot from close-up may cause injury to the retina. Hydraulic functions Ergologic joystick Fig. 8. Floor spot The truck can be equipped with a floor spot that projects bright light on to the ground to warn pedestrians or other truck operators that the truck is approaching. - Page 17 7 DESCRIPTION OF THE TRUCK Reach truck / VNA reach truck CAUTION Con- Functionality Movements The fork spread function must not be operated with a trols load on the forks. The forks could bend and potentially cause damage to the truck and/or load. For the same Tilt Up/Down Move the...
- Page 18 7 DESCRIPTION OF THE TRUCK Four-way reach truck Four-way reach truck Con- Functionality Movements Con- Functionality Movements trols trols Forks Lower/Raise Move the Direction Press the complete control switch button to obtain control away (option) the desired from, or driving direction towards, the Horn Press the...
- Page 19 7 DESCRIPTION OF THE TRUCK Narrow reach truck Narrow reach truck Con- Functionality Movements Con- Functionality Movements trols trols Forks Lower/Raise Move the Direction Press the complete control switch button to obtain control away (option) the desired from, or driving direction towards, the Horn Press the...
-
Page 20: Instrument Panel And Armrest
7 DESCRIPTION OF THE TRUCK Lever Away from the Towards the truck CAUTION truck driver driver The fork spread function is not intended to be used to Steered wheel Steered wheel clamp a load between the forks. assembly assembly counterclockwise clockwise Four-way reach truck Forks apart... -
Page 21: Operator Seat
7 DESCRIPTION OF THE TRUCK Fig. 11. Adjustment of the dashboard and armrest Press button A to adjust the Move lever B upwards to adjust A. Weight adjustment complete dashboard forward or the height of the armrest. back (Reach truck, VNA reach Fold out the crank on the weight adjustment control A and turn it truck and four-way reach truck). -
Page 22: Mini-Wheel
7 DESCRIPTION OF THE TRUCK angled more in the non-tilted state, move the lever so that it is The neck support B can be adjusted up or down in steps. To horizontal. remove the neck support from the seat backrest, press in latch A at the rear of the seat back while at the same time pulling up the D. -
Page 23: Midi-Wheel (Option)
7 DESCRIPTION OF THE TRUCK A. Adjusting the armrest forwards and backwards Stability Support System, S3 The armrest can be adjusted forwards and backwards by pressing S3 alternative 1 (S3) is an electronic auxiliary and monitoring button A and moving the armrest to the desired position. system that improves stability and safety when loading and driving. -
Page 24: Stability Support System, S3-2 (Option)
7 DESCRIPTION OF THE TRUCK Reducing the risk of tipping over Truck model S3-2 Tipping forces are generated when loads are handled at high Narrow reach truck Options heights and when the mast is pushed out and tilted, especially in combination with the truck moving over the floor. -
Page 25: Dynamic Curve Control (Dcc)
7 DESCRIPTION OF THE TRUCK NOTE NOTE The result of the weight measurement during lifting can ASR does not operate in the case of a four-way truck be affected if the oil temperature of the truck is travelling sideways. different from the oil temperature during weight calibration. -
Page 26: Cab (Option)
7 DESCRIPTION OF THE TRUCK Fork Safe Zone System is an electronic auxiliary system which stops the forks before they come into contact with the truck's straddle legs. This minimises damage to the forks/fork carriage. The system is active when the forks are in transport mode (under 0.5 m). - Page 27 7 DESCRIPTION OF THE TRUCK Fig. 17. Cover Fig. 18. Heating element CAUTION The roof hatch may only be used as an emergency exit. Heating element The truck is equipped with one or two heaters and adjustable vents which distribute the hot air inside the cab and to the windows. The distribution of air outside and inside the cab can be adjusted by means of a control on the heater.
- Page 28 7 DESCRIPTION OF THE TRUCK Fig. 20. Heating element functions Control for distributing the air D ON/OFF + button for automatic or manual control Operating buttons for fan speed Display showing the preset temperature. If the indication lamp is lit, automatic operation is activated.
-
Page 29: Lift Stop (Option)
7 DESCRIPTION OF THE TRUCK Other functions Press on the arrow up to increase or arrow down to decrease the temperature. LO indicates that all heating is turned off. HI indicates that full heating in turned on. Press the auto button to switch the heater on or off. -
Page 30: Level Assistance System, Las (Option)
7 DESCRIPTION OF THE TRUCK display, see Symbols in the display page 46. Up to two lift stop The option has up to four zones with up to ten different height levels heights can be set for different height restrictions with the multi in each zone. - Page 31 7 DESCRIPTION OF THE TRUCK Options Descriptions Options Descriptions Camera system Colour system with a fork-mounted Floor spot Projects a bright spot of light on the camera and a 7 inch LCD screen ground to warn pedestrians or other truck operators that the truck is Radio/CD/MP3 approaching.
-
Page 32: Battery
8 BATTERY Comply with local legislation and safety instructions when charging Battery batteries. Areas where batteries are charged should be signposted and have good ventilation. An eye douche, washing facilities, fire Battery specification extinguisher and protective glasses should be available. For information regarding battery capacity (kWh) see battery name plate. -
Page 33: Charging The Lead-Acid Battery
This applies to normal environment and normal use. Connect the charger's connector to the battery plug. Fig. 23. Battery charging (STILL-unique battery plug) Set the charging switch on the battery charger to on. Check that the battery charger is charging. -
Page 34: Maintaining And Changing The Battery (Lead Acid)
8 BATTERY Battery on rollers 10 Connect the truck to the battery connector by turning the handle if the truck is fitted with one. Pull out the battery plug. Lift up the battery lock on the side where you want to pull the battery out, by slackening the screw and pulling the axle up to Maintaining and changing the battery (Lead its uppermost position. -
Page 35: Battery Servicing
8 BATTERY Pull out the 48 V battery plug. Battery servicing Release the battery locks on both sides. WARNING Connect an external 24 V battery plug and move the battery Battery and battery charger servicing may only be out to the charged battery with the aid of the joystick. carried out by specially trained personnel. - Page 36 8 BATTERY • Requirements of EN 1175:2020, Annex A and C as well as EN Always give the serial number when making inquiries. See name 50272-3/EN 62485-3 must be met. See the battery supplier's plate for information about battery voltage, capacity and weight. instruction book and the instruction handbook for the battery charger.
-
Page 37: Description Of The Operating And Display
8 BATTERY Safety instructions If electrolyte substance comes in contact with your skin or eyes, rinse with plenty of Read and follow the instruction and safety water and consult a doctor immediately. If manual for the truck and battery provided. your clothing becomes contaminated, Both the instruction and safety manual remove without delay. - Page 38 8 BATTERY Table 2. Indication of the operating state via the battery LED indicator. Battery LED indicator Operating state during charging No battery connected Main charge Enter Fig. 24. Operating and display unit of the charger. Back-up charge A. Pause button C.
-
Page 39: Charging
8 BATTERY Table 2. Indication of the operating state via the battery LED indicator. (cont'd.) Battery LED indicator Operating state during charging 58.OV Wrong battery connected, too high voltage for this charger 4:30 (yellow LED flashes) 6O.OA 465.5 Ah Pause mode (LEDs flashing alternately) Fig. - Page 40 8 BATTERY Start of charging WARNING Before charging ensure that there is no damage to either the battery, mains connector, the housing, charging and power cables, the charging plug and all exterior screw connections. WARNING Detected defects must be reported to a supervisor immediately.
-
Page 41: Battery Maintenance And Inspection
8 BATTERY After one minute the battery can be activated by pressing the On- WARNING button one more time in order to directly drive to the charger. After that, the battery remains turned off in order to avoid further damage. There is a risk of severe personal injury and/or damage to property, when a running charging process is interrupted by pulling out the charging... - Page 42 8 BATTERY Battery service Error Messages When errors occur an error menu is accessible. NOTE • The battery system will not start or it shuts down. Only clean the battery system when the system is switched off. Necessary Action: Contact your service provider. •...
- Page 43 8 BATTERY • The battery does not switch on — possibly no communication Storage temperature with the charger or vehicle. -20° C to + 45° C Necessary Action: Check the plug and cable (contact problems). Self-discharging • External display does not respond. <...
-
Page 44: Multi Function Display
9 MULTI FUNCTION DISPLAY Multi function display Overview of multi function display Multi function display The truck is equipped with a multi function display that enables the operator to interact with the control system and receive relevant information. Fig. 27. Multi function display, overview A. -
Page 45: Key Switch Logon For Multi Function Display
9 MULTI FUNCTION DISPLAY To change digits that has been entered, use the “Back space” key to erase one position with each activation. Enter Operator password by entering numbers with the 4 6 5 7 function keys (pos C) corresponding to numbers in the function key identifier row (pos B). - Page 46 9 MULTI FUNCTION DISPLAY Fig. 30. Load wheel orientation Longitudinal orientation Fig. 29. Operational screen Lateral orientation A. Centre indicator D. Arrow keys Intermediate orientation B. Battery discharge indicator E. Multi-purpose indicator (BDI) Deviating orientation warning C. Function key indication row Load wheel indicator •...
- Page 47 9 MULTI FUNCTION DISPLAY Fig. 32. End of aisle override If the truck is equipped with end of aisle option, the log off function key (D) is replaced with End of aisle override until normal drive function is activated. Fig. 33. Lift stop override icon Fig.
-
Page 48: Battery Discharge Indicator (Bdi)
9 MULTI FUNCTION DISPLAY • Press the low speed button (G) to activate or deactivate low speed. • Press fetch battery button (H) to activate fetch battery. Fig. 34. Override fork safe zone Battery discharge indicator (BDI) This function shows the state of charge of the battery, see figure Operational screen page 39. -
Page 49: Weight Screen (Option)
0.5m after a fork lowering movement. When the forks are raised or when the forks are above 0.5m, a measurement is still performed but with lower accuracy (+/-100kg). This is indicated by a (~) in front of the weight value. If a load weight cannot be established three lines (- - -) are shown. - Page 50 9 MULTI FUNCTION DISPLAY Selected zone Level selections 3.42 Insert load Withdraw load Zone selector toggle Access the Level selector screen by pressing the Level selector screen button on the operational screen, see Operational screen page 39. The zone is chosen by pressing the zone selection toggle function Fig.
-
Page 51: Steering Angle Indicator
9 MULTI FUNCTION DISPLAY Steering angle indicator 180/360 steering selection screen (option) 180° 360° Fig. 38. Steering selection screen Fig. 37. Steering angle indicator In the steering selection screen the operator can select between Acceleration away from forks C Acceleration towards forks 180 degree or 360 degree steering. -
Page 52: Symbols In The Display
9 MULTI FUNCTION DISPLAY Symbols in the display Symbol Description The truck uses various symbols, colours and error codes in the Indicates that drive stop is active. display to communicate with the operator. Examples of symbols in the display are shown below. Parking brake is active. -
Page 53: Audible Alert
9 MULTI FUNCTION DISPLAY Symbol Description Symbol Description Power consumption. Lower to the floor. Low speed. Activate by pressing low speed Lift stop. function button. Operators left foot not placed on operator Audible alert presence detection pedal. The display features a buzzer to call attention of the operator to the display, when significant information is shown, such as errors. -
Page 54: Menu Screen Multi Function Display
9 MULTI FUNCTION DISPLAY Brightness adjustment Menu screen multi function display Change the brightness with the arrow keys, to increase brightness In the menu screen, use the arrow keys to choose one of the icons by moving the cursor to the right and to decrease the brightness and select by pressing the enter key. - Page 55 9 MULTI FUNCTION DISPLAY Hour/Trip meter The hour screen shows total accumulated operating time. The trip screen shows the current operating time. To reset the trip meter press and hold the reset trip meter function key for one second. Exit to menu by pressing the back button. Change time/date Highlight the desired section by pressing the arrow key.
-
Page 56: Multi Function Display Warnings
9 MULTI FUNCTION DISPLAY Operator session log Versions The versions screen shows the current software versions installed In the operator session log is a list of dates and times of when on the trucks electric system devices. C (A) shows the screen for operators were logged on. - Page 57 9 MULTI FUNCTION DISPLAY Table 3. Warning messages in the display Table 3. Warning messages in the display (cont'd.) Warning Descriptions Operator actions Warning Descriptions Operator actions Contact authorized Release all hand No Hands symbol. Service due. service engineer. controls. Low battery.
- Page 58 9 MULTI FUNCTION DISPLAY Table 3. Warning messages in the display (cont'd.) Table 3. Warning messages in the display (cont'd.) Warning Descriptions Operator actions Warning Descriptions Operator actions System error In the event of a warning. There are persistent warning Swivel forks not in Return forks to two levels of...
-
Page 59: Driving Instructions
10 DRIVING INSTRUCTIONS Driving instructions WARNING Starting the truck Please ensure the truck has come to a complete standstill before leaving the truck. Connect the battery connector. Check that the emergency stop function is disengaged. The drive wheel is automatically Driving instructions centred at power-up. - Page 60 10 DRIVING INSTRUCTIONS Steering is progressive, i. e. the slower the truck moves, the CAUTION more each turn of the steering wheel affects the turning wheel. Extremely slow movements of the steering wheel do The truck may be equipped with 360 degree not affect the steering.
-
Page 61: Switching Off The Truck
10 DRIVING INSTRUCTIONS Four-way reach trucks are always equipped with 360° steering. If the truck is equipped with lithium ion battery, the truck is switched During sideways driving, the steered wheel on the seat side is off by pressing the on/off button turned 90°... -
Page 62: General Loading And Unloading Information
11 GENERAL LOADING AND UNLOADING INFORMATION General loading and unloading Picking up a load information Always pick up a load so that it comes to rest as close to the mast as possible. Responsibility for the load CAUTION The operator of the truck is responsible for the load that is being carried during transport. -
Page 63: Stacking
12 STACKING Stacking Lower the forks. When fetching a load from a stack, carry out these movements General in reverse order. Approach the stack with the load in the lowered position. Lift the load sufficiently high that it clears the stack or shelf and Trucks with mast tilt then drive towards the stack. -
Page 64: Maintenance Of The Truck
13 MAINTENANCE OF THE TRUCK Maintenance of the truck Check that the securing arrangements for the finger protection are intact and that there is a good view through the protection. Daily inspection (before each shift) WARNING Responsibility: Truck operator There is the danger of personal injury if the truck is operated without finger protection in place. -
Page 65: Weekly Inspection
13 MAINTENANCE OF THE TRUCK If there is damage Any damage that has occurred must be reported to the supervisor. Weekly inspection Responsibility: Truck operator Clean the battery; see the battery manufacturer's maintenance instructions. Check the oil level in the hydraulic system by pushing all the hydraulic cylinders to their end positions. -
Page 66: Preventive Maintenance
13 MAINTENANCE OF THE TRUCK Preventive maintenance NOTE Preventive maintenance must be carried out by specially appointed and trained personnel with a good working knowledge of the function and maintenance of the truck. -
Page 67: Servicing And Maintenance
14 SERVICING AND MAINTENANCE Servicing and maintenance WARNING Service technician Do not touch non-insulated electrical connections without the battery being disconnected for at least two minutes. NOTE Servicing and maintenance must be carried out by a • Ensure that the drive wheel is off the ground before specially appointed and trained technician with a good troubleshooting. -
Page 68: Maintenance Intervals
14 SERVICING AND MAINTENANCE Symbol key lubrication chart Maintenance intervals Recommended replacements Sym- Explanation Sym- Explanation NOTE Hydraulic oil Hydraulic oil and oil filter, air filter, To ensure correct operation, use only original spare change parts. Gearbox oil Gearbox oil, change •... -
Page 69: Lubrication Chart, Four-Way Reach Truck
14 SERVICING AND MAINTENANCE Lubrication chart, four-way reach truck Table 4. Lubrication points Lubrication points Mast profile roller surfaces and slide surfaces Swivel wheel bearings and steered wheel bearings *) Battery lock, slide surfaces and springs Reach and tilt cylinders Mast bearing, support rollers Chain pulley Lift chains, all lift chains in the mast, height... -
Page 70: Cab Lubrication Schematic Diagram (Option)
14 SERVICING AND MAINTENANCE 200 h 1 000 h Fig. 42. Lubrication chart, fork carriage for four-way reach truck Lubrication points Gear shaft Slide surfaces for fork carriage and forks Thrust rollers Fig. 43. Lubrication chart for cab Fork attachment bearing Cab lubrication schematic diagram (option) The door hinge, cover and heater, along with the lock, must be lubricated at every routine service. -
Page 71: Fuses
14 SERVICING AND MAINTENANCE Table 5. Lubrication points for cab Designa- tions Lubrication points Hydraulic valves Door hinge and fans Cover hinge Logic supply VCM Heater hinge Fans Lock Key input TMC Main contactor fuse Fuses EPS logic power NOTE Coil supply K2 When replacing the fuse, the battery connector must TMC/PMC selection... -
Page 72: Servicing, Type And Frequency
14 SERVICING AND MAINTENANCE Table 6. Options (cont'd.) NOTE Designa- In the case of demanding and/or dusty environments tions with humid or corrosive air, it is advisable to perform Power battery bed maintenance more often. Your authorised service logic organisation can help you assess this. Fans in cabin Heaters in cabin First service (200 hours) - Page 73 14 SERVICING AND MAINTENANCE Chassis Mast system Description Service Description Service Rubber mat Chains Chassis Forks, fork carriage Lubrication Bearings/Rollers Driver seat Lubrication Caster wheel/steered wheel Mast profile Microswitch Reach carriage Colour Fork locking Finger protection Stabilizing lugs Steering Machine plate Description Service Servo motor...
- Page 74 14 SERVICING AND MAINTENANCE Hydraulic system Electrical system Description Service Description Service Hydraulic oil level Speed Controller Brake pedal Hoses Couplings Level selector Pump motor Mast sensor/switch Fuses Hydraulic pump Battery plug On/off valve proportional valve Video camera Lift cylinders Cooling fan Description Service...
-
Page 75: Maintenance Instructions
14 SERVICING AND MAINTENANCE shown on the diver's display, this must be reported to an Brake system authorised service technician. Description Service Truck Possible cause Procedure Brake function condition The truck The battery plug has Insert the battery plug Parking brake does not start not been inserted Brake disc... -
Page 76: Dismantling And Assembling The Panels
14 SERVICING AND MAINTENANCE Truck Possible cause Procedure condition The truck will The truck is not ready Carry out all the not lift the load for use actions under the heading "The truck will not start" The hydraulic oil level Check the level and is too low top up the hydraulic... - Page 77 14 SERVICING AND MAINTENANCE Dismantling and assembling the front housing Lift up the dashboard and secure it with the support strut. Move the mast a little forward. Remove the footplate (if the footplate is adjustable, it should be in its lowest position). On trucks with midi steering wheels, the midi steering wheel cover (G) must be removed (2 screws).
- Page 78 14 SERVICING AND MAINTENANCE Using pliers, squeeze the clips (item 2, 6 off) and push them out. Grasp the panel (C), refer to Dismantling and assembling the motor cover page 70), lift it up and remove it. Refit in the reverse order. Dismantling and assembling the rear housing and cable protection The rear housing is secured by Velcro on the underside.
-
Page 79: Dismantling And Assembling Wheels
14 SERVICING AND MAINTENANCE Pull up the cable protection so that it is released from its holder. Refit in the reverse order. Dismantling and assembling wheels Safety regulations concerning wheel change WARNING For safety reasons, we recommend that wheel changes only be carried out by an authorised service technician. - Page 80 14 SERVICING AND MAINTENANCE Remove steered wheels on four-way reach truck Remove the cable clips for the electric brake. WARNING CAUTION Removal and installation of steered wheels should, for Ensure that the wiring is not damaged. safety reasons, only be carried out by an authorised service technician.
- Page 81 14 SERVICING AND MAINTENANCE Fit the cable clips for the electric brake. Remove the locking nut and safety washer. Undo the lock plate securing screws and remove it. CAUTION Ensure that the wiring is not damaged. Pull out the axle. Remove the old wheel from the load wheel fork together with ball bearings and washers.
- Page 82 14 SERVICING AND MAINTENANCE Lift up the truck so that the drive wheel becomes free. Secure with wooden blocks. WARNING Oil level Check Ensure that the truck is unable to move while work Wheel bolts is in progress. 300 Nm Remove the drive wheel.
-
Page 83: Cleaning Brakes
14 SERVICING AND MAINTENANCE Clean the brakes during normal services. Service intervals will be TORQUE determined by the environment in which the truck is used. Check for the presence of magnetic particles on the brakes during the Correct tightening torque for the drive wheel bolts first service at during subsequent service intervals. -
Page 84: Removal And Installation Of The Mast System
14 SERVICING AND MAINTENANCE Removal and installation of the mast system Raising the mast after transport WARNING Removal and installation of the mast must for safety reasons only be carried out by an authorised service technician. A truck with a removed mast must be driven in delivery mode. - Page 85 14 SERVICING AND MAINTENANCE WARNING Ensure that the lifting equipment has sufficient capacity to lift the mast, see Weight page 109. Release the tension band (1) that is keeping the mast held against the transportation support or the overhead guard. Remove the cover plate from the carriage.
- Page 86 14 SERVICING AND MAINTENANCE WARNING Do not remove the lifting equipment until the mast has been secured in the tilt cylinders or adjustment linkages. Fig. 48. Tilt cylinder fixing screws Screw Screw Lock plate Tilt cylinder TORQUE Tighten the screws (see 48. Tilt cylinder fixing screws page 80, pos 3) in the tilt cylinders (pos.
- Page 87 14 SERVICING AND MAINTENANCE If the mast has been leaning against a support bar: TORQUE Fit the finger protection. Fit the lock plate (pos. 2) and tighten its screws (pos. 1) to 9.8 Nm. Unscrew the support bar and lift it off the truck. Slightly undo the screw for the instrument panel without Secure the hydraulic hoses and electrical cabling with cable removing it and fold the instrument panel upwards.
- Page 88 14 SERVICING AND MAINTENANCE Open the machine housing cover and remove the temporary steel plate. NOTE Keep the support bar and the temporary steel plate in case the truck will be transported in the future. TORQUE Close the cover and tighten the screw to 80 Nm. NOTE The delivery mode in the truck computer must be inactivated by an authorised service technician...
-
Page 89: Driving In Delivery Mode And Platform Mode
14 SERVICING AND MAINTENANCE Driving in delivery mode and platform mode Fig. 50. Tension band Fig. 51. Truck with lowered mast Release the tension band between the mast cylinders and the Activating delivery mode and platform mode mast stay. Before the truck can be driven with a lowered mast, delivery mode 12 With the aid of the mast reach facility, move the mast towards must be activated in TruckTool by an authorised service the battery. - Page 90 14 SERVICING AND MAINTENANCE WARNING It is not safe to drive the truck with the mast down unless delivery mode has been activated in TruckTool. Ensure that the steered wheel is at 0 degrees! The truck cannot be driven if the truck is not put in the normal position. Driving in delivery mode WARNING Bear in mind the overhang of the mast when in its...
- Page 91 14 SERVICING AND MAINTENANCE WARNING Bear in mind the overhang of the mast when in its lowered position. The mast can project beyond the chassis and therefore require more space when turning. NOTE The hydraulic functions are deactivated in platform mode.
- Page 92 14 SERVICING AND MAINTENANCE Speed control (max. 1.5 km/h) C Deactivated in this mode Brake pedal...
-
Page 93: Safety Regulations
15 SAFETY REGULATIONS Safety Regulations WARNING The authority and obligations of the truck Climbing on the truck is not permitted. operator The truck operator has the authority and the responsibility to refuse to drive the truck in the following cases: Driving the truck •... -
Page 94: Mast Reach
15 SAFETY REGULATIONS Mast reach Signalling Use the signal horn to attract attention. WARNING Before using the mast reach function, ensure that Reduced vision neither yourself nor anyone else is at risk of being crushed between the mast and the rest of the truck. Slow down when approaching crossings and other places where the line of vision is reduced. -
Page 95: Transports
15 SAFETY REGULATIONS Transports direction of the forks the truck is sensitive to sharp turns (compare with reversing a car.) Only drive the truck with covers and housings closed and secured in place. Speed Adjust the speed according to the floor conditions, the line of sight and operational safety. -
Page 96: Load Backrest
15 SAFETY REGULATIONS WARNING WARNING The pushing of material that is on the floor out of the Remember that the load backrest requires extra lifting way using the truck's chassis is not permitted. space! Risk zones Load backrest Do not drive near the edges of loading bays, gangways, etc. where there is a risk of the truck going over an edge. -
Page 97: Direction Of Travel When Driving On Slopes
15 SAFETY REGULATIONS Direction of travel when driving on slopes Four-way trucks The truck is normally driven with the forks facing towards the top of an incline, the load lowered and the mast tilted towards the driver, see illustration 54. Normal driving on slopes page 91. Fig. -
Page 98: Awareness
15 SAFETY REGULATIONS Awareness! Driving Conditions Maximum Direction speed Always be aware of personnel in the vicinity when operating the truck. Reach function in home position 6 km/h Reach function not in home 4 km/h Four-way reach truck position Reach function in home position 9.6 km/h Reach function not in home 4 km/h... - Page 99 15 SAFETY REGULATIONS Fig. 56. Transportation security four-way reach truck Fig. 57. Transportation security, mast If the mast system is removed from a four-way truck, this must be transported separately according illustration Transportation security, mast page 93. The fork carriage is transported separately according...
-
Page 100: Lifting The Forks
15 SAFETY REGULATIONS NOTE NOTE The battery must be disconnected if it is sent together On trucks equipped with fork spread, the forks cannot with the truck. be lifted off. Lifting the forks Moving the forks Lift up the lever to release the lock. Slide the fork into the desired position. -
Page 101: Normal Operating Conditions
15 SAFETY REGULATIONS Work in hazardous environments A truck operating in an area where there is a risk of fire, explosion, or in any other high risk area, must be specially equipped for the purpose. WARNING A truck is not normally equipped for these situations. Parking Fig. -
Page 102: When Lifting The Truck
15 SAFETY REGULATIONS CAUTION WARNING Do not block access to fire fighting equipment or fire If the truck is lifted incorrectly, parts may be damaged doors by parking the truck or placing goods in front of by being subjected to excessive force. them. -
Page 103: When Lifting The Truck
15 SAFETY REGULATIONS When lifting the truck Towing/moving non-powered four-way reach truck Four-way reach truck Remove any loads from the forks. NOTE Towing should be avoided to the extent possible. If this is impossible, the following applies. Lower the forks to the bottom position. Ensure that the mast is pulled in towards the battery, so that the truck will be as stable as possible and to minimise the pressure on the load wheel (support leg wheel). - Page 104 15 SAFETY REGULATIONS Ensure that the truck cannot move while work is in progress. NOTE Chock the wheels if required. Remove the motor cover. Fig. 63. Release of the emergency brake Release the parking brake manually by screwing down two M6x40 screws on the traction motor brake.
- Page 105 15 SAFETY REGULATIONS Lift up the truck with a jack and secure the truck with blocks. Turn the gears with a crowbar or manually so that the screw can lock against the cam (item B) and the wheel is straight (or straight across if towing sideways).
-
Page 106: Assembling And Putting Into Service
15 SAFETY REGULATIONS NOTE Lift the truck sufficiently so that the steered wheel is free from the floor – no higher than this. 11 Remove any blocks. WARNING The truck may move. 12 Tow the truck to a more convenient place. WARNING Move the truck with care. -
Page 107: Subsequent Mounting Of Radio Equipment
15 SAFETY REGULATIONS The following actions are to be taken in order to make the truck Actions before storage ready for use. Clean the truck. • Charge the battery. Clean and charge the battery in accordance with the battery • Perform an inspection in accordance with Daily inspection manufacturer's maintenance instructions. -
Page 108: Moving An Inoperable Truck
15 SAFETY REGULATIONS Hanging load Connect the battery plug. The truck is not intended for hanging loads that may swing. Carry out a weekly inspection in accordance with Weekly inspection page 59. Fixed load centre WARNING The truck is designed to be used with loads with a fixed The truck should only be put back into service by an gravitational load centre, as indicated in the actual capacity plate authorised service technician. -
Page 109: Noise Levels
Cv 0.064 zero. Bear in mind that the truck may still be frozen, even if the ambient temperature has risen above zero. Climatic conditions The normal operating temperature for which the truck is intended is Work platforms within the range of +1°C to +25°C in humidity up to 95% , provided... -
Page 110: Overhead Guard
15 SAFETY REGULATIONS Overhead guard WARNING Removing the overhead guard from a truck which is equipped with Do not look into the light source. Looking continuously one is not permitted. straight into the light of the floor spot and from close-up may cause injury to the retina. -
Page 111: Explanation Of Symbols
15 SAFETY REGULATIONS Explanation of symbols NOTICE DANGER WARNING 147826 Pull the seat to its furthest forward Crushing risk position before Do not stand on between moving angling it outwards. Do not stand under the forks parts the forks Warning for the Do not stand Floor spot - light Read and comply... -
Page 112: Locations Of Safety And Warning Signs
15 SAFETY REGULATIONS Locations of safety and warning signs NOTICE 147826 If the truck is equipped with a mini steering wheel. -
Page 113: Dimensions
16 DIMENSIONS Dimensions NOTE Dimensions The following dimensional information applies to trucks equipped with the smallest possible battery and a fork length of 1150 mm. Table 7. Truck type and dimensions in mm Measurements UFW200 UFW250 2170-3554 2370-4104 4300-8450 4450-9650 4350-8500 4500-9700 5078-9228... - Page 114 16 DIMENSIONS Cab dimensions (option) Fig. 67. Cab dimensions Table 8. Cab and dimensions in mm Measurements Cold storage cab 2400 1000...
-
Page 115: Weight
17 WEIGHT Weight NOTE Weight The table shows the maximum mast weights. The mast in question may weigh less, depending on the type. NOTE The following weights apply to standard trucks, including the smallest possible battery. If the truck has extra equipment fitted, there may be deviations from the table. -
Page 116: Ordering Handbooks And Manuals
18 ORDERING HANDBOOKS AND MANUALS Ordering Handbooks and Manuals Replacement Parts Manual The parts manual can be downloaded via the WebShop by locating the truck model and selecting download. If you have any questions regarding the parts manual, please contact your local distributor.
Need help?
Do you have a question about the FM-4W 20 and is the answer not in the manual?
Questions and answers