Leadshine MX3660 Hardware Installation Manual
3-axis stepper drive with breakout board & i/o's
Hide thumbs
Also See for MX3660:
- Hardware installation manual (17 pages) ,
- Hardware installation manual (25 pages)
Table of Contents
Advertisement
Quick Links
Advertisement
Table of Contents

Subscribe to Our Youtube Channel
Related Manuals for Leadshine MX3660


Summary of Contents for Leadshine MX3660
- Page 1 Authorized Distributor of Leadshine Technology Hardware Installation Manual MX3660 3-Axis Stepper Drive with Breakout Board & I/O’s Version 1.0 11 / 2013 http://www.Leadshine.com http://www.Leadshineusa.com ©2013 Leadshine Technology Co., Ltd. 雷赛智能官方代理:雷创智能科技 www.leadtronker.com...
- Page 2 This manual is not for use or disclosure outside of Leadshine except under permission. All rights are reserved. No part of this manual shall be reproduced, stored in retrieval form, or transmitted by any means, electronic, mechanical, photocopying, recording, or otherwise without approval from Leadshine.
-
Page 3: Table Of Contents
Authorized Distributor of Leadshine Technology Hardware Manual for Leashine MX3660 3-Axis Stepper Drive with Breakout Board & I/O’s Contents 1. INTRODUCTION ..........................4 2. FEATURES ............................. 4 3. APPLICATIONS ..........................4 4. BLOCK DIAGRAM .......................... 5 5. DIMENSIONS ..........................6 6. -
Page 4: Introduction
Thank you for choosing the Leadshine MX3660, a high performance 3-axis stepper drive with built-in breakout board and I/O’s based on the latest DSP technology. The MX3660 is specially designed for EASY and RAPID control of up to three 2-phase (1.8°) stepper motors in frame sizes NEMA 17, 23, 24, and 34. It operates under 20-60 VDC supply voltage and can output up to 6.0A current (peak of sinusoidal) per axis. -
Page 5: Block Diagram
Authorized Distributor of Leadshine Technology Hardware installation manual of the multi-axis drive MX3660 4. Block Diagram The following diagram shows MX3660 main internal components and how it interfaces with other components in the motion control system of your machine/device. Controller... -
Page 6: Dimensions
A 24-54 VDC power supply. Up to 3 stepper motors depending on how many axes that MX3660 will power in your application. A source of step signals, such as a motion controller, PLC, or a PC-based control system (Mach 3, EMC, etc.). -
Page 7: Connecting A Power Supply
7. Connecting a Power Supply The power supply connector is located at the upper left side of MX3660 (“CN2” in Figure 3). The power supply of the MX3660 can be connected as illustrated in Figure 4. Although MX3660’s working voltage is 20-60 VDC, we suggest the use of a 24-54 VDC power supply to leave room for back EMF voltage charge back during motor deceleration. -
Page 8: Connecting A 6-Lead Stepper Motor
Figure 5 Connecting a 4-lead stepper motor 8.2. Connecting a 6-Lead Stepper Motor The MX3660 can drive 6-lead stepper motors in either half coil connection or full coil connection. Before the connection, please read the datasheet of your stepper motor. 8.2.1. -
Page 9: Connecting A 8-Lead Stepper Motor
Hardware installation manual of the multi-axis drive MX3660 8.3. Connecting a 8-Lead Stepper Motor The MX3660 can drive an 8-lead stepper motor in either series connection or parallel connection. Before the connection, please read the datasheet of your stepper motor. -
Page 10: Connecting An E-Stop Switch Or Shorting The Connection
The E-Stop connection is required. The E-Stop connector is located next to the power connector (Figure 3). By default, the MX3660’s activation requires an emergency stop switch connected, or having the two connection pins, “ESTOP+” and “ESTOP-“, shorted. Refer to Figure 10 for how to connect an” E-Stop switch. To short the E-Stop connection, just connect a signal wire between the “ESTOP+”... -
Page 11: Enabling / Disabling Charge Pump
“Charge Pump”, a watchdog timer to enable/disable MX3660. When the charge pump feature is turned on, the MX3660’s activation will depend on the receiving of 10 KHz signals at pin 16 of the DB 25 connector. When the “Charge Pump” feature is turned off, the MX3660 will be activated without such verification. -
Page 12: Configuring Output Current And Micro Step
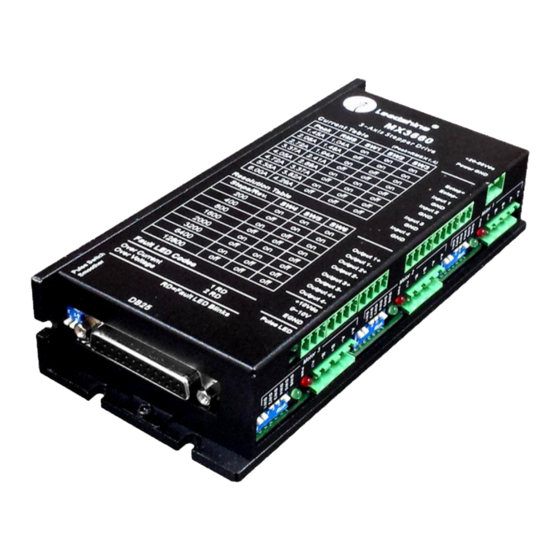
12. Configuring Output Current and Micro Step The MX3660 allows individual settings of the output current and micro step resolution for each stepper motor, via the 6-pin DIP switches of three stepper drive modules (DP1, DP2, and DP3 on Figure 3). -
Page 13: Connecting The Db25 Connector
13. Connecting the DB25 Connector Refer to “Appendix A” for detail specification for the MX3660 DB25 connector pin-out. The DB25 connector is used to connect, directly / indirectly (e.g. via a circuit board), to a source of control signals (“controller”... -
Page 14: Connecting The Db25 Fault Output Pin
The connected external E-Stop switch in the digital input is pressed. With the receiving of a fault received from the MX3660, a controller can be notified an abnormal event has happened. It can then react, such as shutting down the whole control machine/device for machine damage. -
Page 15: Optional Connections For Inputs/Outputs
The 4 general digital inputs are located at the Digital Input Connector (Figure 3) of the MX3660. They are named as Input 1, Input 2, Input 3, and Input 4. They can be used for any purpose such as connecting limit/home switches. Connect one end of your device wire to the “Input X” (X can be 1, 2, 3, or 4) pin, and the other wire to “GND”... -
Page 16: Appendix A: Mx3660 Connection Diagram
Appendix A: MX3660 Connection Diagram When implemented properly, the MX3660 can be used to power three 2 phase (1.8°) stepper motors of NEMA 17, 23, 24, and 34. In addition, it can also allow controls of optional external devices via the built-in digital inputs, digital outputs, and the opto-isolated analog output. -
Page 17: Appendix B: Db25 Connector Pinout
Authorized Distributor of Leadshine Technology Hardware installation manual of the multi-axis drive MX3660 Appendix B: DB25 Connector Pinout Figure 17 DB25 connector pin assignments Name Description INPUT 2 General purpose digital input. It is connected to “Output 2” of the digital output connector (CN7 on Figure 3). - Page 18 Switch” (Figure 3) is set to “OFF” position (Charge pump feature not turned off), the MX3660 will be only enabled with 10 KHz signal receiving at this PIN. Otherwise (no such signal received), MX3660 will be disabled. For example, in Mach3 controlled CNC applications, MX3660’s enabling/disabling will depend on the receiving of “Charge...
-
Page 19: Appendix C: Digital Inputs
Emergency stop input (12V Sourcing). When activated, all three drive boards will be shut down and MX3660 will stop working. The red LED of each drive module will blink three times periodically every 4 seconds to indicate an emergency event signal received. In this case, a fault output will be sent to pin 15 - “Fault”- of the DB25 connector to notify the connected motion controller. -
Page 20: Appendix D: Digital Outputs
Authorized Distributor of Leadshine Technology Hardware installation manual of the multi-axis drive MX3660 Appendix D: Digital Outputs Name Description Output 1 + General purpose output (max 24V@70mA). This pin is connected to pin 17 - “Input 1” - of the DB25 connector. -
Page 21: Appendix F: Stepper Drive Module Replacement
Appendix H: Trouble Shooting In the case that the MX3660 doesn’t operate properly, the first step is to identify whether the problem is electrical or mechanical in nature. The next step is to isolate the system component that is causing the problem. As part of this process you may have to disconnect the individual components that make up your system and verify that they operate independently. -
Page 22: Contact Us
Contact Leadshine for a new stepper drive module drive module is not on already damaged for replacement Contact Us Contact Leadshine HQ, Leadshine USA Inc., or your local authorized Leadshine distributors for sales, technical support, and other services. Leadshine Headquarters Leadshine America, Inc. Address:...
Need help?
Do you have a question about the MX3660 and is the answer not in the manual?
Questions and answers