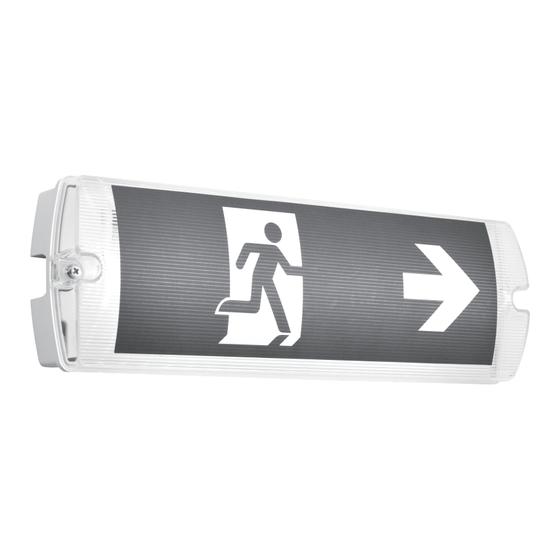
Advertisement
Quick Links
Test Function
Self test
The emergency kits carry out self-tests automatically to ensure its functionality.
The self-test includes 3 types of tests:
Initial test
- As soon as mains supply is connected, the emergency kit will carry out a
3-seconds functional test automatically.
- In case of a failure, the LED will turn permanent red. Otherwise, the charge
mode will start.
Functional test
- Refers to charging, discharging and the functioning of load.
- Carry out for 10 seconds automatically every 30 calendar days.
Duration test
- Refers to the test of batteries capacity.
- Carry out every 180 calendar days.
Rest mode
Rest mode can be initiated during emergency mode by pressing test switch
longer than 3 seconds.
The rest mode will be exited automatically after reconnect AC mains.
Please note
If mains supply is off during self-test period, emergency conversion module
would terminate self-test immediately and go into emergency mode.
Self-test is under the regulation of EN62034.
Explanation of LED indicator
Color
LED indication
Status
Comment
Charging Fully
Green
Permanent green
AC mode
Charged
Fast flashing green
Function test
Green
(0.1 sec on, 0.1 sec off)
underway
Show flashing green
Duration test
Green
(1 sec on, 1 sec off)
underway
Open circuit / Short circuit
Red
Permanent Red
Load failure
LED failure (emergency mode)
Show flashing red
Battery failured the duration
Red
Battery failure
(1 sec on, 1 sec off)
test or function test / No battery
Battery operation
Green and red off
DC mode
(emergency mode)
Manual test switch
The test button is a open switch, if you press it, it connects, and then you
release it, it cuts off automatically.
When you are doing the daily maintenance, if you press the test button, the
emergency driver goes into emergency mode, if you release the button, the
emergency driver will go back to normal mode.
LED indicator
It can reflect charging or not charging. LED charging monitor will be light if
battery is connected while it will be off without battery connecting.
Care and Safety
Live Voltages may be present in this unit even when turned off or when completely disconnected. We recommend cleaning with a soft dry cloth. Do not use
solvents or abrasive cleaners as these could damage the finish. For your safety, always switch off the power supply before cleaning.
This bulb is protected by a shade. This part must be replaced immediately should the shade become cracked or damaged. This fitting must
not be used without the shade in place.
Replace Cracked Shade
V1 15/09/2023
UK Manufacturer: BH17 7BY
EU Manufacturer: Brilliant AG,
Brilliantstrasse 1, D-27442 Gnarrenburg
Battery Replacement
If after routine operation check, the lamp does not remain lit for the three
hour period, a new battery pack may be required.
• Switch off the electricity at the mains, both switched and permanent supply.
• Allow batteries to fully discharge then reconnect to supply and allow to
charge for 24 hours.
• Test again for 3 hours, if light does not remain lit change the battery pack
as follows:
- Disconnect from the mains supply both permanent and switched supply.
- Undo two screws at the end of the product to separate the clear front cover
and the rear casing. Keep screws in safe place for refitting later.
- Pushing the two quick release tabs holding the gear tray and fold down.
- Unplug the battery lead from the lead coming from the PCBA. Remove any
cable ties around the cables.
- Remove the battery pack and lift the battery pack out of the fitting. Waste
electrical products should not be disposed of with household waste.
Please recycle where facilities exist. Check with your local authority or
retailer for recycling advice.
- Replace the battery with a LiFePO4 3.2V 1500mAh only. Use of a
different type of battery will damage the product.
- Write current date on the new battery pack.
- Fit new battery pack in position. Refit the cable ties in position and then
plug battery pack into the PCBA.
- Re-clip the gear tray in place and re-secure the clear front cover using the
screws.
- Restore power and allow to charge for 24 hours.
- Perform full operation check and update test record.
Test
Switch
Selftest mode: "EL-T" jump connected
Normal test mode: "EL" jump connected
Instruction manual
SightPro Self Test
108749
www.saxbylighting.com
Advertisement

Summary of Contents for Saxby Lighting SightPro Self Test
- Page 1 Test Function If after routine operation check, the lamp does not remain lit for the three Self test SightPro Self Test hour period, a new battery pack may be required. The emergency kits carry out self-tests automatically to ensure its functionality.
- Page 2 Installation Thank you for purchasing this light fitting. Please read the instructions carefully before use to ensure safe and satisfactory operation of this product. Please retain these instructions for future reference. Existing fittings must be completely removed before installation of a new product. Before removing the existing fitting, carefully note the position of each set of wires. Note that the switch is turned off before installation.


Need help?
Do you have a question about the SightPro Self Test and is the answer not in the manual?
Questions and answers