Table of Contents

Subscribe to Our Youtube Channel
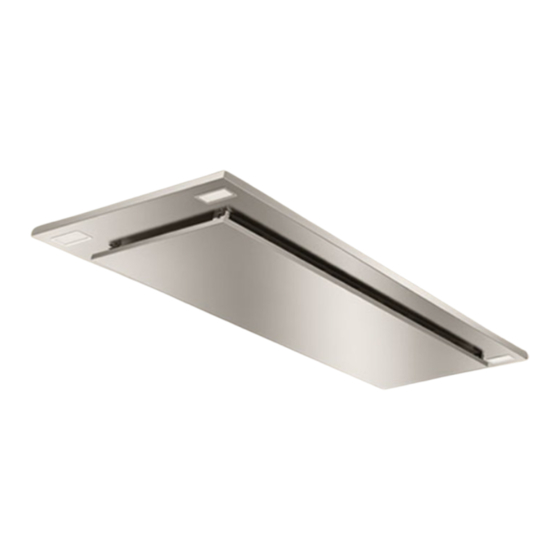
Related Manuals for Victory SUNSET


Summary of Contents for Victory SUNSET
- Page 1 INSTALLATION GUIDE AND USERS MANUAL CEILING - MOUNT RANGE HOOD SUNSET Model Name: NOTICE: For residential use only. Installer: Leave this guide with the homeowner. Homeowner: Keep this guide for future reference. Rev.20240408d...
-
Page 2: Table Of Contents
Preparation....................11 Rough-In..................... 12 Installation....................13 Venting Methods..................14 Remote Blower Option................15 Do’s and Don s for Duct Venting............. 16 Filters......................17 Electrical Wiring Diagram................. 18 Troubleshooting..................22 Maintenance....................23 Warranty...................... 24 Disclaimer....................25 Contact Us....................25 | SUNSET... -
Page 3: Important Safety Notice
IMPORTANT SAFETY NOTICE Read all instructions before installing and operating this appliance • • DO NOT attempt to install this appliance yourself. Injury could result from installing the unit due to lack of appropriate electrical and technical background. • Range hood may have very sharp edges; please wear protective gloves if it is necessary to remove any parts for installing, cleaning or servicing. - Page 4 The manufacturer and/or distributor/reseller will not be held responsible for any damages to personal property or real estate or any bodily injuries whether caused directly or indirectly by the range hood. | SUNSET...
-
Page 5: Electrical Requirements
ELECTRICAL REQUIREMENTS IMPORTANT: Observe all governing codes and ordinances. It is the customer’s responsibility: • • To assure that the electrical installation is adequate and in conformance with National Electrical Code, ANSI/NFPA 70 — latest edition*, or CSA Standards C22. 1-94, Canadian Electrical Code, Part 1 and C22. -
Page 6: Venting Requirements
6” to 8”. If a reducer is used, install a • If turns or transitions are required: Install as far away from opening and as far apart, between 2, as possible. Minimum Duct Size: • Round - 6” minimum | SUNSET... -
Page 7: Calculating Vent System Length
CALCULATING VENT SYSTEM LENGTH Duct Run Calcuation example: Duct Run Calculation: One roof cap, two 90º elbows, and one 45º elbow used: 7ft + 9ft + 9ft + 5ft = 30ft used. The above vent pieces used are equivalent to 30ft of a straight duct run. -
Page 8: Required Tools
(for No Lights version) (not included for No Lights option) (not included for No Lights option) NOTE: Where necessary, additional screws will be needed for installation and added support, but is not included. Please review contents before installation. | SUNSET... - Page 9 PARTS SUPPLIED (Continued) Top Down Isometric View Bottom Up Isometric View Mesh Filter (x3)
-
Page 10: Dimensions
Port access for TOP VIEW 6”- Ø Top Vent Electrical Box 12 ¾” 19 ½” 31 ¾” 38 ½” Exhaust Option 6”- Ø Side Vent BACK VIEW SIDE VIEW 9½ ” 38° 32 ½” ¾” Trim BOTTOM VIEW 13 ½” | SUNSET... -
Page 11: Preparation
DO NOT CLOSE THE BOX AROUND THE HOOD UNTIL THE TEST HAS BEEN PERFORMED. Victory Range Hoods Inc. will not be responsible for additional labour costs related to reinstallation of the hood due to transportation internal damage or wiring issues. -
Page 12: Rough-In
Cut-out ceiling board must be installed in between joists r t o installment. Swing Open Door (B) Remove Filters Installation Holes holes on both side walls to fasten screws on | SUNSET... -
Page 13: Installation
INSTALLATION (3) Lift up range hood to attach the exhaust vent to the 6” duct tube of your option (top or side vent). Vent through ceiling Vent through ceiling Ø ” - to roof cap option to roof cap option 6”- Ø... -
Page 14: Venting Methods
• Use caulking to seal exterior wall or roof opening around the cap. • If the duct is running though a cold 36” Typical section of the house (attic space), insulation of the duct will be required to prevent condensation (refer to sketch). | SUNSET... -
Page 15: Remote Blower Option
REMOTE BLOWER (Optional) Required brace Backdraft to support the Damper optional remote blower Wrap insulation required for cold climates 6”- Ø Duct recommended for remote blower installations 6”- Ø top vent Wood or metal stud framing Wires controlling the lights Internal blower removed 14 gauge wires from range hood for the... -
Page 16: Do's And Don S For Duct Venting
Avoid the use of sharp elbows. Use 45 degrees instead, if possible. b. DO NOT use REDUCERS. Keep the size of the duct the same, as per the manual. A reducer will reduce the CFM of the hood and increase the noise. smooth elbow to guide the air outdoors. | SUNSET... -
Page 17: Filters
FILTERS BOTTOM VIEW FRONT VIEW inserts toward the aft slot of the range hood opening. Mesh Filters Retractable Tabs Push Lever ensure you depress the lever for the retractable tabs to clear way the opening, release the push lever to lock in place. Tab Inserts... -
Page 18: Electrical Wiring Diagram
FRONT PANEL SWITCH* *The wall switch may slightly vary ***IMPORTANT NOTICE*** wiring range hood must be performed by CERTIFIED ELECTRICIAN . VICTORY Range Hoods is not responsible for any damages due to improper connection. 14-3 Cables (Not included) 14-2 Cable (Not included) - Page 19 ELECTRICAL WIRING DIAGRAM (With Lights) Electrical Box Housing (Colour of wires may vary. Follow the labels of corresponding wires.) From light switch (120 volts) Cables from motor Capacitor To LED lights (12 volts) 12v DC...
- Page 20 4 Speeds FRONT PANEL SWITCH* *The wall switch may slightly vary ***IMPORTANT NOTICE*** wiring range hood must be performed by CERTIFIED ELECTRICIAN VICTORY Range Hoods is not responsible for any damages due to improper connection. Not included Not included | SUNSET...
- Page 21 ELECTRICAL WIRING DIAGRAM (No Lights) Electrical Box Housing (Colour of wires may vary. Follow the labels of corresponding wires.) Cables from motor Capacitor...
-
Page 22: Troubleshooting
• The duct size must be 6”, or larger. Please make sure there are NO reducers or plenums in the duct work. • Refer to DO’S and DON’TS for DUCT VENTING page for illustrative examples. NOTE: For all other inquiries, please contact Victory Range Hoods. | SUNSET... -
Page 23: Maintenance
Make sure the range hood is unplugged or turn OFF breaker. • Contact Victory Range Hoods for assistance to replace bulb. • Turn ON breaker and range hood to test for operation. NOTE: For all other inquiries, please contact Victory Range Hoods. -
Page 24: Warranty
The information in this document is subject to change without notice, please contact Victory Range Hoods for updated details. | SUNSET... -
Page 25: Disclaimer
583 Nicola Avenue, Port Coquitam, BC, Canada Toll Free: 1-800-394-4020 info@victoryrangehoods.com The information in this document is subject to change without notice, please contact Victory Range Hoods for updated details. - Page 26 NOTES | SUNSET...
- Page 27 NOTES...
- Page 28 583 Nicola Avenue | Port Coquitlam | BC | Canada | V3B 0M3 www.victoryrangehoods.com...
Need help?
Do you have a question about the SUNSET and is the answer not in the manual?
Questions and answers