
Related Manuals for BDI CORRIDOR SV BAR 5621


Summary of Contents for BDI CORRIDOR SV BAR 5621
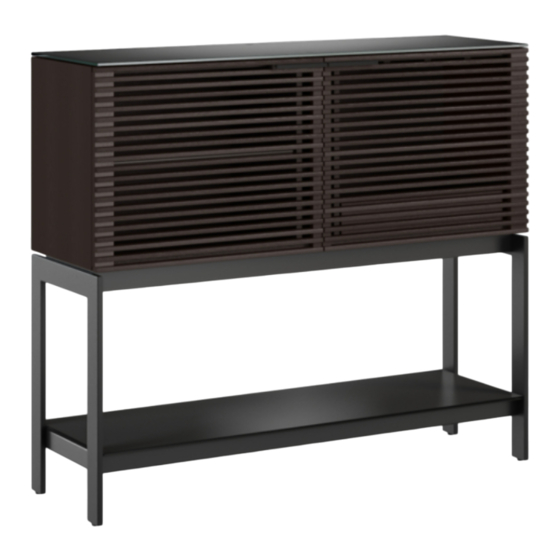
- Page 1 CORRIDOR® SV BAR 5621 BAR CABINET INSTRUCTION MANUAL LET’S GET STARTED. DESIGN MATTHEW WEATHERLY...
- Page 3 Congratulations on the purchase of your Corrid or SV Bar 5621 from BDI. Your bar cabinet has been designed to provide a lifetime of enjoyment. This manual will provide assembly instructions and other helpful information to ensure you get the most out of your product.
- Page 4 Unpack and id entify the parts listed below. The assembly workspace should be a non-marring surface, such as carpet. For missing hard ware pieces, please contact BDI Customer Service at customerservice@bdiusa.com. For all other concerns, please contact your BDI retailer.
- Page 5 HARDWARE AND COMPONENTS Upper Frame (C2) QTY: 1 Lower Frame (C4) QTY: 1 Bottom Shelf (C5) QTY: 1 Top Panel (C6) QTY: 1 Glass Shelf (C7) QTY: 2 Door Pull (C8) QTY: 2 NEED ASSISTANCE? customerservice@bdiusa.com | 5...
- Page 6 Place the Upper Frame (C2) on the HEX WRENCH – T1 Cabinet (C1), paying careful attention the side hole orientation. Attach with 8 Screws (H1). Tighten with Hex Wrench (T1). SCREW – H1 Hole orientation 6 | BDIUSA.COM CORRIDOR SV BAR 5621...
-
Page 7: Step 2. Attach Legs
STEP 2. ATTACH LEGS ASSEMBLY Attach Legs (C3) to Upper Frame (C2) using 8 Screws (H2). Tighten with Hex Wrench (T1). HEX WRENCH – T1 SCREW – H2 NEED ASSISTANCE? customerservice@bdiusa.com | 7... - Page 8 HEX WRENCH – T1 using 8 Screws (H2). Ensure that the "Top" label on the Lower SCREW – H2 Frame (C4) will face up when the Cabinet is flipped over. Tighten with Hex Wrench (T1). 8 | BDIUSA.COM CORRIDOR SV BAR 5621...
- Page 9 STEP 4. INSTALL SHELF PINS & DRAWER LINER ASSEMBLY ASSEMBLY With help from another person, carefully flip the Cabinet over to its upright position. Shelf pins can be repositioned where desired. Once shelf pins are installed, place the Drawer Liner (C7) in the drawer. Shelf pins NEED ASSISTANCE? customerservice@bdiusa.com | 9...
- Page 10 NOT INCLUDED Shelf Pins (H3). Attach the Door Pulls (C9) to the doors using SCREW – H3 4 Screws (H3). Tighten with Phillips Screwdriver (not included). 10 | BDIUSA.COM CORRIDOR SV BAR 5621...
- Page 11 STEP 6. INSTALL RUBBER BUMPERS, BOTTOM SHELF & TOP PANEL ASSEMBLY Attach the 6 adhesive-backed Rubber Bumpers (H4) to the top of the Cabinet (C1), then attach RUBBER BUMPERS– H4 6 adhesive-backed Rubber Bumpers (H4) to the top of the Lower Frame (C4). Paying attention to the labels on the underside of the glass pieces, place the Bottom Shelf (C5) and Top Panel (C6) on top of the Rubber Bumpers (H4).
- Page 12 Fully extend the Drawer and slide the plastic tabs inwards. They are found near the ends of the slides on the underside. Gently lift the front of the drawer and pull the drawer toward you to remove it from the sides. 12 | BDIUSA.COM CORRIDOR SV BAR 5621...
- Page 13 STEP 7. REMOVE DRAWER SLIDES ASSEMBLY Remove the 4 Screws holding the Left Drawer PHILLIPS SCREWDRIVER Slide to the interior wall using a Phillips NOT INCLUDED Screwdriver. Set these screws aside for later. Remove the 4 screws holding the Right Drawer Slide to the metal bracket using a Phillips Screwdriver. Set these screws aside for later.
- Page 14 Attach the Metal Bracket on the opposite side of the cabinet, reinserting the 4 Bracket Mounting Screws you just removed into the threaded inserts in the bottom panel of the cabinet. Tighten with a Phillips Screwdriver. 14 | BDIUSA.COM CORRIDOR SV BAR 5621...
- Page 15 STEP 9. MOUNT DRAWER SLIDES ON OPPOSITE SIDE ASSEMBLY Mount the Left Drawer Slide to the Metal PHILLIPS SCREWDRIVER Bracket using 4 of the Drawer Slide Mounting NOT INCLUDED Screws. Tighten with a Phillips Screwdriver. Mount the Right Drawer Slide to the interior wall of the cabinet using the remaining 4 Drawer Slide Mounting Screws.
- Page 16 ASSEMBLY STEP 10. INSTALL DRAWER Gently place the drawer back on the drawer slides. Slide the drawer all the way back until it drops in place and sits flush on the drawer slides. 16 | BDIUSA.COM CORRIDOR SV BAR 5621...
- Page 17 STEP 11. SECURE DRAWER INTO PLACE ASSEMBLY Push the plastic pins found near the ends of the drawer slides back into their place. This will secure the drawer in place on the slides. NEED ASSISTANCE? customerservice@bdiusa.com | 17...
-
Page 18: Fine Tuning
By adjusting Screw 2 the entire door will move IN or OUT, opening or closing the gap between the door frame and cabinet. (This screw rarely needs adjustment.) 18 | BDIUSA.COM CORRIDOR SV BAR 5621... -
Page 19: Care And Maintenance
While BDI’s stained wood finishes are stable in tone & appearance, all finishes are subject to some degree of discoloration with prolonged exposure to direct sunlight. Please avoid positioning your BDI cabinet in any area with ample direct sunlight. -
Page 20: Warranty
Select chairs carry coverage for five (5) years from the date of the product delivery, based on an 8-hour daily use pattern. BDI reserves the right to refine or update its warranty from time to time. See the complete and latest warranty document at www.bdiusa.com/warranty.
Need help?
Do you have a question about the CORRIDOR SV BAR 5621 and is the answer not in the manual?
Questions and answers