Schweigen KLS-9GLASSBLKS Instruction Manual
Undermounted rangehoods
Hide thumbs
Also See for KLS-9GLASSBLKS:
- Instruction manual (28 pages) ,
- Instruction manual (33 pages)
Table of Contents
Advertisement
Quick Links
UNDERMOUNTED RANGEHOODS
INSTRUCTION MANUAL
Installation / Operation / Maintenance
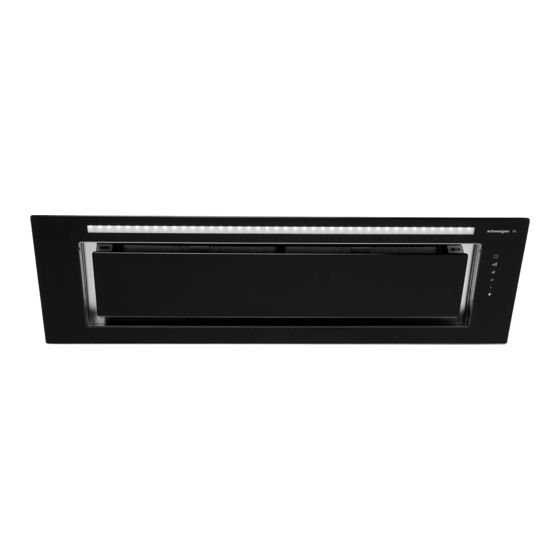
KLS 9GLASSBLKS
KLS 9GLASS
Under our policy of continuous product
development, product specifications may
change without notice. Please refer to
the online version of the manual for the
latest updates and specifications.
Mar 2023/ V4
Advertisement
Table of Contents

Subscribe to Our Youtube Channel
Related Manuals for Schweigen KLS-9GLASSBLKS


Summary of Contents for Schweigen KLS-9GLASSBLKS
- Page 1 UNDERMOUNTED RANGEHOODS INSTRUCTION MANUAL Installation / Operation / Maintenance KLS 9GLASSBLKS KLS 9GLASS Under our policy of continuous product development, product specifications may change without notice. Please refer to the online version of the manual for the latest updates and specifications. Mar 2023/ V4...
- Page 2 INDEX Welcome Important Safety Information Description Operation Cleaning and Maintenance Installation Condensation Information Troubleshooting Technical Speci cations Disclaimer Page 2...
- Page 3 WELCOME Thank you for purchasing this Schweigen IN appliance. IMPORTANT! To achieve the optimal performance from your The appliance should only be appliance, and to avoid the risk of accident or operated when you have read and damage, it is essential to read this manual before understood this manual thoroughly.
-
Page 4: Important Safety Information
IMPORTANT SAFETY INFORMATION Please read the instructions carefully. Only then Flames beneath the pan must be contained at all will you be able to operate your appliance safely times and cannot exceed the width of the pan in and correctly. Retain the instruction manual for use. -
Page 5: Before Installation
IMPORTANT SAFETY INFORMATION BEFORE INSTALLATION Schweigen will not be responsible for any installations executed by non-quali ed technicians We recommend this appliance be installed or that fail to heed the applicable legislation on repaired by an experienced Home Appliances electrical safety. -
Page 6: Product Use
IMPORTANT SAFETY INFORMATION PRODUCT USE MAINTENANCE AND SERVICE This product is designed for household use and The rangehood surface should be cleaned with soft should not be used for commercial applications. cloth and non-corrosive detergent. Do not leave the rangehood wet after cleaning or use, please After use, always ensure that all controls are in keep rangehood dry. - Page 7 DESCRIPTION For models KLS-9GLASS and KLS-9GLASSBLKS 1. Socket lead to Isodrive ® motor 2. Main power cord 3. Single 200mm Outlet 4. Computer board* 5. Filter 6. Cabinet door protection strip 7. Light 8. Rangehood mounting brackets 9. Instruction and screws pack 10.
-
Page 8: Operation
OPERATION For models KLS-9GLASS and KLS-9GLASSBLKS The rangehood has a 4-speed electronic keypad. Speed control usage suggestions: • Low speed for simmering. • Medium speed for light cooking. • High speeds for heavy frying or heavy cooking. Electrical Touch Keypad F.- Timer: When the timer mode is in operation,... -
Page 9: Remote Control Usage
OPERATION REMOTE CONTROL USAGE If the remote control fails or the batteries run out, disconnect the rangehood using the Starting the rangehood for the rst time using safety switch inside the rangehood (which can the remote control: be accessed from one of the lters) and replace the batteries. -
Page 10: Synchronisation Of The Remote Control With The Rangehood
OPERATION SYNCHRONISATION OF THE REMOTE GENERATING A NEW CONTROL WITH THE RANGEHOOD TRANSMISSION CODE If the remote control fails or the batteries In the unlikely event that the remote control run out, disconnect the rangehood using the interferes with other appliances. You can assign safety switch inside the rangehood (which can be a new transmission code to prevent this happen. -
Page 11: Cleaning And Maintenance
CLEANING AND MAINTENANCE WARNING Always switch o and disconnect power to the rangehood before cleaning. The manufacturer is exonerated from all responsibility in the event of re due to poor maintenance of the lters and rangehood. Cleaning and user maintenance shall not be made by children without supervision. FILTERS the rangehood (removing the pins from the front guide), ease down slightly and remove. - Page 12 CLEANING AND MAINTENANCE WARNING Do not use denatured alcohol on the exterior of the rangehood. Do not clean the electric parts or the motor with liquids or solvents. SURFACES Cleaning the Interior Clean the interior of the rangehood with a damp The surface of the rangehood can be cleaned with cloth and a neutral detergent or denatured alcohol.
-
Page 13: Installation
INSTALLATION RANGEHOOD SIZE VS COOKTOP SIZE In addition to the size, the height of the rangehood above the cooktop is important to obtain the best performance. INADEQUATE ADEQUATE OPTIMAL Rangehood smaller than Rangehood same size as Rangehood larger than cooking zone cooking zone cooking zone OVERHEAD CABINET RANGEHOOD INSTALLATION POSITION... -
Page 14: Mounting Laws And Regulations
Note: If the instructions for the gas cooktop specify a greater distance, this must be taken into account. RECOMMENDED INSTALLATION HEIGHT FOR INDUCTION COOKTOP To help avoid condensation, particular to cooking with an induction cooktop, Schweigen recommends a minimum height of 700mm. Refer to page 19 for further information. - Page 15 INSTALLATION Installation for KLS-9GLASS and KLS-9GLASSBLKS IMPORTANT Please read the installation guide thoroughly prior to installation. These models have a di erent method of installation compared to standard undermounts. Step 1 Fix the rangehood mounting supports (A) to the sides of the cabinet (B).
- Page 16 INSTALLATION Step 3 Fit the undermount in place, using the installation screws provided (E). Protecting the Cabinet Door — Optional A reversible “L” shaped pro le is provided for optional cabinet door (D) protection. IMPORTANT “L” shaped Please ensure all plastic pro le protection on the rangehood and lters are removed before use.
- Page 17 INSTALLATION Please DO NOT crush or kink the ducting. 1. Crushed or kinked ducting creates sharp corners that creates turbulence. This reduces the size and e ciency of the ducting, lowers extraction and may cause excessive noise. 2. Sweeping curves and taut ducting reduces resistance and turbulence.
-
Page 18: System Overview
INSTALLATION SYSTEM OVERVIEW 1. Isodrive ® Motor 2. Roof Seal Kit (Dektite) (Not Supplied)* 3. Support Straps (Not Supplied)* 4. Attach Duct to Bell-Mouth Adaptor using ring clamp. Please DO NOT rip the ducting. 5. Isodrive ® Motor Power Lead (Plug) 6. - Page 19 CONDENSATAION INFORMATION COOKING WITH INDUCTION How to reduce the possibility of condensation forming: COOKTOPS • Ensure the rangehood is installed by a quali ed Cooking with an induction (or similar) cooktop, professional, carefully following the installation may produce condensation on the rangehood. guide.
-
Page 20: Troubleshooting
TROUBLESHOOTING Before you contact the technical service department, make sure that the product IMPORTANT is plugged in and power is supplied. Never attempt to repair this • Do not take any action that will damage appliance by yourself. Always the product. refer to a quali ed Service Technician. -
Page 21: Faulty Installation
0800 200 510 FAULTY INSTALLATION It is not the responsibility of Schweigen to rectify any incorrect installations. A service call out fee will be charged for any Schweigen technician that attends a call, whereby it is established that the fault is due to an incorrect installation or non-manufacturing fault. -
Page 22: Technical Specifications
TECHNICAL SPECIFICATIONS KLS-9GLASS, KLS-9GLASSBLKS Light towards the front of the rangehood Thickness of glass- 5mm Model: KLS-9GLASS, KLS-9GLASSBLKS Feeding Voltage: 220-240V 50Hz Max Lamp Power: 1 x LED Strip 726mm long 3.36W 12V 3000k Page 22... -
Page 23: Disposal Of Old Appliances
All pictures used in own determination as to its suitability for their the guide are for illustrative purposes only. purpose/s prior to use. In no event will Schweigen Although our information and marketing states Home Appliances be responsible for damages of the term ‘Silent’... - Page 24 © Schweigen Home Appliances Pty Ltd. Mar2023. Australia Unit 4/1-5 Lake Drive, Dingley Village, Victoria 3172 Phone: 1300 881 693 Email: sales@schweigen.com.au New Zealand 5 Tolich Place, Henderson, Auckland 0610 Phone: 0800 200 510 Email: info.parex@emerson.com www.schweigen.com.au...
Need help?
Do you have a question about the KLS-9GLASSBLKS and is the answer not in the manual?
Questions and answers