
Related Manuals for Schweigen GA-600S


Summary of Contents for Schweigen GA-600S
- Page 1 UNDERMOUNTED RANGEHOODS INSTRUCTION MANUAL Installation / Operation / Maintenance GA-600S GA-900S KLS-9GLASSBLKS KLS-9GLASS (12.2016 / V1.0)
- Page 2 WELCOME Thank you for purchasing this Schweigen IN appliance. IMPORTANT! To achieve the optimal performance from your The appliance should only be appliance, and to avoid the risk of accident or operated when you have read and damage, it is essential to read this manual before understood this manual thoroughly.
-
Page 3: Table Of Contents
TABLE OF CONTENTS Important safety information ........................ 4 Description ..............................7 Installation ..............................8 Operation ..............................17 Cleaning and maintenance ........................19 Troubleshooting .............................23 Technical specifications ........................26 Disclaimer ..............................27 Page 3... -
Page 4: Important Safety Information
IMPORTANT SAFETY INFORMATION Please read the instructions carefully. This appliance is not intended for use by Only then will you be able to operate your person/s (including children) with reduced appliance safely and correctly. Retain the physical, sensory or mental capabilities, instruction manual for future use or for or lack of experience and/or knowledge. - Page 5 IMPORTANT SAFETY INFORMATION BEFORE INSTALLATION Schweigen will not be responsible for any installations executed by non-qualified We recommend this appliance be installed technicians that fail to heed the applicable or repaired by a qualified Schweigen Home legislation on electrical safety.
- Page 6 IMPORTANT SAFETY INFORMATION PRODUCT USE Never flambé any food beneath the rangehood. Always switch off the power source and unplug The Rangehood has one mode of operation: the connection before conducting maintenance or Air extraction: The air is drawn in by the cleaning.
-
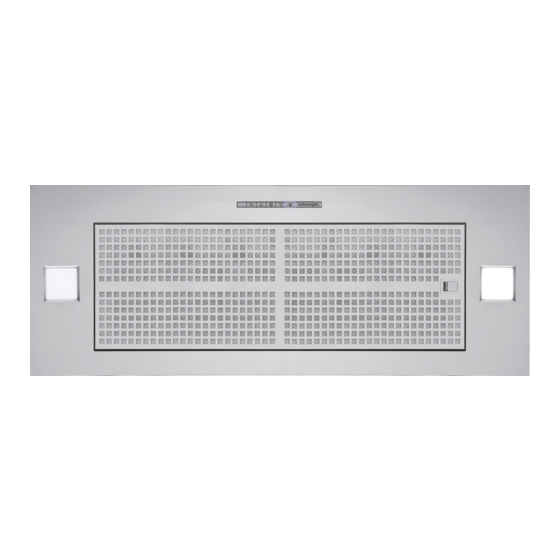
Page 7: Description
DESCRIPTION TYPE 1 TYPE 2 KLS-9GLASS and KLS-9GLASSBLKS GA-600S and GA-900S 1. Female plug, to be connected to Isodrive motor 1. Female plug, to be connected to Isodrive motor system only system only 2. Male Plug, to be connected to main power 240V 2. -
Page 8: Installation
INSTALLATION SYSTEM OVERVIEW 1. Isodrive Motor 2. Roof Seal Kit (Dektite)* 3. Support Straps* 4. Attach Flexi Duct to Bell-Mouth Adaptor using cable tie or ring clamp. Please DO NOT rip the ducting. 5. Isodrive Motor Power Lead (Male Plug) 6. - Page 9 Induction 700mm 800mm 750mm * Schweigen’s recommended height will help avoid condensation, particular to cooking with an Induction Cooktop. Refer to additional notes on pg 23. * IMPORTANT Please check all State and Federal Laws in relation to both the minimum and maximum...
- Page 10 INSTALLATION OVERHEAD CABINET RANGEHOOD INSTALLATION POSITION It is important to consider the benchtop and overhead cabinetry depth before installing the rangehood. The information below is to be used as a guide only, drawings are not to scale and do not account for all circumstances.
- Page 11 INSTALLATION Installation for KLS-9GLASS and KLS-9GLASSBLKS IMPORTANT Please read the installation guide thoroughly prior to installation. These models have a different method of installation compared to standard undermounts. Step 1 Fix the rangehood mounting supports (A) to the sides of the cabinet (B). NOTE: The brackets need to be levelled and secured, in order to hold the entire weight of the undermount.
- Page 12 INSTALLATION Step 3 Fit the undermount in place, using the installation screws provided (E). Protecting the Cabinet Door — Optional A reversible “L” shaped profile is provided for optional cabinet door (D) protection. “L” shaped profile Step 4 Only install the reducer if you are connecting the rangehood to the Isodrive 650 motor.
- Page 13 INSTALLATION Installation for GA-600S and GA-900S Step 1 Cut the cabinetry to the correct size in order to fit the undermount, see figure on the right. NOTE: It is always best to use the rangehood as a cutting guide, not the cabinet cut out diagram as this is only a guide.
- Page 14 INSTALLATION Step 4 Fix the undermount to the cabinetry with appropriate screws, using the pre-drill holes in the undermount body (C). Step 5 Once (D) has been firmly attached, fix the fascia (A) to the rangehood (D) the magnets (B) will hold the fascia in place.
- Page 15 INSTALLATION Step 6 Re-attach the fascia by securing it with 4 x locking screws (E). Step 7 Re-install the filter. IMPORTANT Please ensure all plastic protection on the rangehood and filters are removed before use. Page 15...
- Page 16 INSTALLATION IMPORTANT Please ensure all plastic protection on the rangehood and filters are removed before use. FLEXIBLE DUCTING INSTALLATION IMPORTANT: Please do not crush or kink the flexi ducting as it will reduce air flow and may cause noise to occur throughout the system.
-
Page 17: Operation
OPERATION For models KLS-9GLASS and KLS-9GLASSBLKS. The rangehood has a 4-speed electronic keypad. Speed control usage suggestions: • Low speed for simmering. • Medium speed for light cooking. • High speeds for heavy frying or heavy cooking. Electrical Touch Keypad F.- Timer: When the timer mode is in operation, To obtain the best performance, switch the rangehood on a few minutes prior to cooking and... - Page 18 OPERATION For models GA-600S and GA-900S. The rangehood has a 4-speed electronic keypad. Speed control usage suggestions: • Low speed for simmering. • Medium speed for light cooking. • High speeds are for heavy frying or heavy cooking. Electrical Tactile Keypad D.- Reduce speed: This button reduces the...
-
Page 19: Cleaning And Maintenance
CLEANING AND MAINTENANCE WARNING Always switch off and disconnect power to the rangehood before cleaning. The manufacturer is exonerated from all responsibility in the event of fire due to poor maintenance of the filters and rangehood. Cleaning and user maintenance shall not be carried out by children without supervision. FILTERS the rangehood (removing the pins from the front guide), ease down slightly and remove. -
Page 20: Cleaning The Interior
CLEANING AND MAINTENANCE SURFACES Do not pour any liquid directly onto the rangehood, apply to a soft cloth first. The surface of the rangehood can be cleaned with The cloth must have no buttons, zips or fasteners warm soapy water and a soft sponge / cloth. that can scratch the surface. - Page 21 CLEANING AND MAINTENANCE WARNING Always switch off and disconnect the power cord before replacing any light bulbs. Failure to do so may cause serious injury. Please be aware that the light bulb will retain heat for a short period of time after being switched off. Your rangehood may have multiple light types, please refer to the pictures below for light replacement instructions.
- Page 22 CLEANING AND MAINTENANCE WARNING Always switch off and disconnect the power cord before replacing any light bulbs. Failure to do so may cause serious injury. Please be aware that the light bulb will retain heat for a short period of time after being switched off. TYPE 4 (LED Strip TL): Type 4 —...
-
Page 23: Troubleshooting
TROUBLESHOOTING COOKING WITH INDUCTION How to reduce the possibility of condensation forming: COOKTOPS • Ensure the rangehood is installed by a qualified Cooking with an induction (or similar) cooktop, professional, carefully following the installation may produce condensation on the rangehood. guide. - Page 24 CLEANING AND MAINTENANCE Before you contact the technical service department, make sure that the product IMPORTANT is plugged in and power is supplied. Never attempt to repair this • Do not take any action that will damage appliance by yourself. Always the product.
-
Page 25: Faulty Installation
CLEANING AND MAINTENANCE FAULTY INSTALLATION Calling the Technical Assistance Service Hotline It is not the responsibility of Schweigen Home In the event that the failure is not due to the Appliances to rectify any incorrect installations. faults mentioned in Trouble Shooting, contact A service call out fee will be charged for any the Customer Service. -
Page 26: Technical Specifications
Model: KLS-9GLASS, KLS-9GLASSBLKS Feeding Voltage: 220-240V 50Hz Max Lamp Power: 1 x LED Strip 726mm long 3.36W 12V 4200k Model: GA-600S Feeding Voltage: 220-240V 50Hz Max Lamp Power: 2 x GLED Square 55 x 55mm 2.1W 12V 4000k Model: GA-900S... -
Page 27: Disclaimer
Information is supplied upon the condition that the person/s receiving the information will make their own determination as to its suitability for their purpose/s prior to use. In no event will Schweigen Home Appliances be responsible for damages of any nature whatsoever resulting from the use of, or reliance upon, information from their website or the products to which the information refers. - Page 28 © Schweigen Home Appliances Pty Ltd. 2016. Australia 8/3-4 Anzed Court, Mulgrave, Victoria 3170. Phone: 1300 881 693. Email: sales@schweigen.com.au. New Zealand 5 Tolich Place, Henderson, Auckland 0610. Phone: 0800 200 510. www.schweigen.com.au © Schweigen Pty Ltd. 2017.
Need help?
Do you have a question about the GA-600S and is the answer not in the manual?
Questions and answers