
Related Manuals for Schweigen HN-2OC


Summary of Contents for Schweigen HN-2OC
- Page 1 RANGEHOOD & INSTALLATION GUIDE HN-2OC Revision V2 www.schweigen.com.au (04.2017/v2.0)
-
Page 2: Table Of Contents
Back Draft Fins ___________________________________________________________________ 13 5. Maintenance Filters _________________________________________________________________________________________ 14 Replacing the Light Bulb ________________________________________________________________________ 15 Cooking with Induction Cooktops ________________________________________________________________ 16 Troubleshooting _______________________________________________________________________________ 17 Technical Specifications ____________________________________________________________ 17 6. Specification HN-2OC _______________________________________________________________________________________ 18 7. Disclaimer ___________________________________________________________________________________ 19 Page 2... -
Page 3: Welcome
This will ensure your personal safety and the lasting value of your professional rangehood. We trust that you will enjoy your new Schweigen rangehood. Please always retain your proof of purchase to aid in any warranty queries. If you are unable to locate your warranty card, one is available to download from our website. -
Page 4: Your Safety
2. Your Safety Warning Please read this section thoroughly before attempting to operate the appliance. Inspect your product upon receipt. Any damages or defects MUST be reported within 48 hours of receiving the rangehood, or no claim will be recognised. DO NOT INSTALL THIS APPLIANCE IF IT IS FOUND TO BE DAMAGED. -
Page 5: Before Installation
18. If the unit is not adequately covered or sheltered from the outside elements the warranty will be null and void. Before Installation We recommend this appliance be installed or repaired by a qualified Schweigen Home Appliances technician. Please see our website www.schweigen.com.au for a list of our recommended installers. -
Page 6: Product Use
2. Your Safety Product Use This product is designed for household use and should not be used for commercial applications. After use, always ensure that all controls are in the “OFF” position. When frying with a gas flame, take particular care not to allow the oil or grease in the pan to catch fire (Flambé). Maintenance and Service The rangehood surface should be cleaned with soft cloth and non-corrosive detergent. -
Page 7: Description
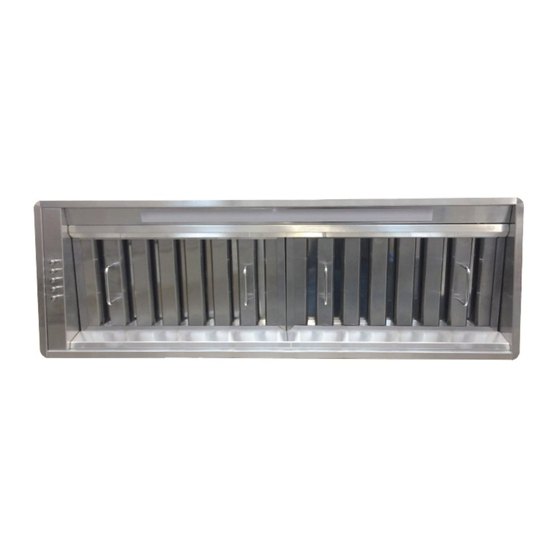
Body Filter Electric Box Cover Capacity Transformer Electric Box Switch LED Strip (HN-2OC only) Motor Silver Tape Ring Clamp 200mm NOTE: Filter and light quantity may vary from model to model. Push Button Control Panel Turn on/off the rangehood Ligh speed setting... -
Page 8: Installation
4. Installation Mounting Laws and Regulations To be installed in an undercover alfresco area and/or indoor kitchen only. If the unit is not adequately covered or sheltered from the outside elements the warranty will be null and void. The rangehood must be located at the correct distance from the work plan. -
Page 9: Mounting Points
4. Installation Mounting Points *Please refer to Specifications for mounting points measurements. Step 1 Before installing the undermount, make sure that none of the parts are damaged in anyway. In case of damaged parts, contact your retailer and do not proceed with installation. Read all the following instructions with care before installing the undermount. -
Page 10: Bbq Installation
4. Installation Step 3 Insert the undermount, making sure the push button panel is placed on the right, when looking at the product from the front of the cooktop. Step 4 Fix unit by using the appropriate screws and tighten them, see points A to F. -
Page 11: Ducting Installation
4. Installation Ducting Installation For internal motor units, please install flexible ducting with the least amount of bends possible, maximum length of flexible ducting should be no longer than 4 meters approximately. Do not apply bends at motor outlet as it will restrict airflow. STANDARD* GOOD BETTER... -
Page 12: Example Installation
4. Installation Example Installation Figure 1 Figure 2 Figure 3 Figure 4 Figure 5 Figure 6 Page 12... -
Page 13: Roof Cowls / Roof Seal Kit
4. Installation Roof Cowls / Roof Seal Kit WARNING All electrical wiring should be kept inside the roof space. Roof Cowls* Flexi Ducting must be pulled taut. DO NOT crush or kink the ducting. Connect flexi ducting to the outlet on rangehood using duct tape or cable tie. -
Page 14: Maintenance
5. Maintenance Filters • For this appliance to function effectively, regular maintenance is a must. • The function of the filter is to absorb the grease particles emitted during cooking. • Blocked filters and heavy oil deposits restrict airflow and may cause the motor to overheat and become a fire hazard. -
Page 15: Replacing The Light Bulb
5. Maintenance Replacing the Light Bulb DANGER Always switch off and disconnect the power cord before replacing any light bulbs. Failure to do so may cause serious injury. Please be aware that the light bulb will retain heat for a short period of time after being switched off. -
Page 16: Cooking With Induction Cooktops
In the event that failure is not due the reason/s in the trouble shooting section, you can lodge an online Service Request. To lodge a Service Request, visit our website www.schweigen.com.au/pages/support/service-warranty and click on the link to download the service request form. -
Page 17: Troubleshooting
It is not the responsibility of Schweigen Home Appliances to rectify any incorrect installations. A service call out fee will be charged for any Schweigen technician that attends a call, whereby it is established that the fault is due to an incorrect installation or non-manufacturing fault. Should the appliance be installed in such a way that the service agent is unable to gain access to the appliance, the person/s who own the premises where the appliance resides —... -
Page 18: Technical Specifications
6. Specifications Technical Specifications Model HN-2OC Feeding Voltage 220-240V 50Hz Lamp Power 1 LED Strip x 10.5W Weight 20kg Page 18... -
Page 19: Disclaimer
All information supplied is to be used for general reference purposes only and is on the understanding that Schweigen Home Appliances will not be liable for any loss, liability or damage of whatever kind arising as a result of any reliance upon such information. All pictures used in the guide are for illustrative purposes only. - Page 20 Australia 8/3-4 Anzed Court, Mulgrave 3170 Victoria. Phone 1300 881 693 Email sales@schweigen.com.au Web www.schweigen.com.au New Zealand 5 Tolich Place, Henderson, Auckland 0610. Phone 0800 200 510 Email info.parex@emerson.com Web www.parex.co.nz Distributed by Axis Group International Pty Ltd. ACN 124 141 322...
Need help?
Do you have a question about the HN-2OC and is the answer not in the manual?
Questions and answers