
Related Manuals for PROLiNK Giant II Series


Summary of Contents for PROLiNK Giant II Series
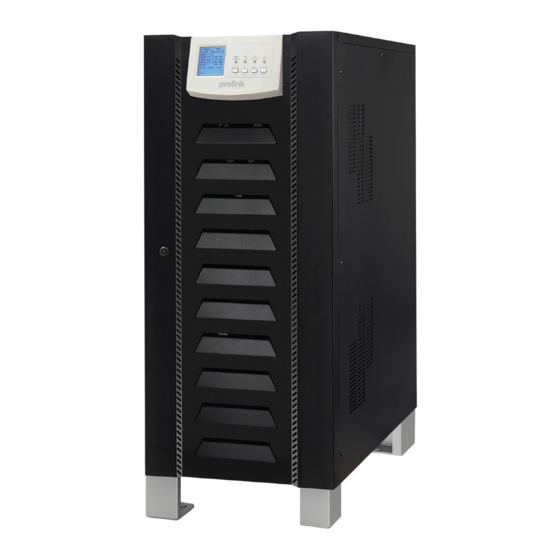
- Page 1 User Guide Giant II Series (3P/3P) Tower Type PRO63300-EL 10-160KVA Version 1.00 (English )
-
Page 2: Table Of Contents
Table of Contents 1. INTRODUCTION ............................1 1-1. Overview ............................1 1-2. Basic structure ..........................1 1-3. Working mode ..........................1 1-4. Overview ............................4 2. IMPORTANT SAFETY WARNING ......................5 2-1. Conventions and used symbols ....................5 2-2. Safety instructions ........................5 3. -
Page 3: Introduction
1. INTRODUCTION 1-1 . Overview This UPS series is a double conversion system with sinewave output. It supplies continuous, stable, clean power for commercial and industrial environments. When the utility is lost accidentally, the UPS system will use the power from battery to output without interruption. - Page 4 1-3-2. Battery mode When the utility fails, the UPS will transfer to battery mode without interruption. The UPS converts the power from battery to output. At this time, static bypass is still in standby. If the utility is recovered, the UPS will transfer back to line mode again.
- Page 5 1-3-5. Maintain bypass mode When the UPS needs maintenance and load needs uninterruptible power, the users can firstly transfer the inverter to bypass mode, and then switch on maintain bypass breaker. After that, switch off all other breakers and switches. In this condition, the utility can still power the load and users can maintain the UPS. Bypass input REC module INV module...
-
Page 6: Overview
1-4. Overview PRO63310-EL PRO63320-EL PRO63330-EL PRO63315-EL PRO63340-EL PRO63360-EL PRO63380-EL PRO633100-EL PRO633120-EL PRO633160-EL Interface 4) Fans Terminals 5) Communications Breaker and switch 6) Cold start button. This button is located same position for whole series. -
Page 7: Important Safety Warning
2. IMPORTANT SAFETY WARNING 2-1. Conventions and used symbols Conventions used: WARNING! Warnings identify conditions or practices that could result in personal injury; CAUTION! Caution identify conditions or practices that could result in damaged to the unit or other equipment connected. - Page 8 WARNING! Pay attention to the slope of the ground and surface to avoid fall down when moving the equipment. WARNING! This equipment is heavy. Do not lift too heavy without help. CAUTION! The UPS can only working on dry condition. Shut down the UPS if any liquid flows into the UPS and dry it with absorbent cloth.
-
Page 9: Installation
3. INSTALLATION 3-1. Basic requirement Ambient temperature: 0°C ~ +55°C Ø Storage temperature: -15ºC ~ 60ºC Ø Relative humidity: 5% ~ 95% Ø Ø Altitude: If the UPS is installed within 1000m, the UPS power will not be derated. When the height is over 1000m, the output power will be derated by following the table Altitude(m) 1000... - Page 10 Preparing two cables. The length of two cables is about 3 meters and the bearing should be at least 1.5 tons. Fix the UPS with cables. Use the hoist to lift up the UPS and place it on the ground. Ø...
-
Page 11: Electrical Connection
4. ELECTRICAL CONNECTION 4-1. Power connection All the connectors are accessible by front panel of the UPS. Simply open the front door for wire connection. Refer below diagrams for inside panel for whole series. PRO63310-EL PRO63320-EL PRO63330-EL PRO63315-EL PRO63340-EL PRO63360-EL PRO63380-EL PRO633100-EL PRO633120-EL... - Page 12 Ø PRO63330-EL/PRO63340-EL Ø PRO63360-EL/PRO63380-EL Ø PRO633100-EL~PRO633160-EL The ground terminal is shown as below:...
- Page 13 The specifications of internal breaker, fuse and switch are shown as below: Input Breaker Output Battery UPS Model Fuse LINE INPUT BYPASS M-BYPASS Breaker Switch PRO63310-EL 50A/3P 32A/3P 32A/3P 100A 32A/3P PRO63315-EL 50A/3P 50A/3P 50A/3P 100A 50A/3P PRO63320-EL 63A/3P 63A/3P 63A/3P 200A 63A/3P...
-
Page 14: Communication
The recommended sizes of the ring terminals are listed as below: PRO63310-EL PRO63360-EL PRO63330-EL PRO633120-EL PRO63315-EL PRO63380-EL PRO63340-EL PRO633160-EL PRO63320-EL PRO633100-EL Items AC INPUT/ AC INPUT/ AC INPUT/ BYPASS/ AC INPUT/ BYPASS/ BYPASS/ BATTERY BYPASS/ OUTPUT/ OUTPUT/ BATTERY OUTPUT/ BATTERY OUTPUT BATTERY D (mm) - Page 15 The output dry contacts only provide two passive statuses: short and open. It’s necessary to connect external power source to trigger this function. The input dry contacts provide active signals and it’s not necessary to connect external power to trigger it. Users can simply short or open the ports to ground.
- Page 16 5: Output overload 6: Fan fault 7: Battery fault 8: Battery open 9: Low battery 10: Input beyond the limitation 11: Bypass beyond the limitation 12: EPO is enabled 13: Maintenance bypass mode 14: Backfeed protection is activated in input 15: Backfeed protection is activated in bypass Function descriptions of input contacts: Input contacts...
- Page 17 4-2-5. RS485 Ø Definition of RS485 pins : Definition Definition PIN1:485-A PIN1:485-A PIN2:485-B PIN2:485-B RS485-2 RS485-1 PIN4:485-B PIN4:485-B PIN5:485-A PIN5:485-A Ø Single unit application : First, please use one RS485 to RS 232 converter or RS-485 to Modbus/TCP converter as media converter between RS485 and computer.
-
Page 18: Commissioning
5. COMMISSIONING 5-1. Start up procedure Although this UPS supports battery start function, we still recommend to follow the steps below to turn on the UPS. Ø Before turning on the UPS, please be sure input and output wiring connection is complete. Please refer to section 4.1 for wiring connection. -
Page 19: Interface
6. INTERFACE 6-1. Control panel 6-1-1. Buzzer UPS state Buzzer status Muted Bypass/Standby Beeping once every 2 minutes Battery / Battery-test mode Beeping once every 4 seconds (normal battery voltage) Battery / Battery-test mode Beeping once every second (low battery voltage) Fault Beeping continuously Warnings (except overload) -
Page 20: Sub-Menus
After the UPS is powered on, LCD will start up first and then display main page. Ø Start Up When first starting up the UPS, it will take few seconds to start up the LCD. Please kindly wait. Ø Main page This page is used to display basic information. - Page 21 Ø Battery Test Battery Test List Battery Test Confirmation screen Ø Clear inoperable state...
- Page 22 6-3-2. Status sub-menu Touch the icon to enter Status page. There are five selections: Input, Bypass, Output, BAT., Temp., and PAR. Item Description Input Display real-time input line voltage, input phase voltage and input frequency. Bypass Display real-time bypass line voltage, bypass phase voltage, bypass frequency and bypass current.
- Page 23 OUTPUT Output status TEMP. PAR. Voltage range for different modes 6-3-3 Setting sub-menu This sub-menu is used to set the parameters of UPS. There are 3 options: UPS settings, General settings and Advanced settings. Touch the icon to enter setting menu page. NOTE : Not all settings are available in every operation mode.
- Page 24 UPS Settings Parameter settings • Input source: It’s to set up AC input. There are two selections: Line and generator. The default setting is “Line”. This parameter setting will display in the main screen. If “generator” is selected, the output frequency will be fixed within 40~75 Hz and output voltage within 165~280V.
- Page 25 Battery settings screen 2 • Starting temp. compensation at (℃): The setting range is from 20℃ to 25℃. • Float charge temp. compensation (mV/cell): The setting range is from 0 to 7. • Battery overtemperature protection: Enable / Disable this function. •...
- Page 26 Advance Settings There are two permissions for Advanced Setting: User and Factory. Advanced Setting à User It’s required to enter password to access to the “Advanced setting” page. After entering password, click “OK” button to enter. Advanced setting menu Electrical settings Electrical setting screen 1 Electrical setting screen 2...
- Page 27 Parallel settings Parallel setting screen Battery test setting Battery test setting screen 1 Battery test setting screen 2 Dry contact settings Dry contact setting screen...
- Page 28 Initialize Initialize screen Advanced Settings à Hidden Factory Settings Factory setting is hidden to avoid mis-operation. It’s required to enter password to access to the “Advanced setting” page first. After entering password, click “OK” button to enter. Advanced setting menu After accessing Advanced setting menu, click “Return arrow”...
- Page 29 After clicking “Factory settings” icon, it will show five selections: Factory test mode, Factory settings, Voltage calibration, Current calibration and Installation Information. Factory test mode Factory settings: It will show default setting from factory. Voltage calibration: It can calibrate input voltage, inverter voltage, bypass voltage, output voltage, battery voltage and BUS voltage.
- Page 30 Installation Information: It can set up system installation date, system maintenance date, battery installation date and battery maintenance date. 6-3-4. Service sub-menu Touch the icon to enter Service page. There are six items to select: Warning information, Critical event information, Event log, Setting log, Export data to USB and About. Service Page Items Description...
- Page 31 Critical event information Critical event information screen Event log Event log screen It’s to record all events on the UPS. Information is including times, code, description, date and time of occurrence. If more than 5 events are listed in the screen, click down arrow to see next page. 2) Check Chapter 8 for detailed warning and fault codes.
-
Page 32: Maintenance
7. MAINTENANCE Caution! Inside maintenance is only available for the engineer with qualified electrical knowledge. There is still possible high voltage inside of the unit even disconnect all connections. 7-1. System maintenance Ø Check if touched LCD functions well. Ø Make sure there is no abnormal noise inside of the unit. Ø... -
Page 33: Trouble Shooting
8. TROUBLE SHOOTING 8-1. Warning code Code Event How to do Please check if battery wires are connected correctly and Battery open battery switch is on. Line phase error Please check the phase sequence of line input. Bypass phase error Please check the phase sequence of bypass Battery over charge Check the battery voltage and then restart the unit. -
Page 34: Fault Code
Battery over-temperature Check battery. warning Over-temperature warning on Reduce the connected loads or cooler the environment REC2 SCR. temperature. Bypass abnormal Please check bypass power source. No input Please check mains input. EEPROM fault Restart the UPS. If problem remains, please call for service. Bypass is not allowed. - Page 35 Restarts the unit. If the problem remains, please call Switch line fault for service. Parallel line loss Recheck if parallel cable is firmly connected. Restart the unit. If problem remains, please call for CAN comm. fault service. Recheck if parallel cable is firmly connected to the Host line loss master UPS.
-
Page 36: Specification
9. SPECIFICATION Table1: Line input Model 160K 100K 120K 160K 10KVA 15KVA 20KVA 30KVA 40KVA 60KVA 80KVA 100KVA 120KVA Capacity 144KW 13.5KW 18KW 27KW 36KW 54KW 72KW 90KW 108KW Rated 3 x 380/400V (3Ph + N) voltage Rated 50Hz/60Hz frequency Voltage 165V~280V (Ph-N) / 285V~485V (Ph-Ph) range... - Page 37 Table 5: ECO Bypass (Default disable) Model 100K 120K 160K Rated voltage 3 x 380/400V (3Ph + N) Rated frequency 50Hz/60Hz Voltage range 176V~264V (Ph-N) / 304V~456V (Ph-Ph) Frequency range 46Hz~54Hz @50Hz; 56Hz~64Hz @60Hz Transfer time <10ms Table 6: Environment Model 100K 120K...
-
Page 38: Parallel Installation Guide
10. PARALLEL INSTALLATION GUIDE 10.1. Introduction Ø The UPS can be paralleled in 3+1 redundancy or 4 units as an expansion. Ø N+1 redundancy is a form of resilience that ensures system availability in the event of one UPS failure. During normal operations, the load is shared equally across all UPSs, which behaves as if they were a single UPS device. - Page 39 10-2-3. Wiring Connection Two UPSs in parallel: Battery Battery INPUT INPUT OUTPUT INPUT INPUT OUTPUT BAT+ BAT+ BAT- BAT- Communication Connection UPS 1 UPS 2 Three UPSs in parallel: Battery Battery Battery INPUT INPUT OUTPUT INPUT INPUT OUTPUT INPUT INPUT OUTPUT BAT+ BAT+...
-
Page 40: Setting And Lcd Display
Communication Connection UPS 1 UPS 2 UPS 3 Please apply the same above wiring connection to finish four UPSs in parallel. Recommended specification of battery breaker for each UPS: Model One unit PRO63310-EL PRO63315-EL 63~80A PRO63320-EL PRO63330-EL 100A PRO63340-EL 125~160A PRO63360-EL 160~200A PRO63380-EL... -
Page 41: Specification
After entering menu of advanced settings, click “Electrical settings” and change “Single” to “Parallel” in Operation mode. Be sure to click “Save settings” before exit. Advanced Setting menu Electrical settings screen 10.4. Specification Model 100K 120K 160K Power 10KVA 15KVA 20KVA 30KVA 40KVA... -
Page 42: Trouble Shooting
10.5. Trouble shooting 10-5-1. Warning code Code Event How to do Check if sharing cables are connected well and restart Parallel line lost the UPS. Check if the Bypass phase sequence and voltage is correct or not. Bypass wiring difference WARNING: If bypass wiring is different and when fault occurs on all parallel UPSs, it will cause power interruption. - Page 44 Note: Closed on Saturdays, Sundays and local/regional Public Holidays. Register online for your Product Warranty at www.prolink2u.com Prolink is a registered trademark of Fida International (S) Pte Ltd. Other brands and product names are trademarks or registered trademarks of their respective holders. Product images are purely for illustrative purposes and may defer from the actual product.
Need help?
Do you have a question about the Giant II Series and is the answer not in the manual?
Questions and answers