Table of Contents
Advertisement
Quick Links
USER MANUAL
Default Login Information
Username: admin
Password: admin
Default IP Address
192.168.226.201
※ The picture might differ according to the specification and model.
※ Contents of this user manual are protected under copyrights and computer program laws.
Rev: 11/20
Before operating the system, please read this User Manual and retain it for future reference.
Advertisement
Table of Contents

Related Manuals for Digital Watchdog MEGAPIX DWC-MB94Wi28T


Summary of Contents for Digital Watchdog MEGAPIX DWC-MB94Wi28T
- Page 1 USER MANUAL Default Login Information Username: admin Password: admin Default IP Address 192.168.226.201 ※ The picture might differ according to the specification and model. ※ Contents of this user manual are protected under copyrights and computer program laws. Rev: 11/20 Before operating the system, please read this User Manual and retain it for future reference.
- Page 2 Notes on Safety • This product is intended to be supplied by a Listed Power Unit, marked with 'Limited Power Source', 'LPS' on the unit, output rated minimum 12V/2 A or POE 48V/ 350mA or AC24V (depending on models), no more than 2000m altitude of operation and Tma=60 Deg.C.
-
Page 3: Table Of Contents
Table of Contents Introduction ....................................5 Product and Accessories ..................................5 Part Name ........................................6 Installation ..................................... 7 Installing the camera ................................... 7 Adjusting the Camera’s Angle ..............................7 Cabling ........................................8 Inserting/Removing the SD Card ............................9 Live View ...................................... 10 Camera Configuration ................................ - Page 4 4.7.2 Reboot..................................... 39 4.7.3 Upgrade ....................................39 4.7.4 Operation Log ..................................39 Search ......................................40 Image Search ....................................... 40 5.1.1 Local Image Search ................................. 40 5.1.2 SD Card Image Search ..............................41 Video Search ....................................41 5.2.1 Local Video Search................................42 5.2.2 SD Card Video Search ..............................
-
Page 5: Introduction
Introduction Product and Accessories Please make sure the camera and accessories listed below are included in the package:... -
Page 6: Part Name
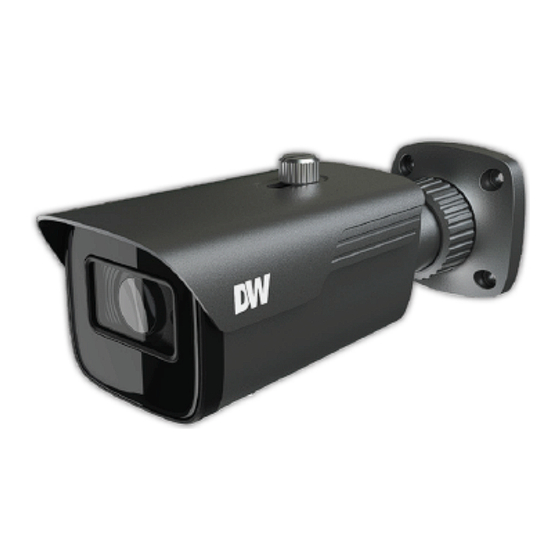
Part Name Description Fixed Ring Mounting Base Network Input Audio Input Power Input Micro SD Card Slot Reset Button Sunshield Cover... -
Page 7: Installation
2 Installation Installing the camera The mounting surface must bear five times the weight of your camera. Do not let the cables get caught in improper places or the electric line cover to be damaged. This may cause a breakdown or fire. Using the mounting template sheet or the camera itself, mark and drill the necessary holes in the wall or ceiling. -
Page 8: Cabling
Cabling Use a PoE-enabled switch to connect data and power through a single cable and begin viewing and recording images instantly. A non-PoE switch will require an adaptor for power transmission. 1. NETWORK CONNECTIONS – Using a PoE Switch or PoE Injector, connect the camera using an Ethernet cable for both data and power. -
Page 9: Inserting/Removing The Sd Card
Inserting/Removing the SD Card 1. To install the camera’s SD Card, locate the SD card slot at the base of the camera module by removing the cover dome. 2. Insert class 10 SD/SDHC/SDXC card into the SD card slot by pressing the SD card until clicks. 3. -
Page 10: Live View
3 Live View Open an Internet Explorer (IE) web browser. Enter the camera’s IP address in the address bar. Enter the camera’s username and password (default username and password are admin | admin). You may be prompted to install the NetAIIPCamera plug-in to view video from the camera. Click on the link above the login to download and install the plug-in. -
Page 11: Camera Configuration
4 Camera Configuration To access the camera’s settings and configuration, click on the ‘Config.’ tab on the top right side of the camera’s main view. The following setting options will be available: System Configuration 4.1.1 Basic Information This option shows the camera’s basic network information. Users can adjust the device’s name, view the current settings version and MAC address. -
Page 12: Local Config
If needed, enable the daylight savings time (DST). You can set the DST settings to apply automatically, or manually enter the start and end time for the DST period. When setting up the camera’s time, users can select to synchronize the camera with an NTP server. If enabled, enter the server’s address and how often the time synchronization will take place. -
Page 13: Storage
4.1.4 Storage The Storage Configuration screen lets users manage the SD card (not included) and setup recording settings. • SD Card Management Users can check the total SD card capacity and remaining storage for both pictures and video recordings. Click the “Format” button to format the SD card. All data will be cleared by clicking this button. Click the “Eject”... -
Page 14: Image Configuration
Image Configuration The Image Configuration menu includes Display, Video/Audio, OSD, Video Mask and ROI Configuration. 4.2.1 Display Configuration The image’s settings can be adjusted from this screen. The setting screen includes a small preview of the camera’s view to see the applied settings for a more accurate setup. Users can also set different profiles for day and night modes. - Page 15 Off: disable backlight compensation. Default mode. HWDR: True WDR adjusts the camera to provide a better image when there are both very bright and very dark areas in the field of view. If enabled, the camera recording will be stopped for a few seconds while HWDR is turning on.
-
Page 16: Video / Audio Configuration
If the current mode of camera parameters is set to schedule, the image configuration mode will automatically switch between day and night according to the schedule. 4.2.2 Video / Audio Configuration Set the resolution, frame rate, bitrate type, and video quality and so on subject to the actual network condition. -
Page 17: Osd Configuration
For cameras with audio input, microphone built-in, or audio output, click the “Audio” tab to go to the interface as shown below. • Audio Encoding: Select the audio encoding from the drop-down menu. G711A and G711U are selectable. • Audio Type: If the camera has a built-in microphone, select to enable audio input from the microphone or external audio input (LIN). -
Page 18: Video Mask
Picture Overlay Settings: The cameras support a picture overlay option. When selected, click “Browse” to select the overlapping picture. Then click “Upload” to upload the picture. The overlapping image should not exceed 200x200 pixels, or the upload will fail. 4.2.4 Video Mask To set up privacy masks in the camera’s view, check the enable button on this menu page. -
Page 19: Roi Configuration
4.2.5 ROI Configuration An area in the image can be set as a region of interest. This area will have a higher bitrate than the rest of the image, resulting in better image quality for the identified area. 1. Check the box next to “Enable”. 2. -
Page 20: Alarm Configuration
Alarm Configuration 4.3.1 Motion Detection This setup menu allows users to set the camera’s motion detection alarm. 1. Check the “Enable” box. If unchecked, the camera will not send out any motion-based triggers, even if there is motion in the video. •... -
Page 21: Other Alarms
3. Click on the “Schedule” tab to set the motion detection schedule. Select which hours, from 0 to 24, for each day, will have SD card recording enabled. Green means scheduled. Blank means unscheduled. • “Add”: Add the schedule for a special day. Drag the mouse to set the time on the timeline. -
Page 22: Alarm In
IP Address Conflict This function is available on models with the Alarm Out interface. Click “Enable alarm” and set the alarm holding time. When the IP address of the camera conflicts with the IP address of another device on the network, the system will trigger the alarm out selected under “Trigger Alarm Out”. -
Page 23: Alarm Out
• Trigger SD Recording: Check the box to send a video recording to the SD card when motion is detected. • Trigger E-mail: Check the box to set out an e-mail notification when motion is detected. Enter the e-mail addresses to receive the notification. To send the e-mail to more than one e-mail address, separate the accounts with a comma. -
Page 24: Alarm Server
• Timing: When timing is selected, the alarm output will be triggered on schedule. Select the alarm type (NO/NC). Click “Add” and drag the mouse on the timeline to set the schedule of alarm out. Click “Erase” and drag the mouse on the timeline to erase the set time schedule. 4.3.5 Alarm Server Alarm server settings let you set an alarm output to a dedicated server. -
Page 25: Event Configuration
Event Configuration The Event Configuration menu includes setup for video tampering, line crossing and intrusion. For improved accuracy, consider the following before installation: • Cameras should be installed on a stable surface. Vibrations can have an impact on the detection accuracy. •... -
Page 26: Line Crossing
4.4.2 Line Crossing Line Crossing: An alarm is triggered if a target crosses the pre-defined alarm lines. 1. Check the box to enable this feature. • Check the box to Save Panoramic Picture when the event is triggered. • Check the box to Save a Target Cutout picture in the SD card when the event is triggered. Note: To save snapshots to the local PC, please enable “Local Smart Snapshot Storage”... - Page 27 Select the alarm line number. The camera supports up to 4 lines. Multiple lines cannot be added simultaneously. • Direction:Indicate the direction objects have to cross the detection line to trigger an event. A<->B: Objects crossing the detection line in any direction will trigger an event. A->B: Objects crossing the detection line from side A to side B will trigger an event.
-
Page 28: Perimeter Intrusion
4.4.3 Perimeter Intrusion Alarms are triggered when objects intrude into the pre-defined detection areas. This function is useful for applications such as restricted or dangerous areas such as military administrative zones, high danger areas, no man’s areas, etc. 1. Check the box to enable this feature. •... - Page 29 2. Click on the “Area” tab and set the detection zone. Click the “Area” tab to go to the interface as shown below. Select the alarm area number on the right side. Up to 4 alarm areas can be added. •...
-
Page 30: Network Configuration
Network Configuration 4.5.1 TCP/IP Use the setup menu below to adjust the camera’s TCP/IP settings. Chose to use IPv4 or IPv6 tabs to setup the camera’s IP settings. Contact your network administrator for more information. • Obtain an IP address automatically: when selected, the camera will obtain its IP address and network settings based on the information from the router. -
Page 31: Port
IP Change Notification Config. Enable this option to be notified when the camera’s IP address is changing. Trigger E-mail: when the IP address changes, the new IP address will be sent to the e-mail address entered here. Trigger FTP: when the IP address changes, the new IP address will be sent to the FTP server entered here. 4.5.2 Port HTTP port, Data port and RTSP port can be set. -
Page 32: Snmp
4.5.4 SNMP Use the SNMP settings page to get the camera status, parameters and alarm information. Before using SNMP, Contact your network administrator for more information. Select which SNMP version to use (SNMPv1, SNMPv2, SNMPv3), and fill out the information under each section accordingly. -
Page 33: Rtsp
4.5.6 RTSP Use this setup screen to configure the camera’s RTSP settings. Select “Enable” to enable the RTSP function. • Port: Access port of the streaming media. The default is 554. • RTSP Address: The RTSP address (unicast) format can be used to play the stream in a media player. •... -
Page 34: Upnp
4.5.7 UPnP When UPnP is enabled, the camera can be quickly accessed through the LAN. Enable UPNP and then enter the UPnP name. 4.5.8 E-mail For all e-mail notifications for events and camera status, an e-mail address must be set as the sender e-mail. •... -
Page 35: Ftp
4.5.9 Once an FTP server is configured on this page, captured images from events can be uploaded to the FTP server. • Server Name: Enter the name of the FTP server. • Server Address: Enter the IP address or domain name of the server. •... -
Page 36: Security Configuration
Security Configuration 4.6.1 User Configuration This page allows admin users to manage all users with access to the camera. To add a user: Click the “Add” button to pop up the following textbox. Enter the username in the “User Name” textbox. Enter the password in the “Password”... -
Page 37: Online User
4.6.2 Online User The “Online User settings page shows a log of all IP addresses connected to the camera, including the username being used. If needed, users (including Administrators) can be disconnected from the camera by an admin account by pressing the “Kick-off” button next to the applicable entry. 4.6.3 Block and Allow Lists Users can list IP addresses allowed or not permitted to access the camera. -
Page 38: Security Management
4.6.4 Security Management Security management settings allow users to setup additional security parameters for passwords and accessing the camera. Enable “locking once illegal login” function: To prevent malicious password unlocking, the “locking once illegal login” function locks the login interface to the camera after six (6) failed login attempts. The camera can be accessed again after 30 minutes or after a camera reboot. -
Page 39: Maintenance Configuration
Maintenance Configuration 4.7.1 Backup and Restore Backup & Restore allows users to import or export settings and restore the camera to its default settings. • Import & Export Settings: Import settings from a different camera, or export the current camera settings. •... -
Page 40: Search
5 Search Image Search Go to the “Search” tab on the top right and select “Picture” from the first drop-down menu to search images saved locally and on the SD card. Icon Description Icon Description Icon Description Start a slide show of the Close the image view. -
Page 41: Sd Card Image Search
5.1.2 SD Card Image Search Choose “Picture”>“SD Card”. Set time: Select the date and choose the start and end time. Choose the alarm events at the bottom of the interface. Click to search the images. Double-click on a file name in the results list to view the photo. Click to return to the previous interface. -
Page 42: Local Video Search
5.2.1 Local Video Search Choose “Record”>“Local”. Set search time: Select the date and choose the start and end time. Click to search the videos. Double-click on a file name in the results list to start playback. Click to return to the previous interface. 5.2.2 SD Card Video Search Choose “Record”>“SD Card”. -
Page 43: Video Clip And Downloading
The timeline can be shown in 24H/12H/2H/1H format by clicking the corresponding buttons. 5.2.3 Video clip and downloading To download a searched video from the search result, use the button to adjust the start time. When in use, the button will appear blue ( ). -
Page 44: Appendix
6 Appendix Troubleshooting What are the camera’s default username, password and IP address? A:The camera’s default IP address, username and password are shown below. If you do not remember your password, please contact DW’s technical support. Learn more here: https:/ /digital- watchdog.com/PasswordResetRequest/ Default IP: 192.168.226.201;... -
Page 45: Dimensions
Dimensions DWC-MB94Wi28T, DWC-MB94Wi36T -45-... -
Page 46: Specifications
Specifications DWC- DWC- DWC- DWC- DWC- DWC- DWC- DWC- MB94Wi28T MB94Wi36T MT94Wi28T MT94Wi36T MT94WiAT MV94Wi28T MV94Wi36T MV94WiAT IMAGE Image sensor 4MP 1/3” CMOS Total pixels 2592(H) X 1520(V) 0.005 lux 0.005 lux 0.005 lux 0.005 lux 0.0038 lux 0.005 lux 0.005 lux 0.0038 lux Minimum... - Page 47 DWC- DWC- DWC- DWC- DWC- DWC- DWC- DWC- MB94Wi28T MB94Wi36T MT94Wi28T MT94Wi36T MT94WiAT MV94Wi28T MV94Wi36T MV94WiAT Video management DW Spectrum® IPVMS software ENVIRONMENTAL Operating -22°F ~ 140°F (-30°C ~ 60°C) temperature Operating 10–95% RH (non–condensing) humidity IP rating IP67-rated IK rating IK10 impact-resistant Other CE, FCC, RoHS...
-
Page 48: Warranty Information
7 Warranty Information Digital Watchdog (referred to as “the Warrantor”) warrants the Camera against defects in materials or workmanship as follows: Labor: For the initial five (5) years from the date of the original purchase if the product is determined to be defective, the Warrantor will repair or replace the unit with the new or refurbished product at its option, at no charge. -
Page 49: Limits And Exclusions
If the problem is not handled to your satisfaction, then write to the following address: Digital Watchdog, Inc. ATTN: RMA Department...
Need help?
Do you have a question about the MEGAPIX DWC-MB94Wi28T and is the answer not in the manual?
Questions and answers