Table of Contents
Advertisement
Available languages
Available languages
Quick Links
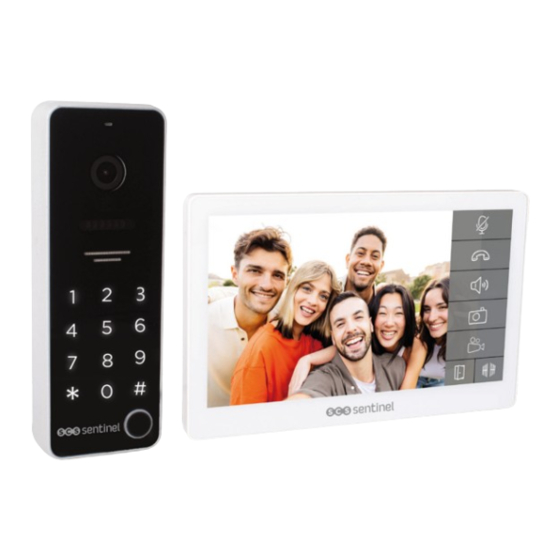
CodeVisio Wi-Fi
Interphone vidéo connecté
avec clavier à code
Connected video intercom with keypad
Videocitofono collegato con tastiera
Vídeo portero conectado con teclado
2 fils
100m max
Ecran tactile
Contrôle
à distance
Photos
vidéos
6 mélodies
Gâche
et portail
Notice d'installation et d'utilisation
Installation and user manual
V.122023 - IndA
Manuale d'installazione e uso
Instrucciones de instalación y uso
Advertisement
Chapters
Table of Contents

Related Manuals for SCS Sentinel CodeVisio Wi-Fi


Summary of Contents for SCS Sentinel CodeVisio Wi-Fi
- Page 1 CodeVisio Wi-Fi Interphone vidéo connecté avec clavier à code Connected video intercom with keypad Videocitofono collegato con tastiera Vídeo portero conectado con teclado 2 fils 100m max Ecran tactile Contrôle à distance Photos vidéos 6 mélodies Gâche et portail Notice d’installation et d’utilisation Installation and user manual V.122023 - IndA...
-
Page 2: Table Of Contents
Il appartient à l’acheteur de se renseigner auprès de la CNIL en cas de questionnement sur les conditions et les autorisations administratives nécessaires en cas d’usage en dehors d’un cadre strictement personnel. SCS Sentinel ne pourra être tenu responsable en cas d’utilisation de ce produit en dehors des lois et réglementations en vigueur. -
Page 3: C- Câblage / Installation
B2- Présentation du produit Port carte micro SD Indicateur d’alimentation QRCode Écran tactile Connecteurs 7” LCD Microphone Caméra Zone RFID (badge en option) Haut-parleur Raccordements Clavier * : annuler # : valider Bouton d’appel C- CÂBLAGE / INSTALLATION C- CÂBLAGE / INSTALLATION C1- Installation et raccordement Moniteur 1- Choisir un emplacement approprié... - Page 4 Platine de rue L’installation sous un porche ou un lieu couvert est recommandée. Eviter que la lentille de la caméra ne soit en contact direct avec les rayons du soleil. Installation sur le support plat 1- Percer 2 trous avec un espacement correspondant à ceux du support mural puis insérer les 2 chevilles fournies. 2- Faire passer le câble à...
-
Page 5: D- Utilisation
C2- Schéma de câblage Contact SENS de porte Bouton OPEN de sortie Automatisme Gâche électrique 12V+ 12V DC- 700mA D1-B D1-A Sans polarité Option : Bouton de sonnette 0 - 50 m - 0,75 mm² Connecteur entrée 50 - 100 m - 1 mm² contact sec Option : Branchement... - Page 6 D2- Écran principal Pour quitter le mode veille, toucher l’écran Appuyer sur pour mettre l’écran en veille ou toucher l’écran et faire glisser vers la gauche (veille automatique après 1 minute sans utilisation). Liaison entre la platine et le moniteur. Carte SD détectée.
- Page 7 D4- Affichage des photos et vidéos Photo ou vidéo L’enregistrement des vidéos se fera automatiquement sur la carte mémoire. L’enregistrement des vidéos ne sera pas possible sans carte mémoire D5- Mode silencieux Mode silence Coupe la sonnerie du moniteur D6- Affichage appel Appel...
- Page 8 D7- Information de stockage Stockage D8- Réglages Réglages Faire glisser l’écran de bas en haut pour découvrir les différents menus. Type de sonnerie Action lors de l’appel 6 mélodies : Enregistrer des photos ou des vidéos - Ding-Dong - Space lors d’un appel - Caribbean - Westminster...
- Page 9 Wi-Fi D9- Réglages de la platine de rue Configuration du système Sélectionner la platine via «liste des platines» Définir les paramètres de la platine de rue : Puis cliquer sur «modifier» pour changer -Temps de déverrouillage du portail ou de la gâche les paramètres enregistrés.
- Page 10 Ouverture motorisation et gâche Bouton de sortie Le paramétrage du bouton de sortie permet de fixer la priorité d’ouverture entre le portail ou la gâche électrique pour les différents modes d’ouverture (bouton de sortie, code ou badge RFID). Sélectionner le mode d’ouverture prioritaire : portail ou portillon.
- Page 11 Exemple : si «portail» est défini dans la partie «bouton de sortie» Taper le code enregistré au préalable Taper le code en ajoutant +1 à la puis valider avec # (ex. 1234#) valeur enregistrée puis valider avec Le portail* est ouvert # (ex.1235#) La gâche* est ouverte N.B : Si le dernier chiffre du code...
- Page 12 Exemple : si «portail» est défini dans la partie «bouton de sortie» Passer le badge sur la zone RFID Appuyer sur le bouton d’appel durant (entre la lentille et le haut parleur) 3 secondes puis passer le badge sur la Le portail* est ouvert zone RFID (entre la lentille et le haut parleur)
-
Page 13: E- Configuration De L'application
E- CONFIGURATION DE L’APPLICATION E- CONFIGURATION DE L’APPLICATION Installation de l’application iSCS Sentinel Pour télécharger l’application, connectez-vous sur l’App Store ou le Play Store de votre smartphone. Recherche «iSCS Sentinel», cliquez ensuite sur Installer. Il est nécessaire d’accepter la politique de confidentialité... - Page 14 Ajout du moniteur Brancher l’alimentation du moniteur et le placer à proximité du routeur Wi-Fi. Le téléphone doit être connecté au même réseau Wi-Fi que le moniteur et la WIFI localisation doit être activée. Certains matériaux peuvent réduire la portée du signal Wi-Fi.
-
Page 15: F- Paramètrage
F- PARAMÉTRAGE F- PARAMÉTRAGE Réglages de l’application Appuyer sur Voir mon profil : pour accéder pour modifier aux réglages de les informations l’application. personnelles Pour ajouter une maison Créer une nouvelle maison. Renseigner les Cliquer sur champs et appuyer sur «TERMINER». Pour supprimer une maison Appuyer sur pour supprimer... - Page 16 Pour modifier une maison Modifier l’adresse. Appuyer sur Paramètres de notifications Appuyer sur «Activer les notifications» pour activer la totalité Appuyer sur des notifications. pour accéder aux Sinon appuyer sur paramètres de les notifications notifications. souhaitées. Utilisation de l’application Activer le Gestion des plein écran platines de rue...
- Page 17 Appuyer Replay : pour visionner modifier les ce qu’il paramètres du visiophone. s’est passé. Enregistrer Enregistrer une vidéo une photo Par défaut, le visiophone apparaîtra dès l’ouverture de l’application dans la liste des favoris. Appuyer sur pour ajouter/supprimer le visiophone des favoris. Scénarios Pour Pour...
- Page 18 Ajouter des invités Maison 1 Maison 1 Maison 1 iSCS Sentinel, Via l’application un invité peut activer / désactiver les appareils mais il ne peut pas les paramétrer. Reset Pour totalement supprimer l’appareil il faudra le supprimer dans l’application.
-
Page 19: G- Caractéristiques Techniques
G- CARACTÉRISTIQUES TECHNIQUES G- CARACTÉRISTIQUES TECHNIQUES Moniteur Alimentation 24V DC 1A 24W Ecran Ecran tactile 7’’ TFT LCD Dimensions 174 x 112 x 19 mm Résolution LCD 1024 x 600 px 90 Mo. Une fois la mémoire pleine, Mémoire interne (photos) la nouvelle photo remplacera automatiquement la plus ancienne 4 Go - 256 Go classe 4 - 10 (non fournie) -
Page 20: H- Assistance Technique
I- GARANTIE I- GARANTIE SCS Sentinel accorde à ce produit une garantie supérieure à la durée légale, en gage de qualité et de fiabilité. Il est impératif de garder une preuve d’achat durant toute la période de garantie. Conservez soigneusement le code-barre ainsi que votre justificatif d’achat, il vous sera demandé pour faire jouer la garantie. -
Page 21: K- Déclaration De Conformité
K- DÉCLARATION DE CONFORMITÉ K- DÉCLARATION DE CONFORMITÉ Par la présente, SCS Sentinel déclare que ce produit est conforme aux exigences essentielles et autres dispositions pertinentes de la directive 2014/53/UE. La déclaration de conformité peut être consultée sur le site :... -
Page 22: A- Safety Instructions
It is up to the buyer to ask the CNIL about the conditions and administrative authorisations required for use outside a strictly personal context. SCS Sentinel cannot be held responsible in case of use of this product outside the laws and regulations in force. -
Page 23: C- Wiring / Installation
B2- Product presentation Micro SD card slot Indicator QRCode Connection Screen 7” port Microphone Camera RFID zone (optional badge) Loudspeaker Connections Keyboard * : Cancel # : Confirm Call button C- WIRING / INSTALLATION C- WIRING / INSTALLATION C1- Installation and connection Indoor monitor 1- Choose a suitable location for the monitor. - Page 24 Outdoor monitor Installation in a porch or covered area is recommended. Avoid the camera lens coming into direct contact with the sun’s rays. Installation on the flat support 1- Drill 2 holes a spacing corresponding to that of the support, then insert the 2 wall plugs supplied. 2- Pass the cable through the hole in the wall bracket, then fix it to the wall using the 2 screws supplied.
-
Page 25: D- Use
C2- Wiring diagram Contact SENS door Exit OPEN switch Automation Electric latch 12V+ 12V DC- 700mA D1-B D1-A No polarity Option : Doorbell button 0 - 50 m - 0,75 mm² Connector dry 50 - 100 m - 1 mm² contact input Option : additional outdoor... - Page 26 D2- Main screen Exit the standby mode, touching the screen. Press to put the standbye mode or touching the screen and slide to the left (automatic after 1 minute without use). Connection between the outdoor and the monitor. SD card detected. Monitor Photo Video...
- Page 27 D4- Photos and videos display Photo ou video Videos will be recorded on micro SD card. The video recording will not be possible without Micro SD card D5- Silent mode Mute Switches off the monitor ringer D6- Call display Call...
- Page 28 D7- Storage information Storage info D8- Setting Setting Slide the screen up and down to discover the different menus. Action for ringing Ringtone type Record photos or videos during a call 6 ringtones : - Ding-Dong - Space - Caribbean - Westminster - Elise - Zen...
- Page 29 Wi-Fi D9- Outdoor station settings Device configuration Select the outdoor via «Doorbell list». Then click on «modify» to change the saved Define the outdoor station settings : settings - Gate or strike release time To confirm the setting changes, exit the menu. - Exit button (strike or gate) - Badge management - Password unlock enable status...
- Page 30 Opening the gate and electric lock Exit button The exit button settings allow you to set the opening priority between the gate or the electric strike for the different opening modes (exit button, code or RFID badge). Select the priority opening mode: gate or door. (This operation must be carried out even if you do not have an exit button).
- Page 31 Example: if «gate» is defined in the «exit button» section Enter the previously Enter the code, adding +1 to the value recorded code and confirm with # entered, then confirm with # (e.g. 1234#) (e.g. 1235#). The gate* is open The electric lock* is open N.B : If the last digit of the code is 9, the +1 digit will be 0.
- Page 32 Example: if «gate» is defined in the «exit button» section Pass the badge on the RFID zone Press the call button for 3 seconds, (between the lens and the loudspeaker) then pass the badge on the RFID zone The gate* is open (between the lens and the loudspeaker) The electric lock* is open * If «gate»...
-
Page 33: E- Configuration
E- APPLICATION CONFIGURATION E- APPLICATION CONFIGURATION Installing the app iSCS Sentinel To download the app, go on to the App Store or Play Store on your smartphone. Search for “iSCS Sentinel”, then click on install. Please agree to the privacy policy before clicking next. - Page 34 Adding the monitor Plug in the power to the monitor and place it near your Wi-Fi router. Your phone must be connected to the same Wi-Fi network as your monitor and location must WIFI be enabled. Some materials may reduce the Wi-Fi range. 200 m Free field 100%...
-
Page 35: F-Setting
F- SETTING F- SETTING Application settings View my profile: Click on to change personal go to the app information settings. To add a home Create a new home. Fill in the fields and Click on click on “finish”. To remove a home Click on to remove a home. - Page 36 To edit a home Edit the address. Click on Notification settings Click on « enable notification » Click on to activate all to go to the notifications. notification Otherwise click on the settings. desired notifications. Using the app Activate full Outdoor station screen (tilt the...
- Page 37 Click on Replay : to change view what the product happened. settings. Save a Save a video photo By default, the product will appear when the app is opened in the favourites list. Click on to add/remove the product from favourites. Scenarios To select By default, the...
- Page 38 To add guests Via the iSCS Sentinel app, your guest can activate/deactivate the devices but cannot configure them. Reset To completely remove the device, you will need to delete it from the app.
-
Page 39: G-Technical Features
G- TECHNICAL FEATURES G- TECHNICAL FEATURES Indoor monitor Input power 24V DC 1A 24W Screen 7 inch digital TFT LCD touch screen Dimensions 174 x 112 x 19 mm LCD resolution 1024 x 600 px 90 Mo. when full the newest photo will automatically Memory capacity (photos) overwrite the oldest one MicroSD card (4 GB - 256 GB class 4 - 10) (not supplied) -
Page 40: H- Technical Assistance
I- WARRANTY I- WARRANTY SCS Sentinel grants to this product a warranty period, beyond the legal time, as a sign of quality and reliability. The invoice will be required as proof of purchase date. Please keep it during the warranty period. - Page 41 Toutes les infos sur : www.scs-sentinel.com 110, rue Pierre-Gilles de Gennes 49300 Cholet - France...
Need help?
Do you have a question about the CodeVisio Wi-Fi and is the answer not in the manual?
Questions and answers