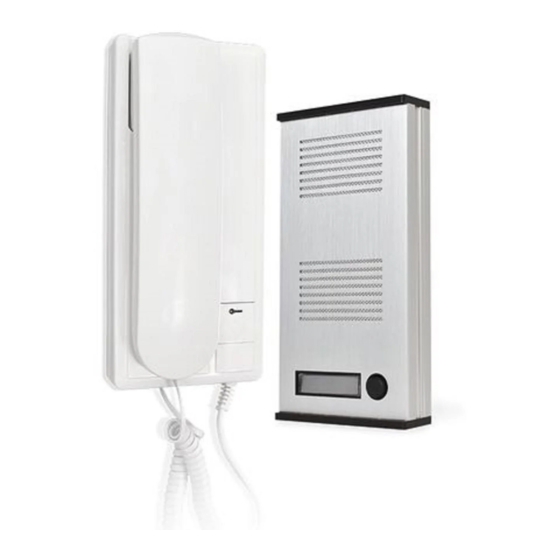
SCS Sentinel AudioKit 32068 Installation And User Manual
Interphone audio filaire. audio door phone
Hide thumbs
Also See for AudioKit 32068:
- Installation and user manual (8 pages) ,
- Installation and user manual (28 pages)
Advertisement
Available languages
Available languages
AudioKit
32068
Interphone audio
filaire
Audio door phone
Citofono audio
Intercomunicador audio
Audio-Türsprechanlage
Audio-Intercom
θυροτηλέφωνου
2 fils
100m max
1 mélodie
Platine de rue
en applique
Notice d'utilisation et d'installation
Installation and user manual
Manuale d'installazione e uso
Instrucciones de uso e instalación
Installation und Bedienungsanleitung
Installatie en Gebruiksaanwijzing
Εγχειρίδιο της εγκατάστασης και της χρησιμοποίησης
V.072020 - IndE
Advertisement
Chapters

Related Manuals for SCS Sentinel AudioKit 32068


Summary of Contents for SCS Sentinel AudioKit 32068
- Page 1 AudioKit 32068 Interphone audio filaire Audio door phone Citofono audio Intercomunicador audio Audio-Türsprechanlage Audio-Intercom θυροτηλέφωνου 2 fils 100m max 1 mélodie Platine de rue en applique Notice d’utilisation et d’installation Installation and user manual Manuale d’installazione e uso Instrucciones de uso e instalación Installation und Bedienungsanleitung Installatie en Gebruiksaanwijzing Εγχειρίδιο...
-
Page 2: Table Of Contents
SOMMAIRE SOMMAIRE A- Précautions d’utilisation ..............................2 B- Descriptif ....................................2 B1 - Contenu du kit / Dimensions ..........................2 B2 - Présentation du produit ............................. 3 C- Câblage / Installation ................................3 C1 - Schéma de câblage ............................3 C2 - Installation et raccordement .......................... -
Page 3: B2- Présentation Du Produit
B2- Présentation du produit Combiné Haut parleur Microphone Ouverture serrure ou Porte étiquette gâche lumineux Bouton d’appel Câble prise intérieure C- CÂBLAGE / INSTALLATION C- CÂBLAGE / INSTALLATION C1- Schéma de câblage Les câbles de liaison ne sont pas fournis Combiné... -
Page 4: C2- Installation Et Raccordement
C2- Installation et raccordement • Fixer la platine de rue à 1,5 mètres de hauteur sur un mur plat. • L’installation sous un porche ou un lieu couvert est fortement recommandée. • Oter les 2 vis du haut de la platine de rue, faire coulisser la plaque arrière de la platine de rue et la fixer au mur. •... -
Page 5: E- Assistance Téléphonique
E- ASSISTANCE TÉLÉPHONIQUE E- ASSISTANCE TÉLÉPHONIQUE En cas de besoin, vous pouvez prendre contact avec notre assistance technique au numéro ci-dessous 0,35 € / min 0 892 350 490 Hotline Horaire hotline, voir sur le site internet : scs-sentinel.com Nous vous demandons au préalable de relever la référence de votre matériel sur la notice ou l’emballage de votre produit. Nous vous conseillons également de brancher votre matériel «... -
Page 6: A- Safety Instructions
TABLE OF CONTENTS TABLE OF CONTENTS A- Safety instructions ................................6 B- Description ....................................6 B1 - Contents / Dimensions ............................6 B2 - Components ................................ 7 C- Wiring / Installing .................................. 7 C1 - Wiring diagram ..............................7 C2 - Installing ................................8 D- Technical features ................................. -
Page 7: B2- Components
B2- Components Handset Loudspeaker Microphone Opening button Illuminated label holder Call button Power cord plug C- WIRING / INSTALLING C- WIRING / INSTALLING C1- Wiring diagram Connecting cables not provided Handset Outdoor station LOCK OR STRIKE : OPTIONAL From 0 to 10 metres : From 0 to 50 metres: use 0.75 mm²... -
Page 8: C2 - Installing
C2- Attaching and connecting the elements • Attach the outdoor station at a height of 1.5 metres mounted on a flat wall back plate. • Installation under a porch or a covered area is highly recommended. • Remove the top from the panel, slightly lift then slide off the front panel. •... -
Page 9: E- Warranty
E- WARRANTY E- WARRANTY The invoice will be required as proof of purchase date. Please keep it during the warranty period. Warranty 2 years Carefully keep the barcode and the proof of purchase, that will be necessary to claim warranty. F- WARNINGS F- WARNINGS •... -
Page 10: A- Precauzioni Per L'uso
INDICE INDICE A- Precauzioni per l’uso ................................10 B- Specifiche....................................10 B1 - Contenuto del kit ................................10 B2 - Presentazione del prodotto ............................11 C- Cablaggio / Installazione ..............................11 C1 - Schema di cablaggio ..............................11 C2 - Impianto ..................................1 2 D- Caratteristiche tecniche .............................. -
Page 11: B2- Presentazione Del Prodotto
B2- Presentazione del prodotto Modulo ricevitore Altoparlante Microfono Pulsante di apertura Porta-etichetta Pulsante di chiamata luminoso Cavo di alimentazione C- CABLAGGIO / INSTALLAZIONE C- CABLAGGIO / INSTALLAZIONE C1- Schema di cablaggio Cavi di collegamento non forniti Modulo ricevitore Pulsantiera esterna Serratura : opzione Da 0 a 10 metri: cavo da 1 mm²... -
Page 12: D- Caratteristiche Tecniche
C2- Fissaggio e collegamento degli elementi • Fissare la piastra esterna 1,5 metri di altezza su una parete piana. • L’installazione sotto un portico o un luogo coperto è altamente raccomandata. • Togliere la vite della parte superiore della piastra, sollevare leggermente la targa posteriore e far scorrere il frontalino. -
Page 13: E- Assistenza Telefonica
E- ASSISTANZA TELEFONICA E- ASSISTANZA TELEFONICA I tecnici del servizio post-vendita sono disponibili al numero : Hotline In caso di alfunzionamento del prodotto durante l’installazione o pochi giorni dopo la stessa si invita a contattare il servizio clienti rimanendo in prossimità del prodotto in modo da consentire ai nostri tecnici di diagnosticare subito l’origine del problema. -
Page 14: A- Precauciones Para El Uso
ÍNDICE ÍNDICE A- Precauciones para el uso ..............................14 B- Descripción ................................... 14 B1 - Contenido / Dimensiones ..........................14 B2 - Presentación del producto ..........................15 C- Cableado / Instalación................................. 15 C1 - Esquema de cableado ............................. 15 C2 - Instalación ................................. 16 D- Características técnicas.............................. -
Page 15: B2- Presentación Del Producto
B2- Presentación del producto Teléfono Altoparlante Microfóno Apertura Porta etiqueta de cerradura luminoso Botón de llamada Cable de alimentación C- CABLEADO / INSTALACIÓN C- CABLEADO / INSTALACIÓN C1- Esquema de cableado Cables de conexión no incluídos Placa exterior Teléfono Plancha o cerradura : opción De 0 a 10 metros : De 0 a 50 metros: se usa cable de 0,75 mm²... -
Page 16: C2 - Instalación
C2- Fijación y conexión de los elementos • Fijar la placa de calle a 1,5 metros de altura en un muro plano. • La instalación en un porche o lugar cubierto está muy recomendada. • Retirar el tornillo superior de la placa, levantar ligeramente la placa posterior y seguidamente hacer deslizar el panel. -
Page 17: E- Asistencia Técnica
E- ASISTENCIA TÉCNICA E- ASISTENCIA TÉCNICA Se puede contactar los técnicos del servicio posventa a la siguiente dirección de email : asistencia.tecnica@scs-sentinel.com F- GARANTÍA F- GARANTÍA Conservar el recibo de compra durante todo este período de Garantía 2 años garantía. Conservar el código de barra así... -
Page 18: A- Vorsichtsmassnahmen Beim Betrieb
ÜBERSICHT ÜBERSICHT A- Vorsichtsmassnahmen beim betrieb ..........................18 B- Beschreibung ..................................18 B1 - Inhalt/abmessungen ............................18 B2 - Produktpräsentation ............................19 C- Anschluss/installation ................................ 19 C1 - Schaltplan ................................19 C2 - Installation ................................. 20 D- Technische eigenschaften ..............................20 E- Garantie .................................... -
Page 19: B2- Produktpräsentation
B2- Produktpräsentation Kombiniert Lautsprecher Mikrofon Öffnungsknopf Leucht-Namensschild Klingelknopf Netzkabelstecker C- ANSCHLUSS / INSTALLATION C- ANSCHLUSS / INSTALLATION C1- Schaltplan Anschlusskabel nicht vorgesehen Türstation Kombiniert Lock streik oder : optional Von 0 bis 10 Meter: Von 0 bis 50 Meter: 0,75mm² - Kabel 1 mm²-Kabel Von 51 bis 100 Meter: 1mm²... -
Page 20: C2 - Installation
C2- Befestigung und anschluss der komponenten • Die Auβensprechstelle auf 1,5 Meter Höhe an einer glatten Wand befestigen. • Installation unter einer Veranda oder einem überdachten Platz wird dringend empfohlen. • Die untere Schraube der Türsprechanlage mit Hilfe des mitgelieferten Schlüssels ausdrehen, das Rückplatte leicht anheben und die Vorderseite gleiten lassen. -
Page 21: E- Garantie
E- GARANTIE E- GARANTIE Es ist zwingend erforderlich, den Kaufnachweis während der Garantie 2 Jahre Garantiezeit aufzubewahren. Bewahren Sie den Barcode und Ihren Kaufnachweis sorgfältig auf, da diese für Garantieansprüche erforderlich sind. F- WARNHINWEISE F- WARNHINWEISE • Ein Mindestabstand (10 cm) muss um das Gerät herum für die ausreichende Lüftung eingehalten werden. •... -
Page 22: A- Voorzorgsmaatregelen Bij Gebruik
SAMENVATTING SAMENVATTING A- Voorzorgsmaatregelen bij gebruik ..........................22 B- Beschrijving ..................................22 B1 - Inhoud / afmetingen ............................22 B2 - Productpresentatie ............................22 C- Bedrading / installatie ................................. 23 C1 - Bedradingsschema ............................23 C2 - Installatie ................................23 D- Technische specificaties .............................. -
Page 23: C- Bedrading / Installatie
C- BEDRADING / INSTALLATIE C- BEDRADING / INSTALLATIE Aansluitkabels C1- Bedradingsschema niet voorzien Straatunit Handset Sluitplaat of lock : Optioneel gebruik kabel 1 mm² 0 tot 50 meter: gebruik kabel 0,75 mm ² 51 tot 100 meter: gebruik kabel 1 mm ² C2- Bevestiging •... -
Page 24: D- Technische Specificaties
D- TECHNISCHE SPECIFICATIES TECHNISCHE SPECIFICATIES Straatunit Installatie Wand gemonteerd Gevel aluminium Besturing van een staking of elektrisch slot 12VDC /1,2A max Afmetingen 100 x 197 x 27 mm Hoorn Installatie Wand gemonteerd Bedrading 0 tot 50 meter: 0,75 mm ² kabel (niet meegeleverd) 51 tot 100 meter: 1 mm ²... -
Page 25: A- Περιγραφικός
ΠΕΡΊΛΗΨΗ ΠΕΡΊΛΗΨΗ A- Περιγραφικός .......................... 25 A1 - περιγραφή / διαστάσεις ......................25 A2 - Περιγραφή των στοιχείων ....................25 B- Καλωδίωση / εγκατάσταση ....................26 B1 - πρότυπο καλωδίωσης ......................26 B2 - τοποθετηση και συνδεση των εξαρτηματων ..............26 C- Χαρακτηριστικά προϊόντος ....................26 D-Εγγύηση... -
Page 26: B- Καλωδίωση / Εγκατάσταση
B- ΚΑΛΩΔΊΩΣΗ / ΕΓΚΑΤΑΣΤΑΣΗ B- ΚΑΛΩΔΊΩΣΗ / ΕΓΚΑΤΑΣΤΑΣΗ Συνδέοντας καλώδια B1- πρότυπο καλωδίωσης παρεχόμενος θυροτηλεφωνο μπουτονιερα κλειδαρια η απεργια: προαιρετικος έως 10 μέτρα χρησιμοποιήστε Έως 50 μέτρα (0-50m 0.75mm καλώδιο 1mm 51-100m 1mm B2- τοποθετηση και συνδεση των εξαρτηματων • Τοποθετήστε... -
Page 27: D-Εγγύηση
ΕΓΓΎΗΣΗ ΕΓΓΎΗΣΗ Αυτό το προϊόν διαθέτει εγγύηση 2 ετών, για τα εξαρτήματα και τα εργατικά, από την ημερομηνία 2 χρόνια εγγύηση αγοράς. Είναι απαραίτητο να διατηρείστε την απόδειξη αγοράς καθ’όλη την διάρκεια αυτής της περιόδου ισχύος της εγγύησης. ΠΡΟΕΙΔΟΠΟΙΗΣΕΙΣ ΠΡΟΕΙΔΟΠΟΙΗΣΕΙΣ •... - Page 28 Toutes les infos sur : www.scs-sentinel.com Route de St Symphorien 85130 Les Landes Génusson...
Need help?
Do you have a question about the AudioKit 32068 and is the answer not in the manual?
Questions and answers
Pourquoi l impulsion délivré par la platine et si courte