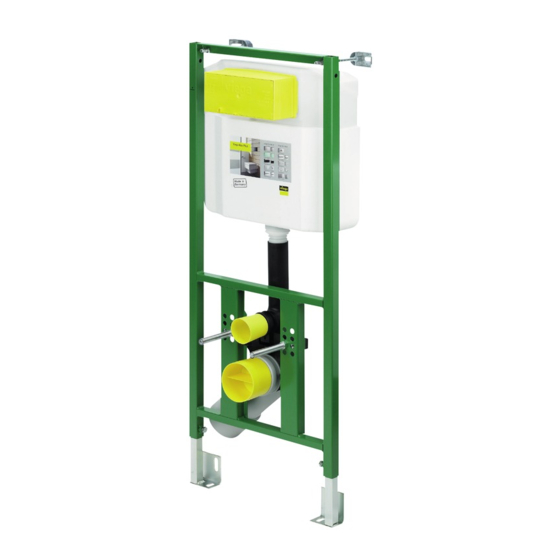
Summary of Contents for Viega Eco Plus 8164.6
- Page 1 Viega Eco Plus WC element Instructions for Use for flush plates Visign Model Year built: 8164.6 from 06/2007 en_INT...
- Page 2 Viega Eco Plus WC element 2 from 20...
-
Page 3: Table Of Contents
Technical data Handling Assembly information 3.1.1 Mounting conditions 3.1.2 Installation dimensions 3.1.3 Required tools Assembly 3.2.1 Connecting concealed cistern 3.2.2 Mounting WC element 3.2.3 Setting the flush volume Cleaning and maintenance Disposal Viega Eco Plus WC element 3 from 20... -
Page 4: About These Instructions For Use
This restriction does not extend to possible operating instructions. The installation of Viega products must take place in accordance with the general rules of engineering and the Viega instructions for use. -
Page 5: About This Translated Version
German/European directives specified in this manual: The information herein is not binding for other countries and regions; as said above, they should be understood as a recommendation. Viega Eco Plus WC element 5 from 20... -
Page 6: Product Information
Intended use 2.2.1 Areas of use The Viega Eco Plus WC element is suitable for mounting on masonry wall constructions and support profiles pursuant to the regulations in section Ä „Regulations from section: Fields of application / Mounting conditions“ on page 6. -
Page 7: Product Description
2.3.1 Overview Fig. 1: Scope of delivery flush actuation site protection Viega Eco Plus WC element Viega concealed cistern 2H flushing pipe Four fixing heights for the WC ceramic: 330 mm / 350 mm / 370 mm / 390 mm... - Page 8 Visign for Style 13 Flush plate 8334.1 Visign for Style 14 Functional unit 8332.3 Visign for More Flush plate Visign for More 8352.1 Flush plate Visign for More 8351.1 Flush plate Visign for More 8353.1 Viega Eco Plus WC element 8 from 20...
-
Page 9: Sound Protection
2.3.4 Technical data Flush volume Small flush volume Factory setting approx. 3 l Setting range approx. 3–4 l Large flush volume Factory setting approx. ca. 6 l Setting range approx. 6–9 l Viega Eco Plus WC element 9 from 20... -
Page 10: Handling
3.1.1 Mounting conditions Suitable walls The Viega WC element is suitable for mounting on masonry wall con‐ structions and support profiles pursuant to the regulations in section Ä „Regulations from section: Fields of application / Mounting condi‐ tions“ on page 6. -
Page 11: Installation Dimensions
Handling 3.1.2 Installation dimensions Fig. 2: Viega Eco Plus WC element 8164.6 dimensions 3.1.3 Required tools The following tools are required for mounting the WC element: drill with 10 mm drill bit ratchet with sockets: 13 mm / 17 mm... -
Page 12: Assembly
Compress the cistern lead-in. Mount the matching screw fitting for the respective pipe system. Screw the corner valve tight. Viega Eco Plus WC element 12 from 20... - Page 13 Push the cistern lead-in with the mounted Viega corner valve into the cistern wall. Insert the Viega screw fitting comprised in the delivery into the cis‐ tern lead-in. Guide the filling hose through the lugs in the top of the cistern.
-
Page 14: Mounting Wc Element
Mount the fixing set with the fork spanner (size 13). 560638_B2 Align the height of the feet. Check WC element on cutting check. Mark fixing points on the floor. 0 - 2 0 0 Viega Eco Plus WC element 14 from 20... - Page 15 0 - 2 0 0 Remove WC element and drill floor holes. Ø10 Fill drill holes with silicone. Insert dowels. Fill dowels with silicone. Attach the element. Optionally, screw feet onto wooden beams. Viega Eco Plus WC element 15 from 20...
- Page 16 Screw in the threaded rods for WC ceramic to the desired height. Pull the plastic protective sleeves for the threaded rods over the WC ceramic. Double-clad WC element with IFGP cladding panels (model 8055.10) (2 x 12.5 mm). Viega Eco Plus WC element 16 from 20...
- Page 17 Pull out the foot and if necessary, adjust (pre-mounted) foot depth from 75 mm to 50 mm. 90° Fill drill holes with silicone. Insert dowels. Fill dowels with silicone. Attach the element. Viega Eco Plus WC element 17 from 20...
- Page 18 0 - 2 0 0 Attach WC element to the support profiles. Clip in drain elbow. Insert protective plug. click Screw in the threaded rods for WC ceramic to the desired height. Viega Eco Plus WC element 18 from 20...
-
Page 19: Setting The Flush Volume
The WC element is factory-set at a large flush volume of approx. 6 l. The large flush volume can be set continuously from approx. 6 l up to approx. 9 l. Remove the drain valve from the concealed cistern. Viega Eco Plus WC element 19 from 20... -
Page 20: Cleaning And Maintenance
The valves may have to be replaced, depending on the extent of deposits. Disposal Separate the product and packaging materials (e. g. paper, metal, plastic or non-ferrous metals) and dispose of in accordance with valid national legal requirements. Viega Eco Plus WC element 20 from 20...


Need help?
Do you have a question about the Eco Plus 8164.6 and is the answer not in the manual?
Questions and answers