Table of Contents
Advertisement
Quick Links
Advertisement
Table of Contents

Subscribe to Our Youtube Channel
Related Manuals for Colorjet SOFTJET GRAND


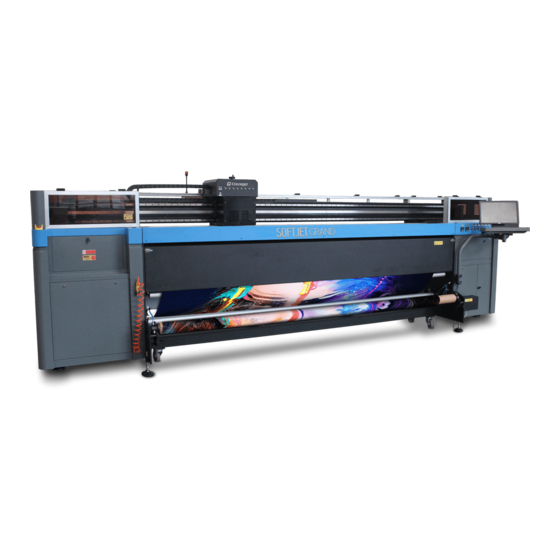
Summary of Contents for Colorjet SOFTJET GRAND
- Page 2 Disclaimer The information and instructions provided in this manual have been checked for accuracy, uniqueness, and reliability. ColorJet group reserves all the rights to modify and revise this manual as per the company requirements without any prior notice. “No part of this document shall be reproduced or used by externals without prior permission of the ColorJet group”.
-
Page 3: Table Of Contents
Ripping and Printing Software Installation ..................20 8. Ink Filling ............................21 9. Loading Fabric ........................... 22 10. Head Installation ..........................26 Head Voltage Settings ........................29 Head Height Adjustment........................30 Head Alignment ..........................31 SOFTJET GRAND Page 2 of 50... - Page 4 Horizontal Calibration ........................34 Step Calibration ..........................37 Save to Printer........................... 38 11. Do’s and Don’t..........................39 12. Maintenance ........................... 40 Print Head Maintenance ........................40 13. Troubleshooting Guide ........................42 14. Error Handling ..........................46 SOFTJET GRAND Page 3 of 50...
-
Page 5: Site Layout
• Packing Dimension : 5450 x 1650 x 2020 mm (LxWxH) • Room Dimension : 7000 X 3000 X 3000 mm (LxWxH) • Machine Net Weight : ~1800kg • Machine Gross Weight : ~2000kg SOFTJET GRAND Page 4 of 50... -
Page 6: Safety Precautions
• Use the machine within the specified temperature and humidity range to avoid halt in operations. • Use gloves while working with the internal parts of the machine to avoid damage. SOFTJET GRAND Page 5 of 50... -
Page 7: Precautions For Fabric Use
Printer's waste ink is industrial waste. Thus, it must be disposed according to regulations and local laws to avoid the environment pollution. If there is any confusion, kindly ask operators for industrial waste disposal to process waste ink. SOFTJET GRAND Page 6 of 50... -
Page 8: Safety Requirements
Win7 64bit OS or Windows 10 OS • Human Input Devices (Keyboard & Mouse) • HDD/SSD: 500GB or more • 1 USB 2.0 Port or USB 2.0 Compatible USB 3.0 • Color monitor with 1600x1024 resolution, 24-bit colors SOFTJET GRAND Page 7 of 50... -
Page 9: Environment Requirements
AC. • There should not be air draught in the room. • Closed dust-free room exclusive for Printer. • Light: o CRI 98% o LUX Min 200 o Color: 5000K SOFTJET GRAND Page 8 of 50... -
Page 10: Preparation Before Installation
Appropriately calibrate the Print Head for high-quality printing • o Use recommended ink only o Don’t shake the ink bottle o Store ink in the mentioned site area to avoid dry or damage SOFTJET GRAND Page 9 of 50... -
Page 11: Unloading And Unpacking
Step 5: Remove the 10x20 mm screws of open able stand offs (2nos at back side) from the base pallet using the 10mm Bit. Now, the machine gets unpacked. Caution: Do not move or unload the machine before ensuring that the place where the machine is landed, is even or level. SOFTJET GRAND Page 10 of 50... -
Page 12: Getting The Printer Ready
Step 5: Move the carriage gently to check, if the carriage path is free from obstacles. Step 6: Mount LCD monitor using the screws provided with the machine. Step 7: Connect computer system to the monitor and machine. SOFTJET GRAND Page 11 of 50... - Page 13 Step 14: Install the Print Head, please refer to the Head Installation section to install the Print Head. Step 15: For test printing, perform the Nozzle Test and verify the result. Now, the printer gets ready for use. SOFTJET GRAND Page 12 of 50...
-
Page 14: Installing The Printer Manager
Step 3: Double-click on the Printer Manager software (.exe file) icon, as shown below: Fig 5: Starting the Printer Manager Installation On-clicking the Printer Manager icon, the Startup screen appears, as shown below: Fig 6: Starting the Installation Process SOFTJET GRAND Page 13 of 50... - Page 15 Note: USB driver is automatically installed with the Printer Manager software. If not, then follow the below given steps. Step 5: Open Device Manager, right-click on the My Computer icon and select the Manage option from the context menu, as shown below: Fig 8: Selecting the Manage Option SOFTJET GRAND Page 14 of 50...
- Page 16 Step 7: Select the Wide-Format Printer option under Other devices and right-clicked on it. The context menu appears on the screen. Step 8: Select the Update Driver Software option from the context menu, as shown below: Fig 10: Configuring the USB Driver SOFTJET GRAND Page 15 of 50...
- Page 17 Step 9: Select the Browse my computer for driver software option from the Update Driver Software window (Refer to Fig 11). Step 10: Select the location where the driver software is stored by clicking on the Browse button, as shown below: Fig 12: Selecting the Driver Location SOFTJET GRAND Page 16 of 50...
- Page 18 Fig 13: Displaying the Process Progress Now, the driver updating process gets completed successfully, as shown below: Fig 14: Updating the Driver Successfully On completing the process, click on the Close button to close the process. SOFTJET GRAND Page 17 of 50...
-
Page 19: Printer Manager Settings
Idle Spray: Spray during carriage at home position. This option must be enabled. o Spray Before Print: This option works with the Print Pre-spray Time option. When enabled, one can specify the duration, if spray before issuing the Print command. SOFTJET GRAND Page 18 of 50... -
Page 20: Save To Printer
After making the desire changes in the printer settings, save these settings into the printer for future usage. To save the settings to the printer, click on the Main Menu→Setting→Save To Printer path, as shown below: Fig 18: Selecting the Save To Printer Option SOFTJET GRAND Page 19 of 50... -
Page 21: Ripping And Printing Software Installation
540X1080 Mode 5 540X1440 Color Profile After installing the Printer Manager software, first install the Color Profile using the CD provided with the machine. Moreover, you can also download the color profile from www.colorjetgroup.com. SOFTJET GRAND Page 20 of 50... -
Page 22: Ink Filling
Note: Please make sure that connectors are attached as per the above shown diagram to avoid the ink overflow situation. Now, pumps start working and ink start moving in the ink pipes. When the ink filled in the sub tanks, pumps get automatically stopped. SOFTJET GRAND Page 21 of 50... -
Page 23: Loading Fabric
Step 3: Insert the shaft into the fabric roll. Step 4: After inserting the fabric roll, fill air into the shaft using the Air Gun, as shown below: Air Filling Fig 22: Filling Air SOFTJET GRAND Page 22 of 50... - Page 24 After adjusting the dancing bar pressure adjusting the pinching roller pressure which must be 7 bars. In case, pressure goes up or down then use the pinching roller knob to adjust the pressure, as shown below: Fig 24: Adjusting the Pinching Roller Pressure SOFTJET GRAND Page 23 of 50...
- Page 25 Step 6: Load the fabric as per the path given below: Fig 25: Defining the Fabric Path The loaded fabric (from supply side) is shown in the image below: Fig 26: Displaying the Laded Fabric (From Supply Side) SOFTJET GRAND Page 24 of 50...
- Page 26 Step 8: Stick the fabric on the take-up and move the take-up roller to the reverse direction. Step 9: Set take-up in the Auto Mode. The loaded fabric (from take-up side) is sown in the image below: Fig 28: Displaying Loaded Fabric on the Take-Up Roller SOFTJET GRAND Page 25 of 50...
-
Page 27: Head Installation
Step 3: Remove the Nozzle Cap from the Print Head (Refer to Fig 30). Note: Don’t put the Print Head (nozzle facing) on the rough or dusty surface. Step 4: Mount the Print Head in the slot on the Head Plate (Refer to Fig 30). SOFTJET GRAND Page 26 of 50... - Page 28 Note: Carefully perform the above step to avoid the chances of ink spilling. Additionally, perform the same action for all colors and release ink up to 5ml. Step 9: Simultaneous, release the purging button and cap the Air Releasing Pipe. SOFTJET GRAND Page 27 of 50...
- Page 29 Step 12: Check whether the Waste Bottle is attached or not. Step 13: Perform the Head Purging for all colors. Step 14: Perform the Nozzle Test to check the nozzle status of all the Print Heads. Now, the Print Head is installed. SOFTJET GRAND Page 28 of 50...
-
Page 30: Head Voltage Settings
Fig 36: Setting the Base Voltage Value The left and right base voltage values of each color Print Head must be matched with the values printed on the same color Print Head. SOFTJET GRAND Page 29 of 50... -
Page 31: Head Height Adjustment
Now, the head voltage gets set. Head Height Adjustment In SOFTJET GRAND, head height can be adjusted using the Head Height knob, as shown below: Fig 38: Adjusting the Head Height To adjust the head height, move the knob in clock-wise or anti-clockwise direction as per the requirements or media thickness. -
Page 32: Head Alignment
Based on the above figure, the list of mechanical checks appears and as per these checks, Print Heads need to be adjusted with the help of tools provided. The list of mechanical checks is given as below: • Angle Check • Vertical Check SOFTJET GRAND Page 31 of 50... - Page 33 When you press the Next button, you are redirected to the Calibration Wizard, as shown in the below image: Fig 41: Displaying the Printer Calibration Options Let’s discuss each test and their result one by one in the upcoming section. SOFTJET GRAND Page 32 of 50...
-
Page 34: Mechanical Checks
Fig 42: The Good Quality Angle Test When there is angular error in a head’s placement, the line formed by a particular Print Head will appear broken, as shown in the image below: Fig 43: Defect in Angle Check SOFTJET GRAND Page 33 of 50... -
Page 35: Vertical Check
Right to Left test print at“0” position. In case of error in the Bi- Direction offset, the Left to Right and Right to Left print would align at some other point on the scale. SOFTJET GRAND Page 34 of 50... - Page 36 “0” position, but at some other point on the calibration scale. The position at which the test head aligns perfectly with the reference head, indicates the error in position. SOFTJET GRAND Page 35 of 50...
- Page 37 The Left Calibration Result is shown in the image below: Fig 46: The Horizontal Left Check The Right Calibration Result is shown in the image below: Fig 47: The Horizontal Right Check SOFTJET GRAND Page 36 of 50...
-
Page 38: Step Calibration
Step 3: Click on the => icon (Refer to Fig 49) on the Step Calibration window. The correction value result will be reflected in the Step field (Refer to Fig 49). The same step value will also be displayed in the Steps field on the Quick Access Toolbar. SOFTJET GRAND Page 37 of 50... -
Page 39: Save To Printer
On clicking the Save To Printer option, all the previously made settings get saved on the Main Board. In case, printer manager needs to reinstall, then you can retrieve all the settings using the Load From Printer option. SOFTJET GRAND Page 38 of 50... -
Page 40: Do's And Don't
• Don’t apply much pressure on the Print Head during installation • Don’t carry out head alignment and calibration without using magnifying lens • Avoid head damage due to media and Print Head confliction SOFTJET GRAND Page 39 of 50... -
Page 41: Maintenance
Using the above window, user can set cleaning parameters like X distance, wiper position, wiper speed, and more. Additionally, user can also clean a particular color head or all heads by selecting the option shown in the above image. SOFTJET GRAND Page 40 of 50... - Page 42 Leaving head plate uncapped while printer off, will block nozzles permanently due to ink solidification. • Color bar should always be enabled while printing and idle spray should always be enabled for long life of the Print Head. SOFTJET GRAND Page 41 of 50...
-
Page 43: Troubleshooting Guide
Case 7: Emergency Button is Pressed a) Release the Emergency Button, if pressed. b) Check 220V on emergency. 8. Default Jumpers are not Case 8: Place Jumpers on the Main Board, if placed in Main Board not available. SOFTJET GRAND Page 42 of 50... - Page 44 7. Vibration in movement:- Case 7: Perform the following actions as per o LM block is wear out the requirements: o Incorrect pulley a) Replace the LM block alignment b) Align the pulley with respect to Belt SOFTJET GRAND Page 43 of 50...
- Page 45 Take-Up Not 1. No signal to Take-Up Motor Case 1: Loose connection in Servo Driver Working and PLC. 2. Take-Up motor movement is Case 2: Remove the Take-Up roller and jammed observe it’s movement. SOFTJET GRAND Page 44 of 50...
- Page 46 Case 4: Replace the ink/air tub or tighten if leakage/cut/loose on fitting loose. joints 5. Vacuum pump connector is Case 5: Tighten the Vacuum Pump Conn- loose/open from MMCB ector or close from MMCB. SOFTJET GRAND Page 45 of 50...
-
Page 47: Error Handling
Kindly refer to the error code 04020021. USB and common earthing related 40020001 Data header error issue. Kindly refer to the error code 40020009 Image too width 400100D1. 4002000C Head board Step 1 Initialization problem. SOFTJET GRAND Page 46 of 50... - Page 48 ALE 8 Abnormal pulse control command Input frequency of pulse command exceeds the limit of it allowable setting value. ALE 9 Excessive Deviation Position control deviation value exceeds the limit of it allowable setting value. SOFTJET GRAND Page 47 of 50...
- Page 49 EE-PROM write-in and read-out is in error. ALE 18/ALE I Serial Communication Time Out RS-232/485 serial communication time out. ALE 19/ALE J Motor Type Error The motor capacity does not match the Servo Drive setting. SOFTJET GRAND Page 48 of 50...
- Page 51 For Any Query Please Contact Us www.colorjetgroup.com Call us on +91-120-4548195 Email on info@colorjetgroup.com For Ink Enquiry:- sales@colorjetgroup.com For Support:- support@colorjetgroup.com...
Need help?
Do you have a question about the SOFTJET GRAND and is the answer not in the manual?
Questions and answers