Table of Contents
Advertisement
Quick Links
Advertisement
Table of Contents

Related Manuals for Intense SNIPER XC PRO


Summary of Contents for Intense SNIPER XC PRO
- Page 1 2 0 2 4 / / S N I P E R X C P R O MANUAL...
-
Page 2: Table Of Contents
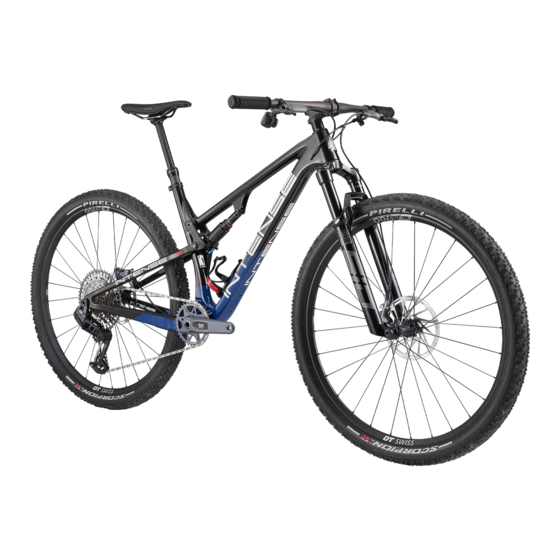
Register your bike at: www.intensecycles.com/pages/registerbike THE INTENSE SNIPER XC PRO Whether you're racing cross-country at an elite level against the world's best, taking on XC epics, or just hammering around your local XC loop, the Sniper XC is for you. With the Sniper XC, we have created a top tier full-suspension XC bike that is true to the INTENSE spirit. - Page 3 From the early days of INTENSE, when founder Jeff Steber worked alone in his garage, to today with our crew of talented people working in our Temecula, CA...
-
Page 4: Components
06 Rear shock Saddle (seat) Spoke Dropper seatpost Tire Seatpost clamp Thru axle Model: INTENSE SNIPER XC PRO Frame Travel: 100mm Compatible Forks: 100mm (MAX 120mm Travel) Headtube/Headset: Integrated IS41/28.6, IS52/40 Frame Seattube Dimensions: ID 31.6mm (ID = Inside Diameter) Seattube Diameter: 31.6mm... -
Page 5: Setup Guide
INTENSECYCLES1993 WE ARE HERE TO HELP! If at any time you feel unsure about what you are doing then please contact us at INTENSE or seek the help of a professional mechanic at your local bike shop. INTENSE +1 951.307.9211... -
Page 6: Remove Wheels And
S T E P 1 REMOVE WHEELS & PUT BIKE IN STAND When you first open your bike box you will find an accessory/tool box and the bike itself. Carefully locate the tool box and remove the wheels from the bike box and put to one side. -
Page 7: Install Handlebars
S T E P 2 INSTALL HANDLEBARS Remove any packaging on the front of the bike, then spin the handlebar stem 180º so that the stem and forks are facing forward (A). Make sure that the forks are the correct way around – the front brake caliper should be on the left (non-drive) side of the bike, with the fork arch facing forward. -
Page 8: Install Rear Derailleur
S T E P 3 INSTALL REAR DERAILLEUR Move to the rear of the bike and cut off any zip-ties or packaging from the rear derailleur and chain (A). Locate the derailleur battery from the SRAM AXS Power Pack Box, remove the red cover from the battery (B). -
Page 9: Install Rear Wheel
S T E P 4 INSTALL REAR WHEEL Take out the rear brake pad spacer (A). Once removed be careful not to squeeze the brake lever until the rear wheel is in position. The rear axle features an integrated pull-out lever that sits inside the axle body. - Page 10 S T E P 4 C O N T I N U E D . . . Once everything is lined up and in position, reinsert the axle and tighten using the integrated lever on the non-drive side (left), turning clockwise until tight (G). Reinstall the lever within the axle by pushing it firmly back in place.
-
Page 11: Install Front Wheel
S T E P 5 INSTALL FRONT WHEEL Remove all packaging from the front wheel making sure the hub end caps are still in the correct place and that they haven’t been pulled off by accident. If they do come off, just press them back into position. - Page 12 S T E P 7 WIRELESS GEARING SET UP & SHIFTING INSPECTION The Sniper XC Pro comes supplied with SRAM’s AXS wireless shifter and rear derailleur. Your wireless S T E P 6 system should come paired, if it is not you can INSTALL PEDALS perform the following steps.
- Page 13 S T E P 8 ADJUST HEADSET & HANDLEBARS Your bike’s headset comes ‘pre-loaded’ from our factory but it is good practice to check it. If it feels a little loose then undo the stem clamping bolts slightly using a using a 4mm Allen key (A). Then gently tighten the top cap bolt 2-4Nm using a 5mm Allen key (B).
- Page 14 S T E P 9 ADJUST SADDLE HEIGHT Set the height of your saddle (seat) with your seatpost in its fully extended position. Using a 4mm Allen key loosen the seatpost clamp and adjust the seatpost to the correct height. A good base measurement is to stand next to your bike in your riding shoes, putting your hand against the top of your hip bone (A).
- Page 15 I M P O R T A N T N O T E : SNIPER XC PRO REAR BRAKE ROUTING After assembly, it is important to ensure the brake line is positioned 38mm (1.5") away from the bottom surface of the downtube. This allows enough slack in the cable so they do not come under tension when the suspension compresses.
- Page 16 You are looking for approximately 20% sag, so for the 100mm (3.9”) fork that comes on the Sniper XC PRO that measurement should be around 20mm (.79”). Adjust the pressure in your forks until you reach the correct sag.
- Page 17 S T E P 1 3 REAR SUSPENSION SETUP LOCKOUT THE REBOUND DIAL (2.5MM ALLEN LEVER SCREW) IS LOCATED UNDERNEATH THE LOCK-OUT LEVER. SEE BELOW. Use the chart below to calculate the air pressure required for your weight. Sag for the rear shock should be 30%.
-
Page 18: Brake Lever
S T E P 1 4 FINAL CHECK You are almost ready to go riding. Now is a good time to check over your bike to make sure that everything looks correct – all packaging is removed, bolts are all tightened to the correct torques, etc. -
Page 19: Maintenance Schedule
S N I P E R X C P R O B I K E C A R E GEOMETRY CHARTS MAINTENANCE SCHEDULE SNIPER XC SIZE LARGE SHOWN You have purchased a high-performance bicycle which requires a certain level of service and maintenance to sustain the level of performance your frame was 72.6º... -
Page 20: Carbon Care
Look for cracks, dents or loose fibers. If you discover damage in any degree it’s best to have your frame inspected by a qualified INTENSE, LLC dealer. Any direct impact to the frame can cause serious structural damage. -
Page 21: Parts Listing
These drawings, any and all specifications and data herein contained and the products manufactured in accordance with the said drawings, specifications and data are the exclusive property of Intense Cycles of Temecula, CA (USA), in accordance with the provisions of the National laws and International Conventions TEL: 1.951.296.9596... -
Page 22: Parts Kit
S N I P E R X C P R O IT150125 AXLE KIT REAR CNC 148X12 BOOST WITH HIDDEN LEVER PARTS KITS 130899 Axle Rear 148x12mm Boost Blk with Hidden Lever IT150002 BEARING REBUILD KIT LOWER SNIPER XC 130845 Crush Tube Sniper Lower Link 430008 Bearing 6802-2RS-MAX... - Page 23 S N I P E R X C P R O IT340343 SEAT COLLAR BOLTED 36.1 SNIPER XC PARTS KITS CONTINUED... 340343 Sniper Seat Clamp IT150004 HARDWARE KIT UPPER 130828 Axle Pivot Sniper 130829 Bolt Shoulder Sniper 130830 Spacer Upper Axle Sniper 19mm OD x 15mm ID x 2.5mm 130832 Spacer Upper Axle 15mm OD x 10mm ID x 2.5mm Sniper 130833...
-
Page 24: Torque Specifications
4Nm / 36in-lbs 16 Nm / 140 in-lbs Torque Notes: M8 HEX, 7 Nm / 60 in-lbs 2024 Sniper XC Pro M5 HEX, 14 Nm / 125 in-lbs 4/18/2024 UDH Derailleur Cap: 25 Nm / 221 in-lbs Axle (non-drive side): 11 Nm / 100 in-lbs... - Page 25 2 0 2 4 / / S N I P E R X C P R O MANUAL...
Need help?
Do you have a question about the SNIPER XC PRO and is the answer not in the manual?
Questions and answers