Table of Contents
Advertisement
Quick Links
Advertisement
Table of Contents

Related Manuals for Intense RECON MX


Summary of Contents for Intense RECON MX
- Page 1 RE CO N M X MANUAL...
-
Page 2: Register Your Bike
REGISTER YOUR BIKE Don’t forget to register your bike: www.intensecycles.com/pages/registerbike TECHNICAL ASSISTANCE We are here to help. If you need any technical assistance, please contact us: techcenter@intensecycles.com US: 951-307-9211... -
Page 3: Table Of Contents
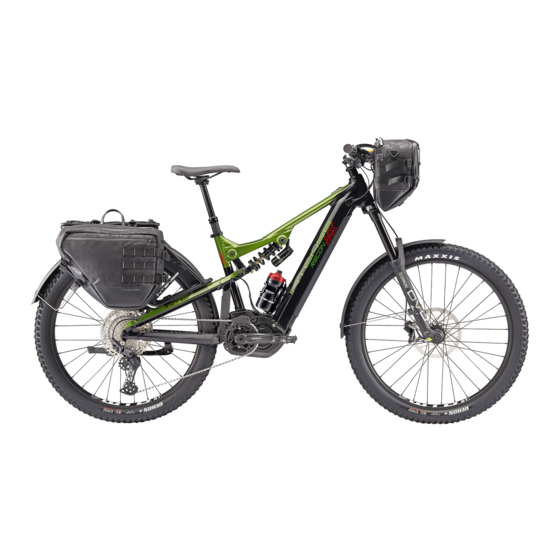
CONTENTS Register your Bike INTENSE bicycle identification information Welcome to INTENSE Know your Recon MX How to use your Set-up guide Recon MX Remove bike from box 48 Charging the battery 13 Charge the battery 51 Turning on your 15 Install the rear derailleur... - Page 5 Welcome to INTENSE, enjoy your experience. THE INTENSE RECON MX Inspired by adventure, the Recon MX is unlike any other eBike you've ridden. Built on 27.5" wheels and with a custom rack and bag set this bike is ready for the ultimate adventure.
-
Page 7: Know Your Recon Mx
K N O W Y O U R R E C O N M X A L L O Y COMPONENT BREAKDOWN Grips Rear Bags Handguards Rear Luggage mounts Shifter Cassette Digital display panel Kickstand Handlebars Rear derailleur Front bag mount Chain Stem Chainring... -
Page 9: Set-Up Guide
GO TO INTENSE.COM/PAGES/TECHVIDEOS WE ARE HERE TO HELP! If at any time you feel unsure about what you are doing then please contact us at INTENSE or seek the help of a professional mechanic at your local bike shop. INTENSE +1 951.307.9211... -
Page 11: Remove Bike From Box
S T E P 1 REMOVE BIKE FROM BOX When you first open your bike box you will find the accessory box (including toolkit), battery charger and bike itself (battery is already installed in the bike). First, remove the front wheel and the accessory boxes and put to the side (A). - Page 12 USE YOUR KEY TO UNLOCK THE BATTERY ON BIKE CHARGE PORT...
-
Page 13: Charge The Battery
S T E P 2 CHARGE BATTERY Once bike is in bike stand, remove remaining packaging. The battery is supplied in sleep mode. To wake it up you need to connect it to your battery charger. You can do this with the battery in your bike by plugging the charger into the port located above the motor near the lower link. - Page 15 S T E P 3 CHECK REAR DERAILLEUR The rear wheel comes installed on the Recon MX so all you need to do is check the torque on the rear wheel axle. Using your 5mm allen on your torque wrench tighten the rear axle and torque to 11Nm (A).
-
Page 17: Connecting The Motor Mode Selector And Display Wires
S T E P 5 CONNECTING THE MOTOR MODE SELECTOR AND DISPLAY WIRES Included in your accessory box is a special SHIMANO connector tool (the TL-EW300 tool). Use this tool to connect the wires to your handlebar display. The tool helps to protect the plug and wire from damage. -
Page 19: Install Front Fender
S T E P 6 INSTALL FRONT FENDER Start by removing the front fender from the rear wheel packaging by cutting the two zip ties (A). Set front wheel aside and remove remaining packaging on fender. Locate the front fender strut clamps and fork rubber shims located in the black mesh bag that came with your bike (B). -
Page 21: Install Front Wheel
S T E P 7 INSTALL FRONT WHEEL Remove all packaging from the front wheel making sure the hub end caps are still in the correct place and that they haven’t been pulled off by accident (A). If they do come off, just press them back into position. - Page 22 PEDAL LABEL...
-
Page 23: Install Pedals
(being careful not to trap anything in the chain or wheel). If you are having any issues with the gears, please check out our Tech Video series on the INTENSE website. -
Page 25: Adjust Headset
S T E P 1 0 ADJUST HEADSET & BARS Remove your bike from the bike stand and set on the ground for this step. You want to ensure that your headset moves easily with a very slight amount of resistance, but with no play. -
Page 27: Check Tire Pressure
S T E P 1 2 CHECK TIRE PRESSURE The ideal tire pressure setting is determined by three factors: rider weight, type of terrain and the desired balance of comfort and traction. The pressures here are a suggested starting point and can typically range +/- 5psi. -
Page 29: Install Handlebar Bag
S T E P 1 5 INSTALL HANDLEBAR BAG Locate the front handlebar bag mount inside the handlebar bag (A). Loosen and remove the two handlebar mount clamp screws using a 4mm allen (B). Then place open handlebar mount clamp around the handlebars ensuring you do not pinch any cables (C). -
Page 31: Install Rear Pannier Bags
S T E P 1 6 INSTALL REAR PANNIER BAGS Remove packaging from bags. Loosen the bracket at the bottom of the bag by turning the dial (A). Place that bracket over the rack to start and once in place, push down on top two bag mount brackets until they click on (C). - Page 32 RECON RACK, FENDER AND BAG SYSTEM COMPATIBILITY This rack, fender and bag system was Do not exceed maximum loads. Always specifically developed for the INTENSE ensure load is distributed evenly. A loaded rack or bags will influence Recon MX. handling and braking ability.
- Page 33 Check that all accessories and bags introduce a risk to your own safety or are attached according to manufactures the safety of others. INTENSE DOES NOT authorize any modifications, and instructions and do not have any loose or dangling straps that could get caught therefore, cannot accept liability for any in spokes or chain.
- Page 34 GENTLY PUSH THE ALIGN THE TABS AND BATTERY UPWARDS INSERT AT THE BOTTOM THERE WILL BE AN AUDIBLE CLICK AS THE BATTERY LOCKS ITSELF IN TO PLACE...
-
Page 35: Install Battery
S T E P 1 8 INSTALL BATTERY Once your battery is fully charged (see page 48) you need to reinstall it back into the bike. Install the battery by inserting the lower tab of the battery into the tab recess hole on the frame of the bike at an angle of approximately 45º... - Page 36 FO R K : DVO D I A M O N D E3 SUGGESTED STARTING POINTS FOR SETTING FORK SAG RIDER WEIGHT (lbs) (kgs) PRESSURE (psi) 120-130 54-59 80-85 130-140 59-64 80-85 140-150 64-68 85-90 150-160 68-73 85-90 160-170 73-77 90-95 170-180 77-82...
-
Page 37: Front Suspension Set-Up
ADJUSTING AIR PRESSURE (DVO): The DVO fork on the Recon MX has just one main air chamber on It is important to get good base the left leg. The Schrader valve (car tire type) can... - Page 38 S T E P 2 0 SETTING FORK SAG You now need to measure the ‘sag’ of the fork. Sag is important as it allows the fork to work properly. With the help of a friend sit on the bike in a normal riding position in full riding gear, pedals level.
- Page 39 S T E P 2 1 SETTING FORK REBOUND The rebound setting on your fork is how quickly your suspension reacts to impacts and returns to its normal position after compression. Your rebound settings can vary depending on the terrain you are riding on, your riding style, etc.
- Page 40 S T E P 2 1 C O N T I N U E D . . . FRONT SUSPENSION SET-UP FO R K : DVO D I A M O N D E3 SUGGESTED REBOUND SETTINGS RIDER WEIGHT (lbs) (kgs) # of clicks 120-130...
- Page 41 HIGH AND LOW SPEED COMPRESSION ADJUSTERS We recommend that you refer to the manufacturer’s website or instruction manual for full technical details and further information on the specific fork (or rear shock) that you have on your bike. www.dvosuspension.com Two of the most common adjustments are High and Low Speed Compression.
-
Page 42: Rear Suspension Set-Up
First check the spring rate-chart on this page to make sure that the spring fitted on your Recon MX is within range for your rider weight. If the spring is too hard or too soft you will need to change it. Please see our Tech Videos section on our website to see how to change the coil on your shock. - Page 43 S T E P 2 3 SETTING SHOCK SAG Just as you did with your forks you now need to set the sag on your rear shock. The optimal sag on your rear shock is 30% of the piston’s movement inside the shock body (stroke).
- Page 44 S T E P 2 4 SETTING SHOCK REBOUND Just like for your fork, the rebound setting on your rear shock is how quickly it reacts to impacts and returns to its normal position after compression. Your rebound settings can vary depending on the terrain you are riding on, your riding style, etc.
-
Page 46: Intense Bicycle Identification
G E T T I N G T O K N O W Y O U R R E C O N M X INTENSE BICYCLE IDENTIFICATION It’s important to keep track of your Recon MX’s serial number as well as the serial numbers of its important components for warranty and replacement purposes. - Page 47 EXAMPLE SERIAL NUMBER SHEET. PLEASE REFER TO YOUR ACCESSORY KIT FOR YOUR OWN SERIAL NUMBER SHEET KEY CODE KEY PROFILE...
-
Page 48: How To Use Your Recon Mx
H O W T O U S E Y O U R R E C O N M X GET CHARGED The battery in your Recon MX is not fully charged at the time of purchase, so before you can use your new bike you will need to charge it using the supplied SHIMANO battery and its dedicated charger. - Page 49 If you leave the battery without charge it will deteriorate. If your Recon MX will not be ridden over an extended period of time, store it away with approximately 70% battery capacity remaining. Also take care not to let the battery become completely empty by charging it every six months.
- Page 50 CHARGER INFORMATION CHARGER LED LAMP AS CHARGING STARTS THE LED LAMP ON THE CHARGER LIGHTS UP. LIT UP Charging (and within 1 hour after completion of charging) BLINKING Charging Error TURNED OFF Battery disconnected (1 hour or more after completion of charging)
-
Page 51: Turning On Your
TURNING ON YOUR RECON MX eBIKE The power ON/OFF button is located on the toptube, toward the front of your bike. It is easy to find and simple to use. Press and hold the power button until you hear an audible ‘beep’. The green LED lights on the Power ON/OFF button will come on at this stage, and the computer display on your handlebars will be activated. -
Page 52: Using The Power Modes
USING THE POWER MODES Your Recon MX motor comes with three main assist modes: BOOST, TRAIL and ECO, and a fourth WALK mode. You can easily toggle between the three modes using the Assist Switch that’s located on the left-hand side of your handlebars. Assistance only starts when you begin to pedal. - Page 53 BOOST BOOST Mode is a lot of fun, especially on long steep climbs and if you’re looking to minimize rider effort for a fantastic riding experience. BOOST will consume the battery the fastest. TRAIL TRAIL mode is the primary mode you will find yourself using for most single track riding.
- Page 54 CHANGING THROUGH THE MODES You only get assistance from the motor when you start to pedal. The motor ‘kicks in’ almost immediately with a nice, smooth transition. On the Assist Switch controller use the up and down arrows to move between the different modes.
- Page 55 In a safe area, away from traffic, go through the different modes as you pedal around, feeling the different levels of assistance. As you change between the modes you can keep pedaling, and don’t forget to try the different modes in different gears to get the best feel for your bike.
- Page 56 A. Battery level indicator Displays the current battery level. B. Gear position Displays the current set gear position. Only displays when electronic gear shifting is in use. The Recon MX comes with mechanical shifting as standard. C. Assist gauge Assistance output indicator.
-
Page 57: The Display
BATTERY LEVEL INDICATOR The battery level indicator is located in the top left of the display screen. You can monitor the battery level as you ride. BATTERY LEVEL INDICATOR ON DISPLAY UNIT BATTERY LEVEL INDICATION BATTERY LEVEL 81% – 100% 61% –... -
Page 58: Shimano E-Tube App
‘profiles’, which we believe to be the perfect level of power and assistance in each of the modes for this model of bike. The Recon MX (SHIMANO E-7000 motor) comes with one pre-set profile. For those of you who would like to fully customize your bike’s settings to match your riding style SHIMANO’s... - Page 59 HOW TO ACCESS THE PRE-SET CUSTOM PROFILE Customize’ option. Using the selection button on the bottom of the display, select ‘Assist Customize’. Using the mode selectors on the left of the handlebar, select your desired ‘Profile’. Setting Assist Customize RD protection reset Display speed MENU Assist customize...
-
Page 60: Troubleshooting
TROUBLESHOOTING BATTERY LED ERROR INDICATORS System errors and similar warnings are indicated by the battery LED through various lighting patterns. BATTERY ERROR INDICATOR LIGHTING PATTERN ERROR INDICATION TYPE SYSTEM ERROR TEMPERATURE PROTECTION SECURITY AUTHENTICATION ERROR CHARGING ERROR BATTERY MALFUNCTION NO LIGHT LIT UP BLINKING... - Page 61 INDICATION CONDITION RECOVERY Communication error with the bicycle Make sure that the cable is not loose or improperly connected. system. If the situation does not improve, contact the place of purchase. If the temperature exceeds the guaranteed operating Leave the battery in a cool place away from direct sunlight until the internal temperature of the battery decreases sufficiently.
- Page 62 WARNING AND ERROR MESSAGES ON THE CYCLE COMPUTER DISPLAY Warning and Error messages are displayed at the top in the middle of the computer display screen. These messages usually start with a ‘W’ and help you identify the problem. Some of the most common error messages can be found printed on the inside of the battery hatch door.
- Page 63 WARNING MESSAGE ON THE DISPLAY SCREEN. THIS DISAPPEARS ONCE THE ERROR IS FIXED. OPERATIONAL RESTRICTION REMEDY Power assisrtance may be lower Stop using the assist function until the temperature of the drive unit drops. If the situa- than usual. tion does not improve contact the place of purchase. The maximum speed up to which power Check that the speed sensor is porperly installed.
-
Page 64: Maintenance
If you discover damage to any degree it’s best to have your frame inspected by a qualified INTENSE Recon MX dealer. Any direct impact to the frame can cause serious structural damage. • Use high-grade waterproof grease on seatpost, BB and headset bearing contact areas. - Page 65 RE CO N M X MAINTENANCE SCHEDULE ACTION EVERY 2000 4000 RIDE MILES MILES MILES 1MTH 6 MTHS 1 YR TIRES CHECK AIR PRESSURE, INSPECT TREAD AND SIDEWALLS FOR TEARS AND PUNCTURES CHAIN BRUSH OFF AND LUBRICATE BRAKES SQUEEZE BRAKES AND CONFIRM FUNCTION GENERAL CLEAN COMPLETE BIKE OF MUD AND DEBRIS HEADSET...
- Page 66 DVO DIAMOND E3 27.5", 160MM, 44MM RAKE DVO JADE R COIL, 140MM TRAVEL, 185 X 55MM, SHOCK SPRING 450LB S/M AND 550LB LG/XL WHEELSET WTB ST I35 TCS 27.5", 35MM FRONT/REAR, INTENSE E-MTN ALLOY HUBS REAR DER. SHIMANO RD-M5100 DEORE 11-SPEED SHIFTER SHIMANO SL-M5100 DEORE 11-SPEED...
-
Page 67: Geometry Chart
73.25˚ These drawings, any and all specifications and data herein contained and the products manufactured in accordance with the said drawings, specifications and data are the exclusive property of Intense Cycles of Fork Axle to Crown: 573.7 mm Temecula, CA (USA), in accordance with the provisions of the National laws and International Conventions UNTOLERANCED LENGTH DIMENSIONS (mm) for the protection of Intellectual Property. - Page 68 EXPLODED VIEW AND PARTS RECON MX ITEM ITEM PART DESCRIPTION QTY. TORQUE SPEC. NUMBER Crush Tube Lower Link Crush Tube 130754 Bearing Cap 24mm OD 130765 Cap Bearing Blk Bearing Cap 130778 Cap Bearing Blk Bolt Shoulder 130785 Bolt Shoulder Fine Thread...
- Page 69 Crush Tube Recon 130847 Crush Tube Top Link Recon Forged Lower Link 130848 Forged Lower Link Recon, Blk Axle Lower 130850 Axle Lower Pivot Recon 20 Nm / 175 in-lbs Crush Tube Recon 130851 Crush Tube Top Link Recon Pivot Axle Spacer 130860 Pivot Axle Spacer Drive Unit Bolt...
- Page 70 EXPLODED VIEW AND PARTS. RECON MX CONTINUED..ITEM ITEM PART DESCRIPTION QTY. TORQUE SPEC. NUMBER Hanger Hardware 410070 Hanger Stop, M4 x 8 x 10mm OD 2 Nm / 18 in-lbs FHCS M4 x 12 410080 FHCS, Flat Head, M4 x 0.7 x 12...
- Page 71 Battery Mount BT-E8035L, 504 Wh Switch: On/Off EW_SW100 Charging Port KEWCP100A Charging Port Rear Shock Recon MX Expert Rear Shock 185 x 55 Motor Shimano E7000 Front Triangle Recon Alloy Front Triangle: S/M,LG/XL Rear Triangle for Rack Recon Alloy Recon Rear Triangle...
-
Page 72: Parts Kits
R E C O N M X PARTS KITS LINK KIT LOWER HARDWARE IT150010 130778 Cap Bearing Blk TW 130785 Bolt Shoulder Fine Thread Blk TW 130795 Bolt Main Pivot 1.5T M16 Blk TW 130807 Spacer Cone Adjuster 8.3mm (Short) Blk TW 130850 Axle Lower Pivot 130860... - Page 73 FRAME PROTECTION KIT ZAE7 IT150164 500524 Flak Guard Chainstay 500525 Flak Guard Seatstay 500526 Flak Guard RT. Vert. Strut 500530 Clear Protector DT Cable Protection 500531 Clear Protector RT Cable Protection 500532 Clear Protector RT UDH LINK KIT UPPER HARDWARE IT150167 130765 Cap Bearing 24mm OD S275C Blk...
- Page 74 R E C O N M X PARTS KITS CONTINUED... SEAT COLLAR KIT IT150168 340339 Seat Clamp GW #CSC0040 WHEEL SENSOR KIT E-7000 IT150200 AAOT000579/SP-SS10 SP-SS10 Speed Sensor Magnet for Brake Rotor KSMDUE11A KSMDUE11A Speed Sensor Unit E7000 DISPLAY UNIT KIT SC-E7000 IT150201 KSCE7000AG Cycle Computer SC-E7000 Clamp Band Diameter 35.0MM...
- Page 76 16 Nm / 140 in-lbs M8 HEX 7 Nm / 60 in-lbs M5 HEX 14 Nm / 125 in-lbs 6-8 Nm / 53-70 in-lbs 16 Nm / 140 in-lbs M8 HEX 7 Nm / 60 in-lbs M5 HEX 14 Nm / 125 in-lbs M8 HEX 7 Nm / 60 in-lbs M5 HEX 14 Nm / 125 in-lbs 20 Nm / 175 in-lbs...
- Page 77 TORQUE SPECIFICATIONS Achieving correct torque is vital to ensuring the proper performance and function of the Recon MX frame. Failure to do so could result in suboptimal performance of your frame as well as premature wear and tear of individual parts. In addition to this chart, torque values are laser etched onto corresponding hardware for your reference.
-
Page 78: Declaration Of Conformity
I N T E N S E R E C O N M X M A N U A L DECLARATION OF CONFORMITY Recon MX intended for Off-road Use. Place and Date of issue of this THE MANUFACTURER Declaration of Conformity:... - Page 79 Phone: +1 (951) 307 9211 Customer Service: techcenter@intensecycles.com General Info: info@intensecycles.com INTENSE LLC 42380 RIO NEDO TEMECULA, CA 92590...
- Page 80 RECO N M X MANUAL...
Need help?
Do you have a question about the RECON MX and is the answer not in the manual?
Questions and answers