Bradley Terreon MF2939 Infrared Installation Manual
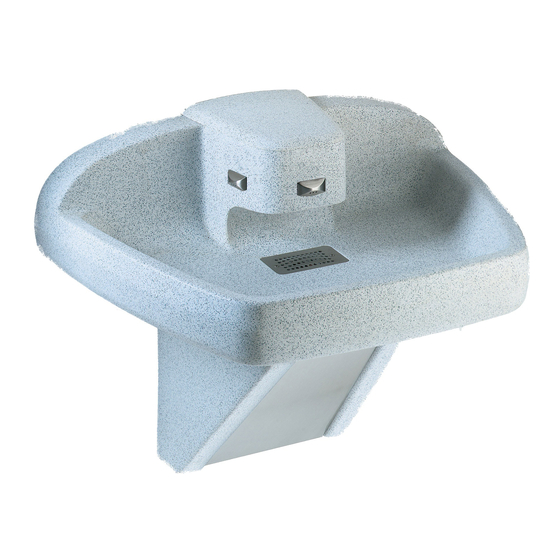
Tri-fount wall-hung washfountain with adaptive infrared
Hide thumbs
Also See for Terreon MF2939 Infrared:
- Parts & service manual (34 pages) ,
- Parts and service manual (39 pages)
Table of Contents
Advertisement
Quick Links
Water supply requires a flowing pressure of at least 20 psi, but no greater than 80 psi.
Make sure that all water supply lines have been flushed and then completely turned off before beginning
installation. Debris in supply lines can cause valves to malfunction.
Hardware supplied by installer must be appropriate for wall construction. Wall anchors used must have a
minimum pull-out rating of 1,000 lbs.
The adaptive infrared activation must be connected with a 12V DC plug-in adapter. Connections to 110 VAC
can cause personal injury and will result in damage to the electronics.
Read this entire installation manual to ensure proper installation. When finished with the installation, file this
manual with the owner or maintenance department.
Separate parts from packaging and make sure all parts are accounted for before discarding any packaging
material. If any parts are missing, do not begin installation until you obtain the missing parts.
Product warranties may be found under "Products" on our website at www.bradleycorp.com.
215-1177 Rev. T; ECO 19-00-009
© 2019 Bradley
Page 1 of 11
7/15/2019
Installation
MF2939 Infrared
Terreon
Wall-Hung Washfountain
with Adaptive Infrared
(Standard*, Juvenile* and OBC Height)
* Standard and Juvenile Height are ADA/TAS Compliant
Table of Contents
Supplies Required by Installer ........................................................2
Pre-Installation Information .............................................................2
Parts included with the Tri-Fount .....................................................3
Rough-Ins ........................................................................................4
Install Valve Assembly .....................................................................5
Install Pedestal Panels ....................................................................5
Assemble and Install Bowl ..............................................................6
Electrical and Supply Connections .................................................7
Check Operation .............................................................................8
Install Top Cover and Front Panel ...................................................8
Cleaning and Maintenance for Stainless Steel ...............................9
Troubleshooting - Solenoid Valve ................................................10
Thermostatic Mixing Valve Troubleshooting ..................................11
WARNING
IMPORTANT
Tri-Fount
®
..........................................9
®
P.O. Box 309
Menomonee Falls, WI 53052 USA
800 BRADLEY (800 272 3539)
+1 262 251 6000
bradleycorp.com
Advertisement
Table of Contents

Related Manuals for Bradley Terreon MF2939 Infrared


Summary of Contents for Bradley Terreon MF2939 Infrared
-
Page 1: Table Of Contents
Product warranties may be found under "Products" on our website at www.bradleycorp.com. P.O. Box 309 215-1177 Rev. T; ECO 19-00-009 Menomonee Falls, WI 53052 USA 800 BRADLEY (800 272 3539) © 2019 Bradley +1 262 251 6000 Page 1 of 11 7/15/2019 bradleycorp.com... -
Page 2: Supplies Required By Installer
• Pipe sealant and plumber’s putty • 110 VAC power source for 120VAC/12V DC plug in adapter supplied • OPTIONAL: Bradley recommends installing an electrical cut-off switch to the unit. This feature prevents accidental water delivery during regular maintenance and service. -
Page 3: Parts Included With The Tri-Fount
Separate all parts from packaging materials and ensure you have all the parts required for assembly. If any parts are missing, do not attempt to assemble the Bradley Terreon Wall-Hung Tri-Fount Washfountain until you obtain all parts. (3) 1/4” PLASTIC TUBING 3’... -
Page 4: Rough-Ins
25-1/4" * 23" * (641) 10" 18-1/2" * (584) (470) (254) Finished Floor Finished Floor * Subtract 1" from these dimensions for Ontario Building Code height or 4" for Juvenile Height Model. Bradley • 215-1177 Rev. T; ECO 19-00-009 7/15/2019... -
Page 5: Install Valve Assembly
Tighten the screws to secure the pedestal panels to Left Right Pedestal Pedestal the frame assembly. Panel Panel Bradley • 215-1177 Rev. T; ECO 19-00-009 7/15/2019... -
Page 6: Assemble And Install Bowl
Locknut Install strainer in the bowl drain using the two #10-24 x 1/2" flat socket head screws supplied. Connect the drain trap (supplied by installer) to the drain spud and drain line. Bradley • 215-1177 Rev. T; ECO 19-00-009 7/15/2019... -
Page 7: Electrical And Supply Connections
IR Sensor Connector (269-1608-DC) Harness Connector (S83-369B) Loosen the compression nuts. Push the sprayhead supply tubes firmly into the tube connectors until they are fully seated. Tighten the compression nuts by hand. Bradley • 215-1177 Rev. T; ECO 19-00-009 7/15/2019... -
Page 8: Check Operation
Secure the access panel to the top of the pedestal frame using the self- Access retaining screw. Panel Back Slot Tighten the screw to secure the bottom of the access panel in place. #10-32 x 3/8" Screw Bradley • 215-1177 Rev. T; ECO 19-00-009 7/15/2019... -
Page 9: Cleaning And Maintenance For Terreon
For complete instructions on this additional maintenance, visit bradleycorp.com. Repair Kits: Terreon repair kits are available. Contact your Bradley representative or distributor for part numbers and pricing. Repair kits are made to order and have a shelf life of 30 days. -
Page 10: Troubleshooting - Solenoid Valve
• reconnect to the adjacent valve and turn on the water supplies to the unit; • pass your hand in front of the sensor. If the station still fails to turn on, replace the sensor. Bradley • 215-1177 Rev. T; ECO 19-00-009 7/15/2019... -
Page 11: Thermostatic Mixing Valve Troubleshooting
198-014 Check Valve* 132-051 Retaining Ring* 118-319 Valve Body 146-079 U-Clip * Included with Prepack S65-326 Tempered Line Adapter Option Part no. S39-804 (replaces S59-4000 if tempered line is used) Strainer (173-028) Bradley • 215-1177 Rev. T; ECO 19-00-009 7/15/2019...
Need help?
Do you have a question about the Terreon MF2939 Infrared and is the answer not in the manual?
Questions and answers