Table of Contents
Advertisement
Available languages
Available languages
Quick Links
Range Hood
USER MANUAL
MVG30W8AST
Warning notices: Before using this product, please read this manual carefully and keep it for future
reference. The design and specifications are subject to change without prior notice for product
improvement. Consult with your dealer or manufacturer for details.
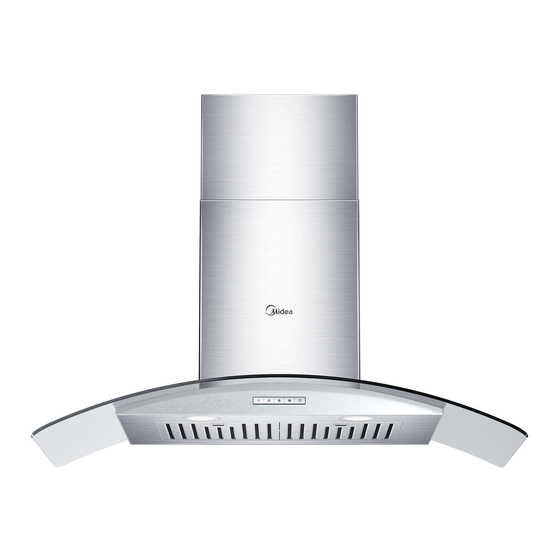
The diagram above is just for reference. Please take the appearance of the actual product as the
standard.
Advertisement
Chapters
Table of Contents

Related Manuals for Midea MVG30W8AST


Summary of Contents for Midea MVG30W8AST
- Page 1 Range Hood USER MANUAL MVG30W8AST Warning notices: Before using this product, please read this manual carefully and keep it for future reference. The design and specifications are subject to change without prior notice for product improvement. Consult with your dealer or manufacturer for details.
-
Page 2: Table Of Contents
THANK YOU LETTER Thank you for choosing Midea! Before using your new Midea product, please read this manual thoroughly to ensure that you know how to operate the features and functions that your new appliance offers in a safe way. -
Page 3: Safety Instructions
SAFETY INSTRUCTIONS Intended Use The following safety guidelines are intended to prevent unforeseen risks or damage from unsafe or incorrect operation of the appliance. Please check the packaging and appliance on arrival to make sure everything is intact to ensure safe operation. If you find any damage, please contact the retailer or dealer. - Page 4 INTENDED FOR RESIDENTIAL COOKING USE ONLY WARNING TO REDUCE THE RISK OF FIRE, ELECTRIC SHOCK OR INJURY TO PERSONS, OBSERVE THE FOLLOWING: • Use this unit only in the manner intended by the manufacturer. If you have questions, contact the manufacturer at the address or telephone number listed in the warranty.
- Page 5 TO REDUCE THE RISK OF A RANGE TOP GREASE FIRE: • Never leave surface units unattended at high settings. Boilovers cause smoking and greasy spillovers that may ignite. Heat oils slowly on low or medium settings. • Always turn hood ON when cooking at high heat or when flambeing food (i.e.: Crêpes Suzette, Cherries Jubilee, Peppercorn Beef Flambé).
-
Page 6: Specifications
• Always leave safety grills and filters in place. Without these components, operating blowers could catch onto hair, fingers and loose clothing. • The vent hood and filters should be cleaned frequently. SAVE THESE INSTURCTIONS SPECIFICATIONS Model MVG30W8AST Voltage/Frequency 120V~/60Hz Rated power 323W Lighting power 1.5Wx2... -
Page 7: Product Overview
PRODUCT OVERVIEW Components Ref. Qty. Product Components Hood Body,complete with: Controls, Light, Blower and Filter. Lower Decorative Chimney Upper Decorative Chimney The Activated Charcoal filter (optional) Grease filter Ref. Qty. Installation Components Screws 0.2'' x 1.97'' Wall Plugs Screws 0.17'' x 0.37'' Hood fixing bracket Chimney fixing bracket Qty. - Page 8 Dimensions unit: inch 11.38" 12.05'' 19.69'' MVG30W8AST 35.4" 13.11"...
- Page 9 Select Installation Type A. Vented Installation B. Non-Vented / Recirculation Installation A. Vented Installation • Roof Discharge This canopy hood is designed for venting through the roof or wall. A 6" round vent system is needed for installation (not included). The hood exhaust opening is 6"...
- Page 10 10.5" 2"min. 9.49" Vent and power Vents and electrical supply cable should be installed entry location 10.5" in the gray shaded areas to provide a clean finished look 20" min. Side Side cabinet cabinet 30" Centerline Cooking surface CAUTION • Vent system must terminate to the outdoors except for non-vented (recirculating) installations.
- Page 11 Hood Mounting Screw Installation: Determine and mark the centerline on the wall where the hood will be installed. 2 Select a mounting height between a minimum of 25.6'' and a suggested maximum of 29.53'' above the range to the bottom of the hood. Mark a reference line on the wall. 3 Tape template in place, aligning the template centerline and bottom of template with hood bottom line and with the centerline marked on the wall.
-
Page 12: Product Installation
PRODUCT INSTALLATION Wall Drilling And Bracket Fixing (2.36'') (2.36'') (2.36'') (2.36'') (3.15'') (3.15'') Chimney 17.64''-30.83'' 15.75"+15.35'' 4.69'' Vertical reference line As a first step, proceed with the following drawings: • A veritcal line up to the ceiling or up to the upper limit, at the center of the area in which the hood is to be fitted. - Page 13 Mark Points: • Mark a point (1) on the horizontal line D, 2.36" to the vertical reference line. • Repeat this operation on the other side, checking that the three marks are leveled. • Mark a point (2) on the horizontal line C, 2.36" to the vertical reference line. •...
- Page 14 IMPORTANT • The vent hood should be lifted and installed by 2 people to prevent injuries and potential damage. Right Wrong Install Duct and Insert Plug: • Install 6" duct over the flange on the fan body. • Use 2" wide metal tape to make an air tight seal between the duct and the fan body. •...
- Page 15 Summary of installation steps 4xScrews (ST 4.2*9.5) Plastic expansion pipes STEP 2 Screws(ST 5*50) STEP 1 2xScrews (ST 5*50) STEP 3 STEP 4 2xScrews(ST 4.2*9.5) STEP 5...
-
Page 16: Operation Instructions
OPERATION INSTRUCTIONS Speed Adjustment. (For Some Models) Light High Power • After plugging, buzz once to declare the hood is connected with electricity. After the connection: • Press the Power button, control motor power: under standby state, press this button, motor will run at low speed, and light for power and low speed button will be on;... -
Page 17: Cleaning And Maintenance
CLEANING AND MAINTENANCE Grease Filters CLEANING METAL SELF-SUPPORTING GREASE FILTERS • The filters must be cleaned frequently and can be washed in a dishwasher or a hot detergent solution. • Depress the latch to remove the filters. • Avoid bending the filters when washing, and allow the filters to completely dry before reinstalling (The color of the filter surface may change throughout the time but this has no influence to the filter efficiency). - Page 18 Lighting LIGHT REPLACEMENT Replacing the light modules • The entire light module must be replaced. • Before changing the light module(s), unplug the appliance or switch off the circuit breaker in the fuse box. 1. Remove the grease filter and carefully remove the 4 screws from each side on the opening (a Phillips head screwdriver will be needed to remove the screws).
-
Page 19: Trouble Shooting
TROUBLE SHOOTING Problem Possible reason Solution • The blades are blocked. Check the blades • The capacitor is damaged. Replace capacitor. • The motor is damaged. Replace motor. Light on, but motor does not work • The internal wiring of motor Replace motor. -
Page 20: Trademarks, Copyrights And Legal Statement --19
Midea may constitute trademark infringement or unfair competition in violation of relevant laws. This manual is created by Midea and Midea reserves all copyrights thereof. No entity or individual may use, duplicate, modify, distribute in whole or in part this manual, or bundle or sell with other products without the prior written consent of Midea. -
Page 21: Data Protection Notice
European Economic Area. Further information are provided on request. You can contact our Data Protection Officer via MideaDPO@midea.com. To exercise your rights such as right to object your personal date being processed for direct marketing purposes, please contact us via... - Page 22 © Midea 2023 all rights reserved...
- Page 23 Hotte De Cuisine MODE D’EMPLOI MVG30W8AST Avertissements : Avant d’utiliser ce produit, veuillez lire attentivement ce mode d’emploi et le garder pour une référence future. La conception et les spécifications sont sujettes à modification sans préavis aux fins d’améliorer le produit. Consultez votre fournisseur ou le fabricant pour plus de détails.
- Page 24 LETTRE DE REMERCIEMENT Merci d’avoir choisi Midea! Avant d’utiliser votre nouveau produit Midea, il faut lire attentivement ce mode d’emploi pour s’assurer que vous savez comment utiliser les caractéristiques et fonctions offertes par votre nouvel appareil en toute sécurité. SOMMAIRE LETTRE DE REMERCIEMENT -----------------------------------01 CONSIGNES DE SÉCURITÉ...
-
Page 25: Consignes De Sécurité
CONSIGNES DE SÉCURITÉ Usage prévu Les consignes de sécurité suivantes visent à prévenir les risques ou les dommages imprévus résultant d’une mauvaise utilisation de l’appareil. Veuillez vérifier l’emballage et l’appareil à l’arrivée pour vous assurer que tout est en parfait état afin de garantir un bon fonctionnement de l’appareil. - Page 26 DESTINÉ À UN USAGE RÉSIDENTIEL UNIQUEMENT AVERTISSEMENT POUR RÉDUIRE LES RISQUES D’INCENDIE, D’ÉLECTROCUTION OU DE BLESSURE, OBSERVEZ CE QUI SUIT : • N’utilisez cet appareil que de la manière prévue par le fabricant. Si vous avez des questions, contactez le fabricant à l’adresse ou au numéro de téléphone indiqué...
- Page 27 POUR RÉDUIRE LE RISQUE D’INCENDIE DE GRAISSE SUR LA CUISINIÈRE : • Ne laissez jamais les appareils de surface sans surveillance à des réglages élevés. Les débordements provoquent des fumées et des projections graisseuses qui peuvent s’enflammer. Faites chauffer • huiles lentement à...
-
Page 28: Caractéristiques
• La hotte et les filtres doivent être nettoyés régulièrement. CONSERVER CES CONSIGNES CARACTÉRISTIQUES Modèle MVG30W8AST Tension/fréquence : 120 V~/60 Hz Puissance nominale 323W Éclairage à del 1,5W x 2 Puissance d’entrée du moteur... -
Page 29: Vue D'ensemble De L'appareil
VUE D’ENSEMBLE DE L’APPAREIL Composants Réf. Qté. Composants du produit Corps de hotte, complet avec : commandes, lumière, ventilateur et filtre. Cheminée décorative inférieure Cheminée décorative supérieure Filtre à charbon actif (en option) Filtre à graisse Réf. Qté. Éléments d’installation Vis 0,2'' x 1,97'’... - Page 30 Dimensions unité : pouce 11.38" 12.05'' 19.69'' MVG30W8AST 35,4" (90 cm) 13,11" (33,3 cm)
- Page 31 Sélectionner le type d’installation A. Installation ventilée B. Installation sans ventilation/recirculation A. Installation ventilée • Évacuation par le toit Cette hotte est conçue pour être ventilée à travers le toit ou le mur. Un système d’évent rond de 6" (15,2 cm) est nécessaire pour l’installation (non inclus). L’ouverture d’échappement de la hotte est ronde de 6"...
- Page 32 10.5" 2" (5,1 cm) min. 9.49" Emplacement Les évents et les de l’évent et circuits électriques de l’entrée 10.5" doivent être du câble installés dans les d’alimentation zones grisées 20 min. afin d’obtenir une finition nette. Meuble Meuble latéral latéral 30"...
- Page 33 Déterminez et marquez l’axe central du mur où la hotte sera installée. 2 Choisissez une hauteur de montage comprise entre un minimum de 25,6'’ (65 cm) et un maximum suggéré de 29,53'’ (75 cm) au-dessus de la cuisinière jusqu’au bas de la hotte.
-
Page 34: Installation De L'appareil
INSTALLATION DE L’APPAREIL Perçage des murs et fixation des supports (2,36'' [6 cm]) (2,36'' [6 cm]) (2,36'' (2,36'' [6 cm]) [6 cm]) (3,15'' [8 cm]) (3,15'' [8 cm]) Cheminée 17,64''- 15,75''+15,35'' 30,83'' 4,69" (40 cm- (11,9 cm) (44,8 cm- 39 cm) 78,3 cm) Ligne de référence verticale... - Page 35 • Faites un point (1) sur la ligne horizontale D, à 2,36'’ (6 cm) de la ligne de référence verticale. • Répétez cette opération de l’autre côté, en vérifiant que les trois repères sont au même niveau. • Faites un point (2) sur la ligne horizontale C, à 2,36'’ (6 cm) de la ligne de référence verticale.
- Page 36 IMPORTANT • La hotte de ventilation doit être soulevée et installée par 2 personnes afin d’éviter les blessures et les dommages potentiels. Droite Incorrecte • Installez un conduit de 6" (15,2 cm)sur la bride du corps du ventilateur. • Utilisez du ruban métallique de 2" (5,1 cm) de large pour réaliser un joint étanche à l’air entre le conduit et le corps du ventilateur.
- Page 37 Résumé des étapes de l’installation 4 vis (ST 4,2*9,5) Tuyaux d’expansion en plastique ÉTAPE 2 Vis (ST 5*50) ÉTAPE 1 2 vis (ST 5*50) ÉTAPE 3 ÉTAPE 4 2 vis (ST 4,2*9,5) ÉTAPE 5...
-
Page 38: Consignes D'utilisation
CONSIGNES D’UTILISATION Réglage de la vitesse. (pour certains modèles) Éclairage Faible Moyen Élevé Marche/Arrêt • Après le branchement, une sonnerie retentit une fois pour indiquer que la hotte est branchée à l’électricité. Après le branchement : • Appuyez sur le bouton d’alimentation pour contrôler la puissance du moteur : en mode veille, appuyez sur ce bouton, le moteur fonctionnera à... -
Page 39: Nettoyage Et Entretien
NETTOYAGE ET ENTRETIEN Filtres à graisse NETTOYAGE DES FILTRES À GRAISSE MÉTALLIQUES AUTOPORTANTS • Les filtres doivent être nettoyés fréquemment et peuvent être lavés au lave-vaisselle ou avec une solution détergente chaude. • Appuyez sur le loquet pour retirer les filtres. •... - Page 40 Éclairage REMPLACEMENT DE LA LUMIÈRE Remplacement des modules d’éclairage • L’ensemble du module d’éclairage doit être remplacé. • Avant de remplacer le(s) module(s) d’éclairage, débranchez l’appareil ou coupez le disjoncteur dans la boîte à fusibles. 1. Retirez le filtre à graisse et retirez soigneusement les 4 vis de chaque côté de l’ouverture (un tournevis cruciforme est nécessaire pour retirer les vis).
-
Page 41: Résolution Des Problèmes
RÉSOLUTION DES PROBLÈMES Problème Cause possible Solution • Les pales sont bloquées. Vérifiez les pales. • Le condensateur est Remplacez le condensateur. endommagé. La lumière s’allume, • Le moteur est endommagé. Remplacez le moteur. mais le moteur ne fonctionne pas •... -
Page 42: Marques, Droits D'auteur Et Déclaration Légale
Le logo , les marques verbales, le nom commercial, la présentation et toutes les versions de ces éléments sont des propriétés précieuses de Midea Group ou de ses sociétés affiliées (« Midea »), auxquelles sont rattachés des marques, des droits d’auteur et d’autres droits de propriété... -
Page 43: Avis De Protection Des Données
économique européen. Vous pouvez obtenir plus d’informations sur demande. Vous pouvez contacter notre délégué à la protection des données à l’adresse suivante : MideaDPO@midea.com. Pour exercer vos droits tels que le droit d’opposition au traitement de vos données personnelles à des fins de marketing direct, veuillez nous contacter à l’adresse suivante MideaDPO@midea.com. - Page 44 © Midea 2023 tous droits réservés 16173000A23827 V1.0...
Need help?
Do you have a question about the MVG30W8AST and is the answer not in the manual?
Questions and answers