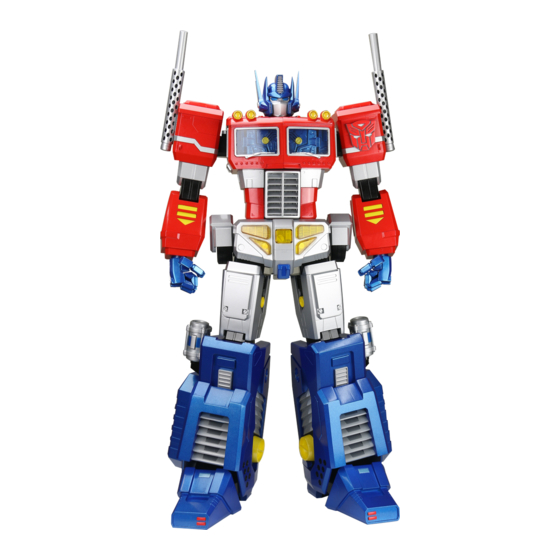
Agora Models OPTIMUS PRIME Build Instructions
Pack 12 blaster
Hide thumbs
Also See for OPTIMUS PRIME:
- Build instructions (50 pages) ,
- Build instructions (24 pages) ,
- Build instructions (50 pages)

Related Manuals for Agora Models OPTIMUS PRIME


Summary of Contents for Agora Models OPTIMUS PRIME
- Page 1 Pack 12 Blaster B U I L D I N S T R U C T I O N S TRANSFORMERS and HASBRO and all related trademarks and logos are trademarks of Hasbro, Inc. ©2023 Hasbro.
- Page 2 Always protect the paint finish on components by placing a cutting mat, sheet of white paper or soft cloth on your work surface. Left and Right! When building your Optimus Prime, the left or right hand side refers to each side as viewed by Optimus Prime. Optimus Prime’s left arm is on the viewer’s right.
- Page 3 Pack 11 Parts for the Blaster T R A Y 3 TR-11-71 TR-11-68 TR-11-70 TR-11-59 TR-11-62 TR-11-58 TR-11-69 TR-11-52 TR-11-53 TR-11-63 TR-11-57 TR-11-56 TR-11-65 TR-11-66 TR-11-64 TR-11-60 TR-11-72 TR-11-67 TR-11-73 TR-11-54 TR-11-61 TR-11-74 AGORAMODELS OPTIMUS PRIME...
- Page 4 TR-12-69 TR-12-92 TR-12-174 TR-12-91 TR-12-146 TR-12-65 TR-12-56 TR-12-59 TR-12-122 TR-12-69 TR-12-71 TR-12-111 TR-12-47 TR-12-60 TR-12-70 TR-12-131 TR-12-46 TR-12-109 TR-12-54 TR-12-57 TR-12-94 TR-12-76 TR-12-95 TR-12-68 TR-12-58 TR-12-44 TR-12-74 TR-12-67 TR-12-45 TR-12-110 ‘1’ TR-12-75 ‘2’ TR-12-114 TR-12-77 TR-12-115 TR-12-150 AGORAMODELS OPTIMUS PRIME...
- Page 5 T R A Y 2 TR-12-73 TR-12-05 TR-12-06 TR-12-107 TR-12-120 ‘1’ TR-12-113 TR-12-66 TR-12-121 ‘2’ TR-12-108 TR-12-123 TR-12-86 TR-12-52 TR-12-112 TR-12-87 TR-12-53 TR-12-51 TR-12-88 TR-12-118 TR-12-40 TR-12-99 TR-12-119 TR-12-106 TR-12-103 TR-12-102 TR-12-100 TR-12-101 TR-12-90 TR-12-04 TR-12-89 TR-12-116 TR-12-117 TR-12-105 TR-12-104 AGORAMODELS OPTIMUS PRIME...
- Page 6 PB 2.3x6mm x95 TR-12-161 x18 nut 3 (TR-12-162) TR-12-170 TR-12-147 TR-12-172 PB 2.6x6mm x26 TR-12-167 PB 2x6mm x13 PB 2.6x8mm x21 PWM 2x6mm x11 TR-12-163 TR-12-166 TR-12-171 PB 2x4mm x9 TR-12-140 TR-12-149 TR-12-173 M 3x6mm x10 TR-12-132 AGORAMODELS OPTIMUS PRIME...
- Page 7 Pack 12 T R A Y 3 TR-12-16 TR-12-13 TR-12-14 TR-12-15 TR-12-128 TR-12-18 TR-12-127 TR-12-02 TR-12-01 TR-12-50 TR-12-129 TR-12-03 TR-12-21 TR-12-130 TR-12-22 TR-12-20 TR-12-145 TR-12-19 TR-12-41 TR-12-49 TR-12-126 TR-12-139 TR-12-48 TR-12-17 TR-12-42 TR-12-43 TR-12-12 TR-12-23 TR-12-125 TR-12-124 AGORAMODELS OPTIMUS PRIME...
- Page 8 TR-12-30 TR-12-27 TR-12-26 TR-12-97 TR-12-39 TR-12-83 TR-12-63 TR-12-10 TR-12-96 TR-12-78 TR-12-27 TR-12-29 TR-12-134 TR-12-82 TR-12-137 TR-12-26 TR-12-11 TR-12-164 TR-12-142 TR-12-79 TR-12-170 TR-12-141 TR-12-61 TR-12-80 TR-12-135 TR-12-62 TR-12-38 TR-12-28 TR-12-09 TR-12-24 TR-12-25 TR-12-85 TR-12-84 TR-12-133 TR-12-81 TR-12-39 TR-12-136 AGORAMODELS OPTIMUS PRIME...
- Page 9 S T E P 3 Take the small circuit board labelled 01 (from Tray 3, shown in 3a). Use the picture to identify the correct sockets for connecting the plugs on parts TR-12-145, TR-12-139 and the assembly from step 2. AGORAMODELS OPTIMUS PRIME...
- Page 10 2x PB 2.3x6 mm screws. TR-12-125 TR-12-124 S T E P 5 Apply a little glue to TR-12-125 and attach to TR-12-124. TR-12-16 TR-12-15 S T E P 6 Apply a little glue to TR-12-15 before attaching TR-12-16. AGORAMODELS OPTIMUS PRIME...
- Page 11 Assembling the Blaster S T E P 7 Attach B and C to A. TR-12-19 TR-12-12 S T E P 8 Attach TR-12-12 and TR-12-19 to A. TR-12-19 is hinged and should open and close the battery compartment. AGORAMODELS OPTIMUS PRIME...
- Page 12 (see page 19). Push the cartridge part up (arrow) to activate the switch. Once tested, remove the batteries to continue assembly. TR-12-18 TR-12-17 S T E P 1 0 Attach TR-12-18 to TR-12-17, then place them both onto assembly A. AGORAMODELS OPTIMUS PRIME...
- Page 13 Slide TR-11-73 on top and secure using 2x PB 2.3x6 mm screws and 2x PB 2.3x8 mm screws. TR-11-68 PB 2.3x6 TR-11-67 TR-11-62 S T E P 1 3 Take part TR-11-62 and attach TR-11-68 and TR-11-67 as shown. Secure them using 1x PB 2.3x6 mm screw. AGORAMODELS OPTIMUS PRIME...
- Page 14 A. Make sure the cable is routed in a straight line - see step 16. TR-11-74 PB 2.3x6 TR-11-66 S T E P 1 6 Place TR-11-66 over the top, securing it in place with 5x PB 2.3x6 mm screws. AGORAMODELS OPTIMUS PRIME...
- Page 15 Align the hinge of part TR-11-71 (from step 14) as shown. Hold the parts firmly together, with the peg for the hinge located in the hole. TR-11-69 PB 2.3x6 S T E P 1 8 Place TR-11-69 on top and secure the parts in place using 2x PB 2.3x6 mm screws. AGORAMODELS OPTIMUS PRIME...
- Page 16 S T E P 2 0 Apply glue to the recess in part TR-11-70. Attach TR-12-173. TR-12-22 TR-12-173 TR-12-173 S T E P 2 1 Apply glue to TR-12-22 in the two recessed areas. Attach 2x TR-12-173. AGORAMODELS OPTIMUS PRIME...
- Page 17 Assembling the Blaster S T E P 2 2 Attach A to B as shown. S T E P 2 3 Apply a little glue to B as shown and fix it to A. AGORAMODELS OPTIMUS PRIME...
- Page 18 Apply glue to TR-12-130 as shown, then fix it t TR-12-129. Make x6 of these. TR-12-130 TR-12-169 TR-12-14 S T E P 2 6 TR-12-127 Glue TR-12-14 as shown and attach TR-12-169. Then attach the hinge TR-12-127. AGORAMODELS OPTIMUS PRIME...
- Page 19 Glue TR-12-13 and attach TR-12-169. Then attach the hinge TR-12-127. S T E P 2 8 Glue the six assemblies from step 25 then attach them to A. TR-12-128 S T E P 2 9 Glue 2x TR-12-128 and attach them to A. AGORAMODELS OPTIMUS PRIME...
- Page 20 S T E P 3 0 Glue the recessed areas on A as shown, then attach 2x TR-12-173. S T E P 3 1 Glue two more recessed areas on A before attaching the hinged assemblies from steps 26 and 27. AGORAMODELS OPTIMUS PRIME...
- Page 21 S T E P 3 2 Apply glue to TR-12-126 then attach to A. Attach TR-12-20 and TR-12-21. TR-11-64 TR-11-60 S T E P 3 3 Attach TR-11-60 to TR-11-64 as shown. Apply a little glue then fix the assembly to A. AGORAMODELS OPTIMUS PRIME...
- Page 22 Install 2x AAA (1.5V) batteries. Gently push the cartridge up to operate the light. Push again to switch the light off. B L A S T E R C O M P L E T E AGORAMODELS OPTIMUS PRIME...
Need help?
Do you have a question about the OPTIMUS PRIME and is the answer not in the manual?
Questions and answers