Table of Contents
Advertisement
Quick Links
Advertisement
Chapters
Table of Contents

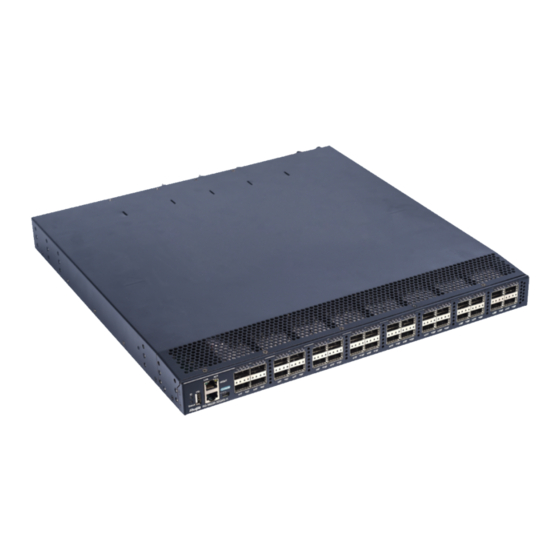
Related Manuals for Ruijie RG-S6220 Series


Summary of Contents for Ruijie RG-S6220 Series
- Page 1 Rain100 V2(32)用户手册 User’s Manual...
- Page 2 重要声明 锐捷网络©2000-2018 锐捷网络股份有限公司版权所有,并保留对本手册的一切权利。 首先感谢您使用本公司的设备。 我们强烈建议您在使用本产品之前仔细阅读本手册,如果您在未读说明书之前而操作设备造成 任何损失,我们也将不承担任何责任。同时,为了提高设备性能,我们可能对实际产品做一些 小的调整,这可能会导致说明书与实际操作有所不同,对此,我们深表歉意,但请您放心,这 不会实质的影响到您对产品的使用。 注意事项 确定所使用的交流电源在其安全范围 100-240V 之内,才能将产品连接至电源插座。 请勿强行将电源插头插入插槽内,如果遇到阻力较大,请确保插头插入插槽的方向正确。 清洁产品前请先关机,并拔掉电源适配器。 请务必注意,在产品进行软件更新时请切勿中断电源。 发生下列任一情况时,请将产品交由维修人员检查:电源线或插头损坏;液体渗透至设备 内; 产品曝露于水气当中; 产品无法正常运作, 或您依照使用手册后仍无法让本产品运作; 产品曾掉落且损坏;产品有明显的破损痕迹。...
-
Page 3: Table Of Contents
目 录 产品简介 ..........................1 装箱清单 ..........................2 产品规格 ..........................2 部件描述 ..........................4 接口标示 ........................... 4 接口说明 ........................... 5 安装准备 ..........................5 安装环境 ........................... 5 安装工具 ........................... 6 注意事项 ........................... 6 安装步骤 ..........................7 背挂架安装 ........................7 线缆连接 ........................... 8 使用说明... -
Page 4: 产品简介
产品简介 Rain100 V2(32)是锐捷网络推出的新一代云课堂终端系列产品之一。产品采用 Intel 处理器, 集成高性能图形处理器,支持 1080P 高清视频显示,为用户带来更舒适的视觉体验。软件方 面,本产品内嵌学生客户端,教师机安装相应的管理软件,同时结合先进的云主机方案,为用 户提供优质的计算机教学体验。 Rain100 V2(32)云课堂终端产品与云课堂云主机联动,实现了教育资源合理分配,教学任务实 时互动,学习成果智能共享。本产品集小巧、时尚、智能于一体,可配置在多种教学场景中, 其典型的组网方案如图 1 所示。 千兆交换机 校园网 RG-RCD 系列云主机 上行链路 Rain100 V2(32) 教师机安装 云课堂云终端 教师管理软件 图 1 Rain100 V2(32)典型组网示意图... -
Page 5: 装箱清单
装箱清单 表 1 Rain100 V2(32)装机清单 项目 名称 数量 单位 终端 台 背挂架 个 背挂架螺丝 个 电源适配器 个 用户手册 本 保修手册 本 产品规格 表 2 Rain100 V2(32)产品主要技术指标 产品型号 Rain100 V2(32) 产品定位 云课堂终端机,室内放置型,内置云课堂学生客户端 Intel 高性能处理器... - Page 6 内存/存储 2GB 内存/ 32GB 存储 分辨率支持 支持多分辨率,最高支持 1920×1080 背挂支持 支持 VESA 标准 100×100mm&75×75mm 防盗支持 支持 Kensington 防盗锁 特色功能 上电自启(可配置)、远程唤醒 电源支持 12V-2A 电源适配器 电源接口 DC 接口(5.5mm×2.5mm) 显示接口 VGA 接口、HDMI 接口 数据接口 5 个 USB 2.0 接口,1 个 USB3.0 接口 网络接口 10/100M/1000M 自适应以太网口 音频接口...
-
Page 7: 部件描述
部件描述 接口标示 图 1 Rain100 V2(32)接口标示图... -
Page 8: 接口说明
接口说明 电源按键:短按开机或长按关机按键,开机状态下其上面的 LED 灯会亮起; USB3.0 单口:一个 USB3.0 接口,连接 USB3.0 设备,如 U 盘,同时兼容 USB2.0 设备; 麦克风输入口:连接麦克风,实现音频信号的输入; 耳机输出口:连接耳机,实现音频信号的输出; USB2.0 单口:一个 USB2.0 接口,连接 USB2.0 设备,如键盘、鼠标等; CMOS 小孔:按下此小孔中的按键,实现清 CMOS 的功能; USB2.0 双口:本产品含两个 USB2.0 双口,每个 USB2.0 双口含上下两个 USB2.0 接口, ... -
Page 9: 安装工具
应该在 Rain100 V2(32)机壳两侧及后面留足 10cm 空间,以便空气流通,确保散热正常 进行。在连接上各种缆线后,应整理成线束放置在配线架上,避免挡住进风口。 为保证设备正常工作,室内需维持一定温度和湿度,如果室内长期处于恶劣的温、湿度环 境, 将会对设备造成损坏。 Rain100 V2(32)设备对环境温、 湿度要求: 长期工作温度 0ºC~ 40ºC, 短期工作温度-10ºC~50ºC, 长期工作湿度 10%~90%, 短期工作湿度 5%~95% (短期工作指连续不超过 48 小时和每年累计不超过 15 天)。 灰尘对设备运行是一大危害。室内灰尘落在机体上,可造成静电吸附,使金属接点接触不 良,尤其室内相对湿度偏低时,更易造成这种静电吸附,影响设备寿命,容易造成通信故 障。Rain100 V2(32)对室内灰尘含量有一定的要求,避免在灰尘飞扬或脏乱的环境中使 用,以免引起系统故障。 安装工具 表 2 工具仪表清单 常用工具 十字螺丝刀、相关的电缆、螺钉、捆扎带 专用工具 防静电工具、万用表... -
Page 10: 安装步骤
2. 请确保安装螺钉牢固可靠。 3. 请确保 Rain100 V2(32)的安装位置以便于观察 power 指示灯状态。 安装步骤 背挂架安装 步骤一: 背挂架的“LOCK”箭头朝上,架上的螺丝过孔对准显示器 背面上的螺丝孔,使用“十”字形螺丝刀和配套的 M4 螺丝 将背挂架锁紧在显示器上。 步骤二: Rain100 V2(32)终端底部的 4 个安装孔, 分别对准支架上 4 个挂勾。... -
Page 11: 线缆连接
步骤三: 将 Rain100 V2(32)终端放上后顺时针方向旋转将机盒 装配在挂勾上。 步骤四: 完成安装,安装完之后连接上相应线缆,可开始使用此款 云终端。 【备注:Rain100 V2(32)云终端预留背挂扣防盗功能, 解扣方式:卸载时借助工具如螺丝刀,从上面的开孔撬起 防盗扣, 同时逆时针旋转机盒, 将机盒从背挂架上取下来。 】 线缆连接 步骤一: 将 VGA 线的一端连接显示器的 VGA 接口,另一端连接至 终端的 VGA 接口。... - Page 12 步骤二: 将 HDMI 线的一端连接显示器的 HDMI 接口, 另一端连接 至终端的 HDMI 接口。 【备注:如需连接 HDMI 视频接口,按此步骤执行】 步骤三: 先将电源适配器接到产品的电源接口上,然后通过电源 线将电源适配器接到 100~240V AC、50~60HZ 的电源 插座上。 步骤四: 最后按下盒子侧面的电源按键完成开机。 【备注:如配置成了上电自启,可省此步骤。】...
-
Page 13: 使用说明
使用说明 开机并启动 按下盒子侧面的电源按键完成开机,设备启动完成后,会自动运行云课堂客户端。每次开机, 系统会自动检测云课堂版本,当发现有较高版本时,自动下载新版本进行安装。 设置 第一次开机后,需要配置网络才能使用。点击屏幕下方的配置图标,配置主服务器地址为 RCD 的 IP 地址,并配置物理机的网络信息后保存。... - Page 14 关闭配置窗口,点击重新连接按钮,客户端连接上云主机。 在配置页面的分辨率设置中,可调整物理机的分辨率。点击保存立刻调整分辨率,点击还 原将分辨率还原到该设置之前的分辨率。...
-
Page 15: 日常使用
日常使用 登录云桌面 选课页面中显示当前可登录的所有课程信息,超过 3 个课程时,点击页面按钮进行翻页。鼠标 移动到课程上高亮显示,此时点击课程图标可登录课程的云桌面。... -
Page 16: 产品有害物质含量状态说明
关闭/重启云桌面 点击操作系统的关闭计算机,或浮动条上的关闭云桌面将退出云桌面,返回选课页面。 点击操作系统的重新启动,或浮动条上的重启云桌面将重新启动云桌面。 故障维护 在选课页面中,如果出现故障(如点击课程无任何响应),可以右键点击课程,尝试关闭、重 启、还原来解决问题。 在云桌面中,如果出现故障,可以通过浮动条上的关闭、重启、还原云桌面来解决问题。 注意:还原云桌面前请务必将创建的文件(如作业)备份或上传到其它机器,还原后这些信息 都会丢失。 产品有害物质含量状态说明 为控制和减少电子信息产品废弃后环境造成的污染,促进生产和销售低污染电子信息产品,保 护环境和人体健康,并满足中国《电子信息产品污染控制管理办法》的相关规定和要求,特声 明由锐捷网络股份有限公司生产的本型号产品在以下物质含量方面符合中华人民共和国电子 行业标准 SJ/T11364-2006“电子信息产品污染控制标识要求”。 该声明基于我们目前所了解的知识。由于使用条件我们无法控制,锐捷网络股份有限公司对该 信息的使用不做任何明示或默示的担保,并且不承担任何责任。... - Page 17 焊接金属 ○ ○ ○ ○ ○ ○ 线材 × ○ ○ ○ ○ ○ 助焊剂,散热膏,标签 ○ ○ ○ ○ ○ ○ 及其他耗材 ○:表示该有毒有害物质在该部件所有均质材料中的含量均在 SJ/T11363-2006 标准规定的限量要求以下。 ×:表示该有毒有害物质至少在该部件的某一均质材料中的含量超出 SJ/T11363-2006 标准规定的限量要求。 注: 1 本表显示锐捷网络股份有限公司供应的本型号产品可能包含这些物质,这些有毒有害物质的部件皆因全球技术发 展水平限制而无法实现有毒有害物质的替代,但这些信息可能随着技术发展而不断更新。 2 根据型号的不同可能不全含有以上的所有部件,请以实际购买机型为准。 3 本表中部件定义的解释权归属锐捷网络股份有限公司。 锐捷网络股份有限公司 远程技术服务中心 4008-111-000 http://www.ruijie.com.cn...
- Page 18 Ruijie Networks Co., Ltd. All Rights Reserved. Thanks for using Ruijie products. Ruijie strongly recommends that you carefully read this manual before using the device. If you perform operations on the device without reading this manual, Ruijie assumes no responsibilities for any losses incurred. In addition, Ruijie may make small adjustments to the device to enhance the device performance, which may result in slight difference between operations described in this manual and actual operations.
- Page 19 Precautions Ensure that the AC power is within the range of 100-240 V before powering on the device. Do not forcibly insert the power plug into the socket. If you encounter great resistance during insertion, please check that the power plug is inserted in the correct direction. Switch off the device and remove the power adapter before cleaning.
- Page 20 PRODUCT OVERVIEW ..................18 PACKING LIST ....................... 19 PRODUCT SPECIFICATIONS ................20 INTERFACES ......................21 ................... 21 NTERFACE OSITIONS ..................22 NTERFACE ESCRIPTION PREPARATION BEFORE INSTALLATION ............23 ................. 23 NSTALLATION NVIRONMENT ..................... 24 NSTALLATION OOLS ........................25 OTES INSTALLATION STEPS ..................25 .....................
-
Page 21: Product Overview
Product Overview Ruijie RG-Rain100 V2(32) is one of the Ruijie Cloud Class (RCC) terminal series products. It adopts Intel processor, integrates the high-performance graphics processor, and supports 1080p high-definition video display, thereby providing comfortable visual experience for users. The RCC student client is embedded into the Rain100 V2(32) and the RCC ClassManager software is installed on the teacher PC. -
Page 22: Packing List
Gigabit switch Campus network RG-RCD Server Uplink Teacher PC (installed with ClassManager) Rain100 V2(32) Figure 1 Typical Networking Topology of the Rain100 V2(32) Packing List Table 4 RG-Rain100 V2(32) Packing List Name Unit Rain100 V2(32) Mounting Bracket Screws Power adapter User Manual Copy Warranty Manual... -
Page 23: Product Specifications
Product Specifications Table 2 RG-Rain100 V2(32) Specifications Model RG-Rain100 V2(32) Feature Indoor Rain, with the embedded RCC student client Intel high performance processor Memory/Storage 2 GB memory/32 GB storage Resolution 1920 x 1080 Support;Hole Pattern: 100 x 100mm, 75 x 75 mm VESA Mounting Security Support security lock (For example, Kensington) -
Page 24: Interfaces
Interfaces Interface Positions Figure 2 Interface Positions of the Rain100 V2(32) -
Page 25: Interface Description
Interface Description Power button: The device is switched on if you press this button for a short period of time and is switched off if you press this button for a long period of time. The LED is on when the device is switched on. -
Page 26: Preparation Before Installation
HDMI interface: Connects to a display device that supports the high-definition multimedia interface (HDMI) interface to implement the display and output of high-definition videos. Network interface: Connects to a network cable to implement the Internet access function. Power interface: Connects to a power adapter and supports 12 V/2 A power adapter ... -
Page 27: Installation Tools
The temperature and humidity inside the computer room need to be maintained within the proper ranges. The device will be damaged if it works in an adverse environment in the long run. The ambient temperature and humidity requirements of the RG-Rain100 V2(32) are as follows: Long-term operating temperature: 0°... -
Page 28: Notes
Users need to get the preceding tools ready except the screws delivered together with the RG-Rain100 V2(32). Notes 1. Disconnect the power supply before installing or moving the RG-Rain100 V2(32). 2. Ensure that screws are installed tightly and securely. 3. Install the RG-Rain100 V2(32) in a proper place easy for observing the power LED. Installation Steps Mounting the Rain Step 1:... - Page 29 Step 2: Align the four installation holes at the bottom of the Rain100 V2(32) with the four hooks on the mounting bracket. Step 3: Rotate the Rain100 V2(32) clockwise until it clicks into place. Step 4: After installation, connect cables. Then, you can use the Rain100 V2(32).
-
Page 30: Connecting The Cables
Connecting Cables Step 1: Connect one end of the VGA cable to the VGA interface of the display and the other end to the VGA interface of the Rain. Step 2: Connect one end of the HDMI cable to the HDMI interface of the display and the other end to the HDMI interface of the Rain. -
Page 31: Powering On And Starting The Device
Step 4: Press the Power button on the Rain to switch on the device. [Note: If self-start upon power-on is configured, this step can be skipped.] Usage Guide Powering on and Starting the Device Press the Power button on the Rain to switch on the device. After the device startup is complete, the RCC client automatically runs. - Page 32 Setting the Device 1. You need to complete the network settings when the device is switched on for the first time. Click the Settings icon. Set PC Name, RCD server IP, and Network Configuration, and then click Save.
- Page 33 2. Close the configuration page and click Reconnectto connect to the RCD Server. 3. On the Resolution page, adjust the resolution of the Rain100 V2(32), and click Save to change the configuration or click Recover to restore the resolution. 4. On the Resolution page, adjust the screen brightness and click Save to make the configuration take effect immediately.
- Page 34 Logging in to the RCD The available courses are displayed on the Select the OS page after login. If there are more than three courses, you can click a button on the page to scroll down the page. Move the cursor over a course.
- Page 35 Shutting Down/Restarting the RCD Click Shutdown of the operating system or click Shutdown on the floating bar to exit the RCD and return to the Select the OS page. Click Restart of the operating system or click Restart on the floating bar to restart the RCD. Troubleshooting On the Select the OS page, if a fault occurs (for example, the system does not respond after you click a course), right-click the course and choose Shut down, Restart, or Recover from...
Need help?
Do you have a question about the RG-S6220 Series and is the answer not in the manual?
Questions and answers