Table of Contents
Advertisement
Quick Links
Advertisement
Table of Contents

Related Manuals for THORLABS TLX3


Summary of Contents for THORLABS TLX3
- Page 1 TLX3 and TLX5 Tunable Laser Sources User Guide...
-
Page 2: Table Of Contents
Chapter 4 Operation ......................... 12 4.5.1 Trigger Output – Wavelength Locking – TLX5 ONLY ..................17 4.5.2 Trigger Output – TLX3 and TLX5 Sweep Modes....................17 4.5.3 Sync Clock Output ............................. 18 Chapter 5 Maintenance, Repair, & Fuses ................... 20 Chapter 6 Troubleshooting ....................... -
Page 3: Chapter 1 Introduction
Introduction Intended Use The TLX3 and TLX5 are tunable laser sources. The intended use of this equipment is to supply a continuously tunable laser source for laboratory use. The environment of intended use is indoors in a controlled temperature and humidity setting. - Page 4 The user can also control the laser using their own software via a full command set. All documentation for this product is available for download on the Thorlabs website at www.thorlabs.com/manuals. A separate Programming Guide provides detailed information about how to connect and control the TLX3 and TLX5 via external user programs.
-
Page 5: Specifications
TLX3 and TLX5 Tunable Laser Sources Chapter 1: Introduction Technical Data 1.4.1 Specifications TLX3 Specifications Parameter Specification Note Wavelength Range 1250 - 1350 nm Output Power 10 - 40 mW Depends on Wavelength (See Graphs) Power Stability ±0.02 dB Power Repeatability ±0.05 dB... - Page 6 TLX3 and TLX5 Tunable Laser Sources Chapter 1: Introduction TLX5 Specifications Parameter Specification Note Wavelength Range 1520 - 1630 nm Output Power 10 - 40 mW Depends on Wavelength (See Graphs) Power Stability ±0.02 dB Power Repeatability ±0.02 dB Wavelength Accuracy ±30 pm...
-
Page 7: Graphs
TLX3 and TLX5 Tunable Laser Sources Chapter 1: Introduction 1.4.2 Graphs TLX3 Typical Spectral Response 63.1 31.6 15.8 1250 1270 1290 1310 1330 1350 Wavelength (nm) Figure 3 TLX3 Tunable Laser Typical Spectral Response TLX5 Typical Spectral Response 63.1 31.6 15.8... -
Page 8: Mechanical Drawings
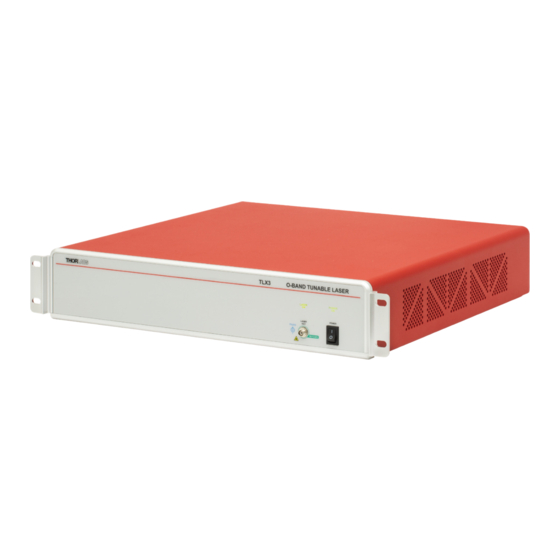
TLX3 and TLX5 Tunable Laser Sources Chapter 1: Introduction 1.4.3 Mechanical Drawings Figure 5 Mechanical Drawing Page 6 TTN220723-D02... - Page 9 Digital Ground Front and Rear Panel Functions The TLX3 and TLX5 come in a 2U height rack-mount sized box with rack-mount hardware as shown here. Screw- on feet for the bottom of the box are also available for bench placement.
- Page 10 TLX3 and TLX5 Tunable Laser Sources Chapter 1: Introduction Figure 7 Back Panel of the TLX3 and TLX5 Tunable Lasers Back Panel Callout Description Main Power Connection Boot Mode Button Indicator LED for Firmware Upgrades Trigger Signal (BNC Female Connector)
-
Page 11: Chapter 2 Safety
3 meters (9.8 feet). Thorlabs is not responsible for any radio or television interference caused by modifications of this equipment or the substitution or attachment of connecting cables and equipment other than those specified by Thorlabs. The correction of interference caused by such unauthorized modification, substitution or attachment will be the responsibility of the user. - Page 12 TLX3 and TLX5 Tunable Laser Sources Chapter 2: Safety Risk of Electrical Shock Before applying power to the instrument, make sure that the protective conductor of the 3 conductor mains power cord is correctly connected to the protective earth contact of the socket outlet.
-
Page 13: Chapter 3 Installation
Printed Copy of the User Guide TLX3 and TLX5 Quick Start Guide 1. Plug the TLX3 or TLX5 laser into the wall supply and turn on the front panel switch. 2. Install the GUI software onto a PC. The software is available here: https://www.thorlabs.com/Software... -
Page 14: Chapter 4 Operation
Follow the Quick Start Guide to get the laser connected to a PC and turned ON. The GUI should appear as shown in this image (in Manual Mode). The screen shot examples below depict the TLX3; the TLX5 will appear the same with a different wavelength range shown. - Page 15 TLX3 and TLX5 Tunable Laser Sources Chapter 4: Operation Manual Mode This mode (as shown in the image above) allows you to simply set the operating wavelength and step it manually using on-screen buttons. The wavelength can be set directly by typing into the “Wavelength Target” box at the lower left or by clicking and dragging the wavelength indicator label above the wavelength scale.
- Page 16 See the Trigger and Synchronization sections for more information about how to synchronize external equipment with the TLX3 and TLX5 in the Continuous Sweep Mode. Note that the Power readout will be blanked during this sweep mode because it’s changing too rapidly to be read accurately.
- Page 17 TLX3 and TLX5 Tunable Laser Sources Chapter 4: Operation The Save & Load buttons can be used to store and recall the complete instrument settings for any particular mode of operation. The settings are stored in a local directory on your PC as .XML files that can be named according to standard Windows OS conventions.
- Page 18 Help: The Help button provides system information as well as several useful links to the TLX3 and TLX5 laser webpage, the User Manual, the Programming Guide, and any License Documentation.
-
Page 19: Trigger Output - Wavelength Locking - Tlx5 Only
TLX3 and TLX5 Tunable Laser Sources Chapter 4: Operation The TLX3 and TLX5 webpage provides complete specifications as well as all other documentation. Trigger and Sync Clock Outputs These BNC (Female) outputs are found on the back of the unit as shown here: 4.5.1... -
Page 20: Sync Clock Output
Chapter 4: Operation the laser is stable at the new wavelength. In the example shown below, the TLX3 laser is set to step from 1300 nm to 1304 nm in 1 nm increments and 1 sec dwell times. Note that the transition times (300 ms) are not included in the dwell times. - Page 21 GUI software package included with the TLX3 and TLX5. Both the RS-232 and the USB connections can be used for remotely controlling the TLX3 or TLX5 lasers via SCPI type serial commands. Which connector to choose for remote control operation depends on the demands of the application and the user’s preference.
-
Page 22: Chapter 5 Maintenance, Repair, & Fuses
Never use acetone. The optical connectors on the front panel may be cleaned using a 2.5 mm bulkhead cleaner such as the Thorlabs FBC250. This allows the user to clean the fiber end-face without removing it from the internal bulkhead adapter. - Page 23 4. Check the fuses for continuity. If in doubt, replace both fuses. Additional replacement fuses can be purchase from Thorlabs or an electronics supply house. Always use fuses of the same type as the original. 5. Reinstall the fuse holder slide into the power entry module, taking care that it fully seats until the top is flush with the rest of the power entry module.
-
Page 24: Chapter 6 Troubleshooting
Contact Thorlabs for more information. Waste treatment is your own responsibility. “End of life” units must be returned to Thorlabs or handed to a company specializing in waste recovery. Do not dispose of the unit in a litter bin or at a public waste disposal site. It is the user’s responsibility to delete all private data stored on the device prior to disposal. -
Page 25: Chapter 8 Thorlabs Worldwide Contacts
TLX3 and TLX5 Tunable Laser Sources Chapter 8: Thorlabs Worldwide Contacts Chapter 8 Thorlabs Worldwide Contacts For technical support or sales inquiries, please visit us at for our most up-to-date www.thorlabs.com/contact contact information. Corporate Headquarters Product Manufacturer Thorlabs, Inc. Thorlabs, Inc. - Page 26 www.thorlabs.com...
Need help?
Do you have a question about the TLX3 and is the answer not in the manual?
Questions and answers