Advertisement
Available languages
Available languages
Quick Links
IMPORTANT SAFEGUARDS
When using electrical equipment, basic safety precautions should always be followed including the
following:
READ AND FOLLOW ALL SAFETY INSTRUCTIONS
1.
DANGER- Risk of shock- Disconnect power before installation.
DANGER – Risque de choc – Couper l'alimentation avant l'installation.
2.
This luminaire must be installed in accordance with the NEC or your local electrical code. If you are
not familiar with these codes and requirements, consult a qualified electrician.
Ce produit doit être installé conformément à NEC ou votre code électrique local. Si vous n'êtes pas
familier avec ces codes et ces exigences, veuillez contacter un électricien qualifié.
3.
DO NOT lift luminaire by the power leads or cord.
SAVE THESE INSTRUCTIONS FOR FUTURE
NOTE:
• No user maintenance is required. Do not
remove the enclosure cover after installation.
• Installer is responsible for ensuring fittings,
TO INSTALL:
1
2
Canopy
3
2.00"
Stem Hole
1 of 3
REFERENCE
junction boxes, pendants stems, and similar
items above the canopy deck are installed
in a weather-tight and sealed manner that
prevents water ingress to wiring and/or
luminaire
Insert
Mounting
Screws
3/4" NPT Stem
(Provided by customer)
Luminaire Hub
4.00"
0.325"
Alignment Hole
INSTALLATION INSTRUCTIONS
INSTRUCTIONS D'INSTALLATION
• Failure to provide a weather-tight seal will
void the 10-year luminaire warranty.
DIRECT MOUNT - CANOPY APPLICATIONS
NOTE: For use with XA-BXCCJBOX accessory or customer
supplied junction box and stem.
STEP 1:
Remove bushing from threaded hub.
STEP 2:
Cut a 2.0" hole for stem into canopy. For installation using
alignment template instructions refer to "Alignment Template
(Optional)" section.
NOTE: Luminaire can be mounted to an existing hole in canopy
up to 4" diameter.
STEP 3:
To mount luminaire to canopy, insert and tighten (4) supplied
Phillips hex head self-drilling sheet metal screws as shown in
Figure 1.
STEP 4:
From above canopy feed leads from luminaire through customer
supplied 3/4" NPT Stem. Screw customer supplied NPT Stem
Figure 2.
into luminaire hub. See
STEP 5:
Attach customer supplied junction box to the other end of
the customer supplied 3/4" NPT Stem and make wiring
connections into customer supplied junction box per "Electrical
Connections" section.
STEP 6:
Apply sealant around stem, hub and alignment screw for a
complete seal.
ALIGNMENT TEMPLATE (OPTIONAL)
STEP 1:
Reference Figure 3 for alignment. Insert supplied #8 screw into
alignment hole on luminaire. See Figure 4 (on back page).
STEP 2:
Cut a 2.0" hole into the desired location of the canopy to mount
the threaded hub of the luminaire. See Figure 3.
STEP 3:
4" away from the Stem Hole, drill a 0.325" hole, Alignment Hole,
using a 11/32" drill bit for the alignment screw. See Figure 3.
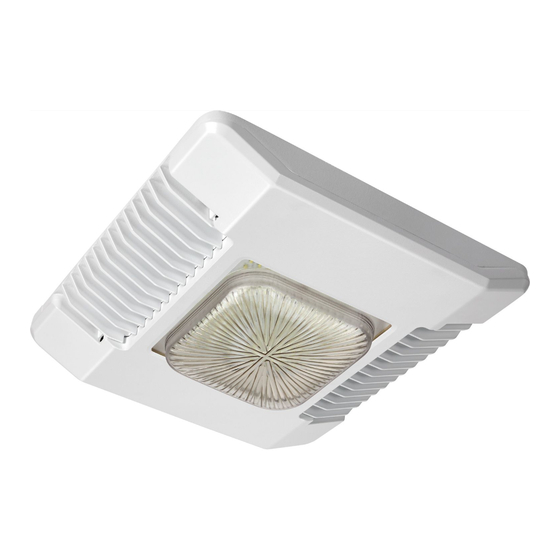
CPY Series
LED Canopy Luminaire
Includes: CPY250
Luminaires
TM
CI391X01R2_D
Advertisement

Subscribe to Our Youtube Channel
Related Manuals for CREE LIGHTING CPY Series


Summary of Contents for CREE LIGHTING CPY Series
- Page 1 CPY Series LED Canopy Luminaire Includes: CPY250 Luminaires IMPORTANT SAFEGUARDS INSTALLATION INSTRUCTIONS INSTRUCTIONS D’INSTALLATION When using electrical equipment, basic safety precautions should always be followed including the following: READ AND FOLLOW ALL SAFETY INSTRUCTIONS DANGER- Risk of shock- Disconnect power before installation.
- Page 2 STEP 4: Bring luminaire to canopy and insert threaded hub into the 2.0” Alignment Hole Stem Hole that was cut in Step 2. Rotate luminaire until alignment Threaded Hub screw seats into the 0.325” Alignment Hole that was cut in Step 3. See Figure 4.
-
Page 3: Electrical Connections
PINK DIM (-) PINK © 2023 Cree Lighting, A company of IDEAL INDUSTRIES. All rights reserved. For informational purposes only. Content is subject to change. See www.creelighting.com/warranty for warranty and specifications. Cree and the Cree Lighting logo are ®... - Page 4 SERIE CPY Luminaria LED de dosel Incluye: Luminarias CPY250 MEDIDAS DE SEGURIDAD IMPORTANTES INSTRUCCIONES DE INSTALACIÓN INSTRUCTIONS D’INSTALLATION Al usar aparatos eléctricos, siempre deben seguirse ciertas medidas básicas de seguridad, incluidas las siguientes: LEA Y SIGA TODAS LAS INSTRUCCIONES DE SEGURIDAD PELIGRO: Riesgo de descarga eléctrica.
- Page 5 PASO 4: Lleve la luminaria al dosel e introduzca el eje roscado Orificio de alineación en el orificio del vástago de 2,0" que cortó en el paso Eje roscado 2. Gire la luminaria hasta que el tornillo de alineación se asiente en el orificio de alineación de 0,325" que cortó...
-
Page 6: Conexiones Eléctricas
© 2023 Cree Lighting, una empresa de IDEAL INDUSTRIES. Todos los derechos reservados. Para fines informativos únicamente. El contenido está sujeto a cambios. Visite www.creelighting.com/warranty para ver la garantía y las especificaciones. - Page 7 SÉRIE CPY LUMINAIRE à pavillon à DEL Comprend : LUMINAIRES CPY250 MESURES DE SÉCURITÉ IMPORTANTES INSTRUCTIONS D’INSTALLATION INSTALLATION INSTRUCTIONS Lors de toute utilisation d’appareils électriques, les consignes de sécurité de base doivent toujours être respectées, dont les suivantes : LISEZ ET SUIVEZ TOUTES LES CONSIGNES DE SÉCURITÉ DANGER–...
- Page 8 ÉTAPE 4 : Approchez le luminaire du pavillon et insérez Trou d’alignement l’entrée taraudée dans le trou de la tige de 5 cm Entrée taraudée (2 po) qui a été découpé à l’étape 2. Faites pivotez le luminaire jusqu’à ce que la vis d’alignement repose dans le trou d’alignement de 8,3 mm (0,325 po) qui a été...
-
Page 9: Raccordements Électriques
© 2023 Cree Lighting, une société d’IDEAL INDUSTRIES. Tous droits réservés. À titre informatif seulement. Le contenu est sujet à changement. Consultez www.creelighting.com/warranty pour la garantie et les spécifications. Cree et le logo Cree ®...
Need help?
Do you have a question about the CPY Series and is the answer not in the manual?
Questions and answers