
Related Manuals for Lenovo ThinkSystem DE6400


Summary of Contents for Lenovo ThinkSystem DE6400
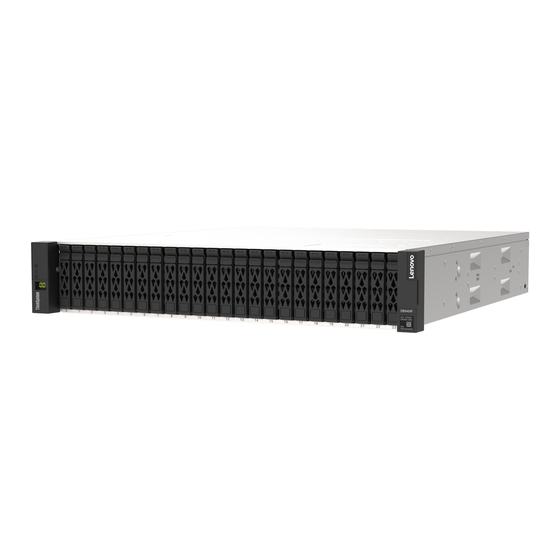
- Page 1 ThinkSystem DE Series Maintaining DE6400 and DE6600 Machine Types: DE6400 (7DB6), DE6600 (7DB7), DE120S (7Y63), DE240S (7Y68), and DE600S (7Y69)
- Page 2 First edition (September 2023) © Copyright Lenovo 2023. LIMITED AND RESTRICTED RIGHTS NOTICE: If data or software is delivered pursuant to a General Services Administration (GSA) contract, use, reproduction, or disclosure is subject to restrictions set forth in Contract No.
-
Page 3: Table Of Contents
Contents 1. Maintain DE6400 and DE6600 hardware ................1.1. - Page 4 Step 3d: Install DIMMs .............. ...
- Page 5 7.2.2. Step 2: Remove controller canister ........... . . ...
-
Page 6: Maintain De6400 And De6600 Hardware
Video instructions: Access video demos to learn more about DE6400 and DE6600 system maintenance procedures at Lenovo ThinkSystem DE6400 and DE6600 Maintenance. 1.1. Batteries A battery is included with a controller and preserves cached data if the AC power fails. -
Page 7: Sas Expansion Cards
1.9. SAS expansion cards A SAS expansion card may be installed within a controller canister. DE6400 and DE6600 controllers support SAS expansion. -
Page 8: Batteries
Chapter 2. Batteries 2.1. Requirements for DE6400 or DE6600 battery replacement Before you replace a DE6400 or DE6600 battery, review the requirements and considerations. A battery is included with a controller and preserves cached data if the AC power fails. 2.1.1. -
Page 9: Replace De6400 Or De6600 Battery
CLI, you can do one of the following: For ThinkSystem System Manager (version 11.70.4 and above) — Download the CLI package (zip file) from Lenovo Data Center Support and then issue CLI commands from an operating system prompt, such as the DOS C: prompt. -
Page 10: Step 2: Remove Controller Canister
◦ From System Manager: a. Select Support › Support Center › Diagnostics. b. Select Collect Configuration Data. c. Click Collect. The file is saved in the Downloads folder for your browser with the name, configurationData-<arrayName>-<dateTime>.7z. 4. If the controller is not already offline, take it offline now using ThinkSystem System Manager. a. - Page 11 5. Squeeze the handles on either side of the controller, and pull back until it releases from the shelf. 6. Using two hands and the handles, slide the controller canister out of the shelf. When the front of the controller is free of the enclosure, use two hands to pull it out completely. ...
-
Page 12: Step 3: Remove Failed Battery
2.2.3. Step 3: Remove failed battery Pull the failed battery out of the controller. Steps 1. Remove the controller canister’s cover by unscrewing the single thumbscrew and lifting the lid open. 2. Confirm that the green LED inside the controller is off. If this green LED is on, the controller is still using battery power. - Page 13 6. Lift the battery out of the controller and place on a flat, static-free surface. 7. Follow the appropriate procedures for your location to recycle or dispose of the failed battery. To comply with International Air Transport Association (IATA) regulations, ...
-
Page 14: Step 4: Install New Battery
2.2.4. Step 4: Install new battery After you have removed the failed battery from the controller canister, follow this step to install the new battery. Steps 1. Unpack the new battery, and set it on a flat, static-free surface. To comply with IATA safely regulations, replacement batteries are shipped ... -
Page 15: Step 6: Complete Battery Replacement
The controller audibly clicks when correctly installed into the shelf. 2.2.6. Step 6: Complete battery replacement Place the controller online, collect support data, and resume operations. Steps 1. Place controller online. a. In System Manager, navigate to the Hardware page. b. - Page 16 If you cannot resolve the problem, contact technical support. 4. Click Support › Upgrade Center to ensure that the latest version of ThinkSystem SAN OS is installed. As needed, install the latest version. 5. Verify that all volumes have been returned to the preferred owner. a.
-
Page 17: Controllers
Chapter 3. Controllers 3.1. Requirements for DE6400 or DE6600 controller replacement Before you replace a DE6400 or DE6600 controller, review the requirements and considerations. A controller consists of a board, firmware, and software. It controls the drives and implements the ThinkSystem System Manager functions. -
Page 18: Step 1: Prepare To Replace Controller
• Review Requirements for DE6400 or DE6600 controller replacement. • Determine if you have a failed controller canister in one of two ways: ◦ The Recovery Guru in ThinkSystem System Manager directs you to replace the controller canister. ◦ The amber Attention LED on the controller canister is on, indicating that the controller has a fault. - Page 19 4. Confirm that the replacement part number for the failed controller is the same as the FRU part number for the replacement controller. Possible loss of data access — If the two-part numbers are not the same, do not attempt this procedure. In addition, if the failed controller canister ...
-
Page 20: Step 2: Remove Failed Controller
3.2.2. Step 2: Remove failed controller Remove a controller canister to replace the failed canister with a new one. This is a multi-step procedure that requires you to remove the following components: battery, host interface card, power supply, DIMMs, and fans. Step 2a: Remove controller canister Remove the failed controller canister so you can replace it with a new one. -
Page 21: Step 2B: Remove Battery
7. Using two hands and the handles, slide the controller canister out of the shelf. When the front of the controller is free of the enclosure, use two hands to pull it out completely. Always use two hands to support the weight of a controller canister. 8. - Page 22 4. Gently squeeze the connector housing the battery wiring. Pull up, disconnecting the battery from the board. 5. Lift battery controller place flat, static-free surface.
-
Page 23: Step 2C: Remove The Hic
Step 2c: Remove the HIC If the controller canister includes a HIC, you must remove the HIC from the original controller canister. Otherwise, you can skip this step. Steps 1. Using a Phillips screwdriver, remove the two screws that attach the HIC faceplate to the controller canister. - Page 24 2. Remove the HIC faceplate. 3. Using your fingers or a Phillips screwdriver, loosen the single thumbscrew that secure the HIC to the controller card. The HIC comes with three screw locations on the top but is secured with only one.
-
Page 25: Step 2D: Remove Power Supply
5. Place the HIC on a flat, static-free surface. Step 2d: Remove power supply Remove the power supply so you can install it in the new controller. Steps 1. Disconnect the power cables: a. Open the power cord retainer, and then unplug the power cord from the power supply. b. -
Page 26: Step 2E: Remove Dimms
3. Locate the handle on the front of the power supply. 4. Use the handle to slide the power supply straight out of the system. When removing a power supply, always use two hands to support its weight. Step 2e: Remove DIMMs Remove the DIMMs so you can install them in the new controller. - Page 27 Steps 1. Locate the DIMMs on your controller. 2. Note the orientation of the DIMM in the socket so that you can insert the replacement DIMM in the proper orientation. A notch at the bottom of the DIMM helps you align the DIMM during installation.
-
Page 28: Step 2F: Remove Fans
Step 2f: Remove fans Remove the fans so you can install them in the new controller. Steps 1. Gently lift the fan from the controller. 2. Repeat until all fans are removed. -
Page 29: Step 3: Install New Controller
3.2.3. Step 3: Install new controller Install a new controller canister to replace the failed one. This is a multi-step procedure that requires you to install the following components from the original controller: battery, host interface card, power supply, DIMMs, and fans. Step 3a: Install battery Install the battery into the replacement controller canister. - Page 30 1. Using a #1 Phillips screwdriver, remove the two screws that attach the blank faceplate to the replacement controller canister, and remove the faceplate. 2. Align the single thumbscrew on the HIC with the corresponding hole on the controller, and align the connector on the bottom of the HIC with the HIC interface connector on the controller card.
-
Page 31: Step 3C: Install Power Supply
The image above is an example; the appearance of your HIC may differ. 5. Using a #1 Phillips screwdriver, attach the HIC faceplate you removed from the original controller canister to the new controller canister with the two screws. Step 3c: Install power supply Install the power supply into the replacement controller canister. -
Page 32: Step 3D: Install Dimms
Step 3d: Install DIMMs Install the DIMMs into the new controller canister. Steps 1. Hold the DIMM by the corners, and align it to the slot. The notch among the pins on the DIMM should line up with the tab in the socket. 2. -
Page 33: Step 3E: Install Fans
The DIMM fits tightly in the slot, but should go in easily. If not, realign the DIMM with the slot and reinsert it. Visually inspect the DIMM to verify that it is evenly aligned and fully inserted into the slot. 3. -
Page 34: Step 3F: Install New Controller Canister
2. Repeat until all fans are installed. Step 3f: Install new controller canister Last, install the new controller canister into the controller shelf. Steps 1. Lower the cover on the controller canister and secure the thumbscrew. 2. While squeezing the controller handles, gently slide the controller canister all the way into the controller shelf. -
Page 35: Step 4: Complete Controller Replacement
The controller audibly clicks when correctly installed into the shelf. 3. Install the SFPs from the original controller in the host ports on the new controller, if they were installed in the original controller, and reconnect all the cables. If you are using more than one host protocol, be sure to install the SFPs in the correct host ports. - Page 36 2. As the controller boots, check the controller LEDs. When communication with the other controller is reestablished: ◦ The amber Attention LED remains on. ◦ The Host Link LEDs might be on, blinking, or off, depending on the host interface. 3.
-
Page 37: Dimms
Chapter 4. DIMMs 4.1. Requirements for replacing a DE6400 or DE6600 DIMM Before you replace a DIMM in a DE6400 or DE6600 storage array, review the requirements and considerations. You must replace a DIMM when a memory mismatch is present, or you have a failed DIMM. Be sure to verify the configuration of your DE6400 or DE6600 controller to ensure the correct DIMM size is replaced. -
Page 38: Step 1: Determine If You Need To Replace A Dimm
• Review Requirements for replacing a DE6400 or DE6600 DIMM. • Make sure that no volumes are in use or that you have a multipath driver installed on all hosts using these volumes. • Make sure you have the following: ◦... -
Page 39: Step 3: Remove Controller Canister
a. Select Support › Support Center › Diagnostics. b. Select Collect Configuration Data. c. Click Collect. The file is saved in the Downloads folder for your browser with the name, configurationData-<arrayName>-<dateTime>.7z. 4. If the controller is not already offline, take it offline now using ThinkSystem System Manager. a. -
Page 40: Step 4: Remove Dimms
6. Using two hands and the handles, slide the controller canister out of the shelf. When the front of the controller is free of the enclosure, use two hands to pull it out completely. Always use two hands to support the weight of a controller canister. 7. - Page 41 Steps 1. Remove the controller canister’s cover by unscrewing the single thumbscrew and lifting the lid open. 2. Confirm that the green LED inside the controller is off. If this green LED is on, the controller is still using battery power. You must wait for this LED to go off before removing any components.
-
Page 42: Step 5: Install New Dimms
Carefully hold the DIMM by the edges to avoid pressure on the components on the DIMM circuit board. The number and placement of system DIMMs depends on the model of your system. 4.2.5. Step 5: Install new DIMMs Install a new DIMM to replace the old one. Steps 1. -
Page 43: Step 6: Reinstall Controller Canister
4.2.6. Step 6: Reinstall controller canister After installing the new DIMMs, reinstall the controller canister into the controller shelf. Steps 1. Lower the cover on the controller canister and secure the thumbscrew. 2. While squeezing the controller handles, gently slide the controller canister all the way into the controller shelf. -
Page 44: Step 7: Complete Dimms Replacement
3. Reconnect all the cables. 4.2.7. Step 7: Complete DIMMs replacement Place the controller online, collect support data, and resume operations. Steps 1. Place controller online. a. In System Manager, navigate to the Hardware page. b. Select Show back of controller. c. - Page 45 If you cannot resolve the problem, contact technical support. 4. Click Hardware › Support › Upgrade Center to ensure that the latest version of ThinkSystem SAN OS is installed. As needed, install the latest version. 5. Verify that all volumes have been returned to the preferred owner. a.
-
Page 46: Drives
Chapter 5. Drives 5.1. Requirements for DE6400 or DE6600 drive replacement Before replacing a drive in a DE6400 or DE6600 array, review the requirements and considerations. Be aware that the drives in your storage array are fragile; improper drive handling is a leading cause of drive failure. -
Page 47: Replace Drive In A De6400 Array
• Make sure you have the following: ◦ A replacement drive that is supported by Lenovo for your controller shelf or drive shelf. ◦ An ESD wristband, or you have taken other antistatic precautions. ◦ A flat, static-free work surface. -
Page 48: Step 1: Prepare To Replace Drive (24-Drive)
◦ A management station with a browser that can access ThinkSystem System Manager for the controller. (To open the System Manager interface, point the browser to the controller’s domain name or IP address.) 5.2.1. Step 1: Prepare to replace drive (24-drive) Prepare to replace a drive by checking the Recovery Guru in ThinkSystem System Manager and completing any prerequisite steps. -
Page 49: Step 3: Install New Drive (24-Drive)
◦ For drives in DE6000H (2U24) controller shelves or DE240S drive shelves, the release button is located at the top of the drive. The cam handle on the drive springs open partially, and the drive releases from the midplane. 3. Open the cam handle, and slide out the drive slightly. 4. -
Page 50: Step 4: Complete Drive Replacement (24-Drive)
When the drive reconstruction completes, the volume group is in an Optimal state. 4. As required, reinstall the bezel. 5. Return the failed part to Lenovo, as described in the RMA instructions shipped with the kit. What’s next? Your drive replacement is complete. You can resume normal operations. -
Page 51: Step 1: Prepare To Replace Drive
Requirements for DE6400 or DE6600 drive replacement. What you’ll need • A replacement drive that is supported by Lenovo for your controller shelf or drive shelf. • An ESD wristband, or you have taken other antistatic precautions. • A flat, static-free work surface. -
Page 52: Step 2: Remove Drive
5.3.2. Step 2: Remove drive Remove a failed drive to replace it with a new one. Steps 1. Unpack the replacement drive, and set it on a flat, static-free surface near the shelf. Save all packing materials. 2. Press the black release button on the failed drive. The latch on the drive springs partially opens, and then the drive releases from the controller. -
Page 53: Step 4: Complete Drive Replacement
When the drive reconstruction completes, the volume group is in an Optimal state. 4. As required, reinstall the bezel. 5. Return the failed part to Lenovo, as described in the RMA instructions shipped with the kit. What’s next? Your drive replacement is complete. You can resume normal operations. -
Page 54: Fans
Chapter 6. Fans 6.1. Requirements for DE6400 or DE6600 fan replacement Before replacing a failed fan in a DE6400 or DE6600 array, review the following requirements. • You have a replacement fan that is supported for your controller shelf or drive shelf model. •... -
Page 55: Step 2: Remove Controller Canister
If a problem occurs when you remove a controller, you can use the saved file to restore your configuration. The system will save the current state of the RAID configuration database, which includes all data for volume groups and disk pools on the controller. ◦... - Page 56 To prevent degraded performance, do not twist, fold, pinch, or step on the cables. 4. Confirm that the Cache Active LED on the back of the controller is off. 5. Squeeze the handles on either side of the controller, and pull back until it releases from the shelf.
-
Page 57: Step 3: Remove Failed Fan
7. Place the controller canister on a flat, static-free surface. 6.2.3. Step 3: Remove failed fan You remove a failed fan so you can replace it with a new one. Steps 1. Remove the controller canister’s cover by unscrewing the single thumbscrew and lifting the lid open. -
Page 58: Step 4: Install New Fan
6.2.4. Step 4: Install new fan Install a new fan to replace the failed one. Steps 1. Slide the replacement fan all the way into the shelf. -
Page 59: Step 5: Reinstall Controller Canister
6.2.5. Step 5: Reinstall controller canister After installing the new fan, reinstall the controller canister into the controller shelf. Steps 1. Lower the cover on the controller canister and secure the thumbscrew. 2. While squeezing the controller handles, gently slide the controller canister all the way into the controller shelf. -
Page 60: Step 6: Complete Fan Replacement
6.2.6. Step 6: Complete fan replacement Place the controller online, collect support data, and resume operations. 1. Place controller online. a. In System Manager, navigate to the hardware page. b. Select Show back of controller. c. Select the controller with the replaced fan. d. - Page 61 SAN OS is installed. As needed, install the latest version. 5. Verify that all volumes have been returned to the preferred owner. a. Select Storage › Volumes. From the All Volumes page, verify that volumes are distributed to their preferred owners. Select More › Change ownership to view volume owners. b.
-
Page 62: Host Interface Cards
HIC to lock down when you bring it online. • You have all cables, transceivers, switches, and host bus adapters (HBAs) needed to connect the new host ports. For information about compatible hardware, refer to the Lenovo Storage Interoperation Center (LSIC) or the Lenovo Press. -
Page 63: Step 1: Place Controller Shelf Offline
• Schedule a downtime maintenance window for this procedure. You cannot access data on the storage array until you have successfully completed this procedure. Because both controllers must have the same HIC configuration when they are powered on, the power must be off when you install HICs. -
Page 64: Step 2: Remove Controller Canister
The file is saved in the Downloads folder for your browser with the name, configurationData-<arrayName>-<dateTime>.7z. 3. Ensure that no I/O operations are occurring between the storage array and all connected hosts. For example, you can perform these steps: ◦ Stop all processes that involve the LUNs mapped from the storage to the hosts. ◦... - Page 65 Depending on what type of HIC you are upgrading to, you might be able to reuse these SFPs. 4. Confirm that the Cache Active LED on the back of the controller is off. 5. Squeeze the handles on either side of the controller, and pull back until it releases from the shelf.
-
Page 66: Step 3: Remove The Hic
7. Place the controller canister on a flat, static-free surface. 7.2.3. Step 3: Remove the HIC Remove the original HIC so you can replace it with an upgraded one. Steps 1. Remove the controller canister’s cover by unscrewing the single thumbscrew and lifting the lid open. - Page 67 The HIC comes with three screw locations on the top, but is secured with only one. The image above is an example, the appearance of your HIC may differ. 6. Carefully detach the HIC from the controller card by lifting the card up and out of the controller. ...
-
Page 68: Step 4: Upgrade The Hic
The image above is an example, the appearance of your HIC may differ. 7. Place the HIC on a flat, static-free surface. 7.2.4. Step 4: Upgrade the HIC After removing the old HIC, you install the new one. Possible loss of data access — Never install a HIC in a DE6400 or DE6600 controller canister if that HIC was designed for another DE-Series controller. -
Page 69: Step 5: Reinstall Controller Canister
Possible equipment damage — Be very careful not to pinch the gold ribbon connector for the controller LEDs between the HIC and the thumbscrew. 4. Hand-tighten the HIC thumbscrew. The image above is an example; the appearance of your HIC may differ. ... -
Page 70: Step 6: Complete The Hic Upgrade
3. If removed, install the SFPs into the new HIC and reconnect all the cables. If you are using more than one host protocol, be sure to install the SFPs in the correct host ports. If you are using more than one host protocol, be sure to install the SFPs in the correct host ports. -
Page 71: Replace Failed Host Interface Card (Hic) In De6400 Or De6600
SAN OS is installed. As needed, install the latest version. 5. Verify that all volumes have been returned to the preferred owner. a. Select Storage › Volumes. From the All Volumes page, verify that volumes are distributed to their preferred owners. Select More › Change ownership to view volume owners. b. -
Page 72: Step 1: Place The Controller Offline
• Make sure you have the following: ◦ HICs that are compatible with your controllers. ◦ An ESD wristband, or you have taken other antistatic precautions. ◦ A flat, static free work area. ◦ Labels to identify each cable that is connected to the controller canister. ◦... -
Page 73: Step 2: Remove Controller Canister
b. If the graphic shows the drives, select Show back of shelf to show the controllers. c. Select the controller that you want to place offline. d. From the context menu, select Place offline, and confirm that you want to perform the operation. -
Page 74: Step 3: Remove The Hic
6. Using two hands and the handles, slide the controller canister out of the shelf. When the front of the controller is free of the enclosure, use two hands to pull it out completely. Always use two hands to support the weight of a controller canister. 7. - Page 75 Steps 1. Remove the controller canister’s cover by unscrewing the single thumbscrew and lifting the lid open. 2. Confirm that the green LED inside the controller is off. If this green LED is on, the controller is still using battery power. You must wait for this LED to go off before removing any components.
- Page 76 The HIC comes with three screw locations on the top, but is secured with only one. The image above is an example; the appearance of your HIC may differ. 6. Carefully detach the HIC from the controller card by lifting the card up and out of the controller. ...
-
Page 77: Step 4: Replace The Hic
The image above is an example; the appearance of your HIC may differ. 7. Place the HIC on a flat, static-free surface. 7.3.4. Step 4: Replace the HIC After removing the old HIC, install a new HIC. Possible loss of data access — Never install a HIC in a DE6400 or DE6600 controller canister if that HIC was designed for another DE-Series controller. -
Page 78: Step 5: Reinstall Controller Canister
The image above is an example; the appearance of your HIC may differ. 4. Hand-tighten the HIC thumbscrew. Do not use a screwdriver, or you might over tighten the screws. 5. Using a #1 Phillips screwdriver, attach the HIC faceplate you removed from the original HIC with the three screws. -
Page 79: Step 6: Complete Hic Replacement
7.3.6. Step 6: Complete HIC replacement Place the controller online, collect support data, and resume operations. Steps 1. Place controller online. a. In System Manager, navigate to the hardware page. b. Select Show back of controller. c. Select the controller with the replaced host interface card. d. - Page 80 a. Select Support › Support Center › Diagnostics. b. Select Collect Support Data. c. Click Collect. The file is saved in the Downloads folder for your browser with the name, support-data.7z. What’s next? Your host interface card replacement is complete. You can resume normal operations.
-
Page 81: Host Port Protocol Conversion
• You have obtained the necessary hardware for the conversion, which may include a new set of HICs and/or SFPs. Your Lenovo Sales Representative can help you determine what hardware you need and help you order the correct parts. - Page 82 2. Locate the feature pack submodel ID. a. From the ThinkSystem System Manager, select Support. b. Select the Support Center tile. c. On the Support Resources tab, locate and select the Storage Array Profile link. d. Type feature pack submodel ID in the text box, and click Find. e.
- Page 83 Key Enabling Procedures, refer to: Premium Feature Key Enabling Procedure. If your controller submodel ID is not listed, contact Lenovo Data Center Support. 1. In System Manager, locate the Feature Enable Identifier. a. Go to Settings › System. b. Scroll down to Add-ons.
-
Page 84: Step 2: Stop Host I/O
The Premium Feature Activation web site includes a link to “Premium Feature Activation Instructions”. Do not attempt to use those instructions for this procedure. . Choose whether to receive the key file for the feature pack in an email or download it directly from the site. 8.2.2. -
Page 85: Complete Host Protocol Conversion For A De6400 Or De6600
3. Click Browse, and then select the feature pack you want to apply. 4. Type CHANGE in the field. 5. Click Change. The feature pack migration begins. Both controllers automatically reboot twice to allow the new feature pack to take effect. The storage array returns to a responsive state after the reboot is complete. - Page 86 • VMware express configuration • Windows express configuration Specific settings might vary. Check the Lenovo Storage Interoperation Center (LSIC) for specific instructions and additional recommended settings for your solution.
-
Page 87: Power Supplies
Chapter 9. Power supplies 9.1. Requirements for DE6400 or DE6600 power supply replacement Before replacing a power supply in a DE6400 or DE6600 array, review the following requirements. • You must have a replacement power supply that is supported for your controller shelf or drive shelf model. - Page 88 Save all packing materials for use when returning the failed power supply. 2. Disconnect the power cables: a. Open the power cord retainer, and then unplug the power cord from the power supply. b. Unplug the power cord from the power source. 3.
-
Page 89: Step 2: Install New Power Supply And Complete The Replacement
9.2.2. Step 2: Install new power supply and complete the replacement After removing the failed power supply, install a new one. Steps 1. Using both hands, support and align the edges of the power supply with the opening in the system chassis, and then gently push the power supply into the chassis using the cam handle. - Page 90 2. Confirm that its status is Optimal and check the controller shelf’s Attention LEDs. If the status is not Optimal or if any of the Attention LEDs are on, confirm that all cables are correctly seated and the controller canister is installed correctly. If necessary, remove and reinstall the controller canister.
-
Page 91: Sas Expansion Cards
Chapter 10. SAS expansion cards 10.1. Requirements for DE6400 and DE6600 SAS expansion card replacement If you plan to add a SAS expansion card to a DE6400 or DE6600 controller, review the following requirements. • You must follow the Install and set up DE6400 and DE6600 storage systems to set up your controller. -
Page 92: Step 1: Place Controller Shelf Offline
This procedure must be done with both controller canisters. Controller HIC configurations must match exactly. • Make sure you have the following: ◦ A SAS expansion card that is compatible with your controller. ◦ An ESD wristband, or you have taken other antistatic precautions. ◦... -
Page 93: Step 2: Remove Controller Canister
hosts. ◦ Unmount all file systems associated with volumes on the array. The exact steps to stop host I/O operations depend on the host operating system and the configuration, which are beyond the scope of these instructions. If you are not sure how to stop host I/O operations in your environment, consider shutting down the host. -
Page 94: Step 3: Add The New Sas Expansion Card
6. Using two hands and the handles, slide the controller canister out of the shelf. When the front of the controller is free of the enclosure, use two hands to pull it out completely. Always use two hands to support the weight of a controller canister. 7. -
Page 95: Step 4: Reinstall The Controller Canister
Steps 1. Remove the controller canister’s cover by unscrewing the single thumbscrew and lifting the lid open. 2. Confirm that the green LED inside the controller is off. If this green LED is on, the controller is still using battery power. You must wait for this LED to go off before removing any components. -
Page 96: Step 5: Complete Sas Expansion Card Addition
10.2.5. Step 5: Complete SAS expansion card addition Place the controller online, collect support data, and resume operations. Steps 1. Plug in power cables to place the controller online. 2. As the controller boots, check the controller LEDs. ◦ The amber Attention LED remains on. ◦... - Page 97 b. If volumes are all owned by preferred owner continue to Step 6. c. If none of the volumes are returned, you must manually return the volumes. Go to More › Redistribute volumes. d. If only some of the volumes are returned to their preferred owners after auto-distribution or manual distribution you must check the Recovery Guru for host connectivity issues.
-
Page 98: Appendix
Any reference to a Lenovo product, program, or service is not intended to state or imply that only that Lenovo product, program, or service may be used. Any functionally equivalent product, program, or service that does not infringe any Lenovo intellectual property right may be used instead. -
Page 99: Trademarks
Web sites. The materials at those Web sites are not part of the materials for this Lenovo product, and use of those Web sites is at your own risk.
Need help?
Do you have a question about the ThinkSystem DE6400 and is the answer not in the manual?
Questions and answers