Table of Contents
Advertisement
Quick Links
Advertisement
Table of Contents

Subscribe to Our Youtube Channel
Related Manuals for WorldWEIGH CA100 Series


Summary of Contents for WorldWEIGH CA100 Series
- Page 1 CA100 SERIES (P.N. 302666242, Revision C, Apr 2015) 81320474 en...
-
Page 2: Table Of Contents
CONTENTS INTRODUCTION ...................... 3 TECHNICAL SPECIFICATIONS ................4 SPECIFICATIONS FOR THE LOCAL SCALE ............4 SPECIFICATIONS FOR THE REMOTE SCALE ........... 4 COMMON SPECIFICATIONS ................5 INSTALLATION ......................6 LOCATING THE SCALES ..................6 SETTING UP THE SCALES ................. 6 REMOTE SCALE SET UP .................... -
Page 4: Introduction
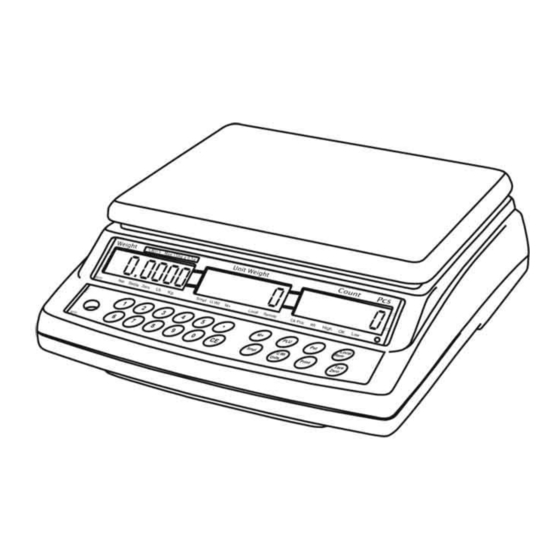
1.0 INTRODUCTION The CA100 series offers a range of an accurate, fast and versatile counting scales that can use one additional external platform (Remote scale) for weighing or counting of heavier items. These counting scales have the ability to use many stored information (PLU). -
Page 5: Technical Specifications
2.0 TECHNICAL SPECIFICATIONS SPECIFICATIONS FOR THE LOCAL SCALE Model # CA100 4 CA100 8 CA100 16 CA100 32 CA100 48 CA100 8a CA100 CA100 35a CA100 70a CA100 100a Maximum 4 kg / 8 kg / 16 kg / 32 kg / 48 kg / Capacity 8 lb... -
Page 6: Common Specifications
COMMON SPECIFICATIONS Interface Bi-directional RS-232 Interface Optional USB Serial Interface Stabilisation Time 2 Seconds Operating Temperature 0°C - 40°C Power supply 115/230 VAC 50/60Hz. 12 VDC 800 mA from external power supply for USA Calibration Automatic external Display 3 x 6 digits LCD digital display Housing Indicator ABS Plastic, Stainless Steel platform... -
Page 7: Installation
SETTING UP THE SCALES SETTING UP THE LOCAL SCALE The CA100 Series comes with a stainless steel platform packed separately. Place the platform in the locating holes on the top cover. - Page 8 SETTING UP THE REMOTE SCALE The CA100 Series can be connected to any size of load cell type weighing base via the Remote scale port on the right side of the scale case. Ensure you have the correct base for the scale as each is matched for calibration.
-
Page 9: Remote Scale Set Up
REMOTE SCALE CONNECTION The cable for the load cell goes to a 9 pin D-subminiature plug connector with the following connections: Pin numbers Connection Pins 1,2 + Excitation (0 V) Pins 4,5 - Excitation (+5 V) Pin 6 + Signal Pin 7 - Signal (The sense wires connections of a six wire load cell are not used and should... -
Page 10: Key Descriptions
4.0 KEY DESCRIPTIONS [0-9, •] These keys are used to manually enter a value for tare weights, unit weight and sample size. A secondary function is to enter alpha-numeric characters for PLU descriptions etc. [CE] Pressing this key clears the unit weight or an erroneous entry. It also clears the memory accumulation when the total is displayed. -
Page 11: Displays
[Local Rem] This key is used to select the local or remote scale. [Tare/Zero] This key has a combined Zero and Tare function. If the net weight is below ±2% of maximum then it acts as a Zero key. This sets the zero point for all subsequent weighing by setting the display to zero. -
Page 12: Unit Weight Window
UNIT WEIGHT WINDOW This display will show the unit weight of a sample. This value is either entered by the user manually or computed by the scale. The unit of measure is either gram on all scales with kilogram selected as weighing unit or in pounds. -
Page 13: Operation
6.0 OPERATION The basic weighing functions are same for both the local and remote scales. However the number of weighing divisions may be less on the remote scale dependant on the total capacity of the load cell/s used. Each scale (local or remote) has the ability to count parts based on the current unit weight. - Page 14 The Tare and Zero function are combined into one key. When the gross weight is within ±2% of the zero, set at power on for either scale then a new zero is set. If the gross weight is greater than ±2% then the tare function is performed.
- Page 15 When the container is removed a negative value will be shown. If the scale was tared just before removing the container this value is the gross weight of the container plus all products those were removed. The zero indicator will also be ON because the platform is back to the same condition as it was when the [Tare/Zero] key was last pressed.
-
Page 16: Memory Functions
MEMORY FUNCTIONS The [M+] key will add the results of a weighing into memory, regardless of whether the local or remote scale is being used for the weighing. 6.2.1 Manual accumulation The values (weight and count) shown on the display can be added to the values in the accumulator by pressing the [M+] key. -
Page 17: Parts Counting
PARTS COUNTING The basic function of parts counting is same for both the scales. In order to do parts counting it is necessary to know the average weight of the items to be counted. This can be done either by weighing a known number of the items and letting the scale determine the average unit weight or by manually inputting a known unit weight using the keypad. -
Page 18: Entering A Known Unit Weight
6.3.2 Entering a known Unit Weight If the unit weight is already known then it can be entered using the keypad. Enter the value of the unit weight using the numeric keys followed by pressing the [U. Wt.] key within few seconds while the display is flashing. -
Page 19: Count Pre-Set Or Check-Weighing
6.3.4 Count pre-set or check-weighing Check-weighing (or Count Pre-setting) is a procedure to cause an alarm to sound when the net weight (or the number of items) on the scale meets or exceeds a number stored in memory. The value to be stored is entered from the keyboard. -
Page 20: Plu (Product Look Up)
PLU (Product Look Up) Product Look-Up (PLU) numbers are used to store information about the commonly used items. The Tare Weight, Description of the product and Unit Weights for a particular item are recalled by entering the PLU number for ease of operation. - Page 21 Please find below an example for setting up “PLU 27” with Description as “M4 Nut” and Unit weight of “0.015”. ACTIONS DISPLAYS REMARKS Weight Unit weight Count “PLU ” “ - -“ “ “ Press [PLU] “PLU ” “ 27” “...
-
Page 22: Entering Description Manually
6.4.2 ENTERING DESCRIPTION MANUALLY The description can be up to 12 characters long and can be a mix of numbers, symbols or letters. During the procedure to set the description the numeric keypad will work in a similar way to a mobile telephone. Pressing a number briefly will show the number and holding it down will scroll through all the characters. -
Page 23: Recalling Plu's Manually
6.4.3 RECALLING PLU’S MANUALLY To recall the PLU values the user should first select either local or remote scale as the tare value stored will be specific to the scale selected. Then press the [PLU] key, enter the PLU number (00 – 99) then press the [PLU] key again to recall the data. - Page 24 If a PLU number is recalled that does not have any information stored against it, the scale will continue to work with Tare and Unit weight unchanged. NOTE: PLU’s can be stored and recalled using RS-232 Interface (see section 9.1 and 9.2 of this user Manual).
-
Page 25: Parameters
7.0 PARAMETERS The following parameters set up the scale as required by the user. For the Technical parameters and configuring the remote platform refer to Section Enter the User Parameters section by pressing the [Pst] key during the self- test when the power is turned on or press and hold the [Pst] key for 3 seconds during normal operation. - Page 26 Un I t “UnI t” ” KG/ Lb” kg/ lb both are enabled ”UnI t” “KiLo” kg only is enabled ”UnI t” “Lb” lb only is enabled F2 Prt P Mo dE Print Au oFF Prints only when the Auto- Accumulation is set to off.
-
Page 27: Real Time Clock
REAL TIME CLOCK The Real Time Clock (RTC) is used only for the RS-232 output. See Section 9. The Date and Time can be set as required. The scale will keep the clock running even when the power is off. Setting up the clock ... -
Page 28: Battery Operation
8.0 BATTERY OPERATION The scales can be operated from the battery. The battery life is approximately 70 hours if only the basic unit is used and the backlight is not used. If the backlight and a second platform is used the battery life will be reduced. -
Page 29: Rs-232 Output
9.0 RS-232 OUTPUT Specifications: RS-232 output of weighing, data default settings ASCII code 4800 Baud (600-9600 selectable) 8 data bits (8 data bits no parity, 7 data bits even and odd parity selectable) RS-232 Connector style: 9 pin D-subminiature socket Pin 2 Input Pin 3 Output Pin 5 Signal Ground... -
Page 30: Input Commands Format
Sample of output: Using M+ function Using PRINT function DATE 01/27/2011 DATE 01/27/2011 TIME 12:38:49 TIME 12:39:58 LOCAL SCALE LOCAL SCALE SID: ABS123 SID: ABS123 UID: 123ABC UID: 123ABC NAME:Text NAME:Text S. No. 12.456 kg NET 12.456 kg NET 1.1234 g U.W. -
Page 31: Storing Data Via Rs232
Basic Commands: PLUxx Select PLU from scale memory to be used Tare current weight value T123.456 preset tare value is 123.456 Zero the display Print using selected format Store current results into memory and print Recall memory values to scale display Clear memory U123.456 Store unit weight of 123.456... -
Page 32: Plu Entry Using Rs-232 Interface
PLU ENTRY USING RS-232 INTERFACE This method enables the user to send the data from a PC program as well as from the keypad. The most common PLUs can be stored and recalled from the scale memory. Other PLU data can be stored on a PC, then the Description (text data), Unit Weight and Tare Weight data can be sent from the PC for the PLUxx (where xx can be any desired number up to 99). -
Page 33: Calibration
10.0 CALIBRATION ACTION DISPLAYS Press the [Tare/Zero] key during the self- “ Pi n” test at power on. The scale will ask to enter the password. Default Password is 0000. Enter “0” four times. “ Pi n” “ - - - -” Password can be changed in technical parameters. - Page 34 “- - - -” “ - - - -” “ - - - - ” The Calibration is complete, the scale “SPAn” “ PASS” “ ” will run the self-test during which the weight should be removed. “SPAn” “ FAiL” “ LoW ” or If calibration is not possible an error message will be shown “HiGH...
-
Page 35: Error Codes
11.0 ERROR CODES During the initial power-on testing or during the operation, the scale may show an error message. The meaning of the error messages are described below. If an error message is shown, repeat the procedure that caused the message, such as turning the balance on, calibration or any other functions. -
Page 36: Technical Parameters
12.0 TECHNICAL PARAMETERS The technical parameters accessed via the “tECH” prompt at the end of user parameters and are password controlled to prevent unauthorised access. These parameters set the metrology for the scales. Each scale is set independently. The parameters will set capacity, division, decimal point position, initial zero range, auto and manual zero range as well as factory calibration. - Page 37 Press the [U.Wt/Unit] to go to next menu. Press [Print] to enter. “CAP”. Scale capacity setting. Use [U.Wt/Unit] to select the decimal point position and press “dESC” “ 0.00” [Print]. To change the remote scale cap press CE to clear and then enter “LOAd”...
-
Page 39: Replacement Parts And Accessories
13.0 REPLACEMENT PARTS AND ACCESSORIES If you need to order any spare parts and accessories, contact your supplier. A partial list of such items is as follows- Power Supply Module In use cover Main Power cord Printer, etc. - Page 40 SOCIETÀ COOPERATIVA BILANCIAI CAMPOGALLIANO Via S. Ferrari, 16 41011 Campogalliano (MO) - Italia Declare under our responsibility that the product: Electronic weighing terminal CA100 and its options described in this declaration complies with: 2014/30/UE (EMC) 2014/35/UE (LVD) Conformity is censure by complying with EN 61000-6-3, EN 61000-6-4 EN 60950 The CE marking has been applied on this product.
- Page 41 This symbol on the weighing instrument you have purchased means that: • this electric or electronic appliance cannot be disposed of as solid municipal waste; • it must be collected separately; • it can be returned to the dealer when a new one is purchased; •...
Need help?
Do you have a question about the CA100 Series and is the answer not in the manual?
Questions and answers