Table of Contents
Advertisement
Advertisement
Table of Contents

Related Manuals for Smeg CWC620D


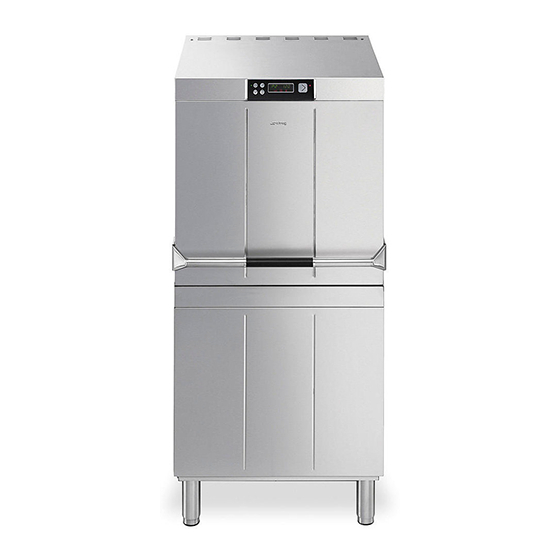
Summary of Contents for Smeg CWC620D
- Page 1 PROFESSIONAL DISHWASHER ...
-
Page 2: Table Of Contents
CONTENTS PRECAUTIONS FOR SAFETY AND USE ..3 TECHNICAL DATA ...6 INSTALLATION AND POSITIONING ...7 INSTRUCTIONS FOR TECHNICAL STAFF ...8 Plumbing hookup ..8 Electrical connection .. 10 FIRST START‐UP .. 12 SET‐UP .. 13 Dishwasher parameter modification procedure: .. 13 Quit “ SET‐UP “ menu .. 16 Rinsing temperature setup ... 16 Washing temperature setup ... -
Page 3: Precautions For Safety And Use
11.1 Daily cleaning .. 30 11.2 Routine inspection of the spray arms ... 32 11.3 Lengthy periods out of use ... 32 TROUBLESHOOTING .. 32 MALFUNCTIONS SHOWN ON THE DISPLAY (FOR THE USER) ... 34 SMEG Thanks you for choosing one of its products. Read all the instructions in this manual carefully to become familiar with the right conditions for the TECHNICAL INSTRUCTIONS These are intended for the qualified staff who are to install, commission and test the appliance and carry out any servicing and repairs. INSTRUCTIONS FOR THE USER These provide recommendations for use, a description of the controls and the correct procedures for cleaning and maintaining the dishwasher. 1 PRECAUTIONS FOR SAFETY AND USE ... - Page 4 THIS MANUAL IS AN INTEGRAL PART OF THE DISHWASHER AND MUST ALWAYS BE POSITIONING, HOOKUP, COMMISSIONING, TROUBLESHOOTING AND REPLACING THE POWER CABLE MUST ALWAYS BE CARRIED OUT BY QUALIFIED STAFF. THE APPLIANCE MUST BE GROUNDED AS REQUIRED BY ELECTRICAL EQUIPMENT THE DISHWASHER IS INTENDED FOR PROFESSIONAL USE ONLY AND MUST ONLY BE USED BY AUTHORISED STAFF. IT IS DESIGNED TO WASH TABLEWARE (PLATES, CUPS, BOWLS, OVEN DISHES AND CUTLERY) AND SIMILAR ITEMS IN THE RESTAURANT AND INSTITUTIONAL CATERING SECTOR, AND COMPLIES WITH THE INTERNATIONAL STANDARDS ON ELECTRICAL AND MECHANICAL SAFETY ...
- Page 5 THE SYMBOL OF THE RUBBISH BIN WITH A BAR ACROSS IT ON THE PRODUCT OR IN THE TECHNICAL DOCUMENTATION INDICATES THAT THIS PRODUCT MUST NOT BE TREATED AS ORDINARY DOMESTIC WASTE BUT MUST BE CONSIGNED TO THE SPECIAL COLLECTION POINT FOR THE RECYCLING OF ELECTRICAL AND ELECTRONIC EQUIPMENT. NEVER PLACE SOLVENTS SUCH AS ALCOHOL OR TURPENTINE, WHICH MIGHT CAUSE AN EXPLOSION, INSIDE THE APPLIANCE. NEVER LOAD DISHES DIRTY WITH ASH, WAX OR PAINTS. DO NOT DRINK ANY WATER LEFT IN THE DISHES OR DISHWASHER AT THE END OF THE WASHING PROGRAM. THE APPLIANCE IS NOT SUITABLE FOR USE BY JUVENILES OR PERSONS WITH REDUCED PHYSICAL, SENSORIAL OR MENTAL CAPACITIES, OR THOSE WITHOUT THE NECESSARY KNOWLEDGE AND EXPERIENCE. SUCH PERSONS MAY ONLY USE THE APPLIANCE UNDER ...
-
Page 6: Technical Data
2 TECHNICAL DATA Supply voltage Frequency Max. power absorption at 400V 3N ~ Boiler heating element power at 400V 3N ~ Tank heating element power Water intake pressure Water intake temperature Water intake hardness Rinse cycle water consumption Boiler capacity Tank capacity Durée cycle standard avec alimentation d’eau à 50°C Degree of protection Net weight Fuse Power supply cable type Supply voltage Frequency 400V 3N ~ C 10.8 kW 5 X 4 □ ‐ CW 620/630 Hz kW kW kW ... -
Page 7: Installation And Positioning
3 INSTALLATION AND POSITIONING INSTALLATION and POSITIONING Bring the hood dishwasher to the installation site, remove the packaging and check the appliance and components for damage; any damage found must be reported to the transporter in writing. The packaging components (plastic bags, expanded polystyrene, nails, etc.) must not be left within reach of children and pets since they are potentially dangerous. All packaging materials used are environment‐ friendly. They can be kept without constituting any hazard, or may be disposed of at a specialist waste disposal centre. The plastic components suitable for recycling are marked as follows: PE polyethylene: external packaging film, bag containing the instructions, protective bags. PP polypropylene: straps. PS expanded polystyrene: corner guards, top of packaging. Wooden and cardboard components can be disposed of in accordance with the relevant regulations. When the product is decommissioned it must ... -
Page 8: Instructions For Technical Staff
SOLENOID VALVE EARTH TERMINAL ELECTRICITY SUPPLY CABLE PERISTALTIC HOSES DRAIN HOSE 4 INSTRUCTIONS FOR TECHNICAL STAFF 4.1 Plumbing hookup Water supply and drain hookup The water pipelines and electricity supply cable lead out of the bottom right‐ hand corner of the appliance. Connect the water intake hose to a connector with ¾” gas threaded fitting, fitting the filter A provided (in models with Aquastop, the filter and ring‐nut form a single unit). The connection to the water mains must only be made with new hoses; the use of old or worn hoses is not permitted. The dynamic water supply pressure must be between 1 and 6 bar; if it is higher, installation of a pressure reducer is necessary. ... - Page 9 Drainage: The dishwasher is fitted with a drain pump and can operate with drain connections on the floor or wall. Caution: make sure that the intake and drain hoses are not bent, constricted or crushed after installation. Warning! Maximum height of drain hose! If the appliance is fitted with a water softener, the drain must not be connected to a siphon with valve. Refer to the connection diagram for the maximum permitted height of wall drains – (see TECHNICAL DATA) Caution: make sure that the intake and drain hoses are not bent, constricted or crushed after installation. ...
-
Page 10: Electrical Connection
4.2 Electrical connection The dishwasher and any additional equipment must be connected to the electrical system by authorised, skilled staff, in accordance with the relevant regulations; also comply with the technical instructions for the connection. The total rated power is stated on the appliance’s technical data plate. The electrical protection devices fitted for the dishwasher must serve this appliance only. ... - Page 11 ‐ CW 620/630 Figure 1 – Appliance electrical connection diagram 11 ...
-
Page 12: First Start-Up
5 FIRST START-UP First start‐up The electrical protection system must undergo a functional test before the appliance is put into operation. The appliance must be installed and/or inspected by qualified staff, who will start it up for the first time and provide the relevant operating instructions. Preparing for use (important) The rinse aid dispenser is fitted on all models, the detergent dispenser only on some. If both dispensers are present put the external detergent and rinse aid containers in place and insert the respective intake hoses on the rear of the appliance into them. ... -
Page 13: Set-Up
Whenever the type of detergent or rinse aid is changed, it is ABSOLUTELY ESSENTIAL to flush out the peristaltic pumps by placing the external intake pipes in water for a few cycles. Always use only products specifically recommended for use in a dishwasher. Failure to comply with this recommendation leads to forfeiture of the warranty entitlement on the appliance’s water system. The internal pipes of the detergent and rinse aid pumps should be replaced by the After‐Sales Service every 12 months or 15,000 wash cycles and operation of the diaphragm rinse aid pump should be checked. 6 SET-UP Set‐up During first start‐up, the functions/parameters listed below must be set or adjusted: 6.1 Dishwasher parameter modification procedure: Only accessible after filling is complete or with the hood open. ... - Page 14 Washing temperature (tank temperature) Quantity of rinse aid dispensed, OPT, only if installed (the number indicates the number of seconds for which the peristaltic pump is operated) Quantity of detergent dispensed, OPT, only if installed (the number indicates the number of seconds for which the peristaltic pump is operated) Start‐on/start‐off Set at “on” to start the cycle when the hood is closed. Set at “off” for cycle start after confirmation with the start button Water hardness setting (OPT, on models with softener only) tStP on/off “on” = minimum rinsing temperature as set, regardless of intake water temperature; the cycle duration may be a few seconds longer than the nominal length. “off” = the minimum rinsing temperature might be a few degrees lower than the setting if hot intake water is not used. ‐ CW 620/630 14 ...
- Page 15 Rinse aid pump total operating minutes display. This value can be reset after pump maintenance ‐ see below. Detergent pump total operating minutes display. This value can be reset after pump maintenance ‐ see below. Energy consumption (kW) display The Pc option indicates the total kW consumed since installation of the dishwasher or since the latest reset. Display of the number of cycles performed When scrolling through the appliance parameters, the “tc 88888” item will also appear; this is the count of the total cycles performed by the dishwasher since installation. This parameter cannot be modified or reset unless the software is reprogrammed. Customisation of duration of program P4. ‐ CW 620/630 15 ...
-
Page 16: Quit " Set-Up " Menu
Steam extraction system operating time display and setting This submenu and the relative functions can only be accessed with the aid of a password available on SmegTech and only by technical staff. 6.2 Quit “ SET‐UP “ menu Wait more than 10 seconds without pressing any button and the appliance quits this menu automatically, or press the on/off button to exit. Caution: the tank and boiler temperatures shown on the display may be different from the actual temperatures by a few degrees, especially in transient phases (just after the FILL is completed, just after ... -
Page 17: Washing Temperature Setup
6.4 Washing temperature setup 6.5 Rinse aid dispensing setup * default value (factory preset) 6.6 Adjusting detergent dispensing (optional if installed) * default value (factory preset) ‐ CW 620/630 Modify the value of the parameter by pressing Modify the value of the parameter by pressing . Modify the value of the parameter by pressing ... -
Page 18: Autostart Function
6.7 Autostart function Set at “on” to start the cycle when the hood is closed. Set at “off” for cycle start after confirmation with the start button 6.8 Regeneration frequency setup (models with softener) (Default value: H03; modify the parameter to suit the mains water hardness. At first use, the salt tank has to be filled. It is subsequently sufficient simply to fill up with regenerating salt when necessary. Important: During normal operation, the dishwasher will perform a number of washing cycles while regeneration is in progress. ... -
Page 19: Tstp (Minimum Rinsing Temperature) Function
6.9 tStP (minimum rinsing temperature) function Set at “on” for minimum rinsing temperature as set; set at “off” for rinsing regardless of boiler temperature. If the parameter is set as “off” and hot intake water is not used, the minimum rinsing temperature might be a few degrees lower than the setting. ... -
Page 20: Energy Consumption - Display And Reset If Required
6.12 Energy consumption – Display and reset if required 6.13 Customisation of duration of program P4. The duration of program P4 can be customised from 3 to 10 minutes 6.14 Steam extraction time setting (optional if installed) ‐ CW 620/630 To reset, press Access the programming procedure and scroll through to “ınF” using the button, then scroll through to 03:00 and press the button to set the time required (from 3 to 10 minutes) After a few seconds without the user pressing any buttons, the display will return to the normal operating status and the modifications will be saved. Steam extraction system operating time display and setting 20 for 3 seconds. ... -
Page 21: Service Setting (For After-Sales Service Only)
6.15 Service setting (for After‐Sales Service only) 6.16 Starting the peristaltic pumps – rapid filling of detergent and rinse aid delivery circuit. Perform after the parameter modification procedure explained in the previous point. With the dishwasher powered up, access “programming mode” by pressing the on/off the “beep”, release the button and press it again quickly within 0.5 seconds. The peristaltic pumps continue to operate until the same button is pressed again. The rinse aid and detergent symbol lights remain on as long as the pumps are on; bear in mind that the rinse aid peristaltic pump fills the circuit in about 7 ... -
Page 22: Malfunctions Shown On The Display (For The Technician)
7 MALFUNCTIONS SHOWN ON THE DISPLAY (FOR THE TECHNICIAN) The dishwasher is able to identify a number of malfunctions and show them on the display. If the problem persists after the dishwasher has been switched off and back on, proceed as described below: The anti‐flooding system has been Err01 activated (for the relevant models only). Err04 Tank temperature probe malfunction Err05 Tank water filling malfunction Err06 Water pump‐out malfunction Err09 Too much water in tank ‐ CW 620/630 Large water leak: check the origin of the problem. Tank temperature probe disconnected or not working. The tank does not fill within the allowed time: check ... - Page 23 Err23 Boiler does not heat up as expected Err24 Boiler temperature probe malfunction Err25 Boiler water filling malfunction Err26 Boiler emptying malfunction Boiler emptying malfunction – with tank Err27 full Err28 Boiler heating malfunction (overheating) ‐ CW 620/630 The problem might occur because water is continually entering the tank (the causes are as for Err5 – see above) If it persists, check in this order: ‐ damaged boiler heating element ‐ contactor failure, ‐ boiler safety thermostat failure, ‐ boiler temperature probe faulty or incorrectly positioned ...
-
Page 24: Instructions For The User
8 INSTRUCTIONS FOR THE USER 8.1 Control panel On‐off button Program selection button Start CONFIRM/PAUSE button Total emptying button (tank and boiler) Additional function selection button L1 Mains power on light L2 Intake/standby cycle in progress light (red/green) L3 Pump‐out in progress light No rinse‐aid symbol (if a system for monitoring outside the dishwasher is provided) Tank heating element on symbol No salt symbol (if softener is fitted) ... -
Page 25: Before Washing
8.2 Before washing Use only detergents and rinse aids for industrial dishwashers. Do not use detergents intended for hand washing. We recommend the use of Smeg products, specially developed for this dishwasher. When topping up the tanks, take care not to swap the products; this might damage the dishwasher and cause malfunctions. Do not mix different detergents; this would damage the dispenser device. Industrial dishwasher detergents may cause serious irritation. Comply carefully with the instructions provided by the detergent producer on the pack. Turn on the The level of mains water detergent and tap (user) rinse aid in the containers. ... - Page 26 When the hood is closed again, the system offers the last program run. ‐ CW 620/630 Load the dishes Lower the hood and the cycle starts Select the program required by pressing Only with Autostart OFF: Confirm the program start by pressing down for 1 second (light L2 changes from green to orange). Cycle in progress, the progress of the cycle is displayed by vertical bars which illuminate in sequence. If the hood is opened “CLOSE” flashes and the program stops; when it is ...
-
Page 27: Changing The Program
8.4 Changing the Program Note: During heating of the water in the boiler and tank with the cycle running, the tank heating element and boiler heating element symbols may appear on the display. Filter presence sensor (on some models only) The filter is fitted with a sensor which checks that it is properly fitted; if it is not in the correct position, the word FiLter” appears on the display. ‐ CW 620/630 With the hood closed, to change to a fresh program instead of repeating the last one, press the The programs available are displayed. If a program has already started, press down to interrupt it. ... -
Page 28: Choosing The Program
9 CHOOSING THE PROGRAM PROGRAM P1 Glasses and plates with light dirt P1+ Glassware, plastic trays, pre‐washed plates Sanitisation function P2 Glasses, cups and plates with light dirt P2+ Normal cycle for glassware Sanitisation function P3 Very dirty dishes and cutlery P3+ Cycle for sanitising plates and glasses Sanitisation function P4 Depending on the duration set. (*) The cycle duration stated above refers to three‐phase appliances supplied with hot water at 50°C. If the appliance is supplied with cold water, the cycle duration might increase depending ... -
Page 29: Selecting The "Extra Rinse" Function (Available In P1-P2-P3-P4)
10.2 Selecting the “extra rinse” function (available in P1‐P2‐P3‐P4) Extends the duration of the rinse During performance of cycles with Extra Rinse, the cycle duration increases by about 30" because of the increased duration of the rinsing phase and the time consequently required to restore the level and temperature in the boiler. If the Termostop is OFF and the dishwasher is connected to cold water, this function will be less effective Selecting the “sanitisation” function (only available in P3) Increases the program’s washing and rinsing temperatures and duration N.B.: ‐ the supplementary function remains selected until the program is changed or the dishwasher is switched off by pressing the ‐ During execution of the selected program, the display alternates between showing the supplementary function and the duration. ... -
Page 30: Maintenance And Cleaning
Cutlery Use the basket(s) provided. Load cutlery loose, preferably with the handle at the bottom, taking care not to injure yourself with fork prongs or knife blades. TOTAL PUMP‐OUT AT THE END OF THE DAY The dishwasher is able to perform an automatic cleaning cycle at the end of the day. 11 MAINTENANCE AND CLEANING Although no particular scheduled maintenance is required, users are advised to have the dishwasher checked by a specialist technician twice a year. N.B: the manufacturer accepts no liability for wilful damage or damage deriving from carelessness, neglect, failure to comply with instructions, regulations and standards or incorrect connections. ... - Page 31 Cleaning the filter during the day In case of particularly heavy‐duty working conditions, the filter should be cleaned every 30‐40 cycles, keeping the machine in operating conditions; to do this, carry out the “partial tank pump‐out” routine (program “P0”). Remove the filters (simply lift them out as shown here), taking care that no large residues fall into the sump underneath. Clean them to remove ...
-
Page 32: Routine Inspection Of The Spray Arms
11.2 Routine inspection of the spray arms Remove the washing and rinsing (top and bottom) spray arms by unscrewing the central screw; remove the rinsing spray arms 3 and remove the screws 2 as shown. Do not unscrew the nozzles. Clean the holes and nozzles under a jet of clean running water; do not use tools which might cause damage. Reassemble the spray arms with care. ... - Page 33 INADEQUATE RINSING DISHES NOT PROPERLY DRIED STAINS ON GLASSES AND CUTLERY WATER IN TANK AFTER PUMP‐OUT ‐ CW 620/630 Too little or unsuitable detergent or rinse aid No or not enough detergent or rinse aid being supplied: detergent or rinse aid not being taken from the relative container. Plates/glasses badly arranged Low washing temperature Inappropriate cycle set Spray arm nozzles fouled Limescale in boiler Rinse aid unsuitable or not being delivered correctly. Rinsing temperature too low Rinse aid unsuitable or not being delivered correctly. Water hardness above 12°f or large amounts of dissolved salts Drain hose incorrectly positioned or partially obstructed. Drain hose incorrectly positioned or partially obstructed. 33 day” Check type and quantity of detergent. Pipe inside detergent and/or rinse ...
-
Page 34: Malfunctions Shown On The Display (For The User)
13 MALFUNCTIONS SHOWN ON THE DISPLAY (FOR THE USER) The dishwasher is able to identify a number of malfunctions and show them on the display. If the problem persists after the dishwasher has been switched off and back on, proceed as described below: (TO ALLOW THE AFTER‐SALES SERVICE TO TAKE THE APPROPRIATE ACTION, ALWAYS MAKE A NOTE OF THE ERROR INDICATED) The anti‐flooding system has been Err01 activated (for the relevant models only). Err04 Tank temperature probe malfunction Err05 Tank water filling malfunction Water pump‐out malfunction Err06 (dishwasher is left full of water) Err09 Tank water level too high Boiler heating malfunction (does not Err23 heat up) Err24 Boiler temperature probe malfunction Err25 Boiler water filling malfunction Err26 Boiler emptying malfunction Boiler emptying malfunction – with tank ... - Page 35 INFORMATION AND AFTER‐SALES SERVICE FOR SMEG PRODUCTS Our Sales Department staff will be able to provide you with information about prices and special offers. Our After‐Sales Department will be able to provide you with guidance about keeping your appliance functioning correctly and put you in touch with your nearest authorised Service Centre. * Maximum cost 14.26 cent./min. including VAT with no charge on answer from landline. Maximum cost 48 cent./min. including VAT with maximum charge on answer of 15.49 cents including For further details of costs of calls from cell phones contact your operator. Our whole product offering can be viewed at: International customers, please contact your local SMEG distributor. Via Leonardo da Vinci, 4 ‐ 42016 Guastalla (Reggio Emilia) ‐ CW 620/630 COMMERCIAL DISHWASHERS VAT from cell phone. www.smeg‐ristorazione.com Smeg S.p.A. Tel. +39 0522 8211 ‐ Fax + 39 0522 821453 email ristorazione@smeg.it 19.390.2718.02 25/03/2012 Ed. Ed. 35 Date ...
Need help?
Do you have a question about the CWC620D and is the answer not in the manual?
Questions and answers
Do we need to have any exhaust to outside?