Table of Contents
Advertisement
Quick Links
Advertisement
Table of Contents

Related Manuals for Uninet DTF 3300


Summary of Contents for Uninet DTF 3300
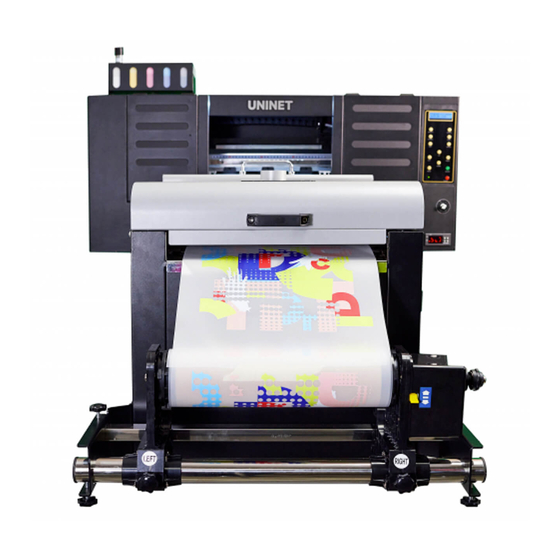
- Page 1 3300 USER MANUAL pg. 1 UNINET DTF 3300...
- Page 2 Date Version Language 08/10/2022 English pg. 2 UNINET DTF 3300...
-
Page 3: Table Of Contents
ATTACHING THE PRINTER……………………………………………………………………………………………………………………………………………………17 INSPECTING THE PRINTER………………………………………………………………………………………………………………………………………………..…18 INSTALLING THE MEDIA ROLL…………………………………………………………………………………………………………………………………………….19 PRINTHEAD INSTALLATION………………………………………………………………………………………………………………………………………………...20 FIRST TIME START-UP………………………………………………………………………………………………………………………………………………………...25 BUTTON PANEL & TEMPERATURE CONTROL………………………………………………………………………………………………………………….….25 PRINT EXP INSTALLATION……………………………………………………………………………………………………………………………………………….….26 PRINT EXP OVERVIEW…………………………………………………………………………………………………………………………………………………….…..27 CALIBRATION………………………………………………………………………………………………………………………………………………………………………31 SHAKER & HEATER……………………………………………………………………………………………………………………………………………………………..34 ADDITIONAL SOFTWARE…………………………………………………………………………………………………………………………………………………….37 PC REQUIREMENTS……………………………………………………………………………………………………………………………………………………………..37 MAINTENANCE……………………………………………………………………………………………………………………………………………………………………38 pg. 3 UNINET DTF 3300... -
Page 4: Warning
IT IS RECOMMENDED THAT ALL THE STAFF THAT WORK WITH AND / OR WHO ARE RESPONSIBLE FOR THE USE AND MAINTENANCE OF THE SYSTEM CAREFULLY READ THIS MANUAL AND BE FAMILIAR WITH THE NECESSARY PRECAUTIONS, OPERATIONAL AND MAINTENANCE PROCEDURES. pg. 4 UNINET DTF 3300... -
Page 5: General Safety Precautions
• This product emits low level magnetic flux. If you use a cardiac pacemaker and feel abnormalities, please move away from this product and consult your doctor. pg. 5 UNINET DTF 3300... - Page 6 WARNING: WORK IN A WELL VENTILATED AREA and use protective equipment when working with DTF products and processes. UNINET highly recommends the use of a fume extractor to handle the fumes caused by TPU adhesive powder curing. Bodily protection, including the use of PPE equipment such as a full body covering, a respirator / N95 mask, goggles and gloves are recommended to protect against TPU adhesive powder (prior to curing) that may become airborne due to handling.
-
Page 7: General Information
When performing TEST PRINTS, you can print directly to regular paper, by feeding the paper just like you would a regular printer. IDENTIFICATION Brand: UNINET DTF Model: UNINET DTF -3300 GENERAL WARNINGS • The minimum age of staff/operators is 18 years old. Keep away from children or untrained operators. -
Page 8: Warranty
RESPONSIBILITY The total liability of UNINET DTF ™ cannot, in any case, exceed the value of the defective, damaged or not delivered goods, calculated on the basis of the prices charged on the invoice. UNINET DTF ™... -
Page 9: Instructions For Use
• Do not spill liquid on the printer and / or handling system of the media; • Inspection and repair should be performed by trained personnel as recommended by UNINET DTF ™ - tampering, improper use, repairs and / or action taken by anyone not authorized by UNINET DTF ™ void the warranty. -
Page 10: Read This First
• If you are experiencing personal injury, property damage and / or faults caused by misuse of the products and / or aftermarket parts and / or different from those recommended in the specific operating and maintenance or UNINET DTF ™ . pg. 10... -
Page 11: Materials
The following instructions will walk you through how to assemble the printer’s base. Parts do not have physical alphabetical labels, this is done for instructional purposes. First, attach the 4 wheels to parts A using 16 Philip’s head screws. Philip’s Head Wheels Screws Result once all wheels are correctly attached pg. 11 UNINET DTF 3300... - Page 12 B is the side that connects to part A. Hexagon Head Screws Result once part B is correctly attached to part A Then, take part C and attach it to both B parts using 14 hexagon head screws. pg. 12 UNINET DTF 3300...
- Page 13 There will be 3 screw holes on the inside of part C at each end and 4 screw holes on the outside of part C on both ends. Examples of both screw hole locations are shown above. Next, take both D parts and attached them to the B parts using 10 hexagon head screws. pg. 13 UNINET DTF 3300...
- Page 14 D parts. The second silver tube will go in the inner holes of the base and the half cut holes of the roll media holder. An image of the parts assembled correctly can be seen on the next page. pg. 14 UNINET DTF 3300...
- Page 15 The waste bottle holder with be attached using 3 short hexagon head screws. An image of the parts assembled correctly can be seen on the next page. pg. 15 UNINET DTF 3300...
- Page 16 4 of the E parts and 12 short hexagon head screws. These are to be attached to the inner and outer sides of the B parts. In the images below are examples from different views of the parts attached correctly. Front View Top View Side View pg. 16 UNINET DTF 3300...
-
Page 17: Attaching The Printer
REMOVE THE PRINTER FROM THE BOX AS SHOWN IN THE IMAGE BELOW. RIMUOVERE LA STAMPANTE DALLA SCATOLA COME MOSTRATO NELLA FIGURA. DÉPLACER L’IMPRIMANTE DE LA BOÎTE COMME INDIQUÉ DANS L’IMAGE CI-DESSOUS. REMOVER LA IMPRESORA DE LA CAJA COMO ESTA INDICADO EN EL DIBUJO SIGUIENTE. pg. 17 UNINET DTF 3300... -
Page 18: Inspecting The Printer
This piece needs to be removed so that the printhead can move freely. Simply unscrew the 2 Philip’s head and single hexagon head screws, remove the metal plate and put the screws you removed back into their original places. pg. 18 UNINET DTF 3300... -
Page 19: Installing The Media Roll
Once you are happy with the alignment, push the handle in so that the rubber rollers secure the film in place. pg. 19 UNINET DTF 3300... -
Page 20: Printhead Installation
3. After the carriage cover is taken off, you need to remove the cover that sits atop the carriage. This can be detached by remove the 2 Philip’s head screws on the right-hand side and 1 on the left- hand side. Carriage Cover Top Cover Left Top Cover Right Screws Side Screw Side Screws pg. 20 UNINET DTF 3300... - Page 21 Folding a cable does not negatively affect it. The image below depicts what the control board should look like when all 4 cables are inserted. Left Left CMYK White Right Right pg. 21 UNINET DTF 3300...
- Page 22 All dampers for the white printhead are the same and plug in one by one from left to right. For the CMYK printhead the order the dampers from left to right is: Black, Yellow, Cyan, Magenta, Magenta, and Cyan. White Dampers CMYK Dampers pg. 22 UNINET DTF 3300...
- Page 23 The other white line is connected to the peristaltic pump and should be attached to one of the spouts on the top of the white ink tank. Peristaltic Pump pg. 23 UNINET DTF 3300...
- Page 24 The printheads cannot be exposed to air for more than 12 hours. Remove all ink from the tanks on top. Empty waste bottle and ensure waste lines are not freely dripping. pg. 24 UNINET DTF 3300...
-
Page 25: First Time Start-Up
3. Press and hold S + ↑ or ↓ to quickly change the temperature. 4. Press and hold S, while holding S simply press, not hold, ↑ or ↓ to fine-tune the temperature. pg. 25 UNINET DTF 3300... -
Page 26: Print Exp Installation
“PrintExp” to run it. 5. It is recommended to have this program on your desktop; to do so just right-click the file, select “create shortcut” then drag the shortcut file from the folder directly onto your desktop. pg. 26 UNINET DTF 3300... -
Page 27: Print Exp Overview
Set the current position to X White Edge. the nozzles of the printhead. Left / Right: Directional control for the printing carriage. Ahead / Back: Directional control for the media. X Reset: Moves printing carriage back to capping station home position. pg. 27 UNINET DTF 3300... - Page 28 Task Information: Print Job List: Finished print jobs will appear Displays basic information Contains the current job here, double-click to return on the current print job. selected for printing. them to the Print Job List. pg. 28 UNINET DTF 3300...
- Page 29 When turned on, the nozzle will flash ink before printing. Auto Clean: If set, printhead will clean throughout print job if it detects one or more nozzles have become clogged or not outputting as much ink as a normal operation. pg. 29 UNINET DTF 3300...
- Page 30 & H2 (color-back head). Forces ink through the lines, damper, and into printhead to then be absorbed by capping station and emptied into the waste tank. Margin Setting: The X Margin is the initial position of the print job when it begins. pg. 30 UNINET DTF 3300...
-
Page 31: Calibration
Repeat the check and adjustment until all lines are straight when printed. Poor Vert Check Good Vert Check Printhead Base pg. 31 UNINET DTF 3300... - Page 32 2 are at perfect 0. Below are examples of both a poor and a perfect check print. Poor Head Horz. Distance Check Perfect Head Horz. Distance Check pg. 32 UNINET DTF 3300...
- Page 33 Bidirect value in order to reach a perfect 0. A perfect calibration is when both the thick and thin lines are flawlessly aligned vertically. Offset Bidirect Check pg. 33 UNINET DTF 3300...
-
Page 34: Shaker & Heater
SHAKER & HEATER With your DTF 3300 printer fully assembled and functional, all that is left to do is to incorporate the shaker/heater. Once the unit is removed from its crate, the take-up roll holder and motor need to be attached. For this you will need: •... - Page 35 Once you are happy with the alignment, tightening the knobs on the front of the roll holders to keep them secured in place. pg. 35 UNINET DTF 3300...
- Page 36 Switch: Turns the shaker paddle in the unit on/off. Dusting Switch: Turns the dusting paddle on/off; the single line move the paddle counter-clockwise and the double lines move the paddle clockwise. Curing Switch: Turns the heating elements of unit on/off. pg. 36 UNINET DTF 3300...
-
Page 37: Additional Software
• Apple operating systems are NOT supported and require either the use of Bootcamp or Parallels to run a supported Windows operating system. • CPU: Intel Core i5 or higher, AMD Ryzen 3 or higher. • RAM: 8GB minimum. • USB 3.0 capable. pg. 37 UNINET DTF 3300... -
Page 38: Maintenance
• You can initiate a Nozzle Check by pressing the “Nozzle Check” button on the interface that is on the printer. • Another way to initiate a Nozzle Check is by going into the control software and clicking “Check”. Perfect Nozzle Check pg. 38 UNINET DTF 3300... - Page 39 It is recommended to perform this task 2-3 times a week. • Empty the waste bottle when it is about 75% full and rinse with water before putting waste tubes back in. pg. 39 UNINET DTF 3300...
Need help?
Do you have a question about the DTF 3300 and is the answer not in the manual?
Questions and answers