Table of Contents
Advertisement
Advertisement
Table of Contents

Related Manuals for Uninet IColor 650


Summary of Contents for Uninet IColor 650
- Page 1 IColor 650 Digital Color + White Transfer Media Printer User Manual...
-
Page 2: Table Of Contents
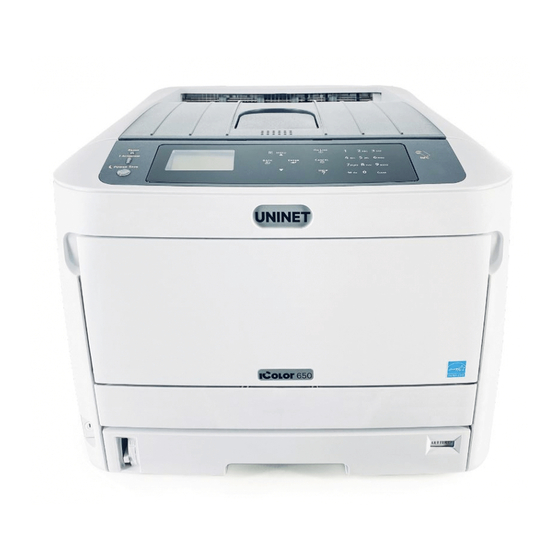
Table of Contents IColor 650 Model Summary Page 3 Installation Environment Page 4 Printer Guide Page 5 – 8 How to use the Numeric Keypad Page 8 – 9 Changing the Administrator Password Page 9 Unpacking and Installing Consumables Page 9 – 13... - Page 3 Please follow the enclosed quick setup guide, as well as this manual, to get started. The IColor 650 comes complete with 4 toner/drum cartridges for full color with white printing (CMYW), as well as a true black toner/drum combination. Simply swap the white for black when white is not needed, for true black printing.
-
Page 4: Installation Environment
Installation Environment Install the printer on a flat surface that is wide enough to accommodate the legs of the printer. Allow for enough room around the printer as shown in the following figures: Install the printer in the following environment. •... -
Page 5: Printer Guide
Printer Guide Exterior: Front View... - Page 6 Interior and Exterior: Rear View...
- Page 7 Control Panel...
-
Page 8: How To Use The Numeric Keypad
How to use the Numeric Keypad • Use to enter numbers and characters. Press the key consecutively to switch between numbers and characters. Press the key until the desired character is displayed, and then press the «ENTER» button. • Available characters and how to switch types of characters are shown below. •... -
Page 9: Changing The Administrator Password
«CLEAR» key • Deletes a character when entering a password. Uninet does not suggest altering any settings hard corded into the printer. Undesirable results may occur. Changing the Administrator Password • The factory default password is ‘123456’. It is not necessary to change the password unless there are security risks to be considered. - Page 10 1) Remove the printer from the box, and then remove all cushioning materials and the plastic bag from the printer. 2) Remove the two strips of protective tape (Blue) at the back of your printer. 3) Lift the printer, and then place it where it is to be installed. 4) Insert your finger into the recess on the right side of the printer and pull the front cover open lever (1) to open the front cover (2) forward.
- Page 11 6) Prepare flat surface covered with sheets of newspaper, etc. to remove protective sheets from the image drums set in the printer. 7) Firmly hold the top of the ‘C: Cyan’ toner/drum cartridge located in the front the printer and lift it out. Place it on a protective surface. 8) Remove the protective sheet (5) that is wrapped around the toner/drum cartridge.
- Page 12 10) Repeat from step 7 to step 9 to pull out the ‘Y: Yellow’ and ‘M: Magenta’ toner/drum cartridges. Remove the protective sheet and install them back to the printer, then turn the toner cartridge lock lever. Closing the cover without turning the toner cartridge lock lever (blue) may cause a malfunction.
- Page 13 14) Plug the power cord into the power connector and plug the power cord into the outlet. 15) Hold down the power switch for about 1 second to turn on the power. The Power switch LED indicator lights up when the printer turns on. The message “Ready To Print” is displayed in the operator panel once printer is ready.
-
Page 14: Wireless Setup
Wireless Setup Enabling Wireless LAN (Infrastructure) • Wireless (Infrastructure) and Wireless (AP Mode) cannot be enabled at the same time. • A router (access point) is necessary to set up a wireless connection. • Do not place any electric products that emit weak radio waves (such as microwaves or digital cordless telephones) close to the printer. - Page 15 9) When [Pushbutton method] is displayed, select [Yes] and press the «ENTER» button. • The printer starts searching for wireless LAN access points. The "Running push button method..." message is displayed on the screen. 10) Press and hold WPS button on the wireless LAN access point for a few seconds while the message is displayed. 11) When [WPS connection successful.] is displayed, it indicates that the wireless LAN setup has completed.
- Page 16 6) Select the encryption method you checked in step 1, and then press the «ENTER» button. 7) The procedure depends on the encryption method you selected in step 5: • If you selected [WPA/WPA2-PSK], select [TKIP/AES], and then press the «ENTER» button. Enter the Pre-shared Key afterward and select [Next].
-
Page 17: Connecting Via Usb Cable
3) Enter the administrator password using the numeric (0-9) keys, and then press the «ENTER» button. 4) Press the up scroll button to select [Enable] and then press the «ENTER» button. 5) Press the scroll button several times to select [Manual Setup] and press the «ENTER» button. 6) Check the [SSID] and [Password] of the printer. -
Page 18: Connecting Via Network (Lan) Cable
Connecting via Network (LAN) Cable 1) Prepare the LAN cable (1) and hub, switch or router (2). 2) With the printer off, insert one end of the LAN cable into the back of the printer. • A LAN cable is included with your printer. •... -
Page 19: Setting A Static Ip
Setting a Static IP It is recommended to set a static IP to avoid other devices on your network from ‘stealing’ the printer’s IP address when it is powered down. 1) With the printer on, press the down arrow several times to select [Admin Setup] and press the «ENTER» button. 2) Enter the administrator password, using the numeric (0-9) keys and press the «ENTER»... - Page 20 8) Enter the subnet mask in the same manner as the IP address. When complete, press the «BACK» button. 9) Press the down scroll button to select [Gateway Address], and press the «ENTER» button. 10) Enter the Gateway Address in the same manner of IP address. All input was completed, then press the «BACK» button.
-
Page 21: Loading Media
Loading Media 1) Uninet suggests using the MP Tray when printing transfers. 2) If using tray 1, pull out the paper cassette (1) and set the paper size dial (2) to match the loading paper size. • For example, set the dial to [A4] when loading A4 size paper with a landscape configuration. - Page 22 Excess stacking can cause paper jams. 4) Fan a stack of paper well, and then align the edges of the paper. Load the paper with the print side face down. 5) Secure the loaded paper with the paper guide and check if a size of loaded paper matches the setting of paper size dial.
-
Page 23: Printing From The Mp Tray
Printing from the MP Tray 1) Open the MP tray (1) forward by inserting your fingers into the front recesses (2). 2) Pull out the paper supporter (3) by holding the center part of it. 3) Unfold the sub support (4) and open the paper set cover (5). 4) Adjust the manual feeding paper guide (6) to the width of paper to be loaded. -
Page 24: Paper Output
5) Close the paper set cover (5). • Do not load paper of different sizes, types or weights at the same time. • When adding paper, remove the paper on the MP tray and straighten the edges of both stacks of paper, and then load them again. -
Page 25: Cancelling Printing
3) Use the rear output tray when a straight paper path is required, or when printing on envelopes, labels, or long paper. Paper is printed with the printed side up and piled in reverse chronological order. 4) Open the rear output tray (1) on the rear side of the printer. 5) Unfold the paper support and the sub support. -
Page 26: Energy Saving Modes
Energy Saving Modes • The IColor 650 has three energy saving functions: Power Save Mode, Sleep Mode and Auto Power OFF Mode. Power Save Mode • If you do not use the printer for a certain period of time, the printer automatically enters the Power Save mode, saving power consumption. - Page 27 4) Press the «ON LINE» button. Setting the Time Before Entering the Sleep Mode • When a printer is in the power saving mode, press the «POWER SAVE» button to restore from the mode. • Check if the message “Ready To Print” appears. If the message is not displayed, press the «ON LINE» button. 5) Press the «Fn»...
-
Page 28: Icolor Prorip Software Introduction
2) Enter «2» «0» «2» using the numeric keypad and then press the «ENTER» button. 3) Press the scroll buttons to specify the time and then press the «ENTER» button. 4) Press the «ON LINE» button. IColor ProRIP Software Introduction Use the IColor ProRIP software to print white as an overprint in one pass. - Page 29 UNINET Aqua Clear paper). When the white is installed in the first slot of the IColor 650 printer, this is configured for ‘Right Side Printing’ where the white is printed first, as an underprint, all in one pass.
-
Page 30: Icolor Prorip Software Installation
White toner performs the following functions: 1) To produce the color white on a dark garment. 2) To fill in the halftones on lighter images so that there is enough toner on the page to fully transfer to your garment or to pull all the B adhesive. This second point is the most important one and the reason why you cannot simply use a CMYK printer for transfer printing. - Page 31 IMPORTANT: This USB dongle is your license key. Ensure that it is not lost or broken, as cannot UNINET replace it without a charge. You cannot use the software without it installed in your PC. 4) Select either the 32 or 64 bit application (dependent upon your version of windows). Accept the terms of the...
- Page 32 5) Choose ‘Full install of IColor ProRIP’ and click ‘Next’. Click ‘Next’ again to accept the installation folder. 6) Click ‘Next’ to allow the creating of the IColor ProRIP Program Folder and the installation will begin.
- Page 33 7) If not already installed, you will be prompted to install .NET Framework, which is a necessary component to the ProRIP software. Accept the license terms and click ‘Install’. Once the InstallShield Wizard is complete, click ‘Finish’. This installation normally takes several minutes to complete. ProRIP First Time Setup 1) Be sure the IColor ProRIP dongle is installed and you are connected to the internet.
- Page 34 2) Once the ProRIP opens, the Queue Wizard will begin the installation of the support files for your IColor printer. Click ‘Next’ and then ‘Install Printer’. 3) Select the appropriate printer from the support menu. Click ‘OK’. Then click ‘Next’ to continue the installation. Note that you may have already installed the printer driver in windows.
- Page 35 4) Click the ‘Port Setup’ dropdown and select how your printer is connect (Network or USB). You must complete this step or you will not be able to print. 5) If connected via network (recommended), choose TCP/IP. If connected by USB, choose the printer as identified in the drop down.
- Page 36 If you need to change or reset the ports in the future: Click Queue >> Manage Queues to view, update or change the port settings. Port settings will reset when the queues are updated so you will have to do this from time to time. 8) In the ‘Port’...
- Page 37 9) If connected via network, once TCP/IP is selected, the software will poll your network for available printers. Select the proper IColor printer. Note that the IP address of the printer is displayed. Be sure to set a static IP address for your printer so that the IP address does not change later.
- Page 38 Import the desired graphic by clicking the ‘green plus’ icon and navigating to the proper folder. You can also import by clicking File > Import File, or simply dragging and dropping your file into the queue. 12) There are preloaded images that can used to print a test page. Click Devices >> Print Test Page to see the choices.
-
Page 39: Using The Icolor Prorip Software
Using the ProRIP Software (Summary) Once your image is loaded, take note of the preconfigured settings relating to the media being used in the printer. The ‘Queue’ tab shows the size of the media that will be used, where to load the media into the printer and the paper type setting recommended. - Page 40 The ‘Page’ tab offers the ability to print multiple copies and nest images. You can also adjust the size of the image to fit your media here (and in the Queue tab). The ‘Job’ tab allows you to lock the proportions of your image to maintain the aspect ratio.
- Page 41 Adjustments can also be made by using these icons at the top of the screen. When ready, click the ‘Print’ icon to print your graphic. If you encounter any of these issues when printing from the RIP, please refer page 24, step 7 to set the proper port in Queue Manager.
- Page 42 Once the print has completed, the job will be archived in the reserved area for 7 days. If you wish to reprint that job, drag and drop the job from the reserved section into the proper queue. To lengthen the amount of time a job stays in reserve, click Queue>>Properties. Then click ‘Job Reserve’ and set the ‘Auto Clean Reserve’...
- Page 43 After a particular job has printed, it will be ‘closed’. This means that it was rendered by the software so that the next time you print, the processing time will be minimal. If you need to make any changes to the print job before printing, you must ‘open’...
-
Page 44: Toner Cartridge Replacement Guide
Toner / Drum Cartridge Replacement Guide Because the IColor 650 features cartridge remapping to achieve a white underprint or overprint, it is important that you follow these rules when determining which color cartridge to order (pertains to both toner and drum units):... -
Page 45: Use Genuine Uninet Icolor Consumables
Use Genuine UNINET IColor Consumables Only use genuine UNINET IColor consumables. The use of incompatible supplies (toner, drums, transfer belts, fusers) will cause damage to your printer not covered by your warranty. Replacing Toner Cartridges • When the "[COLOR] Toner Low" message ("[COLOR]" indicates C (cyan), M (magenta), Y (yellow) or K (black)) appears on the display screen, prepare a replacement toner cartridge. - Page 46 Closing the cover without turning the toner cartridge lock lever (blue) may cause a malfunction. Make sure to turn the cartridge lock lever until it lines up with the arrow in the far end. 10) Close the front cover (2). 11) Recycle your cartridge – request a return label from Uninet.
- Page 47 Replacing the toner cartridge in 2 and 4 Station 1) Display will read C (cyan), M (Magenta) or Y (yellow) low or empty. 2) Insert your finger into the recess on the right side of the printer and pull the front cover open lever (1) to open the front cover (2) forward.
- Page 48 11) Close the output tray (4) by pushing the center of the output tray (4) firmly. Close the front cover (2). • The front cover cannot be closed if the output tray is not closed securely. 12) Recycle your cartridge – request a return label from Uninet.
-
Page 49: Replacing Image Drum Cartridges
Replacing Image Drum Cartridges • When the ‘[COLOR] Image Drum Near Life’, (‘[COLOR]’ indicates C (cyan), M (magenta), Y (yellow) or K (black)) appears on the display screen, prepare a replacement drum cartridge. • When the ‘Please install new Image Drum Unit’ appears and printing is stopped, replace the drum cartridge. Use the ‘Toner / Drum Cartridge Replacement Guide’... - Page 50 4) Identify the image drum to be replaced by its label color and consulting the ‘Toner / Drum Cartridge Replacement Guide’ on page 44. 5) Remove the image drum (5) from the printer and place the image drum on a flat, clean surface. •...
- Page 51 11) Insert the toner cartridge (7) removed in step 7 by aligning its left side indentation (8) with the protrusion (9) on the image drum so that the toner cartridge and image drum color label align. Then insert the right side gently into place.
-
Page 52: Replacing The Transfer Belt
14) Close the output tray (4) by pushing the center of the output tray (4) firmly. Close the front cover (2). • The front cover cannot be closed if the output tray is not closed securely. Replacing the Transfer Belt When the ‘Belt Unit Near Life’... - Page 53 4) Take all four image drums out of the printer, and then place them on a flat surface. • Use extra care when handling the image drum (the green cylinder, because it is fragile. 5) Cover the image drums you took out with paper so that the image drums do not expose to the light. 6) Turn the blue knobs (5) on each side of the belt unit in direction of the arrow to unlock.
-
Page 54: Replacing The Fuser Unit
12) Close the output tray (4) by pushing the center of the output tray firmly. Close the front cover (2). • The front cover cannot be closed if the output tray is not closed securely. Replacing the Fuser Unit When the ‘Fuser Unit Near Life’ message appears on the display screen, prepare a replacement fuser unit. You can keep printing approximately 2,500 pages until the next message appears. - Page 55 4) Pull forward the left locking lever (5) of the fuser unit to unlock. 5) Hold the fuser unit handle (6) and take out the fuser unit from the printer. 6) Peel off the tape from the new fuser unit, and pass the tape through the handle of the fuser unit. 7) Pull the protective sheet in the direction of the arrow to remove.
-
Page 56: When Paper Jams Occur
9) Hold the handle and place the new fuser unit into the printer. 10) Push back the left locking lever (5) of the fuser unit to lock. 11) Close the output tray (4) by pushing the center of the output tray firmly. Close the front cover (2). When Paper Jams Occur •... - Page 57 3) Check for jammed paper in the duplex unit. If jammed paper remains, pull it out gently. Check the back side of the duplex unit and remove jammed paper gently if it remains. 4) Open the upper duplex unit cover (2) and check for jammed paper. If jammed paper remains, pull it out gently and close the cover.
- Page 58 Error Code ‘381’, ‘638’ • A paper jam has occurred near the image drum. 1) Insert your finger into the recess on the right side of the printer and pull the front cover open lever (1) to open the front cover (2) forward. 2) Press the open button (3) and open the output tray (4).
- Page 59 6) Return all four image drums into the printer carefully. 7) Close the output tray (4) by pushing the center of the cover firmly. 8) Close the front cover (2). • The front cover cannot be closed if the output tray is not closed securely. Error Code ‘382’, ‘383’, ‘385’, 639, ‘640’...
- Page 60 6) Hold the fuser unit handle (6) and lift the fuser unit out of the printer. 7) Lift the release levers (7) on the fuser unit, and pull out the jammed paper forward gently. • If paper is pulled out towards the rear, this may result in soiled prints. 8) If jammed paper remains in the printer, hold the both sides of the paper to remove it gently.
- Page 61 11) Return all four image drums into the printer carefully. 12) Close the output tray (4) by pushing the center of the cover firmly. 13) Close the front cover (2). • The front cover cannot be closed if the output tray is not closed securely. Error Code ‘390’, ‘637’...
- Page 62 4) Remove the paper from the back gently if the edge of paper cannot be seen. 5) Close the front cover (3). 6) If loading paper on MP tray, lift the paper set cover (1) and set the paper with the print side face up. 7) Lower the paper set cover (1).
- Page 63 Error Code ‘391’, ‘392’, ‘393’, ‘394’, ‘632’, ‘633’, ‘644’ • If paper jams occur frequently, clean the paper feed rollers. 1) Gently pull out from the printer the paper cassette (1) for which an error is indicated. 2) Remove the jammed paper. •...
-
Page 64: Cleaning The Led Heads
Maintaining your Printer Cleaning the LED Heads • Clean the LED heads if vertical white lines appear, images are faded, or the periphery of letters are smudged in the printouts. 1) Insert your finger into the recess on the right side of the printer and pull the front cover open lever (1) to open the front cover (2) forward. -
Page 65: Cleaning The Light-Shielding Film
Cleaning the Light-shielding Film • Clean the light-shielding film of the image drum becomes dirty, wipe the film by following the procedures below. 1) Insert your finger into the recess on the right side of the printer and pull the front cover open lever (1) to open the front cover (2) forward. - Page 66 3) Remove paper loaded in the paper cassette. 4) Wipe the paper feed roller (3) on the paper cassette with a wet cloth that has been wrung out well. 5) Load paper in the paper cassette. Push the paper cassette back into the printer. Cleaning the Paper Feed Rollers (MP Tray) •...
- Page 67 3) In the same manner, slightly lifting the MP tray, press the left arm inward, then unlock the tab. 4) Open the paper set cover (5) until it touches to the printer body. 5) Wipe paper feed rollers with a wet cloth that has been wrung out well. Do not damage the paper end sensor lever when cleaning the rollers.
-
Page 68: Cleaning The Resist Roller
12) Close the MP tray. If the MP tray cannot be closed, press the paper setting part of the MP tray downward to put the paper set cover back in place. Cleaning the Resist Roller • Clean the resist rollers in the following steps when they are dirty. - Page 69 UV sensitive toner while using the standard black cartridge in place. The white cartridge that shipped with your IColor 650 printer can also be used if a white overprint is required. Operating on the same application principles as standard toner that ships with your printer, you can print and/or press onto virtually any surface using the appropriate transfer paper –...
- Page 70 Why use IColor SmartCUT? SmartCUT allows owners of smaller width printers to gain the benefits of tabloid or larger sized printers. SmartCUT is a user centric tool that is a key component to expanding the size constraints of popular print methods, especially as it relates to transfer printing commonly associated with garment decoration.
-
Page 71: Color Registration Procedure
Color Registration Procedure If the printer registration is out of alignment, run the Color Registration Procedure Signs of this would appear as outlines of white or color around your graphic. IMPORTANT! Remove the white toner and put the printer into the CYMK configuration with the black cartridge in the first slot and the cyan in the last slot. - Page 72 Printing Tips When transferring images with halftones, it’s possible that some of the adhesive from your 2 step paper will not transfer over to the toner during the first step. If you see this happen with your image, just reprint the image with a white overprint using the ProRIP to thicken up the density and give the adhesive something to stick to.
- Page 73 ALSO AVAILABLE: • IColor Premium and Premium Stretch 2-Step Transfer Paper for light and dark colored garments • IColor Select and Select Ultra Bright 2-Step Transfer Paper for light and dark colored garments • IColor Standard 2-Step Transfer Paper for light and dark colored garments •...
- Page 74 IColor 650 System Specifications Print Speed: Print Speed: Letter/A4 – up to 36 ppm Color and Monochrome; Tabloid/A3 – up to 20 ppm (Transparency setting speeds may vary) Processor: 667 MHz Duty Cycle: Up to 50,000 pg/mo. Duplex: Standard (not for use with transfer paper)
Need help?
Do you have a question about the IColor 650 and is the answer not in the manual?
Questions and answers